Table of Contents
Advertisement
Advertisement
Table of Contents

Related Manuals for URC Total Control TDC-7100


Summary of Contents for URC Total Control TDC-7100
- Page 1 TDC-7100 Total Control Owner’s Manual TDC-7100 Owner’s Manual...
-
Page 2: Table Of Contents
Settings Menu ........28 contact information. Title Bar ..........6 Sleep Settings ......29 Contact Support Total Control is a URC product sold direct only. For questions or assistance contact Room’s Menu ......... 7 General ......... 30 your Custom Installer/Programmer. Room Linking......... 8 Sound .......... -
Page 3: Features And Benefits
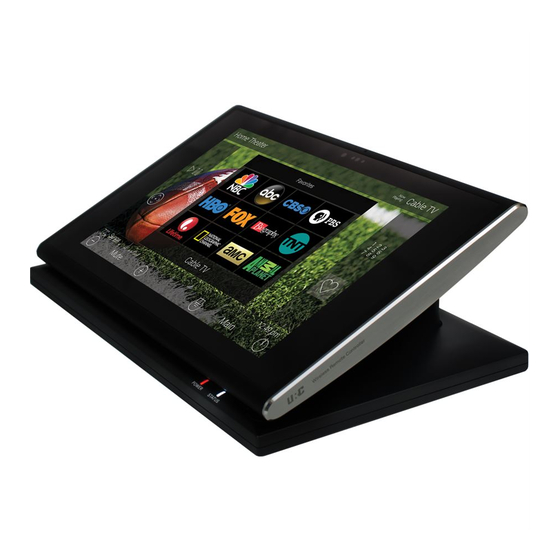
TDC-7100 Total Control Owner’s Manual Features and Benefits The TDC-7100 In-Wall Network Keypad is one of URC’s most advanced devices that is optimized for usage with Total Control. Enjoy these key features: Updated User Experience This device has the capability of using URC’s Total Control software suite. Using this software provides this device with a modern “look and feel”... -
Page 4: Proximity Sensor
TDC-7100 Total Control Owner’s Manual Proximity Sensor This feature allows the TDC-7100 to spring into action automatically. Utilizing its proximity sensor, the keypad can detect distances from up to three (3) feet away. This setting can be adjusted in the device’s Settings menu. Inductive (Wireless) Charging Wirelessly charge the TDC-7100 with its sleek, easy to place charging dock. - Page 5 TDC-7100 Total Control Owner’s Manual Part List Included in the TDC-7100: Fully charge the TDC-7100’s battery prior to first time usage. • 1x - TDC-7100 Tabletop Controller • 1x - USB-C Charging Cable • 1x - Inductive Charging Dock • 1x - Power Adapter TDC-7100 USB-C Cable Charging Dock...
-
Page 6: Main Menu Navigation
• Right Swipe: Swipe right to reveal the Scenes Menu. The Scenes Menu contains URC Scenes that are created by the custom integrator. Return to the Main Menu by swiping left from the Scenes Menu. • Button Tapping: On the Main Menu selecting each of these areas provide the end-user with control: A. -
Page 7: Main Menu: View Modes
TDC-7100 Total Control Owner’s Manual Ribbon View: Main Menu: View Modes Total Control features two different view modes for the TKP- 7600. Each view mode has its own unique properties that compliment the user experience. The view mode must be programmed from within the Accelerator software, speak to a custom home integrator for more details. -
Page 8: Title Bar
TDC-7100 Total Control Owner’s Manual Title Bar The Title Bar is always present regardless of what menu and/or room the TDC-7100 is currently using. On the left of the Title Bar, the current room the TDC-7100 is controlling is Now Playing Current Room displayed. -
Page 9: Room's Menu
TDC-7100 Total Control Owner’s Manual Room’s Menu Tap on the Room Name located on the left in the Title Bar to display the Room’s Menu. The Room’s Menu contains every room programmed into the system. Specific rooms may be hidden from certain interfaces, speak to the custom home integrator for that option. -
Page 10: Room Linking
TDC-7100 Total Control Owner’s Manual Room Linking Remember, Room Linking can only be used by DMS Zones/Areas. The following steps take place from within the Room’s Menu: 1. Select the Room Link button, this displays the Room Linking Menu. 2. Select which rooms in the system to link. Only rooms that are DMS Zones/Areas appear on the Room Linking Menu. -
Page 11: Now Playing
TDC-7100 Total Control Owner’s Manual Now Playing On the right hand side of the Title Bar is the Now Playing area. The Now Playing area always dictates what activity is currently playing in the room. In the example at the right, Now Playing reads “SNP-2 Pandora”. This means that in the Home Theater the SNP-2 is using Pandora currently. -
Page 12: Core Buttons
TDC-7100 Total Control Owner’s Manual Core Buttons These buttons are almost always on display. Each one of these buttons has a specific function: A. Volume: Used to control an active audio device. B. Shortcut Popup: Use this to display the Shortcut Popup Menu. This menu contains up to six (6) current room activities. -
Page 13: Shortcut Popup Menu
TDC-7100 Total Control Owner’s Manual Shortcut Popup Menu The Shortcut Popup Menu holds the end-user’s favorite or most frequently used devices/activities and places them in one easy to access location. Adding Shortcuts Follow these steps to add a Shortcut: 1. Locate an available button and hold it down until the status bar on the top of the display fills. -
Page 14: Removing Shortcuts
TDC-7100 Total Control Owner’s Manual Just tap on a Shortcut button to launch that device/activity. Remember, this menu can only hold up to six (6) items and each item must already be a device/activity programmed into that current room. Removing Shortcuts Follow these steps to remove a Shortcut: 1. -
Page 15: Status Bar
TDC-7100 Total Control Owner’s Manual Status Bar Located above the Core Buttons, this section of the interface is almost always on display. The Status Bar is designed to inform the end-user of various customization options: A. Metadata Information: Located to the far left, options selected from the programming software cycle through here. - Page 16 TDC-7100 Total Control Owner’s Manual B. Page Indicator: The icons here represent the current page number the interface is on. However, the icon located to the left is the Scenes Menu icon. All icons to the right of that represent page numbers. C.
-
Page 17: Intercom
TDC-7100 Total Control Owner’s Manual Intercom The TDC-7100 has the capability of communicating across the home network to any Intercom-Enabled client (interface). There are three (3) different types of intercom calls that can be made: 1. Audio-Video: This type of call uses the camera and microphone of the calling and receiving client to provide auditory and visual feedback. - Page 18 TDC-7100 Total Control Owner’s Manual 3. Audio Broadcast Call: This type of call is audio communication between two or more clients. An ideal way to communicated across multiple Intercom-Enabled interfaces in almost any home.
-
Page 19: Navigating The Intercom Menu
TDC-7100 Total Control Owner’s Manual Navigating the Intercom Menu As mentioned on page 6 of this document, accessing the Intercom button is performed by swiping down on the Title Bar. After selecting the Intercom button from the Title Bar Menu, the Intercom Menu displays. -
Page 20: Making Calls: Audio-Video
TDC-7100 Total Control Owner’s Manual Making Calls: Audio-Video Remember that the Intercom feature must be enabled from with in the Settings Menu. The following steps take place from the Intercom Menu, to access this menu refer to page 1. Select an available client from the Intercom Menu. After selecting a client, the three (3) call options are displayed. - Page 21 TDC-7100 Total Control Owner’s Manual Once the call is accepted, the TDC-7100 provides auditory and visual two-way feedback on the screen. Use the Volume Slider at the right of the video feedback to raise or slower the volume. Slide the indicator to the top for maximum volume or slide it down to the bottom to mute the audio.
-
Page 22: Making Calls: Audio Calls
TDC-7100 Total Control Owner’s Manual Making Calls: Audio Calls Remember that the Intercom feature must be enabled from with in the Settings Menu. The following steps take place from the Intercom Menu, to access this menu refer to page 1. Select an available client from the Intercom Menu. After selecting a client, the three (3) call options are displayed. - Page 23 TDC-7100 Total Control Owner’s Manual Once the call is accepted, the TDC-7100 provides two-way communication between clients via audio only. Use the Volume Slider at the right of the call icon area to raise or slower the volume. Slide the indicator to the top for maximum volume or slide it down to the bottom to mute the audio.
-
Page 24: Making Calls: Audio Broadcast22
TDC-7100 Total Control Owner’s Manual Making Calls: Audio Broadcast Remember that the Intercom feature must be enabled from with in the Settings Menu. The following steps take place from the Intercom Menu, to access this menu refer to page 1. Select Broadcast Call. A list populates of all available Intercom- Enabled devices. - Page 25 TDC-7100 Total Control Owner’s Manual Once the call is established, all selected devices communicate via audio. Use the Volume Slider at the right of the call icon area to raise or slower the volume. Slide the indicator to the top for maximum volume or slide it down to the bottom to mute the audio.
-
Page 26: Do Not Disturb Mode
TDC-7100 Total Control Owner’s Manual Do Not Disturb Mode Enabling the Do Not Disturb feature sets the current TDC-7100 unavailable. This means that the keypad cannot receive any calls from other interfaces. To enable this feature, use the slider located at the right of the text Do Not Disturb. -
Page 27: Scenes Menu
TDC-7100 Total Control Owner’s Manual Scenes Menu The Scenes Menu is dictated by the system programmer. Access this menu by swiping to the right from the Main Menu. The Scenes Menu can contain up to a hundred (100) Scenes (buttons) per room. Keep in mind that the Scenes Menu is unique to each room. -
Page 28: Charging The Tdc-7100
TDC-7100 Total Control Owner’s Manual Charging the TDC-7100 The TDC-7100 supports the “Wireless Charging” feature. Place the device on the charging dock to begin charging the battery. This method eliminates the need of any physical charging cables to the TDC-7100. A full charge can be achieved in approximately five (5) hours. -
Page 29: Wi-Fi Setup
TDC-7100 Total Control Owner’s Manual Wi-Fi Setup Drag down the Title Bar to reveal the Settings Menu as explained on page 6. Once in the Settings Menu, select the Network options. The image at the right is displayed: 1. Select Wireless Search. The TDC-7100 scans for all available networks and presents them in the next screen. -
Page 30: Settings Menu
Most settings do NOT require interaction with the end-user. Changing some settings could cause issues with the Total Control system, only do so when instructed by URC Technical Support. These are the available options: • Sleep Settings: Manage when the LCD screen turns OFF. -
Page 31: Sleep Settings
TDC-7100 Total Control Owner’s Manual Sleep Settings Below are the selectable choices available in this menu: 1. LCD Screen is Always On: When selected, the TDC-7100’s display never turns off. 2. LCD Screen will Turn Off: When selected the Turn Off After section is selectable. -
Page 32: General
TDC-7100 Total Control Owner’s Manual General Using the left and right arrow keys, enter the values of each category: 1. Date: The following can have its value changed: • Month • • Year 2. Time: The following can have its value changed: •... -
Page 33: Sound
TDC-7100 Total Control Owner’s Manual Brightness Press the minus (-) button to lower the TDC-7100’s display brightness or press the plus (+) button to increase the brightness. Sound Press the minus (-) button to lower the TDC-7100’s audio output or press the plus Additionally, dragging the slider to the right increase the display brightness while (+) button to increase the volume. -
Page 34: Proximity Sensor
TDC-7100 Total Control Owner’s Manual Proximity Sensor Press the minus (-) button to lower the sensitivity on the TDC-7100’s Proximity Sensor or press the plus (+) button to increase the sensitivity. Additionally, dragging the slider to the right increases the sensitivity while dragging it to the left decreases it. -
Page 35: System Information
TDC-7100 Total Control Owner’s Manual System Information Although none of the information can be modified. These System Pages display important information about the TDC-7100. These pages are only needed by a custom install professional or by URC Technical Support. -
Page 36: Network
TDC-7100 Total Control Owner’s Manual Network This option displays important information about the current network. Caution, these settings should ONLY be changed by a professional. Entering values without specific instruction could easily result in the TDC-7100 failing to function correctly. Here is the information that can be displayed here: 1. -
Page 37: Intercom
TDC-7100 Total Control Owner’s Manual Intercom The Audio-Video Intercom Settings menu is the location where the Intercom features must be enabled. By default this feature is disabled, it must be enabled in order for the TDC-7100 to communicate with other Intercom-Enabled devices. •... -
Page 38: Power
TDC-7100 Total Control Owner’s Manual Power The TDC-7100 displays a low battery warning to inform the end-user that it requires recharging. In this menu use the left arrow key to decrease the value of the battery percentage and the right arrow key to increase it. The image at the right is set to receive a low battery warning when the device has reached twenty (20) percent battery charge. -
Page 39: Factory Default
Factory Default This should only be attempted by a custom install professional that is familiar with Total Control or under instruction from URC Technical Support. Selecting this option resets the TDC-7100 to its factory state and does not function until the device is reprogrammed by a custom install professional. -
Page 40: Specifications
Specifications These are the technical specifications for the TDC-7100: Limited Warranty Statement Microprocessor: Cortex-A9 Dual 1Ghz https://www.urc-automation.com/legal/warranty-statement/ Memory: 4GB eMMC, 1GB RAM End User Agreement Devices: Supports up to 255 devices The terms and conditions of the End User Agreement available at https://www.urc-automation.com/legal/end-user-agreement/... - Page 41 TDC-7100 Total Control Owner’s Manual Warning! The manufacturer is not responsible for any Radio or TV interference caused by unauthorized modifications to this equipment. Changes or modifications not expressly approved by the manufacturer could void the user's authority to operate the equipment. Regulatory Information to the User •...
Need help?
Do you have a question about the Total Control TDC-7100 and is the answer not in the manual?
Questions and answers