Advertisement
Quick Links
Advertisement

Summary of Contents for Xilinx ZCU104
- Page 1 ZCU104 System Controller – GUI Tutorial June 2018 XTP502...
-
Page 2: Revision History
NOTICE OF DISCLAIMER: The information disclosed to you hereunder (the “Information”) is provided “AS-IS” with no warranty of any kind, express or implied. Xilinx does not assume any liability arising from your use of the Information. You are responsible for obtaining any rights you may require for your use of this Information. - Page 3 – Program System Controller – Clocks – Voltages – Power – FMC – EEPROM Data – UTIL • Example #1: Read Board Name from EEPROM • Example #2: Read data from IRPS5401 – About References Note: Presentation applies to the ZCU104...
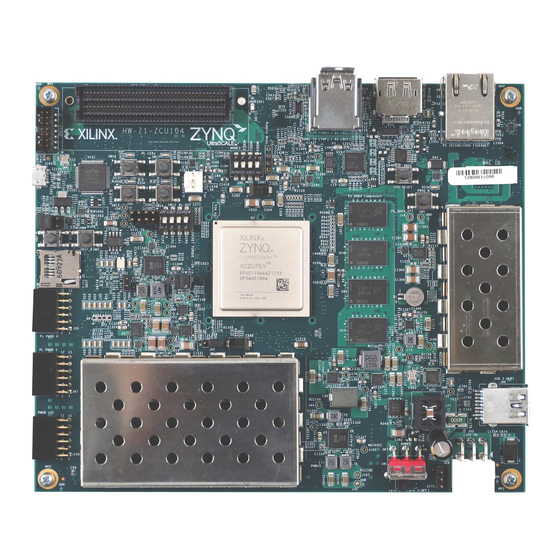
- Page 4 Xilinx ZCU104 Board Note: Presentation applies to the ZCU104...
- Page 5 ZCU104 Software Install and Board Setup Refer to XTP504 – ZCU104 Software Install and Board Setup for details on: – Software Requirements – ZCU104 Board Setup – UART Driver Install Note: Presentation applies to the ZCU104...
- Page 6 ZCU104 System Controller Open the RDF0456 – ZCU104 System Controller GUI (2018.2 C) ZIP file – Extract these files to your C:\ drive Note: Presentation applies to the ZCU104...
- Page 7 ZCU104 System Controller From C:\zcu104_scui, double click on BoardUI.exe BoardUI will detect the attached ZCU104 board; select the serial number in the pull-down menu Note: Presentation applies to the ZCU104...
- Page 8 Program System Controller...
- Page 9 Program System Controller Before using the Board User Interface (BoardUI), the System Controller must be downloaded Select the About tab Click Program System Controller button Note: This must be repeated if power is cycled...
- Page 10 Clocks...
-
Page 11: Setting The Clocks
Setting the clocks Select the Clocks tab Type in the file name ZCU104_nom_IDT8T49N287i_20180407.tcs Click Set IDT Frequency button – Returns clocking chip to factory defaults Note: Takes about 15 seconds... - Page 12 Voltages...
- Page 13 Reading onboard ZCU104 voltages Select the Voltages tab Click the Run All button Observe the ZCU104 Voltages; note that VADJ is 0 V...
- Page 14 Power...
- Page 15 Reading power values using default calibration Select the Use Default Calibration tab underneath the Power tab Click the VCC12 button Observe the ZCU104 power readings Note: Presentation applies to the ZCU104...
- Page 16 Read INA226 Registers Select the Get INA226 Registers tab Click the VCC12 button and observe the INA226 Registers settings Note: Presentation applies to the ZCU104...
- Page 17 Set INA226 Registers Select the Set INA226 Registers tab Review TI INA226 documentation before making changes Note: Presentation applies to the ZCU104...
- Page 18 Reading power values using custom calibration Select the Use Custom Calibration tab Click the VCC12 button (no calibrations were entered in this example) Note: Presentation applies to the ZCU104...
- Page 20 Set VADJ Click the FMC tab Under the Set VADJ tab, click Set VADJ to 1.8 V Note: Presentation applies to the ZCU104...
- Page 21 Set VADJ Select the Voltages tab Click the Get VADJ FMC Voltage button Note VADJ is now 1.8 V...
- Page 22 Reading FMC EEPROM With an optional FMC card attached, select the LPC tab Under the EEPROM tab, click the Get EEPROM Data button Note: Presentation applies to the ZCU104...
- Page 23 Reading FMC EEPROM The EEPROM data will be displayed in a separate window (XM107 card data shown) Close this window when done Note: Presentation applies to the ZCU104...
- Page 24 Setting FMC HPC clocks Select the XM107 tab and set the XM107 Si570 clock as desired The default frequency is 156.25 MHz Any changes must be repeated after a power cycle Note: IBERT uses the default clock of 156.25 MHz...
-
Page 25: Eeprom Data
EEPROM Data... - Page 26 Reading the Board EEPROM Data Select the EEPROM Data tab Click the Run All button Note: Presentation applies to the ZCU104...
- Page 27 UTIL...
- Page 28 UTIL Manual I2C Will cover two examples...
- Page 29 Example #1: Read Board Name from EEPROM Set MUX: 01...
- Page 30 Example #1: Read Board Name from EEPROM IIC Write: Address 54 Data D0...
- Page 31 Example #1: Read Board Name from EEPROM IIC Read: Address 54 Data 06 View raw data, ASCII for ZCU104...
- Page 32 Example #2: Read data from IRPS5401 Equal to pressing the Get VCC INT Voltage button Set MUX: 04...
- Page 33 Example #2: Read data from IRPS5401 IIC Write: Address 43 Data 0000...
- Page 34 Example #2: Read data from IRPS5401 IIC Repeated Start #1: Address 43 Data 20 Bytes: 1 View raw data: 18...
- Page 35 Example #2: Read data from IRPS5401 IIC Repeated Start #2: Address 43 Data 8B Bytes: 2 View raw data: DA00 (May vary from reading to reading)
- Page 36 About...
- Page 37 Reading version information Select the About tab Click the Get Version button to get Firmware version information Note: Presentation applies to the ZCU104...
- Page 38 References...
- Page 39 References Vivado Release Notes – Vivado Design Suite User Guide - Release Notes – UG973 • https://www.xilinx.com/support/documentation/sw_manuals/xilinx2018_2/ ug973-vivado-release-notes-install-license.pdf – Vivado Design Suite 2018 - Vivado Known Issues • https://www.xilinx.com/support/answers/70860.html Vivado Programming and Debugging – Vivado Design Suite Programming and Debugging User Guide – UG908 •...
- Page 40 Documentation...
- Page 41 – Zynq UltraScale+ MPSoC • http://www.xilinx.com/products/silicon-devices/soc/zynq-ultrascale-mpsoc.html ZCU104 Documentation – Xilinx Zynq UltraScale+ MPSoC ZCU104 Evaluation Kit • https://www.xilinx.com/products/boards-and-kits/zcu104.html – ZCU104 Board User Guide – UG1267 • https://www.xilinx.com/support/documentation/boards_and_kits/zcu104/ ug1267-zcu104-eval-bd.pdf – ZCU104 Evaluation Kit Quick Start Guide User Guide – XTP482 • https://www.xilinx.com/support/documentation/boards_and_kits/zcu104/ xtp482-zcu104-quickstart.pdf...


Need help?
Do you have a question about the ZCU104 and is the answer not in the manual?
Questions and answers