
Related Manuals for Automatic Technology NeoSlider NES-500


Summary of Contents for Automatic Technology NeoSlider NES-500
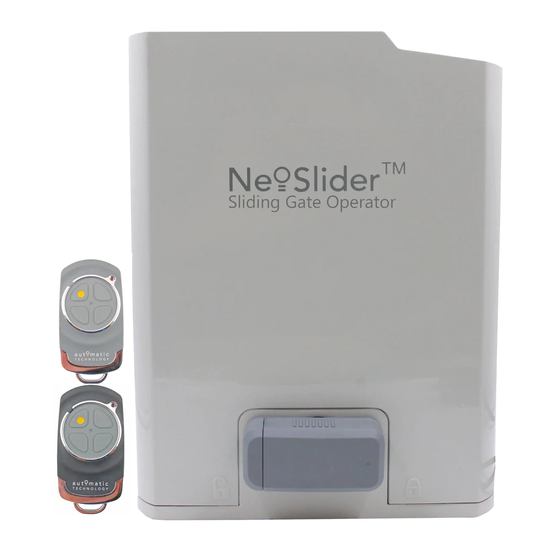
- Page 1 NeoSlider NES-500 & NES-800 Sliding Gate Openers Ne Slider ™ Doc # 160065_03 Part # 13448 Released 17/03/17...
-
Page 2: Table Of Contents
Automatic Technology Australia Pty Ltd hereby further expressly excludes all or any liability for any injury, damage, cost, expense or claim whatsoever suffered by any person as a result whether directly or indirectly from failure to install the Automatic Technology Australia Pty Ltd Garage Door Opener in accordance with these installation instructions. -
Page 3: Important Safety Instructions
Disconnect the power cord from mains power before making any repairs or removing covers. Only experienced service personnel should remove covers from the gate opener. If the power supply cord is damaged, it must be replaced by an Automatic Technology • service agent or suitably qualified person. -
Page 4: Control Board Layout
2. Control Board Layout Fig 2.1 PED N/O input terminal Console Exit button Console Down/Close button SB2 (Safety Beam (2), two, three Console SET button wire or wireless) OUT 2 (optional relay Antenna connector SB1 (Safety Beam(1), two, three module coil drive) wire or wireless) Console display PG3 programmer / network connector... -
Page 5: Set Up Requirements
3. Set Up Requirements 3.1 Kit Contents ITEM DESCRIPTION DRIVE UNIT NES-500 / NES-800 TRIO-CODE 4B PTX-5V2 TRANSMITTER METAL BASE PLATE NUTS, BOLTS AND WASHERS METAL FEET W/ DYNABOLTS (4) ACTUATOR W/ 2 SCREWS ANTENNA IMPORTANT WARNING! A qualified electrician must perform the installation where 240V AC power is used. -
Page 6: Drive Unit Installation
4. Drive Unit Installation The Automatic Technology NeoSlider™ sliding gate opener is designed to operate most residential sliding gates. The gates must be in good working condition and should operate freely by hand. (Refer to 3.1 Initial Checking) 4.1 Mounting the Drive Unit The NeoSlider™... -
Page 7: Rack & Limit Actuator Installation
5. Rack & Limit Actuator Installation 5.1 Mounting rack to gate A strong base on the gate is required for mounting the rack. a. Manually open the gate and place a rack section to mesh with the pinion gear on the Gate Drive Unit. -
Page 8: Programming The Neoslider
6. Programming The NeoSlider 6.1 Common Programs The two most common programs are; Program Menu’s required Function Section Automated Set Up Menu 10.1 Setting the Limits Safety Obstruction Force 9.1 and 9.2 Menu 1 Coding the Transmitter 10.1 Fig 6.1 Automated Set Up with Menu 10.1 Setting the Limits... -
Page 9: Setting Limits
8. Setting Limits The NeoSlider has the alternate ability to set travel limits using a TrioCode 128 transmitter, allowing free movement around the gate to better assess the desired limit positions. In order to use a transmitter, it must first have at least one of its buttons coded to the gate controller. -
Page 10: Safety Obstruction Force Test
9. Safety Obstruction Force Test WARNING! Take care when testing or adjusting the Safety Obstruction Force. Excessive force may cause SERIOUS PERSONAL INJURY and/or PROPERTY DAMAGE. 9.1 Testing Close Cycle a. Press the OPEN button to open the gate. b. Place a piece of timber approximately 40mm wide on the (Fig. -
Page 11: Coding Transmitter
10. Coding Transmitter The NeoSlider can store up to thirty (30) transmitters in its IMPORTANT NOTE: memory. Each transmitter can be allocated an alpha-numeric ID Only TrioCode 128 Technology Transmitters label up to eleven (11) characters in length and each button can are compatible with this product. -
Page 12: Emergency Release
11. Emergency Release 11.1 Your gate CAN NOT be used by the opener when: a. There is a power failure. 11.2 Your gate CAN be used when: a. There is an emergency, by disengaging the opener. b. There is a power failure, by disengaging the opener. Step 1 Step 2 Step 3... -
Page 13: Auto-Close Mode
13. Auto-Close Mode WARNING! The Auto-Close function is not available unless Safety Beam is installed. 13.1 Setting Up Standard Auto-Close 13.3 Pedestrian Auto-Close Menu 3. Auto-Close Times Menu 3.3 Safety Beam Auto-Close Auto-Close mode is a function that automatically closes This mode is selected by entering a non-zero time for the the gate a preset time after the Safety Beam recognise that “Safety Beam Auto-Close”... -
Page 14: Accessories Installation
14. Accessories Installation Wiring Output1 And Output2 Outputs 1 and 2 are used to control a lock, Light or Safety Beam power. Which output is to control which function and the way it is controlled is programmable. If using these outputs make sure that the functions are configured for correct operation prior to setting the travel limits. -
Page 15: Battery Replacement
Check your local Refer to the Automatic Technology website for information on where regulations for appropriate disposal of to recycle batteries in Australia. the batteries. -
Page 16: Specifications
17. Specifications Technical Specifications NES-500 NES-800 Input Voltage: 230 - 240 Vac 230 - 240 Vac Mains frequency: 50 Hz 50 Hz Maximum Input Power: 200 W 200 W Maximum pulling force: 280N 700N Maximum gate opening: Width: Weight: Up to 500kg Up to 800kg Receiver type: TrioCode™128... -
Page 17: Troubleshooting
18. Troubleshooting Symptom Possible cause Remedy Gate will not operate Mains power not switched on. Switch on mains power. Opener motor is disengaged Check that the motor is engaged for automatic operation Gate is obstructed. Remove obstruction. The opener is in “Vacation Mode” Turn off “Vacation Mode”(Appendix C Menu 7.4). -
Page 18: Appendix
OPERATIONAL BUTTONS: 19. Appendix 1. Press PREV/NEXT buttons move to Left/Right. 2. Press OPEN/CLOSE buttons to change setting. 3. Press SET button to save changes. A - Console Menu Structure 4. Press EXIT to return to MENU without saving changes. Parameter Default Step... - Page 19 Parameter Default Step Unit Menu Section HOMING / SETUP SPEED VOLTS Volts Voltage applied to motors when setting up the travel limits STOP PAUSE TIME Pause time used between motor direction changes Parameter Option Default Menu Section Menu 7 - Operating Modes SB1 TYPE 2 WIRE 2 WIRE...
- Page 20 Appendix NOTE: The System will automatically return to the main screen after 30 secs if a menu screen is displayed and no buttons are pressed. A - Console Menu Structure Parameter Option Default Menu Section Menu 9 - Memory Tools CLR CONTROL Appendix E CLR TRANSMITTERS (TX’ERS)
-
Page 21: B - Viewing & Editing Parameters
Appendix B - Viewing & Editing Parameters This section illustrates how to locate, view and View Mode (No cursor) adjust parameters. Parameter Parameter Locating parameters number in list name Refer to Appendix A for Consile Menu Parameter Structure. Locate the required parameter and 2: Close Lock value note the MENU number. -
Page 22: C - Control Board Adjustments
Appendix C - Control Board Adjustments The standard operation of the opener can be altered by editing various parameters. This section describes the parameters and the effect they have. Use the VIEWING AND EDITING PARAMETER PROCEDURE (Appendix B) to make changes. Menu 6. -
Page 23: D- Diagnostic Tools
Appendix D- Diagnostic Tools The controller provides several diagnostic tools from within the Diagnostics Menu (Menu 8). This section details the function of each tool and its use. MENU 8 Navigating To Diagnostics Menu Diagnostics a. Press PREV to navigate to Menu 8 (Fig. D.1). b. -
Page 24: E - Memory Tools
Appendix D- Diagnostic Tools Menu 8.5 Service Counter The NeoSlider™ provides a periodic service counter which can be set to expire after a number of drive cycles. When expired, Service Counter the NeoSlider™ will beep at the beginning of each drive (CYCLES) 60000 cycle and a message will be displayed on the MAIN SCREEN... -
Page 25: F- Transmitter Editing
Appendix F- Transmitter Editing Navigating To “Edit Transmitter” Menu a. Press NEXT to navigate to Menu 1 “Code Transmitter”. A B SMITH b. Press SET to enter the transmitter edit procedure. OSC PED LGT VAC c. Press NEXT to enter transmitter list and edit mode. Editing Button Function Field Fig F.1 a. -
Page 26: G- Transmitter Managment
Appendix G- Transmitter Managment Transmitter Listing Facility The NeoSlider™ provides a transmitter listing facility which enables the user to find a transmitter location within the memory. Once located, a Press Tx’er stored transmitter can be replaced, deleted, edited, copied or, if the Button LIST>... -
Page 27: Warranty And Exclusion Of Liability
20. Warranty and Exclusion of Liability This Warranty is given by Automatic Technology (Australia) Pty Ltd (h) repairs which are not authorised by ATA; (ABN 11 007 125 368) (ATA), 6-8 Fiveways Boulevard, Keysborough (i) any failure to install or maintain the Product in accordance with the 3173, 1300 133 944, sales@automatictechnology.com.au... - Page 28 Automatic Technololgy (Australia) Pty Ltd © Sept 2016 Automatic Technology (Australia) Pty Ltd. All rights reserved. TrioCode ABN 11 007 125 368 and NeoSlider are trademarks of Automatic 6-8 Fiveways Boulevard Technology (Australia) Pty Ltd. No part of this Keysborough, Victoria, 3173, Australia...
Need help?
Do you have a question about the NeoSlider NES-500 and is the answer not in the manual?
Questions and answers