
Related Manuals for Boly BG710 Series


Summary of Contents for Boly BG710 Series
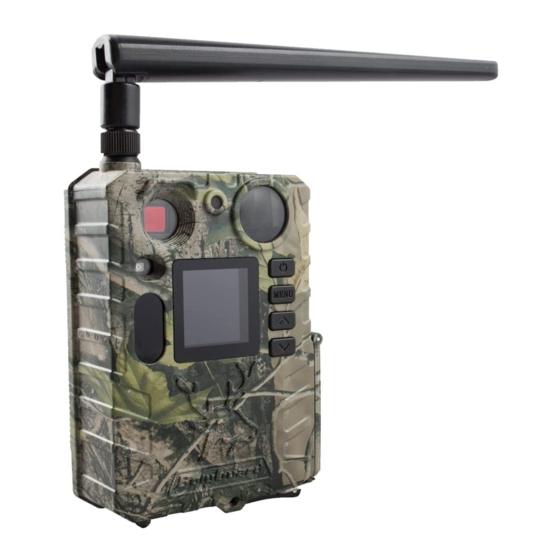
- Page 1 Boly Trail Camera BG710 Series Infrared Digital Scouting Camera User Manual BG710 Series...
-
Page 2: Table Of Contents
Boly Trail Camera BG710 Series Table of Contents 1. Getting Started..................3 2. Camera Operations................3 2.1 Batteries / Power Supply ............ 4 2.2 TF Card Information............5 2.3 SIM Card Information............5 2.4 Camera Modes ................ 6 2.5 Manage Images and/or Videos........7 2.6 Sending via MMS/GPRS/Molnus........ -
Page 3: Getting Started
Boly Trail Camera BG710 Series 1. Getting Started BG710 series camera, this is a digital infrared surveillance camera. Use 1.44" color LCD display and 2*18650 battery (Button top, length: 67~69mm), the USB port connects to the solar panel can charge the 18650 battery. -
Page 4: Batteries / Power Supply
Boly Trail Camera BG710 Series 2.1 Batteries / Power Supply Battery The camera is powered by 2*18650 batteries. (Button top,18650 battery, length: 67~69mm) External power supply It is also possible to power the device or charge the 18650 battery in the device via an external USB power supply adapter(5V/2A) or solar panel. -
Page 5: Tf Card Information
Boly Trail Camera BG710 Series 2.2 TF Card Information This camera uses a TF card, to take full advantage of the latest technologies, we recommend Class 10 TF cards or better, which have fast transfer speeds and long durability for extensive shooting in the most extreme outdoor conditions. -
Page 6: Camera Modes
Boly Trail Camera BG710 Series 2.4 Camera Modes The different modes are accessed by pressing the OK button, marked on the camera. OFF Mode To turn off the camera when the display screen is active, press and hold the OK button until the screen powers off. The camera will still consume a small amount of battery power while in OFF mode. -
Page 7: Manage Images And/Or Videos
Boly Trail Camera BG710 Series 2.5 Manage Images and/or Videos Place the camera in TEST/SETUP mode and press the POWER button to view images or videos, the latest image or video will be shown on the LCD screen. Press the ▲/Up or ▼/Down buttons to cycle through the pictures and videos were taken. -
Page 8: Password Setup
Boly Trail Camera BG710 Series 2.7 Password Setup For encryption settings, enter your four-digit pre-set password to enter the camera. This function helps protect your privacy. This function is off by default. To use this function: 2.7.1 Press ▲/▼ to adjust the number from 0~9, and /► to change the password 2.7.2 The same password must be entered twice to take effect. -
Page 9: Camera Setup Settings & Display
Boly Trail Camera BG710 Series 3. Camera Setup Settings & Display 3.1 Settings Interface & Display To update the camera settings, turn the camera on to activate the display screen. OK/Power: Switch on and off, save parameter settings, enter or... -
Page 10: Wireless Model Setup
Boly Trail Camera BG710 Series 3.2 Wireless Model Setup The features described in this section only support communication models. 3.2.1 Mobile Communication The camera can receive and respond to commands sent via SMS, Molnus and the Apple or Android application, as long as the camera is correctly connected to a wireless carrier. - Page 11 Boly Trail Camera BG710 Series STEP 1> Select your country and carrier. STEP 2> Check WAP/Internet Parameters. Fill out the required fields (marked with an asterisk), enter an Email server such as “smtp.gmail.com” or “smtp.bolymedia.com.” Step 1 Step 3 Step 2...
-
Page 12: Setup For Mobile Applications
Boly Trail Camera BG710 Series STEP 3> Choose between default or manual settings. For first time users, we suggest using the default settings. STEP 4> Enter the phone number of the phone to receive/send the remote commands and images in the “administrator number” field and email address in the “Receive Email 1”... - Page 13 Boly Trail Camera BG710 Series STEP 2: ①Input the model of your camera ②Input your SIM card number which is inserted in your camera ③Select your camera model number, then click “Add” to finalize. STEP 1 STEP 2 STEP 3: Click “send,” then choose the country and provider that corresponds with your SIM card (which is inserted in your camera).
- Page 14 Boly Trail Camera BG710 Series STEP 4: In the Select Mail Server: you can decide on using a Boly Email or Other Email service. Select “my device” to add or delete a device. STEP 5: Select “Setting” to set the user's parameters or set to default.
-
Page 15: Cloud Service - Molnus
Boly Trail Camera BG710 Series 3.3 Cloud Service - Molnus Molnus is a cloud service that allows users to access to transfer and store images taken through the cameras with the use of compatible devices or a computer. To get started, you need to supply the camera with batteries and a SIM-card that has internet access. -
Page 16: Camera Setup Options
Boly Trail Camera BG710 Series Step4 Press the Register camera button to register your camera. (In Molnus) Step5 Press the Register button in Molnus, and wait for about 5 minutes. (In Molnus) The registration should now be done, and the camera should now be able to upload images to Molnus. - Page 17 Boly Trail Camera BG710 Series Set the date and time of the camera. The date format is Set Clock day/month/year and the time format is hour: minute: second. Choose the image size:24MP,18 MP ,12 MP ,5 MP Photo Size Default: 5 MP Choose the number of photos taken after the camera is triggered: 1 Photo, 2 Photo, or 3 Photo.
- Page 18 Boly Trail Camera BG710 Series Default: All This parameter defines a certain time in a day when the camera can be triggered, while the device will shut off during non-working hours. The effective value ranges from 00:00 to 23:59. Work Hour When this parameter is set to Off, the camera works at all times.
- Page 19 Boly Trail Camera BG710 Series NOTE: Some cellular carriers limit the size of files being sent. Some images and video files may be too large to send. Default: Instant SMS Control enables mobile communication functionality. When SMS Control to ON, the camera can receive and respond SMS Control to your SMS commands.
-
Page 20: Troubleshooting
Boly Trail Camera BG710 Series Version Shows firmware Version. Register Camera Used only for the Molnus app to register the camera. 4. Troubleshooting 1. The display screen is suddenly black. A: The camera may be in “Hunting mode.” Press MENU to wake it If there is no response, the camera may be powered off. -
Page 21: Pir Detection Zone
Boly Trail Camera BG710 Series 5. PIR Detection Zone This camera has a new patented PIR, the following picture shows the compared detection zone between normal PIR and the new patented PIR. The PIR detection angle (α) is smaller than the field of view (FOV) angle (β). -
Page 22: Technical Specifications
Boly Trail Camera BG710 Series 6. Technical Specifications Image Sensor 5MP CMOS Sensor F/NO=2.4 Lens FOV(Field of View)=57° LED Type 940nm LED Number 2pcs PIR Detection Range 100ft Illumination Distance 100ft Display Screen of Remote 1.44" Color LCD Control Memory Card... -
Page 23: Parts List
Boly Trail Camera BG710 Series 7. Parts List BG710-M/BG710-MFP Part Name Quantity Camera Belt USB Cable User Manual 4G Antenna 18650 Battery (BG710-MFP with) TF Card (BG710-MFP with) TF Card Adapter (BG710-MFP with) Iron Sheets Version 1.1... -
Page 24: Warranty Card
Boly Trail Camera BG710 Series WARRANTY CARD Customer Name: Contact Address: Date of Purchase: Contact Tel: Model No.: Series No.: Retailer: The camera manufacturer provides 12 months warranty for this product against manufacturing defects or malfunctions. If your camera fails to function under regular use within one year, the camera manufacturer will repair or replace the camera free of charge.
Need help?
Do you have a question about the BG710 Series and is the answer not in the manual?
Questions and answers