Table of Contents
Advertisement
Advertisement
Table of Contents

Related Manuals for Boly MG984G Series


Summary of Contents for Boly MG984G Series
- Page 1 Boly Trail Cameras – MG984G Series MG984G Series User Manual...
-
Page 2: Table Of Contents
Boly Trail Cameras – MG984G Series Table of Contents 1. Getting Started..............1 2. Camera Operations............3 2.1 Batteries / Power Supply........... 3 2.2 SD Card Information............3 2.3 SIM Card Information............4 2.4 Camera Modes..............5 2.5 Manual Image / Video Capturing........6 2.6 Manage Images and/or Videos........ -
Page 3: Getting Started
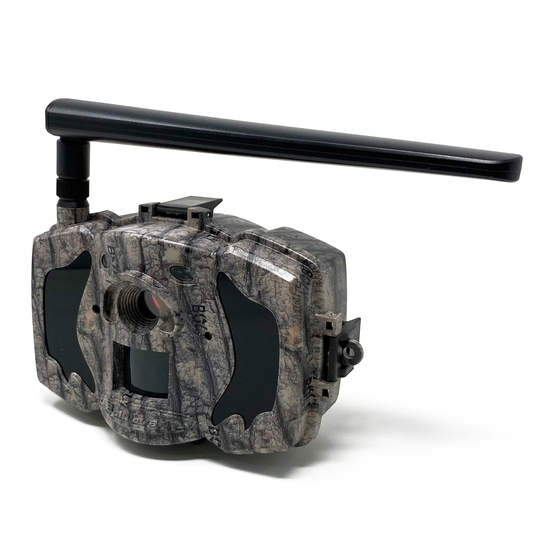
1. Getting Started Lock Loop Battery Tray... - Page 4 DC Port This camera, is a digital scouting and infrared surveillance camera with communication functionalities. It can be triggered by any human or animal movement, and is monitored by a highly sensitive Passive Infrared (PIR) motion sensor. After triggered, the camera automatically captures high quality pictures (up to 36M pixels) or records video clips (1080 FHD).
-
Page 5: Camera Operations
2. Camera Operations 2.1 Batteries / Power Supply This camera is powered by 8 AA batteries. High-density, high-performance rechargeable or non-rechargeable Alkaline batteries are recommended. NiMH batteries can be used as well. When the camera’s battery levels are low, the indication LED light will blink twice, then the camera will automatically shut down. -
Page 6: Sim Card Information
Make sure the SD card is unlocked before inserting it into the camera The camera will power off with a code stating that the SD card is locked when inserted. If you experience any problems with an inserted SD card Try reformatting the SD card, by using the camera’s main settings options. -
Page 7: Camera Modes
2.4 Camera Modes The different modes are accessed by sliding the power switch to the different positions marked on the camera. The power switch is located inside the camera on the bottom right of the LCD screen. The different camera modes are as follows: ... -
Page 8: Manual Image / Video Capturing
2.5 Manual Image / Video Capturing Place the camera in TEST/SETUP mode and press the “►/SHOT” button on the right of the control pad to manually capture photos or record video. Press “►/SHOT” again to stop video recording. 2.6 Manage Images and/or Videos Put the camera in TEST/SETUP mode and press the “OK/Play”... -
Page 9: Sending Via Mms/Gprs/Molnus
2.7 Sending via MMS/GPRS/Molnus Images sent directly your wireless device/email/Molnus, based on the Send Mode settings. 1) Insert the SD & SIM card into the camera before turning on the camera. 2) Turn on the camera in TEST/SETUP mode. Make sure the SIM card is recognized and signal strength is adequate. -
Page 10: Trigger Modes
Press OK again to send the picture via the messaging option chosen in your camera settings 2.8 Trigger Modes There are 3 different trigger modes for the camera: PIR Trigger/Sensitivity, Time Lapse, combined PIR/Time Lapse mode. These modes are activated by three different menu options (PIR Trigger/Sensitivity, PIR Interval, and Time Lapse). - Page 11 The camera will capture pictures or video when motion is detected and at the preset time(s), regardless of motion detection. ● If PIR Trigger/Sensitivity and Time Lapse options are BOTH OFF, the camera will not capture any photos or videos. Additional PIR settings to note: ...
-
Page 12: Password Setup
2.9 Password Setup For encryption settings, enter your four digit pre-set password to enter the camera. This function helps protect your privacy. This function is off by default. To use this function: 2.9.1 Press ▲/▼ to adjust the number from 0~9, and /►... -
Page 13: Camera Setup Settings & Display
3. Camera Setup Settings & Display 3.1 Settings Interface & Display To update the camera settings, place the power switch to the TEST/SETUP position. To navigate the menus, utilize the following built-in buttons: MENU: Enter the program menu in Preview Mode ▼►... -
Page 14: Mobile Communication
3.2 Mobile Communication The camera can receive and respond to commands sent via SMS, MMS, GRPS, Molnus and the Apple or Android application, as long as the camera is correctly connected to a wireless carrier. To enable the SMS functionality using the mobile application, you must complete the following steps: ... -
Page 15: Camera Setup Software
3.3 Camera Setup Software For assistance with the camera setup, download the camera setup application (BMC_config.zip), along with the basic instructions both found from our website www.bolymedia.com/index/Support. Open the software and select camera model: STEP 1: Select your country and carrier. STEP 2: Check WAP/Internet Parameters: Fill out the required fields (marked with an asterisk). - Page 16 Step 1 Step 3 Step 2 Step 4 Step 5...
-
Page 17: Cloud Service - Molnus
STEP 3: Choose between default or manual settings. For first time users, we suggest using the default settings. STEP 4: Input the phone number of the phone to receive/send the remote commands and images in the “administrator number” field and email address in “Receive Email 1”... - Page 18 The APN name is provided by the operator of the SIM card. Each operator has their own APN name. If not present in any documents sent along with the SIM-card, then please check the operator’s homepage for APN settings. IMEI, Control Code can be found on your camera. You will need a SIM-card that has internet access.
-
Page 19: Mobile Applications
area with no movement, for example against the wall. (On camera) Step6 Press the Register button in Molnus, and wait for about 5 minutes. (In Molnus) The registration should now be done, and camera should now be able to upload images to Molnus. Test the function by making movement in front of camera. -
Page 20: User Level
3.5.1 User Level There are two user authorization levels for this feature: administrator and normal users. Functions User Level Set administrator phone Only administrator’s number password Set administrator’s Administrator password Set camera parameters Administrator Set normal user Administrator Receive emergency calling Administrator, normal user Send SMS for on spot Administrator... - Page 21 MG984G-36M MG984G-36M STEP 1 STEP 2 STEP 3: Set the super user number and password. For the first time, use the super user password 0518. The Super User number is the SIM card phone number inserted in your mobile phone. STEP 4: Click “send”, then choose the country and provider that corresponds with your SIM card (which is inserted in your camera).
- Page 22 STEP 4 STEP 5: In the Select Mail Server: you can decide on using a Boly Email or Other Email service. Select “my device” to add or delete a device. STEP 6: Select “Setting” to set users parameters or set to...
- Page 23 MG984G-36M STEP 5 STEP 6 STEP 7: Select “Get Photos” means you can get a photo from your camera device. There are two ways to send an image via: Cellphone: Send MMS to phone (not available for MG984G-V) Email : Send to email by GPRS. STEP 8: For more settings, select “Advanced”...
- Page 24 STEP 7 STEP 8 Set password: If you forget your super user password, you can get a new one. Super User information: Change your super user and password in the advanced settings section. Add or Delete a device: Android Select“My Device” to add a device, Long click on the device to select the delete option.
-
Page 25: Camera Setup Options
Click“ ”to add a device and choose your device, or slide to the left to delete it. Android 3.6 Camera Setup Options To view the camera’s settings menu, slide the power switch to TEST/SETUP mode and press MENU button on the remote. Use the ►... - Page 26 Depending on the model and firmware version, not all Menu options may be available on your specific camera. The menu options with * are not available for MG984G-V. Menu Options Descriptions Basic Settings Choose between capturing images, videos or Camera Mode both at the same time: Photo, Video, Pic+Video Default: Photo Choose the image size: 14MP, 25MP, or 36MP...
- Page 27 options are BOTH OFF, the camera will not capture any photos or videos. Default: OFF This setting is for the sensitivity of the PIR sensor. There are four sensitivity parameters: High, Normal, Low, OFF. It is recommended to use HIGH sensitivity in areas with little environmental interference and for warmer, PIR Trigger/ humid climates.
- Page 28 Phone [MMS]: Send the image to cellular device via WAP. (not available for MG984G-V) Email [MMS]: Send the image to email address via WAP. (not available for MG984G-V) Email [GPRS]: Send the image to email address via SMTP. Molnus: Send the image to Molnus via WAP.
- Page 29 in the web by yourself. SIM IMEI & Control Code: check the camera Version Enter. Insert the SIM card and get the network. There are 3 options for this setting. Daily : Only works in ON mode. Photo Mode: This setting will...
- Page 30 Choose the language you prefer. Language options include: English, Suomi, Deutsch, Language Svenska, Dansk, Norsk, Czech, Russian, Italian, French. Default: English Enable or disable the sound the camera will Beep Sound make while navigating the menu settings. Default: On Used for multiple cameras in an area. You can set an A-Z indicator for each of your cameras in Camera order to distinguish between which photos are...
-
Page 31: Detection Ranges - Pir Detection Zones
4. Detection Ranges – PIR Detection Zones This picture shows Bolymedia’s 5 types of detection ranges at various detection angles. This camera has a super long detection range with a 60 degree FOV angle. The PIR detection angle (α) is smaller than the field of view (FOV) angle (β). -
Page 32: Technical Specifications
The information contained herein is based on tests and data that Boly Inc. believes to be reliable, but the accuracy or completeness is not guaranteed. No warranty of any kind is made with respect to any of the above representations. No reproduction, copy or use thereof... -
Page 33: Appendix : Parts List
Appendix : Parts List Part Name Quantity Digital Camera USB Cable Mounting Bracket Belt User’s Manual Antenna Warranty Card Version 1.1 http://www.bolymedia.com/index/Support...
Need help?
Do you have a question about the MG984G Series and is the answer not in the manual?
Questions and answers