
Related Manuals for Xtreme M90U-80


Summary of Contents for Xtreme M90U-80
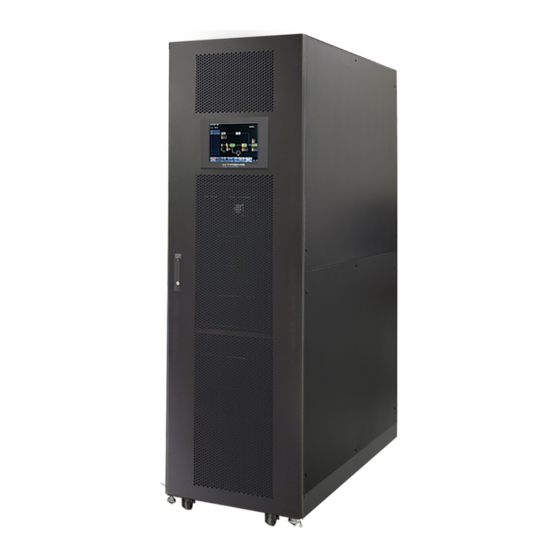
- Page 1 M90U-80 & 140 Modular Online Three-Phase UPS 15-140kVA Models User & Installation Manual www.xpcc.com | © 2021 Xtreme Power Conversion Corporation. All rights reserved. (Rev 10/14/21)
-
Page 2: Table Of Contents
M90U-80 & 140 User’s Manual Uninterruptible Power Supply Table of Contents 1. Safety......................4 1.1 Important Safety Instructions....................4 1.2 EMC............................4 1.3 Installation Information......................4 1.4 Maintenance..........................4 1.5 Recycling the Used Battery......................5 2. Installation....................5 2.1 Initial Inspection.........................5 2.2 Installation Environment......................5 2.3 Unpacking..........................6 2.4 Moving the Cabinet........................8 2.5 Types of UPS Cabinet.........................9... - Page 3 M90U-80 & 140 User’s Manual Uninterruptible Power Supply 4.4 History Record.........................64 5. Interface and Communication..............65 5.1 Dry Contact Port........................65 5.2 Extra Comm. Slot........................67 5.3 Local Communication Ports – RS232 & USB................67 5.4 SNMP Slot..........................67 6. Troubleshooting..................68 7. Service....................70 7.1 Replacement Procedures Of Power Module................71 7.2 Replacement Procedures Of STS Module................71...
-
Page 4: Safety
M90U-80 & 140 User’s Manual Uninterruptible Power Supply 1 Safety 1.1 Important Safety Instructions This UPS contains LETHAL VOLTAGES. All repairs and service must be performed by AUTHORIZED SERVICE PERSON- NEL ONLY. There are NO USER SERVICEABLE PARTS inside the UPS. -
Page 5: Recycling The Used Battery
M90U-80 & 140 User’s Manual Uninterruptible Power Supply 1. Remove watches, rings, or other metal objects. 2. Use tools with insulated handles. 3. Wear rubber gloves and boots. 4. Do not lay tools or metal parts on top of batteries or battery cabinets. -
Page 6: Unpacking
M90U-80 & 140 User’s Manual Uninterruptible Power Supply clearances are suggested: • Keep a clearance of 36” from the top of the UPS for maintenance, wiring and ventilation. • Keep a clearance of 36” from the back of the UPS and the external battery cabinets for ventilation. - Page 7 M90U-80 & 140 User’s Manual Uninterruptible Power Supply 3. Put the included ramp in the front of the cabinet. Then, remove two side panels. Refer to Figure 2-3. Figure 2-3 4. Remove 4 shipping brackets and loosen leveling feet by rotating them counterclockwise. Then, move the cabi- net from the pallet.
-
Page 8: Moving The Cabinet
M90U-80 & 140 User’s Manual Uninterruptible Power Supply 2.4 Moving the Cabinet The UPS is secured on the pallet with 4 shipping brackets. When removing it, pay attention to the movement of the casters to avoid accidents. The cabinet can be pushed forward or backward only. Pushing it sideways is not allowed. When pushing the cabi- net, be careful not to tip it as the center of gravity is high. -
Page 9: Types Of Ups Cabinet
Uninterruptible Power Supply 2.5 Types of UPS Cabinet There are two types of UPS cabinets. The M90U-80 has slots for (4) power modules amd (16) battery modules. The M90U-140 has slots for (8) power modules (batteries are contained in a separate cabinet. - Page 10 M90U-80 & 140 User’s Manual Uninterruptible Power Supply Figure 2-7 Exterior Mechanical Data Dimensions UPS cabinet Width Depth Height M90U-80 & 140 23.6” 43.3” 79.1” Figure 2-8 Dimensions Xtreme Power Conversion Corporation Page 10...
- Page 11 2.6.2 Front View Unlock and open the front door and you will see the Input Breaker (Q1), Maintenance Breaker (Q2), Output Break- er (Q3), STS Module, Power Module slots and Battery Module slots (Battery Module for M90U-80 only). M90U-80 M90U-140 1.
-
Page 12: Internal Mechanisms
After opening the front door, there are three breakers, Input Breaker (Q1), Maintenance Breaker (Q2) and Output Breaker (Q3). For the M90U-80, there is a battery breaker for internal battery modules located on the rear. Xtreme Power Conversion Corporation Page 12... - Page 13 M90U-80 & 140 User’s Manual Uninterruptible Power Supply M90U-80 M90U-140 Figure 2-11 Front Breakers Battery Breaker M90U-80 Figure 2-12 Rear Breaker Xtreme Power Conversion Corporation Page 13...
- Page 14 M90U-80 & 140 User’s Manual Uninterruptible Power Supply 2.7.2 Wiring Terminal Blocks Open the UPS’s back doors and you will see the wiring terminal block. For UPS cabinet wiring, please refer to Figure 2-13. Item Function Description Output Block Connects the critical loads Includes T, S, R and Neutral terminals.
-
Page 15: Control Panel
M90U-80 & 140 User’s Manual Uninterruptible Power Supply Figure 2-15 M90U-140 Terminal Blocks 2.8 Control Panel 2.8.1 LCD Display Through the graphic LCD display, the user can easily view the operational mode of UPS. In addition, the measure- ment, parameters, versions of firmware and warnings can be browsed in the friendly interface. For detailed infor- mation, please refer to Chapter 4. -
Page 16: Introduction Of Modules
M90U-80 & 140 User’s Manual Uninterruptible Power Supply 2.8.2 LED Indicators Color Status Definition Input source is normal. LINE Green Flashing Input source is abnormal. No input source Load on Bypass. BYPASS Yellow Flashing Input source is abnormal. Bypass not operating. - Page 17 M90U-80 & 140 User’s Manual Uninterruptible Power Supply 2.9.1 STS Module The STS Module is installed before leaving factory. It provides the bypass power when UPS is in Bypass Mode. In addition to offering bypass power, it includes some communication interfaces. For detailed information, please refer to Chapter 5.
- Page 18 M90U-80 & 140 User’s Manual Uninterruptible Power Supply Power Module Each Power Module is shipped with its own packaging. It must be installed during the UPS system installation. The capacity of each Power Module is 20kVA/20kW or 15kVA/15kW. It includes a power factor correction rectifier, a battery charger, an inverter and control circuit.
- Page 19 The SW1 and SW2 position have been setup before leaving the factory. It’s not necessary to change it. Module ID Assignment SW1 & SW2 Module Address Module ID SW1 & SW2 Module Address Module ID Table 2-2 Module ID Assignment 2.9.3 M90U-80 Battery Module (does not apply to M90U-140 Xtreme Power Conversion Corporation Page 19...
-
Page 20: Power Cable
M90U-80 & 140 User’s Manual Uninterruptible Power Supply The Battery Module are shipped seperately. The batteries inside the module are installed at the factory. M90U-80 Battery Modules contains 10 pcs of 12V/580W batteries. Internal batteries are installed by a factory technician, or end user. - Page 21 M90U-80 & 140 User’s Manual Uninterruptible Power Supply Table 2.10.1 Model 15KVA 20KVA 30KVA 40KVA 45KVA 60KVA 75KVA Current (A) 60.1 120.2 180.3 Power cable (mm2) Fixation torque force (lb- 88.3 88.3 88.3 88.3 88.3 88.3 88.3 Model 80KVA 90KVA...
-
Page 22: Wiring
M90U-80 & 140 User’s Manual Uninterruptible Power Supply 2.11 Wiring WARNING: • Before connecting any wire, make sure the AC input and battery power is completely turned off. • Make sure the breakers, Input Breaker (Q1), Maintenance Breaker (Q2), Output Breaker (Q3) and battery breaker are all in the OFF position. -
Page 23: Power Module Installation
M90U-80 & 140 User’s Manual Uninterruptible Power Supply 2.11.3 External Battery Cabinet Connection Figure 2-24 External Battery Cabinet Wiring After the battery is completely installed, be sure to set up nominal battery voltage, battery capacity and maximum charging current in LCD setting. Otherwise, if battery setting is different from actual installation, the UPS will keep warning. - Page 24 M90U-80 & 140 User’s Manual Uninterruptible Power Supply 4. Secure the Power Module to the cabinet by inserting the screws at the front panel of the Power Module. 5. Move the ready switch to the “ ”position (i.e., in ready state).
- Page 25 -Before performing the Battery Module installation/ replacement, make sure the Battery Breaker is in the OFF position. 2.13.1 Insert the Battery Module (M90U-80 Cabinet only) 1. Open the UPS’s front door and remove the panel of battery module shelf 2. There are 4 rails for inserting the Battery Modules in the same shelf. Four Battery Modules MUST be installed to form a set of Battery.
-
Page 26: Operation Mode And Ups Operation
M90U-80 & 140 User’s Manual Uninterruptible Power Supply Battery Module Shelf 3. Regarding the maximum load of power modules, please refer to section 2.10.2 for the minimum number of bat- tery modules. 4. Secure the Battery Module to the cabinet by fixing the screws of the Battery Module. -
Page 27: Operation Mode
M90U-80 & 140 User’s Manual Uninterruptible Power Supply factory installed jumpers wiring installed by qualified electrician Figure 3-2: Wiring diagram for single inputs 3.2 Operation Mode This modular UPS is a three-phase, four wire on-line, double-conversion and reverse-transfer UPS that permits operation in the following modes: •... - Page 28 M90U-80 & 140 User’s Manual Uninterruptible Power Supply 3.2.2 Line Mode In Line Mode, the rectifier derives power from the utility power and supplies DC power to the inverter and the charger charges the battery. The inverter filters the DC power and converts it into pure and stable AC power to the load.
- Page 29 M90U-80 & 140 User’s Manual Uninterruptible Power Supply Figure 3-6 : Bypass Mode Diagram 3.2.5 ECO Mode The ECO Mode is enabled through the setting menu of LCD panel. In ECO mode, the load is powered by bypass when the bypass voltage and frequency are within the acceptable ranges. If the bypass is out of range, the UPS will transfer the power source of load from bypass to inverter.
-
Page 30: Ups Operation
M90U-80 & 140 User’s Manual Uninterruptible Power Supply Figure 3-8 : Shutdown Mode Diagram 3.2.7 Maintenance bypass Mode A manual bypass switch is available to ensure continuity of supply to the critical load when the UPS becomes unavailable e.g. during a maintenance procedure. Before entering the maintenance bypass mode, make sure the... - Page 31 M90U-80 & 140 User’s Manual Uninterruptible Power Supply The operating procedures are as follows: Step 1: Refer to “Chapter 2 Installation” to connect the power cables and install the Power Modules and the bat- tery required for the UPS system.
- Page 32 M90U-80 & 140 User’s Manual Uninterruptible Power Supply Step 5: Make sure there are no warning or fault events happening. If there is, please refer to Chapter 6 Trouble- shooting to solve it. Step 6: Press Power ON/OFF button for two seconds to enter into Line Mode as shown below.
- Page 33 M90U-80 & 140 User’s Manual Uninterruptible Power Supply Step 7: Switch ON the output breaker (Q3). AC startup procedure is complete. 3.3.2 Cold Start Startup Step 1: Switch ON the battery Breaker. Step 2: Press the “Battery Start” button on any one of Power Modules to start up the control power of all Power modules and STS as shown below.
- Page 34 M90U-80 & 140 User’s Manual Uninterruptible Power Supply Step 4: Before UPS enters into shutdown mode, please press “Power On/Off” button for 2 seconds immediately as shown in the diagram below. Step 5: Then, UPS will enter Battery Mode as shown in the diagram below.
- Page 35 M90U-80 & 140 User’s Manual Uninterruptible Power Supply Step 3: Switch ON the Maintenance Bypass Breaker as shown below. Step 4: Switch OFF the Input Breaker (Q1) as shown below. Input Step 5: It is possible to change the STS module, Power Module and Battery Module.
- Page 36 M90U-80 & 140 User’s Manual Uninterruptible Power Supply Step 4: Turn off Maintenance Bypass Breaker as shown below. Step 5: Lock back the mechanical lock plate as shown below. 3.3.4 Turn off Operation 3.3.4.1 Bypass Mode/ Standby Mode Turn Off Operation When the UPS neither is turned on nor turned off, the UPS operates in the Standby Mode or Bypass Mode, de- pending on the “Bypass Mode”...
- Page 37 M90U-80 & 140 User’s Manual Uninterruptible Power Supply The LCD diagrams are shown below. Bypass Mode Setting is Disabled Bypass Mode Setting is Enabled Step 1: Switch OFF the Input Breaker (Q1). The LCD diagrams are shown below. Bypass Mode Setting is Disabled UPS enters Shutdown Mode.
- Page 38 M90U-80 & 140 User’s Manual Uninterruptible Power Supply Bypass Mode Setting is Enabled UPS stays in Bypass mode and No AC input is indicated. Step 2: Switch OFF the external power switch to disconnect the AC power to the UPS. Wait until the LCD is OFF.
- Page 39 M90U-80 & 140 User’s Manual Uninterruptible Power Supply After turned off, the UPS will transfer to Standby Mode or Bypass Mode, depending on the “Bypass Mode” Setting. Next, follow the Bypass Mode/ Standby Mode Turn Off Operation procedure. 3.3.4.3 Battery Mode Turn Off Operation The LCD diagram is shown below when the UPS operates in the Battery Mode.
-
Page 40: Control Panel And Display Description
M90U-80 & 140 User’s Manual Uninterruptible Power Supply 4. Control Panel and Display Description 4.1 Introduction The control panel and display are located on the front door of the UPS. The LCD is on the front. The LED indicators, the display description and the Power on/off button are on the back of the front door. -
Page 41: Screen Description
M90U-80 & 140 User’s Manual Uninterruptible Power Supply Table 4-2: Control key table Control Key Description Power On/Off Turn on UPS or Turn off UPS. (hold 2-Sec) Table 4-3: Audible Alarm Audio Type Description Power on/off Buzzer sounds for two seconds. - Page 42 M90U-80 & 140 User’s Manual Uninterruptible Power Supply Module icon Explanation STS icon with ID no. Power module icon with ID no. No power module Power module output on Power module output off Power module charger on Power module charger off Power module fault Power module is operating normally.
- Page 43 M90U-80 & 140 User’s Manual Uninterruptible Power Supply Figure 4-5 Control menu tree Figure 4-6 Control screen page Xtreme Power Conversion Corporation Page 43...
- Page 44 M90U-80 & 140 User’s Manual Uninterruptible Power Supply Figure 4-7 Confirmation screen Touch any control option directly. Then, confirmation screen will pop up. Touch icon to confirm command or touch icon to cancel command as shown in Figure 4-7. 4.2.5 Measurement Screen Touch icon to enter into the sub-menu.
- Page 45 M90U-80 & 140 User’s Manual Uninterruptible Power Supply Figure 4-9 System Measurement Screens Touch icon to monitor module measurement value. Xtreme Power Conversion Corporation Page 45...
- Page 46 M90U-80 & 140 User’s Manual Uninterruptible Power Supply Figure 4-10 Module Measurement Screens The measurement can be read listed in Table 4-4. Table 4-4: Measurement data Menu Item Explanation L-N Voltage (V) Input phase voltage (L1, L2, L3). Units 0.1V.
- Page 47 M90U-80 & 140 User’s Manual Uninterruptible Power Supply 4.2.6 Setup Screen Touch the icon to enter into the sub-menu. It’s required to enter password to access General, SYSTEM, BATTERY and PRE-ALARM sub-menus as shown in Figure 4-11 and 4-12. Figure 4-11 Setup menu Touch the grey column and it will pop up number keyboard.
- Page 48 M90U-80 & 140 User’s Manual Uninterruptible Power Supply Output Voltage Bypass Voltage Range Bypass Frequency Range Converter Mode ECO Mode Bypass Mode System Auto-Restart Cold Start Battery Mode Delay Time System Shutdown Time System Restore Time Redundancy Charger Test Nominal Battery Voltage...
- Page 49 M90U-80 & 140 User’s Manual Uninterruptible Power Supply 4.2.6.1 Setup-General Screen The Setup-General screen and setting list are shown in Figure 4-14 and Table 4-6. General setting can be set in any operating mode. Figure 4-14 Setup-General screen Table 4-6: Setup-General setting list...
- Page 50 M90U-80 & 140 User’s Manual Uninterruptible Power Supply Set Audible Alarm Audible Alarm • Disable • Enable (Default) Factory Reset Restore to factory default setting EEPROM Reset Set EEPROM default Set EPO active status EPO Function • Normal Close Active •...
- Page 51 M90U-80 & 140 User’s Manual Uninterruptible Power Supply Nominal Battery Voltage Battery Capacity in Ah Maximum Charging Current Battery Low/Shutdown Setting Periodic Battery Test Battery Battery Test Interval Stop by Time Stop by Battery Voltage Stop by Battery Capacity Battery Age Alert...
- Page 52 M90U-80 & 140 User’s Manual Uninterruptible Power Supply Figure 4-16 Warning screen Table 4-8: Setup-System setting list Setting Item Sub Item Explanation Set output voltage • 120Vac (Default) Output Voltage • 127Vac MUST be reviewed after UPS installation Set bypass voltage range: Upper limit •...
- Page 53 M90U-80 & 140 User’s Manual Uninterruptible Power Supply Set auto-restart • Disable Auto-Restart • Enable (Default) After “Enable” is set, once UPS shutdown occurs due to low battery and then utility restores, the UPS will return to line mode. Set cold start •...
- Page 54 M90U-80 & 140 User’s Manual Uninterruptible Power Supply Figure 4-17 Setup-Battery Screen Table 4-9: Setup-Battery setting list Setting Item Sub Item Explanation Set battery nominal voltage Nominal Battery Voltage • 10x12V (Default) MUST be set after UPS installation Set battery capacity. (0~999) •...
- Page 55 M90U-80 & 140 User’s Manual Uninterruptible Power Supply Set periodic battery test disable or enable Periodic Battery Test • Disable (Default) • Enable Set battery test interval (7~99 Days) Battery Test Interval • 30 Days (Default) Set testing time for battery test (10~1000sec)
- Page 56 M90U-80 & 140 User’s Manual Uninterruptible Power Supply Table 4-10: Setup-Pre-Alarm setting list Setting Item Sub Item Explanation Set line voltage range: Upper limit • • +10% • +15% Line Voltage Range • +20% (Default) Lower limit • • -10% •...
- Page 57 M90U-80 & 140 User’s Manual Uninterruptible Power Supply Figure 4-20 Identification screen page 4.2.7.2 INFORMATION - System Screen When System submenu tab is touched, the system power, nominal voltage, nominal frequency … etc. informa- tion will be displayed, as shown in Figure 4-21 and 4-22. Touch UP and DOWN arrows to switch different pages.
- Page 58 M90U-80 & 140 User’s Manual Uninterruptible Power Supply Figure 4-22 INFORMATION System screen page 2 4.2.7.2 INFORMATION - Battery Screen When Battery submenu tab is touched, the Battery nominal voltage, capacity, charging current … etc. information will be displayed, as shown in Figure 4-23...
- Page 59 M90U-80 & 140 User’s Manual Uninterruptible Power Supply 4.2.8 Events Screen When event occurs, you will see flashing icon in the Main Screen as shown in Figure 4-24. You also can touch icon to check the latest event lists, history events and reset all events as shown in Figure 4-25.
- Page 60 M90U-80 & 140 User’s Manual Uninterruptible Power Supply Figure 4-26 Current Events screen 4.2.8.2 History Events The detailed event information is saved in history events. It can save up to 500 events in history events. When warning occurs, it will display alarm code, alarm time and Module ID. When fault event occurs, it will display alarm details, alarm time and Module ID.
-
Page 61: Alarm List
M90U-80 & 140 User’s Manual Uninterruptible Power Supply 4.2.8.3 Reset All Events The Maintainer password is required to enter Reset All Events screen as shown in Figure 4-28. After entering cor- rect password, it will pop up reconfirmed screen. Then, touch... - Page 62 M90U-80 & 140 User’s Manual Uninterruptible Power Supply Fault! Bus Voltage Unbalance DC bus voltage is not balanced Fault! Bus Short DC bus is short The rectifiers can’t start due to low DC bus voltage within specified Fault! Bus Soft Start Time Out...
-
Page 63: History Record
M90U-80 & 140 User’s Manual Uninterruptible Power Supply Warning! Turn On Abnormal As stated. Warning! Charge Fail As stated. Warning! EEPROM Fail EEPROM operation error Warning! Fan Lock As stated. Warning! Line Phase Error As stated. Warning! Bypass Phase Error As stated. -
Page 64: Interface And Communication
M90U-80 & 140 User’s Manual Uninterruptible Power Supply Setup! Factory Reset Setup! Cold Start Setup! EEPROM Reset Setup! Battery Mode Delay Time Setup! EPO Function Setup! Shutdown Restore Time Setup! Save Setting Setup! Redundancy Setup! Power Rating Setting Setup! Charger Test... -
Page 65: Dry Contact Port
M90U-80 & 140 User’s Manual Uninterruptible Power Supply Figure 5-1 Dry contact ports and communication ports Dry Contact No. Dry Contact No. Function Remote EPO input port Future use Future use Maintenance Bypass Switch State Port Future use Battery Cabinet Temperature Detection Port... - Page 66 M90U-80 & 140 User’s Manual Uninterruptible Power Supply Table 5-1: Description of remote EPO port EPO Logic Setting Position Description EPO is activated when X1.1 & X1.2 X1.1 & X1.2 opened EPO is activated when X1.1 & X1.2 X1.1 & X1.2 shortened If EPO Logic setting is Normal Closed (N.C), EPO is triggered when pins 1 and 2 of X1 are opened.
-
Page 67: Extra Comm. Slot
M90U-80 & 140 User’s Manual Uninterruptible Power Supply Figure 5-4 Battery Cabinet Temperature Detection Port Table 5-3: Description of Battery Cabinet Temperature Detection Port Name Position Description X6.1 I²C communication SCL Signal X6.2 I²C communication SDA Signal +3.0V X6.3 Power GND X6.4... -
Page 68: Troubleshooting
M90U-80 & 140 User’s Manual Uninterruptible Power Supply 6. Troubleshooting The M90U-80 & 140 can alarm for the following faults or warnings: LCD Message Explanation Solution Fault! Bus Over Voltage DC bus voltage is too high Contact service personnel. Fault! Bus Under Voltage DC bus voltage is too low Contact service personnel. - Page 69 M90U-80 & 140 User’s Manual Uninterruptible Power Supply Fault! Line SCR Fail Line SCR short circuit fault Contact service personnel. Fault! EEPROM Fault EEPROM operation error Contact service personnel. Fault! Parallel Cable Loosen Check if the parallel cable is loose and con- As stated.
-
Page 70: Service
M90U-80 & 140 User’s Manual Uninterruptible Power Supply Check the redundancy setting is correct and Warning! Redundancy Set Fail As stated. contact service personnel. Warning! Parallel Sys Config. Parallel System Configure error Contact service personnel. Wrong Check if the connector is loose when it acts Warning! Maintenance Bypass Enter maintenance abnormally. -
Page 71: Replacement Procedures Of Power Module
M90U-80 & 140 User’s Manual Uninterruptible Power Supply 7.2 Replacement Procedures of the STS Module Warning: Confirm the UPS is operating in Maintenance Bypass Mode. 1. Follow Section “3.3.3.1 Transfer to maintenance bypass” procedure to transfer UPS into Maintenance By- pass operation. -
Page 72: Specifications
M90U-80 & 140 User’s Manual Uninterruptible Power Supply M90U-80 Specifications M90U80-20k M90U80-40k M90U80-60k M90U80-80k MODEL NUMBER CAPACITY Power rating 20kVA/20kW 40kVA/40kW 60kVA/60kW 80kVA/80kW Enclosure capacity: power modules Up to 80KVA (4 x 20KVA) or up to 60kVA (4 x 15KVA) - Page 73 M90U-80 & 140 User’s Manual Uninterruptible Power Supply M90U-140 Specifications M90U140- M90U140- M90U140- MODEL NUMBER M90U140-20k M90U140-40k M90U140-60k M90U140-80k 100k 120k 140k CAPACITY Power rating 20kVA/20kW 40kVA/40kW 60kVA/60kW 80kVA/80kW 100kVA/100kW 120kVA/120kW 140kVA/140kW Power modules Up to 140KVA N+1 (8 x 20KVA) or up to 105kVA N+1 (8 x 15KVA)
-
Page 74: Obtaining Service
2. Include a letter with your name, address, daytime phone number, RMA number, and a brief description of the problem. 3. Mark the RMA number on the outside of all packages. Xtreme Power cannot accept any package without the RMA number marked on the outside of the boxes. -
Page 75: Xtreme Power Conversion Limited Warranty
Any technical advice furnished by XPC Corporation or a XPC Corporation authorized representative be- fore or after delivery with regard to the use or application of Xtreme Power Conversion equipment is furnished on the basis that it represents XPC Corporations best judgment under the situation and circumstances, but it is used at the recipient’s sole risk.
Need help?
Do you have a question about the M90U-80 and is the answer not in the manual?
Questions and answers