
Related Manuals for Sindoh A1 Series


Summary of Contents for Sindoh A1 Series
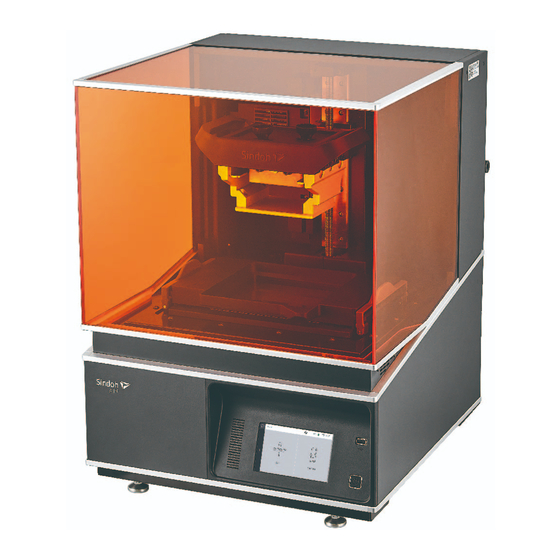
- Page 1 A1 Series User Manual Read the User manual before operating the product, and keep the manual at a convenient place near the product. 3dprinter.sindoh.com...
- Page 2 Safety Instructions Be sure to observe the following instructions when using the device.. Warning: Failure to observe the instructions may lead to death or serious injury. • Directly plug the power cord in the receptacle on the wall. Do not use extension cord. •...
- Page 3 Before using the device Thank you for purchasing our product. This user manual contains detailed information about correct use of device and easy maintenance to maintain the optimal state, and to contribute to the rationalization of office work of your company Please carefully read the user manual before using the device and keep close at hand.
-
Page 4: Table Of Contents
Contents Before using the device Preface --------------------------------------------------------------------------------------------------------------- 1 --------------------------------------------------------------------------------------------------------- 2 Conventions -------------------------------------------------------------------------------------------------------------- 2 Symbols ------------------------------------------------------------------------------------------------- 3 Safety Information ---------------------------------------------------------------------------------------------------------- 5 Precautions 4.1 Installation ---------------------------------------------------------------------------------------------------------- 5 ------------------------------------------------------------------------------------------------ 6 4.2 Moving the Device ------------------------------------------------------------------------------------------- 7 Handling Consumables Resin ----------------------------------------------------------------------------------------------------------------- 7 --------------------------------------------------------------------------------------------- 8 5.2 Isopropyl Alcohol, IPA Instructions for Use ------------------------------------------------------------------------------------------------ 9... - Page 5 Chapter.2 UI Menu Function ------------------------------------------------------------------------------- 2-2 UI Menu Function Descriptions 1.1 Home ------------------------------------------------------------------------------------------------------------- 2-3 --------------------------------------------------------------------------------------------------------- 2-4 1.2 Cartridge ------------------------------------------------------------------------------------------------------------ 2-4 Change ---------------------------------------------------------------------------------------------------------- 2-7 1.3 Settings ----------------------------------------------------------------------------------------------------------- 2-4 XY Scale Z Offset --------------------------------------------------------------------------------------------------------- 2-10 --------------------------------------------------------------------------------------------- 2-12 Chamber Heating --------------------------------------------------------------------------------------------- 2-14 Resin Auto Supply ---------------------------------------------------------------------------------------------- 2-16 Platform Leveling ------------------------------------------------------------------------------------------- 2-19...
- Page 6 Chapter.5 Maintenance ----------------------------------------------------------------------------------------------- 5-2 Machine Cleaning 1.1 Printer Interior Cleaning -------------------------------------------------------------------------------------- 5-2 ------------------------------------------------------------------------------------------ 5-2 1.2 Periodical Inspection ---------------------------------------------------------------------------------------- 5-2 Oil/Grease Inspection --------------------------------------------------------------------------------------------------------- 5-3 1.3 Platform ------------------------------------------------------------------------------------------------------- 5-10 1.4 Resin Tank 1.5 Protective Glass ------------------------------------------------------------------------------------------------ 5-13 ------------------------------------------------------------------------------------------------- 5-16 1.6 Resin Cartridge --------------------------------------------------------------------------------------------------- 5-18 1.7 Orange Cover Error Messages and Solutions...
-
Page 7: Preface
- The contents of the user manual is subject to be changed without any prior notifications. Sindoh shall not be liable for consequential, special, indirect damages or losses caused by the handling or operating of the machine or by the user’s negligence. -
Page 8: Conventions
Before Using the Device 2. Conventions Symbols This manual uses the following symbols and meanings. Indicates important safety notes. Ignoring these notes could result in serious injury or death. Be sure to read these notes carefully for your safe operations of the device. Indicates important safety notes. -
Page 9: Safety Information
Before Using the Device 3. Safety Information Please plug the power cord into a properly grounded outlet with is near and quickly accessible from the device. Do not use or place the machine in wet or humid environment. This device is very sophisticated 3D printing device, so please keep in mind the following safety information for safe use. - Page 10 Before Using the Device Laser safety The Center for Devices and Radiological Health (CDRH) prohibits the repair of laser based optical units in the field. The optical housing unit can only be repaired in a factory or at a location with the requisite equipment. The laser subsystem is replaceable in the field by a qualified Customer -Engineer.
- Page 11 This product has been designed, tested and approved to meet strict safety requirements of international safety standards. Some safety features of parts may not be guaranteed. Sindoh is not liable for problems caused by using an unauthorized spare parts or consumables.
-
Page 12: Precautions
Before Using the Device 4. Precautions Installation Install the device in a well ventilated area. You can smell odor during the operation. It should not be harmful, but if the area of the place where the device is located is not well ventilated, make sure to ventilate the area appropriately periodically. -
Page 13: Moving The Device
Before Using the Device Moving the device Turn off the power by pressing power button. Unplug the power cord and all cables being connected the device. Make sure if resin tank is removed. Otherwise, resin in the resin tank may overflow. Lift the device using handles located in the left/right side of the device. -
Page 14: Handling Consumables
Please note that you shall follow our technical information or support being described in this manual at your own discretion and risk. Sindoh is not responsible for the use and handling of resin other than those described in this manual. -
Page 15: Isopropyl Alcohol, Ipa
Before Using the Device Isopropyl Alcohol (IPA) Isopropyl alcohol is supposed to be sold separately. You should consult the chemical manufacturer or supplier for more in depth safety information. Carefully follow the safety instructions provided with the isopropyl alcohol you purchase. Isopropyl alcohol can be flammable, even explosive, and should be kept away from heat, fire or sparks. -
Page 16: Instructions For Use
Before Using the Device 6. Instructions for Use Precautions for resin • Wear nitril gloves all the time while handing the resin. • Check the remaining resin capacity before starting print. In case that manual supply of resin is necessary, check if the device is not operating and supply resin into tank very slowly in order to prevent bubbles because bubbles can degrade the print quality. -
Page 17: Ventilation
Before Using the Device 7. Ventilation Use the machine in a place with good ventilation. If the machine is used in a place without good ventilation, this may be harmful for your health. Ventilate it on a regular basis. Do not block vents. Inappropriate cooling may lead to high temperatures inside the machine. In general, a new machine may produce small amount of gaseous components, so ensure good ventilation when the machine is used for the first time. -
Page 18: Notices
Before Using the Device 8. Notices ❖ Noise Emission Level The following noise level is measured in accordance of ISO 7779 and reported to meet ISO 9296. Some modes may not be available in products you purchased. Average Sound Pressure at 1 Meter Away Printing 45dBA Standby... - Page 19 Before Using the Device Reorient or relocate the receiving antenna. Increase the separation between the equipment and receiver. Connect the equipment into an outlet on a circuit different from that to which the receiver is connected. Consult the dealer or an experienced radio/TV technician for help. ③...
- Page 20 Before Using the Device Total Energy Usage It would be useful to calculate the Total energy usage of the machine. Since the electricity bill is charged in Watt unit, you have to multiply time spent in each mode by power consumption in order to calculate the energy use. Total energy usage is the sum of energy used in each mode.
-
Page 21: Disposal Of Used Battery
Before Using the Device 9. Disposal of Used Battery Control board uses a Lithium battery. Please discard used batteries following the environmentally friendly procedure stated on the manufacturer guidelines. To replace batteries, please contact a qualified service engineer. -
Page 22: Wifi Module Disclaimer
Do not expose this product to water, humidity or liquid. Do not expose this product to direct light, hot temperature or fire. If the machine has been modified by unauthorized personnel, Sindoh is not liable for the machine trouble or failure. - Page 23 Before Using the Device ❖ Precautions Frequency IEEE 802.11b : 2412MHz ~ 2462MHz IEEE 802.11g : 2412MHz ~ 2462MHz IEEE 802.11n(20MHz) : 2412MHz ~ 2462MHz IEEE 802.11n(40MHz) : 2422MHz ~ 2452MHz Antenna Power Density IEEE 802.11b : 10mW(10dbm)/MHz IEEE 802.11g : 10mW(10dbm)/MHz IEEE 802.11n(20MHz) : 10mW(10dbm)/MHz IEEE 802.11n(40MHz) : 10mW(10dbm)/MHz No.
-
Page 24: Usb Memory Disclaimer
Please use the enclosed USB flash drive. The enclosed USB flash drive is in FAT32 format. The A1 Series 3D printer does not support USB flash drives in NTFS format. The warranty will not be valid if a 3rd party USB drive is used. - Page 25 (1) this device may not cause interference, and (2) this device must accept any interference received, including interference that may cause undesired operation. RESPONSIBLE PARTY Name : Sindoh America, Ltd. Address : 6047 Tyvola Glen Circle, Suite #115, Charlotte, NC 28217 Phone No. : 1-704-414-6690...
- Page 26 A1 Series USER MANUAL...
-
Page 27: Chapter.1 Preparations For Machine Operation
449 x 501 x 600 (W x D x H) Weight 44.3Kg (excluding resin cartridge) Ports USB Device, USB Host, Wifi, Ethernet Software/Support Software Support Sindoh Exclusive Slicer File Format *.stl, *.ply, *.obj Operating System Window 7 or Above, Mac OSX 10.10 or Above Memory Requirements (Recommended) DRAM 8GB+... -
Page 28: Components
Preparations for Machine Operation 2. Components Basic Components Please check all basic components in the packaging box. Please keep the box and packaging material; they are needed for product exchange or repair service. 3D Printer USB Memory Power Cable USB Cable T-Handle Hexagon Wrench (M5) Quick Start Guide... -
Page 29: Finishing Kit (Optional)
Preparations for Machine Operation Finishing Kit (Optional) Nipper Sprayer Nitril Glove Washing Tub Cleaning Tray Filter Metal Scrapper Rubber Scrapper Platform Cleaning Brush The blades of the metal scrapper can be very sharp. Please be cautious. Please do not use for other than removing printables and cleaning platform. -
Page 30: Understanding The Parts
Preparations for Machine Operation 3. Understanding the parts [ Front ] [ Rear ] Part Name Description Power Press this button shortly to turn on printer. Button Press and hold for more than 2 seconds to turn off the printer. Power Button Lamp ON Power is ON... - Page 31 Preparations for Machine Operation [ Interior ] Part Name Description Resin Tank Working space where resin is filled and printing is processed. Resin Tank Locking Levers Levers that lock and unlock the resin tank. Camera Let users monitor how the printing is going on. Resin Level Detect Sensors Detect resin height to fill the optimum amount of resin in resin tank.
- Page 32 Preparations for Machine Operation [ Resin Cartridge ] Part Name Description Resin Cartridge Bottle being filled with resin. Resin Cartridge Handle Let users hold the cartridge in case of handling it. Nozzle Discharges resin through it from the cartridge. Seals cartridge Tube Connects air pump and cap.
-
Page 33: Installation (Including Connection, Cartridge Setup And S/W Installation)
Preparations for Machine Operation 4. Installation (Including Connection, Cartridge Setup and S/W Installation) Please remove all packaging materials from inside and outside of the device. Furthermore, open the orange cover and remove all protective materials and accessories from interior. 4.1 Device Connection Connect the power cable to the power socket on the rear side of the device, and connect the power cable to the power outlet. - Page 34 Preparations for Machine Operation Install the additional files required by the software list. When installation of the file is complete, a pop-up window shows up as the picture below. Press [Next] button to initiate the installation of 3DWOX Desktop Program. Choose the destination location of the files and press [Next] to proceed.
- Page 35 Preparations for Machine Operation All configurations get saved and the installation starts. After all installation is complete, you can see that “3DWORK Desktop” icon created on the desktop of your computer.
- Page 36 A1 Series USER MANUAL...
-
Page 37: Ui Menu Function Descriptions
UI Menu Function 1. UI Menu Function Descriptions Cartridge Change Cartridge Setting XY Scale Z Offset Chamber Heating Resin Auto Supply Dashboard Logging Network Test Print S/W Update General Language Power Saving Beep Sound Units Time Setting Time Zone Setting Email Setting Security Saved Files... -
Page 38: Home
UI Menu Function 1.1 Home The first screen that user can see after the device is turned ON. This is the starting point where every operations of the device start. Name Description Home Button Move to Home screen. Slide Menu Bar Open Slide Menu. -
Page 39: Cartridge
UI Menu Function 1.2 Cartridge Cartridge Change Change This function is used to replace the resin cartridge in case that the current resin cartridge is empty or user wants to switch to the different type of resin. Press [Cartridge] from the Home screen. Press [Change]. - Page 40 UI Menu Function Open the orange cover, and remove the cartridge currently being used. sealing cap with resin supply cap for the new cartridge, and insert nozzle and tube as being Replace instructed on UI screen. resin supply cap with sealing cap for the used cartridge, and install the new cartridge. Replace...
- Page 41 UI Menu Function Press [Finish] when installation of the new cartridge is complete, and UI screen will be moved to Home screen in 5 seconds automatically.
-
Page 42: Settings
UI Menu Function Setting Setting XY Scale Z Offset Chamber Heating Resin Auto Supply Dashboard Logging Network Test Print S/W Update General Language Power Saving Beep Sound Units Time Setting Time Zone Setting Email Setting Security... -
Page 43: Xy Scale
UI Menu Function XY Scale This function allow users to change horizontal(X)/vertical(Y) ratio of prints in case that the size difference of 3D model and actual prints exist. Press [Slide Menu Bar] from the Home screen. Press [Setting] from the Menu screen... - Page 44 UI Menu Function Press [XY Scale]. XY Scale screen where horizontal(X) and vertical(Y) scale can be adjusted is shown. Change X/Y scale values by pressing [+] or [-] until they reach the target numbers. Adjustable range is 95.0~105.0% in 0.1% unit. Press [Save] when finished.
-
Page 45: Z Offset
UI Menu Function Z Offset This function allows users to adjust the distance between platform and resin tank to change the thickness of the first layer of raft. Change Z Offset value to [-] direction in case of printing failure caused by a drop of raft. On the other hand, change Z offset value to [+] value to increase raft thickness in case that raft is thicker than specified. - Page 46 UI Menu Function Press [Z Offset]. screen is shown up. Z Offset Change a value by pressing [+] or [-] until it reaches the target number. Adjustable range is - 0.05mm~+0.5mm in 0.05mm unit. Press [Save] when finished.
-
Page 47: Chamber Heating
Mode or heater needs to be turned ON or OFF in any circumstances necessary. ※ Temperature in the chamber is automatically controlled by heater in case of Sindoh’s resin for the best printing quality. It is recommended that chamber heating is turned ON when Sindoh’s resin is used. - Page 48 UI Menu Function Press [Chamber Heating]. If you agree on the message of pop-up window, press [Done] to continue. Select [On] or [Off], and press [Save] to finish.
-
Page 49: Resin Auto Supply
UI Menu Function Resin Auto Supply This function allows user to enable or disable resin auto supply features. Press [Slide Menu Bar] from the Home screen. Press [Setting] from the Menu screen... - Page 50 UI Menu Function Press [Auto Resin Supply]. If you agree on the message of pop-up window, press [Done] to continue. Select [On] or [Off], and press [Save] to finish.
-
Page 51: Platform Leveling
UI Menu Function Platform Leveling This function allows users to make an alignment of platform with resin tank Press [Slide Menu Bar] from the Home screen. Press [Setting] from the Menu screen... - Page 52 UI Menu Function Press [Platform Leveling]. Remove all resin remaining in resin tank. If resin is not completely removed from the resin tank, leveling may be done incompletely. Refer to [Resin tank] of [5.Maintenance] for details of how to remove resin from the resin tank. Loosen 6 platform locking screws using T-handle hexagon wrench, and press [Next].
- Page 53 UI Menu Function T-Handle Hexagon Wrench ※ Do not completely remove screws from the platform and just “loose” them. If you try to remove screws from platform, they may be dropped into resin tank by accident. Platform moves down to the lower limit position. When platform lowering is complete, fasten back 6 platform locking screws using T-handle hexagon wrench, and press [Next].
-
Page 54: Dashboard Logging
UI Menu Function Dashboard Logging This function let users to remotely check the status of device, and send management information by email. Press [Slide Menu Bar] from the Home screen. Press [Setting] from the Menu screen... - Page 55 UI Menu Function Press [Dashboard Logging]. Select [On] or [Off], and press [Save] to finish.
-
Page 56: Network
UI Menu Function Network This function let users to set up network configurations of the device. Both wired and wireless LAN can be configured in details. Press [Slide Menu Bar] from the Home screen. Press [Setting] from the Menu screen... - Page 57 UI Menu Function Swipe the screen upward, and press [Network]. Network setup screen is shown up. Name Description Select Wifi or wired LAN. Network Type ON/OFF Turn ON or OFF Wifi. SSID Select SSID or enter SSID manually if it is hidden. DHCP Allocate IP address automatically Static...
- Page 58 UI Menu Function List of SSIDs is displayed. Select a SSID you want to connect, and press [Save] to store the setting. If selected SSID requires password, enter it. Press [DHCP] to see an allocated IP address after getting connected.
- Page 59 UI Menu Function Press [Static] if a fixed IP address is required. Press pen icon[ ] to enter IP address manually. For wired LAN, repeat the same procedure as the case of wireless if required.
-
Page 60: Test Print
UI Menu Function Test Print This function allows users to print a sample model already saved in the internal memory of printer. Press [Slide Menu Bar] from the Home screen. Press [Setting] from the Menu screen... - Page 61 UI Menu Function Swipe the screen upward, and press [Test Print]. List of sample model files is shown up. Select a file to be printed. Printing gets started.
-
Page 62: S/W Update
UI Menu Function S/W Update This function keeps S/W of the device up to date. It works only when network connection is available. Press [Slide Menu Bar] from the Home screen. Press [Setting] from the Menu screen Swipe the screen upward, and press [S/W Update]. - Page 63 UI Menu Function Press [Update] if you wish to proceed. S/W update is in progress. When S/W update is finished, press [Done] to reboot the device.
-
Page 64: General
UI Menu Function General This function allows users to change general settings. Press [Slide Menu Bar] from the Home screen. Press [Setting] from the Menu screen Swipe the screen upward, and press [General]. - Page 65 UI Menu Function List of general items appears. Select an item to change. ▣ Language System language of the device can be chosen. Select a language using [<] and [>]. ▣ Power Saving Time delay before entering power saving mode can be set. Adjustable range is 0~120 minutes in 5 minutes unit.
- Page 66 UI Menu Function ▣ Time Zone Settings The current time zone setting of the device can be shown. Press [>] to change, and swipe the screen up and down to choose the new time zone. ▣ Email Settings Email address, which a photo capturing the printing status will be sent to, can be specified.
- Page 67 UI Menu Function Title Descriptions Email address which a photo capturing the printing status will be sent to. Email Address Address SMTP server address of email service. Port SMTP server port number. Normally the port number 25 is used, and sometimes 465 or 587 is used depending on security setting.
-
Page 68: Saved Files
UI Menu Function Saved Files Saved Files Press [Slide Menu Bar] from the Home screen. Press [Saved Files] from the Menu screen... - Page 69 UI Menu Function List of files existing in printer’s internal memory is shown. Name Description Displays detailed information of file Info Delete Deletes a file from the internal memory of printer Print Starts printing a selected file. Printing gets started. ▣...
-
Page 70: Info
UI Menu Function Info Info Statistics History This allows users to check detailed information about the device, and to set the name of the device and administrator password. Press [Slide Menu Bar] from the Home screen. Press [Info] from the Menu screen. - Page 71 UI Menu Function In Info screen, it is possible to set the name of the device and administrator password, and to see the other detailed information about the device. For history of device usage, press [History]. Statistical information regarding machine usage is shown. For details, press [>]. ▣...
- Page 72 UI Menu Function ▣ Cumulative Usage - Resin Total cumulative amount of resin is displayed, and usage of each individual resins is displayed too. ▣ Most Recent Print File List List of files being printed most recently is displayed.
-
Page 73: Quick Guide
UI Menu Function Quick Guide Quick Guide Press [Slide Menu Bar] from the Home screen. Press [Quick Guide] from the Menu screen. - Page 74 UI Menu Function Programs Programs This feature allows users to install add-in SW such as web browser, etc, and make shortcuts for frequently used functions so that you can access them very quickly. Press [Slide Menu Bar] from the Home screen. Press [Programs] from the Menu screen.
- Page 75 UI Menu Function Press [Programs] from the Menu screen. ▣ Internet You can access the internet using build-in web browser. ▣ Program Manager You can install or uninstall add-In S/W.
- Page 76 UI Menu Function ▣ Install / Uninstall List of add S/W is shown. Press [ ] to install, or [ ] to uninstall.
- Page 77 A1 Series USER MANUAL...
-
Page 78: Chapter.3 Printing
Printing 1. Printing User can start printing via USB flash drive, USB cable, or over the network. The following Home screen on the device means it is ready to start print. Printing from USB Flash Drive Connecting USB flash drive into the device. In order to print using USB flash drive, insert the flash drive into USB port. - Page 79 Printing When the USB flash drive is connected while in the home screen, a list of files in the USB appears. Name Description File Name A list of files existing in the USB flash drive. Download Downloading a file to the internal memory of the printer. Preview Preview image of print appears.
- Page 80 Printing File is copied to the internal memory of printer first, and printing gets started. If there is not enough resin in the resin tank, more resin needs to be filled. Air pump starts to run to supply resin and resin starts coming out of the nozzle of resin cartridge. Once resin is filled enough, pump stops and printing starts.
- Page 81 Printing If temperature in the chamber is lower than the level being required, heater starts to heat up the chamber. Be aware of that sometimes it may take a time for heating. When you are busy, you may need to start printing even if chamber temperature does not reach the target.
- Page 82 Printing Pausing Print Pressing [Pause] during printing will pause the current print job, and pop-up menu showing additional functions appears. ▣ Printing Check Printing status can be checked. Press [Raise the Platform] to move the platform upward so that user can check printing status..
- Page 83 Printing Canceling Print Press [Cancel] if you need to terminate print permanently. Pop-up windows shows up to check If you really want to cancel printing. Press [Cancel Printing] if you are sure, or press [Continue Printing] if you want to resume printing. Printing Completion If printing is complete, platform moves up to return to ready position.
-
Page 84: Printing Via Pc
Printing Printing via PC Prepare PC connected to the same network which the printer is connected to. Run Slicer S/W Press [Print] button. Follow steps (same as steps 3~9 of printing from USB flash drive) For pausing and canceling print, please refer to [Printing from USB flash drive] for details. Changing Resin When a different type of resin from the current one needs to be used, clean up resin tank and platform in order to ensure the best print quality and to prevent mixing up of different type of resins. - Page 85 A1 Series USER MANUAL...
-
Page 86: Checking Printed Output
Printed Output Check 1. Checking Printed Output Wear nitril gloves before getting started and do not take off gloves until all processes are finished. Detaching Printed Output Standing by until platform’s returning to ready position. After printing is finished, wait until platform completely returns to ready position. Do not open the orange cover before platform stops moving. - Page 87 Printed Output Check Removing platform locking screws Hold the platform firmly by using either one of handles, and scrape down remaining resin on platform toward resin tank with the other hand. Be careful not to drop or splash resin to other parts but resin tank. Use a metal scrapper with care because blade is sharp.
-
Page 88: Finishing Printed Output
Printed Output Check When removing and moving platform, be careful not to drop or splash resin. Use a metal scrapper with care because blade is sharp. You may be injured when removing output. Close the orange cover after removing platform from the device. Resin can be cured if resin is exposed to light sources for long time. -
Page 89: Preparing The Next Print
Printed Output Check Drying and post curing Curing time may vary depending on the printed output’s size and shape. For quick curing, fill a transparent container with water and put a printed output in the water. Clean up Isopropyl alcohol completely using paper towel or dry it well using air compressor. Then expose the printed output to sunlight for 60 minutes, or use curing machine (optional) for curing. - Page 90 Printed Output Check Cleaning resin tank Release locking levers in both sides and pull out resin tank from the device. Before removing resin tank, check if platform cleaning has been done. If not, resin may be dropped to protective glass. It may result in contamination of optical parts such as protective glass, laser unit, etc or penetration of resin into the device.
- Page 91 Printed Output Check Pour all remaining resin into a clean bottle. If resin is not flowing down well, use rubber scrapper enclosed in the finishing kit to scrap down resin. If too much force is applied to the scrapper, film can stretch or tear. Scrape the surface of film softly. Rubber Scrapper After pouring is done, remove all remaining resin inside of the resin tank using Isopropyl alcohol (IPA) and paper towel, and then clean up IPA using dry paper towel.
- Page 92 Printed Output Check Checking protective glass A transparent protective glass is located under the resin tank. It can be seen when resin tank is removed. Protective Glass Tilt Bracket Check if there is resin or any types of contaminants on the protective glass, and clean if needed. For details of how to clean the protective glass, please refer to [Protective Glass] of [5.
-
Page 93: Enhancing Print Quality
Printed Output Check Supplying resin Pour the resin, which was stored in a clean bottle, back into the resin tank using filter. Be careful not to exceed the MAX line shown on the resin tank. Installing platform Install the platform on the mount, and fasten two knobs by turning in clockwise direction. Closing that orange cover Enhancing Print Quality Following the guideline for resin use... -
Page 94: When Printer Can't Be Turned On
Printed Output Check 2. When Printer Can’t be Turned ON When the power is ON again, platform moves upward to initial position. As described in [1. Checking Printed Output], remove aborted print from the platform, and clean platform and resin tank for the next job. - Page 95 Printed Output Check 3. If problems Persist Please visit http://www.sindoh.com for help.
- Page 96 A1 Series USER MANUAL...
-
Page 97: Machine Cleaning
Maintenance 1. Machine Cleaning If a cleaning tool or contaminants such as resin, IPA, etc enters into the device, it may cause malfunctions or failures. Turn off the power while cleaning. Printer Interior Cleaning Over time, there will be a build-up of resin in the printer. If resin goes into conveyor belt or any optical parts, it may result in printer malfunction, degradation of print quality, and printing failure. -
Page 98: Platform
Maintenance Platform If debris of cured resin, half-cured resin, contaminants exist on the surface of platform or in the holes of it, platform leveling may not be performed perfectly. They can cause the degradation of print quality, or print failure just in case. For the best printing performance, clean the platform regularly and after each printing jobs. -
Page 99: Resin Tank
Maintenance Clean remaining resin using paper towel and Isopropyl alcohol. Finally, clean all residual Isopropyl alcohol using dry paper towel. Do not place IPA close to heat, fire or sparks because IPA can be flammable, even explosive. Resin Tank Resin tank consists of aluminum die-casted walls, transparent window, flexible film, silicon gaskets. For the best print quality, it is very important to keep optical parts such as transparent window and flexible film clean and undamaged. - Page 100 Maintenance Checking the inside of resin tank To check the inside of resin tank, inspect it by scrapping the bottom of resin tank using rubber scrapper. Look at film and transparent window by carefully scrapping from one side to the other. Do not scrape the bottom of resin tank too strongly.
- Page 101 Maintenance 1.4.3 Cleaning Resin Tank Wear nitril gloves before starting cleaning. Cleaning film Use fingers or rubber scrapper to remove residues of prints sticking to film and cured resin or particles floating in resin. Do not scrape the bottom of resin tank too strongly. Film can loosen or tear out. Filtering remaining resin If meticulous cleaning is necessary, use cleaning filter.
- Page 102 Maintenance Use a safe bottle made of stainless steel or transparent PE/PP plastic. It not, resin can be pigmented, or bottle can be melted down and mixed with resin. Be careful not to drop or splash resin when pouring resin. Do not scrape the bottom of resin tank too strongly.
- Page 103 Maintenance ① Upset the resin tank to put transparent windows to upward. Be sure to place the resin tank on the flat surface. ② Spray cleaner to the transparent windows once or twice, and wipe it from one side to the other without stopping.
-
Page 104: Protective Glass
Maintenance Protective Glass Protective glass is made of transparent acryl (PMMA) to pass through laser beam with maximum efficiency. In addition, it blocks external dust or resin from penetrating inside the device. For the best printing performance, it is very important that the protective glass is not scratched or contaminated. - Page 105 Maintenance Cleaning protective glass Protective glass needs to be cleaned only with clean microfiber cloth and a dedicated cleaner for acryl (PMMA) material, for example, NOVUS No.1 Plastic Clean and Shine. Non-microfiber cloth or paper towel can scratch the protective window. ①...
- Page 106 Maintenance Never use Isopropyl alcohol (IPA) or ammonia-based cleaner to clean the protective window. Otherwise protective window will be broken or deformed. Checking protective window Check protective window by using reflected light as the exactly same way of checking the transparent window of the resin tank.
-
Page 107: Resin Cartridge
Maintenance Resin Cartridge 1.6.1 Managing Resin Cartridge Photo curable resin is composed of various chemical ingredients. For the best print quality, shake unused resin cartridge at least one a week, so that ingredients are well mixed. Ensure a sealing cap is firmly closed before shaking. Sealing Cap 1.6.2 Storing Resin Cartridge Store resin cartridges in a dark and well ventilated place. - Page 108 Maintenance If the smart ID Chip or terminals are contaminated with resin, etc, clean them by rubbing a cotton swab with a small amount of Isopropyl alcohol (IPA) until contaminants are completely removed. Be careful not to get Isopropyl alcohol on the resin tank or other parts of the cartridge by mistake. Ensure that Isopropyl alcohol (IPA) is completely dry before installing the resin cartridge.
-
Page 109: Orange Cover
Maintenance Orange Cover The orange cover is made of translucent orange acryl (PMMA) material in order to allow users to check the situation of inside the device. Orange acryl is a specially selected material to safely shield the laser beam. To prevent users from accidentally using the device with the cover open, double safety devices are used;... - Page 110 Maintenance Pull the center part of the cover in order to close easily. If you pull the left or right part, force is dispersed, which needs more force than the center. 1.7.3 Cleaning the Orange Cover Orange cover needs to be cleaned only with clean microfiber cloth and a dedicated cleaner for acryl (PMMA) material, for example, NOVUS No.1 Plastic Clean and Shine.
- Page 111 Maintenance Never use Isopropyl alcohol (IPA) or ammonia-based cleaner to clean the orange cover. Otherwise orange cover will be broken or deformed.
-
Page 112: Error Messages And Solutions
Maintenance 2. Error Messages and Solutions Message Description What To Do Once the boot up process is finished and device is Booting On the first boot, user must wait ready, this message disappears automatically. Please wait until booting is until the booting process is complete. -
Page 113: Problems And Solutinos
Maintenance 3. Problems and Solutions If the Resin is not Properly Supplied 3.1.1 Checking Auto Resin Supply Function If [Auto Resin Supply] function is set to [OFF], resin will not be supplied automatically. Check if [Auto Resin Supply] function is set to [ON]. 3.1.2 Checking Smart IC Chip and Terminals or Resin Cartridge If smart IC chip or terminals are contaminated with resin, etc, resin cartridge may not be detected even if it is properly installed. - Page 114 Maintenance 3.1.3 Checking Transparent Windows for Level Detect Sensors There are two small transparent windows for level detect sensors. They are located in backside of left and right. If those windows are contaminated, resin may not be supplied automatically because S/W considers that the sufficient resin is already filled in the resin tank.
- Page 115 Tube Maintenance 3.1.5 Resin Supply in Open Mode If 3 party resin is used in open mode, resin may not be supplied or may be overflowed. Set [Auto Resin Supply] function to [OFF] if you operate the device in open mode.
-
Page 116: In Case Of Opening Orange Cover During Printing
Maintenance 3.1.6 Empty Resin Cartridge If all resin in the resin cartridge runs out, resin won’t be supplied. Replace with a new one. For details of how to replace a resin cartridge, refer to [Replacing Resin Tank] of [5.Maintenance]. Smart IC chip is used to keep track of the remaining amount of resin in the cartridge. If resin is manually charged or removed from the resin tank, malfunction may occur because it cannot detect the correct remaining amount. - Page 117 Maintenance 3.3.2 Cleaning Resin Tank & Platform Refer to how to clean resin tank and platform, please refer to [Resin Tank] and [Platform] sections of [5.Maintenance]. In case of printing failure, more debris or contaminants can exist in the resin. It is recommended that you should use filter to remove residual contaminants.
-
Page 118: Replacing Consumables
Maintenance 4. Replacing Consumables Replacing Resin Cartridge Preparation for replacing Photo curable resin is composed of various chemical ingredients. For the best print quality, shake new resin cartridge before replacing in order to mix up well all ingredients. Ensure a sealing cap is firmly closed before shaking. Sealing Cap For the best print quality, shake resin cartridge at least one a week, so that ingredients are well mixed Replacing cap... - Page 119 Maintenance If the cap is not completely closed, there may be a problem in resin supply. You must close the cap until the protrusions on the cartridge and cap are in contact each other. Protrusions Removing used resin cartridge Pull out the resin supply tube from the cartridge. Tube Lift the resin cartridge using handle, and take out the cartridge out of the machine.
- Page 120 Maintenance If resin remains in used cartridge, replace resin supply cap with sealing cap to prevent leakage of resin and curing. If resin supply cap is not replaced with sealing cap, resin can leak or can be cured though the hole existing in the resin supply cap. Installing new resin cartridge Install new resin cartridge in the housing inside of the machine.
- Page 121 Maintenance If air pump tube is not properly connected to resin supply cap, there may be a problem with resin supplying. Ensure that the end of tube is pushed completely down up to the bottom of the resin cartridge. Tube...
-
Page 122: Replacing Platform
Maintenance Replacing Platform Wear clean nitril gloves before starting cleaning. Removing the current platform Open the orange cover, and remove two platform locking knobs by turning in counter-clockwise direction. Hold the platform with both hands grasping handles, and remove it from the machine. Be careful not to drop the platform during handling it. - Page 123 Maintenance Installing a new platform Place a new platform on the mount in the exactly reverse order of removing the platform, and secure it with two locking knobs by turning them in clockwise direction. When placing a platform on the mount, align two protrusions of the mount with platform’s holes. If they are not aligned, platform will not be installed properly.
-
Page 124: Replacing Resin Tank
Maintenance Replacing Resin Tank 4.3.1 Replacing Resin Tank Removing the current resin tank Open the orange cover, and release two locking levers in left/right side of resin tank. Cover Levers To remove the current resin tank, pull the resin tank slightly forward and lift it up. To lift up the resin tank, it needs to be pulled forward so that the projection of the resin tank is completely out of the locking lever. - Page 125 Maintenance Removing remaining resin If resin remains in the resin tank, pour all remaining resin through filter and store in the bottle. If resin does not flow down well, use rubber scrapper to scrape down. Rubber Scrapper Filter Bottle Use a safe bottle made of stainless steel or transparent PE/PP plastic. It not, resin can be pigmented, or bottle can be melted down and mixed with resin.
- Page 126 Maintenance Leveling platform It is necessary to perform a platform leveling process when new resin tank is installed. Please refer to [Platform Leveling] for details of leveling platform. To check if resin tank is properly installed, there is an actuator lever in the backside of resin tank. If this lever is actuated by any accidents, it is considered that resin tank is installed even though resin tank does not exist in place.
- Page 127 Maintenance 4.3.2 Replacing Release Film Wear clean nitril gloves before starting cleaning. If film is seriously damaged, replace it according the following procedure. Contact your local service center regarding ordering film replacement kit. Cleaning resin tank For details of how to clean resin tank, refer to [Resin Tank] of [5.Maintenance]. Removing transparent window Turn the resin tank upside down with the transparent window of resin tank facing up.
- Page 128 Maintenance Check if tray and gasket gets resin on them, and if necessary, clean them with Isopropyl alcohol (IPA) and paper towel. Removing a sealing bracket Remove 36 screws to disassembly a sealing bracket using a crosshead screw driver. Sealing Bracket Removing a release film After removing a sealing bracket, remove two rubber gaskets and release film.
- Page 129 Maintenance Align protrusions of the resin tank with gaskets and film well. If film or gasket is placed over the protrusions, they may be damaged. Assembling a sealing bracket Put a sealing bracket on top and fasten 36 screws back. Fasten 4 screws in every corner first, and do the same for the other 32 screws.
- Page 130 Maintenance Cleaning the release film and transparent window If any contaminants exist between film and window, it is impossible to remove them. Therefore, it is necessary to clean up the film and the window before putting back the tray. Clean the release film with some Isopropyl alcohol (IPA) and paper towel. For transparent window, use clean microfiber cloth and a dedicated cleaner for acryl (PMMA) material, for example, NOVUS No.1 Plastic Clean and Shine.
- Page 131 Maintenance Pay attention to the orientation when assembling the tray. Make sure that the protruded parts on the left and right sides of the tray are to be positioned opposite the outlet of resin tank. If assembly direction is wrong, the resin tank will not be installed. When assembling tray, fasten 4 screws in the corner and do the same to the other 12 screws.
- Page 132 Notice to Users Type Notice This equipment is a Class A EMC • Class A equipment (Electromagnetic compatible) equipment, (commercial telecast and should not be use in household equipment) locations This equipment is a Class B EMC • Class B equipment (Electromagnetic compatible) equipment for (domestic telecast household purposes, available to be used in...
Need help?
Do you have a question about the A1 Series and is the answer not in the manual?
Questions and answers