
Related Manuals for Sindoh A1SD Series


Summary of Contents for Sindoh A1SD Series
- Page 1 Sindoh A1 Series User Manual This user manual contains the product warranty inside. ● Please read this user manual before using this product ● and keep the manual nearby. 3dprinter.sindoh.com...
- Page 2 Safety Instructions Please make sure to follow the instructions below when using the machine Warning: Failure to observe the instructions may lead to death or serious injury. Do not plug the power cord into extensions. Plug the cord directly into the wall socket. If the power cable or plug is worn or damaged, pull out the power plug.
- Page 3 Before use Thank you for purchasing our product. This user manual contains detailed information about correct use of device and easy maintenance to maintain the optimal state, and to contribute to the rationalization of office work of your company. Carefully read the user manual before using the device and keep close at hand. In order to use device correctly and safely, please carefully note the precautions before use.
-
Page 4: Table Of Contents
Contents Before using the machine Preface ------------------------------------------------------------------------------------------------------------------ 1 Conventions ---------------------------------------------------------------------------------------------------------- 2 Symblos ----------------------------------------------------------------------------------------------------------------- 2 Safety Information -------------------------------------------------------------------------------------------------- 3 Precautions ----------------------------------------------------------------------------------------------------------- 5 Installation ------------------------------------------------------------------------------------------------------------- 5 Leveling Machine ---------------------------------------------------------------------------------------------------- 6 Moving the Machine ------------------------------------------------------------------------------------------------- 7 Handling Consumables -------------------------------------------------------------------------------------------- 8 SLA Resin (Photo Curable Resin) --------------------------------------------------------------------------------- 9 Isopropyl Alcohol, IPA ------------------------------------------------------------------------------------------------10 Instructions for Use --------------------------------------------------------------------------------------------------11 Ventilation -------------------------------------------------------------------------------------------------------------13... - Page 5 Installed Resin ------------------------------------------------------------------------------------------------------- 2-4 Setting ------------------------------------------------------------------------------------------------------------------ 2-5 XY Scale --------------------------------------------------------------------------------------------------------------- 2-6 Z Offset ---------------------------------------------------------------------------------------------------------------- 2-9 Chamber Heating ------------------------------------------------------------------------------------------------- 2-11 The First Exposure ------------------------------------------------------------------------------------------------ 2-13 Platform Leveling -------------------------------------------------------------------------------------------------- 2-14 Cloud Monitoring -------------------------------------------------------------------------------------------------- 2-19 Level Printer -------------------------------------------------------------------------------------------------------- 2-20 Network ------------------------------------------------------------------------------------------------------------- 2-24 Test Print ------------------------------------------------------------------------------------------------------------ 2-28 S/W Update --------------------------------------------------------------------------------------------------------- 2-30 General Setting ---------------------------------------------------------------------------------------------------- 2-32 LCD Check ---------------------------------------------------------------------------------------------------------- 2-35...
- Page 6 Chapter 5. Maintenance Machine Cleaning -------------------------------------------------------------------------------------------------- 5-2 Printer Interior Cleaning ------------------------------------------------------------------------------------------- 5-2 Periodical Inspection ----------------------------------------------------------------------------------------------- 5-2 Oil/Grease Inspection ---------------------------------------------------------------------------------------------- 5-2 Platform --------------------------------------------------------------------------------------------------------------- 5-3 Resin Tank ------------------------------------------------------------------------------------------------------------ 5-4 Resin Tank’s Life ----------------------------------------------------------------------------------------------------- 5-4 Checking the Resin Tank ------------------------------------------------------------------------------------------ 5-4 Cleaning the Resin Tank ------------------------------------------------------------------------------------------- 5-6 LCD Protective Glass ---------------------------------------------------------------------------------------------- 5-8 Orange Cover ------------------------------------------------------------------------------------------------------ 5-10 Opening the Orange Cover ------------------------------------------------------------------------------------- 5-10...
-
Page 7: Before Using The Machine
- The content of the user manual is subject to be changed without any prior notifications. - Sindoh shall not be liable for consequential, special, indirect damages or losses caused by the handling or operating of the machine or by the user’s negligence. -
Page 8: Conventions
Before Using the Machine Conventions Symbols The following symbols are used in this manual and their definitions are as follow. Warning - Indicates important safety notes. Ignoring these notes could result in serious injury or death. Be sure to read these notes carefully for your safe operations of the machine. Caution - Indicates important safety notes. -
Page 9: Safety Information
Before Using the Machine Safety Information Please plug the power cord into a properly grounded outlet with is near and quickly accessible from the machine. If you use this machine in one socket outlet with other products together, be careful not to exceed the electric rating of the socket outlet. - Page 10 Before Using the Machine Electric Shock Caution - Contact with this part may result in electric shock. - To avoid electric shocks, follow the instructions below. Proceed your work after turning off the machine and unplugging the power cord from the outlet in case of accessing the system board, or installing hardware or optional memory devices.
-
Page 11: Precautions
Before Using the Machine Precautions Installation Injury Hazard Caution - Install the machine in a well ventilated area. - You can smell odor during the operation. It should not be harmful, but if the area of the place where the machine is located is not well ventilated, make sure to ventilate the area appropriately periodically. -
Page 12: Leveling Machine
Before Using the Machine Leveling Machine Install the printer on a flat surface. If the printer is not leveled, irregular noise and vibration may occur, resulting in splash resin or printing failure. This product has four screws for the purpose of leveling. The printer can be leveled by turning them according to the indication of the built-in level. -
Page 13: Moving The Machine
Before Using the Machine Moving the Machine Turn off the power by pressing power button. Unplug the power cord and all cables connected to the machine. Make sure if resin tank is removed. Otherwise, resin in the resin tank may overflow. Lift the machine using handles located in the left/right side of the machine. -
Page 14: Handling Consumables
Before Using the Machine Handling Consumables Warning - Isopropyl alcohol can be flammable, even explosive.. Any containers holding isopropyl alcohol should be kept closed or covered when not in use because it is highly volatile. it should be kept away from heat, fire or sparks. Caution - Keep consumables out of reach of children, pet, etc. -
Page 15: Sla Resin (Photo Curable Resin)
Before Using the Machine SLA Resin (Photo Curable Resin) Please be cautious of the followings when handling Resin. - Wear nitril gloves all the time while handling the resin. - Resins being used for this machine should not be used for the food, drink and medical purposes. - Do not eat or inhale resin in any forms. -
Page 16: Isopropyl Alcohol, Ipa
Before Using the Machine Isopropyl Alcohol, IPA Please be cautious on the followings when handling the IPA. - Please make sure to wear nitril gloves all the time while using the IPA - Carefully follow the safety instructions provided with the isopropyl alcohol you purchase. You should consult the chemical manufacturer or supplier for more in depth safety information. -
Page 17: Instructions For Use
Before Using the Machine Instructions for Use Caution - The following items are for user-handling components made of metal, so they are very heavy. Resin tank Platform - If any of them falls while installing/removing or moving it, the machine may be damaged, or if it falls on a person, it may cause an injury. - Page 18 Before Using the Machine Important - If any of the following optical components positioned in the path of a LED beam reaching the resin is damaged or dirty, it may cause reduced quality or failed printing, so make sure to clean it while preparing the next one after completing the previous printing.
-
Page 19: Ventilation
Before Using the Machine Ventilation Caution - Use the machine in a place with good ventilation. Do not block vents. Inappropriate cooling may lead to high temperatures inside the machine. - In general, a new machine may produce small amount of gaseous components, so ensure good ventilation when the machine is used for the first time. -
Page 20: Notices
Before Using the Machine Notices Manufacturer ❖ Sindoh Co., Ltd. Address : 3, Seongsui-ro24-gil, Seongdong-gu, Seoul 04797, REPUBLIC OF KOREA Noise Emission Level ❖ The following noise level is measured in accordance of ISO 7779 and reported to meet ISO 9296. - Page 21 Before Using the Machine ② INFORMATION TO USER This equipment has been tested and found to comply with the limits for a Class A digital device, pursuant to part 15 of the FCC Rules. These limits are designed to provide reasonable protection against harmful interference in a residential installation.
- Page 22 Before Using the Machine Note - You can set the time for machine to become power saving mode automatically. For more information, please refer to ‘Energy Saving’ in ‘2. UI Menu Function’. Deactivated Mode ❖ The machine consumes power even in the deactivated mode. Unplug the power cord to completely stop the power consumption.
-
Page 23: Disposal Of Used Battery
Before Using the Machine Disposal of Used Battery Control board uses a Lithium battery. Please discard used batteries following the environmentally friendly procedure stated on the manufacturer guidelines. To replace batteries, please contact a qualified service engineer. -
Page 24: 10. Wifi Module Disclaimer
- Do not expose this product to water, humidity or liquid. - Do not expose this product to direct light, hot temperature or fire. Caution - If the machine has been modified by unauthorized personnel, Sindoh is not liable for the machine trouble or failure. Caution - To prevent RF signals that exceed FCC RF exposure limits from being exposed to human, this module has been mounted in a place that minimizes human access. - Page 25 Before Using the Machine Important IEEE 802.11b : 2400 ~2483.5 MHz IEEE 802.11g : 2400 ~2483.5 MHz Frequency IEEE 802.11n(20MHz) : 2400 ~2483.5 MHz IEEE 802.11n(40MHz) : 2400 ~2483.5 MHz IEEE 802.11b : 16 dBm IEEE 802.11g : 15 dBm Antenna Power Density IEEE 802.11n(20MHz) : 14 dBm IEEE 802.11n(40MHz) : 14 dBm...
-
Page 26: 11. Usb Flash Drive Disclaimer
Before Using the Machine 11. USB Flash Drive Disclaimer This USB flash drive is compatible with Sindoh’s 3D printer products. ❖ FCC COMPLIANCE STATEMENT ❖ This device complies with part 15 of the FCC Rules. Operation is subject to the following two conditions : (1) This device may not cause harmful interference, and (2) this device must accept any interference received, including interference that may cause undesired operation. - Page 27 : (1) this device may not cause interference, and (2) this device must accept any interference received, including interference that may cause undesired operation. RESPONSIBLE PARTY Name : Sindoh America, Ltd. Address : 6047 Tyvola Glen Circle, Suite #115, Charlotte, NC 28217 Phone No. : 1-704-414-6690...
-
Page 29: Chapter 1. Preparation For Machine Operation
Sindoh A1 Series USER MANUAL Preparation for Machine Operation... -
Page 30: Specifications
*.stl, *.ply, *.obj Operating System Windows 10(64bit) or Above Memory (Recommended) Sindoh A Desktop Slicer – At least 8GB (16GB is recommended) Exocad, NetFabb – At least 16GB (64GB is recommended) Note - Graphic card must support OpenGL 4.0 or higher. -
Page 31: Components
Preparation for Machine Operation Components Basic Components Please check all basic components in the packaging box. Caution - Please keep the box and packaging material; they are needed for product exchange or repair service. 3D Printer Power Cord USB Cable T-Handle Hexagon Quick Installation Guide USB Memory... -
Page 32: Finisher Kit
Preparation for Machine Operation Finisher Kit Nipper Sprayer Nitril Gloves (2pairs) Washing Tub Cleaning Tray Filters (3pcs) Metal Scrapper Rubber Scrapper Funnel Hammer Empty Bottle Platform Cleaning Brush Kit List Warning - The blade side of metal scraper is very sharp. Please do not use it for other than removing the sculpture. In particular, do not touch or contact the blade side. -
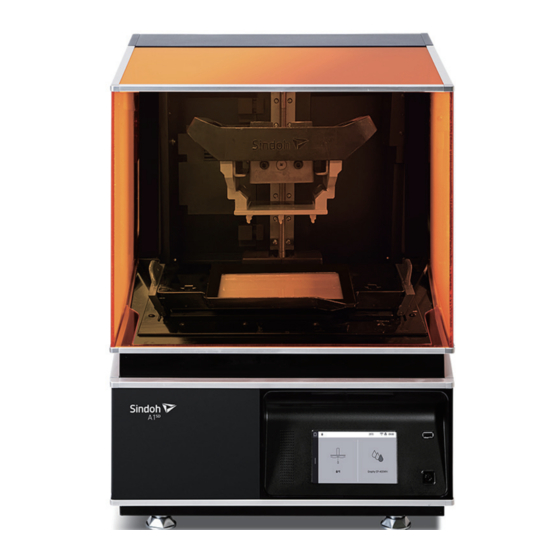
Page 33: Understanding The Parts
Preparation for Machine Operation Understanding the parts [ Front ] [ Rear ] Part Name Description Press this button shortly to turn on printer. Power Button Press and hold for more than 2 seconds to turn off the printer. Power Button Lamp ON Power is ON Indicator... - Page 34 Preparation for Machine Operation [ Interior ] Part Name Description Resin Tank Working space where resin is filled and printing is processed. Resin Tank Locking Levers Levers that lock and unlock the resin tank. May not be supported depending on model. ※...
-
Page 35: Installation (Incl. Connection And S/W Installation)
Preparation for Machine Operation Installation (Incl. Connection and S/W Installation) Caution - Please remove all packaging materials from inside and outside of the device. Furthermore, open the orange cover and remove all protective materials and accessories from interior. Device Connection Connect the power cable to the power socket on the rear side of the device, and connect the power cable to the power outlet. - Page 36 Preparation for Machine Operation Please set the time zone of the machine according to instructions shown on UI. Set time and date of the machine according to instructions shown on UI. After booting up is completed, check if home screen is displayed on UI. Open orange cover and install resin tank and platform.
- Page 37 Preparation for Machine Operation Release two platform locking knobs from machine, attach the platform as shown below, tighten the locking knobs firmly, and attach the platform cover to the platform. Connection to PC ① Direct Connection : Connects one end of the enclosed USB cable to the back of the device and the other end to the PC.
-
Page 38: S/W Installation
Preparation for Machine Operation S/W Installation Start the S/W installation by clicking on “3DWOX Desktop.exe” file in the enclosed USB flash drive. Install the additional files required by the software list. When installation of the additional files is done, a pop-up window shows up as the picture below. Press [Next] button to start the installation of A Desktop Program. - Page 39 Preparation for Machine Operation Choose the destination location of the files and press [Next] to proceed. All configurations get saved and the installation starts. After all installation is complete, you can see that “A Desktop” icon created on the desktop of your computer.
-
Page 41: Chapter 2. Ui Menu Function
Sindoh A1 Series USER MANUAL UI Menu Function... -
Page 42: Ui Menu Function Descriptions
UI Menu Function UI Menu Function Descriptions ※ Please refer to ‘Chapter 3. Printing’ for Print menu. Installed Resin Setting XY Scale Z Offset Chamber Heating The First Exposure Platform Leveling Cloud Monitoring Level Printer Network Test Print S/W Update General Setting Language Power Saving... -
Page 43: Home
UI Menu Function Home The first screen that user can see when turning ON the machine. Part Name Description Home Button Go to Home screen. ※ When it’s not Home screen, it changes to the Back( ) button. Slide Menu Bar Open up Slide Menu. -
Page 44: Installed Resin
UI Menu Function Installed Resin It is used to designate the resin currently installed on the machine. Press [Resin icon] from the Home screen. Select the resin currently installed on the machine. If the resin information on the slider does not match, an error is displayed. -
Page 45: Setting
UI Menu Function Setting Setting XY Scale Z Offset Chamber Heating The First Exposure Platform Leveling Cloud Monitoring Level Printer Network Test Print S/W Update General Setting Language Power Saving Beep Unit Voice Guide Time Setting Time Zone Security Exposure LCD Check Release Film Cleaning Print Condition Reset... -
Page 46: Xy Scale
UI Menu Function XY Scale If the actual printing size differs from the designed model size, this function allows users to adjust the thickness error range and the horizontal(X)/ vertical(Y) scale of the print output. If you are not familiar with the machine, you can use the semi-auto calibration (adjustment) function, which suggests corrected (corrected / adjusted) values after measuring the print output size. - Page 47 UI Menu Function XY scale(%) and XY thickness error(㎜) range reconfiguring screen appears.. X, Y(%) : Adjust the scale of model in X/Y axis. Xt, Yt(㎜) : You could modify the thickness(㎜) of outlines. You can adjust and manage the printing scale for each resin separately. To select a resin type, press the [Resin Change] button and choose the resin type with the [<] or [>] button, then press the [Save] button.
- Page 48 UI Menu Function The semi-auto calibration is a function to see a suggested corrected value of the machine by printing out a pattern and measuring its dimensions. Press [Print] to print out an embedded pattern. With the print output attached to the platform, measure X1, X2, Y1, and Y2 as shown in the picture. Adjust each measured value with the slide bar on the screen or by pressing [+] or [-].
-
Page 49: Z Offset
UI Menu Function Z Offset This function allows users to adjust the distance between platform and resin tank to change the thickness of the first layer of raft. Change Z Offset value to [-] direction in case of printing failure caused by a drop of raft. On the other hand, change Z offset value to [+] value to increase raft thickness in case that raft is thicker than specified. - Page 50 UI Menu Function Z Offset screen shows up. Change a value by pressing [+] or [-] until it reaches the target number. Adjustable range is -0.05mm~+0.5mm in 0.05mm unit. Press [Save] when finished.
-
Page 51: Chamber Heating
Chamber Heating This option allows the user to turn on/off the use of the heater. If the 3rd party resin that Sindoh does not supply is used, the print quality is not guaranteed by using the heater. Important - In the case of using Sindoh proprietary resin, you should keep the chamber temperature at the right level using the heater for the best printing quality. - Page 52 UI Menu Function It is a notice message notifying that the machine doesn’t guarantee the printing quality in Open Mode. If you agree on the message of pop-up window, press [Done] to continue. Select [Off] or [On] for the Enable Chamber Heating. After selecting the Enable Chamber Heating [On], select [Off] or [On] of the Enable Pre Heating.
-
Page 53: The First Exposure
UI Menu Function Select [Off] or [On] for the Enable Time Setting. After selecting the Enable Time Setting [On], select the day of the week, start time, and end time. Click Save to save the settings. The First Exposure This function is used to change the strength at which the Raft is attached to the platform. The bond strength can be changed by adjusting the Exposure Time of the first raft. -
Page 54: Platform Leveling
UI Menu Function Press [1st Exposure] . The screen changing the exposure time according to the type of resin will appear. First, select the type of resin to change the exposure time . Then, press the [+] or [-] button to set the exposure time for the selected resin type. The adjustment can be incremented or decremented by 0.5 sec by pressing the active [+] or [-] button. - Page 55 UI Menu Function Press [Setting] from the Menu screen. Press [Platform Leveling] . Remove all resin remaining in resin tank. Refer to “Resin tank of 5.Maintenance” for details of how to remove resin from the resin tank. Please note that leveling wil fail or won’t work precisely if resin still remaining in the resin tank.
- Page 56 UI Menu Function Platform rises. Click [Next] when the Platform lifting completion message shows up. Loosen six platform locking screws with a T-handle hexagon wrench, and press [Next] . Caution - Do not completely remove the screws from the platform and just loosen them up. If you try to remove the screws, they may drop onto the resin tank, and damage the release film and LCD protective glass.
- Page 57 UI Menu Function The platform moves down. When the screen indicates that the lowering is complete, press [Next] . Check the gap of all 4 corners between platform and resin tank using enclosed gap gauge. If gap is bigger than thickness of gap gauge in any corner. fasten the locking screws.
- Page 58 UI Menu Function Lock the platform locking screws in the following order: ① front side → ② right side → ③ left side. ③ Left side ① Front side ② Right side Important - Make sure to lock the platform locking screws in the specified order. - If the platform locking screws are not locked in the specified order, the platform leveling may fail, resulting in failed printing.
-
Page 59: Cloud Monitoring
UI Menu Function Check if the screws are fully tightened, and then press [Finish] . Cloud Monitoring This function lets users check the state of the machine remotely and send management data through email. Press the [Slide Menu Bar] button from the home screen. Press [Setting] . -
Page 60: Level Printer
UI Menu Function Press [Cloud Monitoring] . Select [Off] or [On] , and then press [Save] to save the settings. Level Printer This function lets users level the printer. Important - Sensor which is used to display the level or the printer should be used within the proper tempearature(20~30 ℃) in order to prevent malfunction. - Page 61 UI Menu Function Press [Setting] . Swipe up the screen, and then select [Level Printer] . The screen shows the leveling state of the printer.
- Page 62 UI Menu Function The leveling state screen shows the level of the machine with a circular level, which is commonly found in a washing machine. The circular level shows the level state with a bubble. Level the printer so that the orange circle of level is centered. Circular level With the enclosed spinner, properly turn the leveling screws located at the bottom of the printer to level the machine.
- Page 63 UI Menu Function Turn the leveling screws clockwise to raise the printer. Level it so that the bubble is centered in the level and turns green. Once the bubble turns green, the [Done] button will be activated so that the leveling procedure can be completed. Caution - If the leveling screws are turned clockwise too much, they may be removed from the printer.
-
Page 64: Network
UI Menu Function Network This function let users to set up network configurations of the device. Both wired and wireless LAN can be configured in details. Important - Using both wired and wireless network simultaneously is not recommended for electric devices which can be connected to network. - Page 65 UI Menu Function Swipe the screen upward, and press [Network] . Network setup screen shows up. Enable to choose wireless or wired connection according to your network connection provider. Wireless (Wifi) Setting Part Name Description ON/OFF Turn ON or OFF Wifi. Network Name (SSID) Select SSID or enter the name manually if can’t find the one you’re looking for.
- Page 66 UI Menu Function As pressing [Network] button, list of SSIDs is displayed. Select a SSID you want to connect, and press [Save] to store the setting. If selected SSID requires password, enter it. Select DHCP if the SSID gets IP automatically assigned from the network provider. As press [Connect], it will connect to the internet with the SSID.
- Page 67 UI Menu Function Press [Static] in the network setting screen if a fixed IP address is required. Press the pen icon [ on the right to enter the IP address manually. Then, press [Connect] to connect to an SSID. Wired LAN Setting For wired LAN, DHCP and fixed IP settings can be selected to connect to the network in the same procedure as the Wi-Fi.
-
Page 68: Test Print
UI Menu Function Test Print This function allows users to print a sample model already saved in the internal memory of printer. Press [Slide Menu Bar] from the Home screen. Press [Setting] from the Menu screen. Swipe up the screen, and then select [Test Print] . - Page 69 UI Menu Function The example files of the machine are listed. Select a file to print. Press the [ ] button to preview the information of the file to print. The information of the selected file is displayed. Press the [ ] button of the file to print to start printing.
-
Page 70: S/W Update
UI Menu Function S/W Update This function keeps S/W of the machine up to date. It checks the latest firmware through the network connection. Therefore, it won’t be working if the network is not connected. Press [Slide Menu Bar] from the Home screen. Press [Setting] from the Menu screen. - Page 71 UI Menu Function Confirm to proceed with the software update. Press [Start Update] . If there is a firmware update, the software update will start. After the update is complete, press the [Done] button to reboot the machine.
-
Page 72: General Setting
UI Menu Function General Setting This function allows users to change general settings. Press [Slide Menu Bar] from the Home screen. Press [Setting] from the Menu screen. Swipe the screen upward, and press [General Setting] . - Page 73 UI Menu Function List of [General Setting] items appears. Select an item to change. Language ❖ The system language of the machine can be chosen. Select a language using [<] and [>]. Power Saving ❖ The time delay before entering the power saving mode can be set. The adjustable range is in the unit of 5 min.
- Page 74 UI Menu Function Voice Guide ❖ The voice guide and related functions can be changed. On/Off : Turn ON or OFF the voice guide. Volume : Very Low, Low, Medium, High, or Very High can be selected. Speed : Very Slow, Slow, Medium, Fast, or Very Fast can be selected. Reference - Some models do not support the voice guide function.
-
Page 75: Lcd Check
UI Menu Function the exposure time for the selected resin type. Adjustment can be increased or decreased in 0.1 sec increments by pressing the activated [+] or [-] button. When the adjustment is complete, click [Save] to save the settings. If you press [Reset], the exposure time for the selected resin type is changed to the default value of ‘0’. -
Page 76: Release Film Cleaning
UI Menu Function Press [Setting] from the Menu screen. Swipe screen upward , and Press [LCD Check] . 4. ON 을 눌러 LCD 의 문자가 나타나면 이상이 없음을 알수 있습니다. Press [ON] If the character on the LCD appears, you can see that there is no problem.. Release Film Cleaning This function is for removing abnormal substances attached to the release film. - Page 77 UI Menu Function Press [Setting] from the Menu screen. Swipe screen upward , and Press [Release Film Cleaning] . 4. ON 을 눌러 LCD 의 문자가 나타나면 이상이 없음을 알수 있습니다. Select the cleaning range according to the range of the abnormal substance attached(Wide: 120 X 90mm, Narrow: 50 X 35mm).
-
Page 78: Print Condition Reset
UI Menu Function Print Condition Reset This function initializes the XY Scale, Z Offset, Chamber Heating, and 1st Exposure at once. Press [Slide Menu Bar] from the Home screen. Press [Setting] from the Menu screen. Swipe screen upward , and Press [Print Condition Reset] . 4. -
Page 79: Saved Files
UI Menu Function Click OK to initialize the values set below. 4. ON 을 눌러 LCD 의 문자가 나타나면 이상이 없음을 알수 있습니다. Saved Files Press [Slide Menu Bar] from the Home screen. Press [Saved Files] from the Menu screen. - Page 80 UI Menu Function List of files existing in printer’s internal memory is shown. Part Name Description Info Display detailed information of file. Print Start printing a selected file. Edit Manage files such as file deleting/editing, in the internal storage memory of printer. Info ❖...
- Page 81 UI Menu Function Print ❖ Check if there are remaining printed output on the platform. If there is no problem, press [Next]. Make sure that the resin tank and platform are firmly fixed, and then press [Next]. In manual resin supply mode, check if enough resin is filled in the resin tank using marks.
- Page 82 UI Menu Function After all the procedures are completed, press [Done] to start printing. Printing gets started.
-
Page 83: Info
UI Menu Function Info This allows users to check detailed information about the machine, and to set the name of the machine and administrator password. Press [Slide Menu Bar] from the Home screen. Press [Info] from the Menu screen. In Info screen, it is possible to set the name of the device and administrator password, and to see the other detailed information about the device. - Page 84 UI Menu Function Statistical information regarding machine usage is shown. For details, press [>] . Total Print Time ❖ Total running time of the device by now is displayed. Number of Printed Model ❖ Total number of print jobs and number of print jobs which are successfully finished are displayed.
- Page 85 UI Menu Function Cumulative Usage - Resin ❖ Display total cumulative amount of resin and usage volume per each resin type. Most Recent Print File List ❖ Display the list of most recently print files.
-
Page 86: Quick Guide
UI Menu Function Quick Guide It shows a brief description for each feature. Press [Slide Menu Bar] from the Home screen. Press [Quick Guide] from the Menu screen. Select a function that needs to be explained. If there are several pages, press the [Previous] or [Next] button to move to the previous or next page. -
Page 87: Programs
UI Menu Function Programs Press [Slide Menu Bar] from the Home screen. Press [Programs] from the Menu screen. It displays the related sub menu. - Page 88 UI Menu Function Application Manager ❖ You can install or uninstall add-In S/W.. To install a new S/W, press [ ] icon, or press [ ] icon to uninstall.
-
Page 89: Cloud
UI Menu Function Cloud Press [Slide Menu Bar] from the Home screen. Press [Cloud] from the Menu screen. It displays the list of apps available via cloud service. Reference - The list of apps is subject to change without notice. - Page 90 Name of printer can be entered if you press [Alexa]. You can get a registration code if you press [Generate Code] to register an app supporting Alexa service. Reference - Please visit Sindoh’s homepage in order to get detailed information regarding register and activate Sindoh printer to Alexa service.
- Page 91 Cloud Monitoring ❖ You can register printers to Cloud Monitoring service being provided by Sindoh, and manage them. Name of printer can be entered if you press [Cloud Monitoring]. You can get a registration code if you press [Generate Code] to register your printer to Cloud Monitoring service.
-
Page 93: Printing
Sindoh A1 Series USER MANUAL Printing... -
Page 94: Printing From Usb Flash Drive
Printing Printing User can start printing via USB flash drive, USB cable, or over the network. The following Home screen on the device means it is ready to start print. Printing from USB Flash Drive Connecting USB flash drive into the device In order to print using USB flash drive, insert the flash drive into USB port. - Page 95 Printing When the USB flash drive is connected while in the home screen, a list of files in the USB appears. Part Name Description File Name A list of files existing in the USB flash drive. Download Downloading a file to the internal memory of the printer. Preview Preview image of print appears.
- Page 96 Printing Check if there is remaining printed output on the platform. If there is no problem, press [Next]. Make sure that the resin tank and platform are firmly fixed, and then press [Next]. In manual resin supply mode, check if enough resin is filled in the resin tank using marks.
- Page 97 Printing After all the procedures are completed, press [Done] to start printing. You can find a pop-up message saying USB should not be removed during file transfer. If USB memory is removed before the pop-up message disappears, printing will be canceled automatically. Icon ( ), which means that USB memory can be removed, will show up, and printing starts.
- Page 98 Printing If chamber temperature is lower than the target, heater will heat up the inside of the chamber. When chamber temperature reaches the target, printing starts. Pausing Print Pressing [Pause] during printing will pause the current print job, and pop-up menu showing additional functions appears.
- Page 99 Printing Cancel Print Press [Cancel]. A dialog box will then be prompted to confirm the termination of operation. Press [Yes] to terminate the current operation and return the platform to its home position. Caution - If printing is canceled, more cured debris or contaminants may remain in the resin tank and platform in comparison to when the printing is fully completed.
-
Page 100: Printing Via Pc
This function lets users check the state of the machine remotely using web browser of PC or mobile device, and receive the printing status through email. Reference - Cloud monitoring may not be supported depending on models. Sign Up/Login Connect to Cloud Monitoring service(https://cloud3d.sindoh.com) and login. If you don’t have an account, click [Sign Up] to create. - Page 101 Printing Initial Screen If you login Cloud Monitoring service very first time, the initial screen as follows is shown. Adding a new printer is required because no printer is registered yet. Generation Code Go to [Cloud Monitoring] of UI menu, and press [Generate Code] to get a registration code. Generated code should be used in 600 seconds, otherwise it will be void.
- Page 102 Printing Adding New Printer In the initial screen, press [Add New Printer] and enter the registration code generated in Cloud Monitoring of UI. If registration code is correctly entered, printer registration will be finished. Starting Screen Starting screen of Cloud Monitoring consists of as follows.
- Page 103 Printing Name Description Menu Select additional features provided in Cloud Monitoring Printer Delete Button Delete registered printer. Printer Status Names and types are shown. Add New Printer Add new printer Additional Features Press Printer Status and then information of printer detail is shown. You can find out resin type, number of print completed, total amount of resin usage and resin usage history.
-
Page 104: Changing Resin
Email address to which printer’s status is sent can be set, and change email notification setting. If you need to use several email addresses, use semi-colon. (i.e cloudmonitoring1@sindoh.com ; cloudmonitoring2@sindoh.com) Changing Resin When a resin different from the current one needs to be used, clean up the resin tank and platform to ensure the best print quality and to prevent mixing. - Page 105 Printing Cleaning the resin tank Clean the release film and walls of the resin tank using isopropyl alcohol (IPA) and a paper towel. clean it using isopropyl alcohol (IPA) or glass cleaner and a microfiber cloth if required. Caution - For details on how to clean the resin tank, refer to “Resin Tank of 5. Maintenance”.
-
Page 107: Checking Printed Output
Sindoh A1 Series USER MANUAL Checking Printed Output... -
Page 108: Detaching Printed Output
Checking Printed Output Checking Printed Output Caution - Wear nitril gloves before getting started. Detaching Printed Output Standby Until Platform Returns To Ready Position After printing is finished, wait until platform completely returns to ready position. Do not open the orange cover before platform stops moving. Platform Platform Locking Knobs Removal When platform stops moving, open the orange cover and remove two platform locking knobs... - Page 109 Checking Printed Output Platform Locking Screws Removal If not removing the resin remnant sufficiently, the table, work area or machine exterior may become contaminated by the overflowing resin from the platform when carrying the platform. As shown in the picture below, please place the platform over a resin tank that resins accumulated on the platform drop to the resin tank.
- Page 110 Checking Printed Output Important - As moving the platform away from the machine, be careful not to let the resin splash or spill onto any part of the resin tank. Insert blade of metal scrapper between printed output and platform and detach it by pushing scrapper slowly and carefully.
-
Page 111: Finishing The Printed Output
Checking Printed Output - After removing the platform from the unit, be sure to close the orange cover. If the resin contained in the resin tank is exposed to external light for a long time, the resin may harden and cause the printing failure. - Page 112 Checking Printed Output Remove remaining resin using a brush or toothbrush. Use a sprayer to wipe out the fine gaps or holes in the output with IPA. Drying and post-curing Important - The curing time may vary depending on the printed output’s size and shape. - For quick curing, fill a transparent container with water, and put the printed output in it.
-
Page 113: Preparing The Next Print
Checking Printed Output Preparing the Next Print Cleaning Platform Remove debris of print and contaminants remaining on the platform using an enclosed metal scraper. Clean remaining resin on the top and bottom of the platform using a paper towel and IPA. Finally, clean all remaining IPA using a dry paper towel. -
Page 114: Enhancing Print Quality
Checking Printed Output Enhancing Print Quality Following the guideline for resin use - The print quality is seriously influenced by the condition of resin. Take note of the expiration date as well as the storage and working temperatures marked on the resin. - Resin in the resin tank needs to be filtered regularly using mesh filter. -
Page 115: When Printer Can't Be Turned On
Checking Printed Output When Printer Can’t be Turned ON When the power is ON again, platform moves upward to initial position. As described in “1. Checking Printed Output”, remove aborted print output from the platform, and clean the plat form and resin tank for the next job. -
Page 116: If Problems Persist
Checking Printed Output If problems Persist Please refer to “Error Messages and Solutions and Problems and Troubleshooting” from Chapter 5. Maintenance”. Please visit https://3dprinter.sindoh.com or contact your seller for further assistance and help. - Page 117 Maintenance Sindoh A1 Series...
-
Page 118: Machine Cleaning
Maintenance Machine Cleaning Caution - Turn off the power for the machine cleaning. If resin or cleaning tools go into the machine while the power is on, it may cause a machine malfunction. Printer Interior Cleaning During machine use, the resin may fall inside the machine. If the resin goes into sensitive parts such as any optical parts, it may cause a malfunction or printing failure. -
Page 119: Platform
Maintenance Platform If debris of print or contaminants exists on the surface of the platform or in its holes, platform leveling may not be performed perfectly. They may cause a degradation in the print quality or print failure. For the best printing performance, clean the platform regularly and after each printing job. Caution - Wear nitrile gloves before cleaning. -
Page 120: Resin Tank
Maintenance If contaminants exist on a part where the platform is installed, platform leveling may fail, resulting in failed printing. Make sure that there are no contaminants remaining between the main body and the platform, and clean it using IPA and a paper towel if there is any. Assembly Surface Assembly Surface (Platform) - Page 121 Maintenance Checking the inside of the resin tank To check the inside of the resin tank, inspect it by scraping its bottom using the supplied rubber scraper. Look at the release film by carefully scraping resin from one side to the other of the resin tank. Rubber Scraper Important - Do not scrape the bottom of the resin tank too hard.
-
Page 122: Cleaning The Resin Tank
Maintenance Cleaning the Resin Tank Caution - Wear nitrile gloves before cleaning. Cleaning the release film Use your fingers, a rubber scraper, or a gap gage mylar to remove residues of prints sticking to the release film and cured resin or particles floating in resin. Important - Do not scrape the bottom of resin tank hard. - Page 123 Maintenance Filtering remaining resin If the residues of prints or contaminants cannot be perfectly removed with your fingers or a rubber scraper, filter the resin through the cleaning filter to remove them. Pour the resin into a bottle with the cleaning filter to remove them. If resin does not flow down from the resin tank, lean the tank onto several layers of waste paper or paper towel, and use a rubber scraper to scrape down resin.
-
Page 124: Lcd Protective Glass
Maintenance LCD Protective Glass The LCD protective glass is made of transparent glass to pass through LED beam with maximum efficiency. In addition, it prevents external dust or resin from penetrating inside the machine. For the best printing performance, it is very important that the LCD protective glass, through which the LED beam passes, is not scratched or contaminated. - Page 125 Maintenance Cleaning the protective glass ① The LCD protective glass needs to be cleaned only with IPA or a dedicated cleaner for glass and a clean microfiber cloth. Non-microfiber cloth or paper towel can scratch the LCD protective glass. ② Completely remove alcohol or glass cleaner with a dry microfiber cloth. ③ In a completely dry state, apply the glass coating agent evenly and let it dry for 10 minutes.
-
Page 126: Orange Cover
Maintenance Orange Cover The orange cover is made of translucent orange acryl material to allow users to check the situation inside the device. Orange acryl is a specially selected material to safely shield the LED beam. To prevent users from accidentally using the machine with the cover open, double safety systems are installed. It is designed to stop temporarily for the safety of a user because if the cover is opened during printing, it may cause reduced quality or failed printing. -
Page 127: Cleaning The Orange Cover
Maintenance Reference - Pull the center part of the cover to easily close it. If you pull the left or right part, force is dispersed, which needs more force than the center. Cleaning the Orange Cover The orange cover needs to be cleaned only with a clean microfiber cloth and a dedicated cleaner for acryl material, for example, NOVUS No. -
Page 128: Error Messages And Solutions
Maintenance Error Messages and Solutions Message Description What To Do Booting On the first boot, the user must Once the boot-up process is finished and the Please wait until wait until the booting process is machine is ready, this message disappears booting is complete. -
Page 129: Problems And Solutions
Maintenance Problems and Solutions Actions in Case of a Printing Failure Inevitably, printing can fail. In the event of a printing failure, a small piece of missing or incompletely cured resin will float in the resin tank or remain attached to the release film. These contaminants are generated more in case of a printing failure rather than successful printing. -
Page 130: If Noise Is Generated From The Lead Screw Of Platform
Maintenance If Noise is Generated from the Lead Screw of Platform Noise can be generated from the lead screw of platform if foreign matters such as resin, etc is located to the lead screw. To remove the noise, gently wipe the noise generating area of the lead screw using clean microfiber cloth in order to get rid of foreign matters. -
Page 131: Replacing Consumables And Important Components
Maintenance Replacing consumables and important components Replacing the Platform Caution - Wear clean nitrile gloves before cleaning. Removing the current platform Open the orange cover, and remove the two platform locking knobs by turning in counterclockwise direction. Hold the platform with both hands grasping the handles, and remove it from the machine. Caution - Be careful not to drop the platform during installation or removal. - Page 132 Maintenance Installing a new platform Place the new platform on the machine in the exact reverse order of removing the platform, and secure it with two locking knobs. Important - When placing a platform on the mount, align the two protrusions of the fixed part. If they are not aligned, the platform will not be installed properly.
-
Page 133: Replacing The Resin Tank
Maintenance Replacing the Resin Tank Replacing the Resin Tank Removing the current resin tank Open the orange cover, and then remove the resin tank in the following order: ① Turn the locking levers that hold both sides of the resin tank outward to unlock them. ②... - Page 134 Maintenance Removing remaining resin If resin remains in the resin tank, pour all remaining resin through the filter and store them in a bottle. If resin does not flow down from the resin tank, lean the resin tank onto several layers of waste paper or paper towel, and use a rubber scraper to scrape down resin.
- Page 135 Maintenance ② Turn the locking levers inward to secure the resin tank. Turn them until they are locked. Leveling the platform Once the new resin tank is installed, proceed with the platform leveling process again to adjust the alignment between the platform and resin tank. For details on platform leveling, refer to “Platform Leveling of 3.
-
Page 136: Replacing The Release Film
Maintenance Replacing the Release Film Caution - Wear clean nitrile gloves before cleaning. If the release film is severely damaged, replace it according to the following procedure. Contact your local dealer regarding ordering a film replacement kit. Cleaning the resin tank If the release film is replaced without cleaning the resin tank, resin may enter the gaps of the tank, where it is difficult to remove the resin during disassembly. - Page 137 Maintenance Assembling a new release film Prepare the new release film. The protection sheets are attached to both sides of the film. Remove them gently. A new replacement release film is put on a sealing bracket boss and place this sealing bracket with a release film on the resin tank.
- Page 138 Maintenance Important - When the sealing bracket is assembled, please secure the bolts in the following order. 1). Half-fasten 4 bolts (①,②,③,④ ) in order of number (not fully fastened) 2). 3bolts (②,③,④) are Half-fastened counterclockwise from ① (not completely fastened). 3).
-
Page 139: Periodic Inspection For Maintenance
Maintenance Periodic Inspection for Maintenance Duration Time Check Point Description Daily "Warming Temp Temp 20~30℃ ① Check if the temperature on the upper Right of the UI is kept Up" at 20~30℃ in the standby state. ② If it is less than 20℃, chamber heating must be activated in the settings. -
Page 140: Spare Parts List
Maintenance Spare Parts List Replacement Part No. Description Unit cycle MRL1A601-FR FR-UNIT:EXTERIOR:OP:LCD:A1 FRONT COVER ASSY(A1SD) 5 yr MRL1N601-FR FR-UNIT:EXTERIOR:OP:LCD:NEO FRONT COVER ASSY(NEO) 5 yr MRP1A416-FR FR-ASSY:HEATER:MYRON-P1 HEATER ASSY 5 yr MRL28100-FR FR-PCB ASSY:CTL:MYRON-LCD CTL BOARD 5 yr MRP18200-FR FR-PCB ASSY:UICC:MYRON-P UICC BOARD 5 yr MRL28302-FR... - Page 141 Notice to Users Type Notice This equipment is a Class A EMC Class A equipment (electromagnetic compatible) (commercial telecast equipment, and should not be used in hou- equipment) sehold locations This Product is a Class A equipment.
Need help?
Do you have a question about the A1SD Series and is the answer not in the manual?
Questions and answers