Advertisement
Quick Links
Quick Start Guide
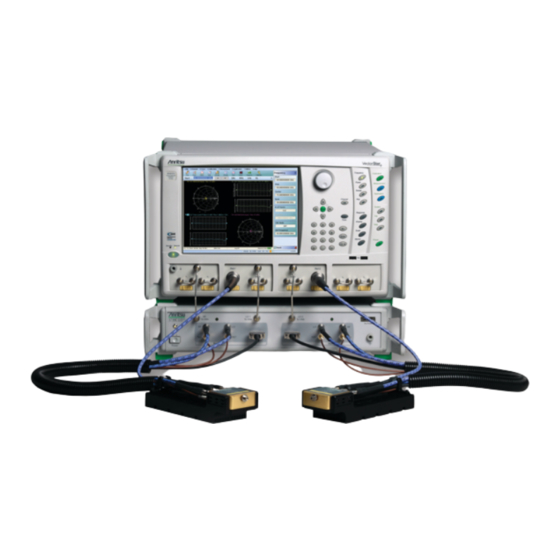
VectorStar™ ME7838A/AX
2-Port Broadband/Banded mmWave
System
High Performance Modular Broadband/Banded mmWave Vector Network
Analyzer (VNA) Measurement System, 70 kHz to 125 GHz
Anritsu Company
Part Number: 10410-00292
490 Jarvis Drive
Revision: F
Morgan Hill, CA 95037-2809
Published: September 2021
USA
Copyright 2021 Anritsu Company. All rights reserved.
http://www.anritsu.com
Advertisement

Related Manuals for Anritsu VectorStar ME7838AX


Summary of Contents for Anritsu VectorStar ME7838AX
- Page 1 High Performance Modular Broadband/Banded mmWave Vector Network Analyzer (VNA) Measurement System, 70 kHz to 125 GHz Anritsu Company Part Number: 10410-00292 490 Jarvis Drive Revision: F Morgan Hill, CA 95037-2809 Published: September 2021 Copyright 2021 Anritsu Company. All rights reserved. http://www.anritsu.com...
- Page 2 Series Broadband Vector Network Analyzers Installation Guide – 10410-00293. This and all other documentation that supports the ME7838A/AX is available on the ME7838x web page: http://www.anritsu.com/test-measurement/products/me7838 On this web page, you can select various tabs for more information about your instrument. Included is a Library tab which contains links to all the latest technical documentation related to this instrument.
- Page 3 Installing Rear Panel Cables (MS464xA VNA) This section focuses on installing cables when using a MS464xA VNA. Start the ME7838A assembly by placing the 3739B/C Broadband Test Set so you can access the rear panel for cable connection. Warning To avoid injury, use two or more people to lift the MS464xA VNA to the top of the 3739B/C Test Set. To avoid connector damage or inaccurate measurements, before making any connections, ensure Caution the connectors are clean, undamaged, and meet pin depth specification.
- Page 4 Table 1. ME7838A Cable Rear Panel Connections (MS464xA VNA) To 3739B/C Test Set Part Number Index Description From VNA Location Location MS464xA VNA MS464xA VNAs only work with ME7838A systems. 3739B/C Test Set a1 IF a1 IF b1 IF b1 IF IF Interface Cables 3-73598-1 a2 IF...
- Page 5 Installing Rear Panel Cables (MS464xB VNA) This section focuses on installing cables when using a MS464xB VNA. Start the ME7838A/AX assembly by placing the 3739B/C Broadband Test Set so you can access the rear panel for cable connection. Start the ME7838A/AX assembly by placing the 3739B/C Broadband Test Set so you can access the rear panel for cable connection.
- Page 6 Table 2. ME7838A/AX Cable Rear Panel Connections (MS464xB VNA) To 3739B/C Test Set Part Number Index Description From VNA Location Location MS464xB VNA 3739B/C Test Set a1 IF a1 IF b1 IF b1 IF IF Interface Cables 3-73598-1 a2 IF a2 IF (5 cable bundle) b2 IF...
- Page 7 Installing Front Panel Cables Connect the front panel cables between the VNA and the 3739B/C Test Set, and between the Test Set and the mmWave modules as shown below and as described in Table Frequency Calibration Power Measurement Sweep Application Channel System Response...
- Page 8 Table 3. ME7838A/AX Cable Interconnect Part Numbers and Locations Connection Connection Part Number Index Description From MS464xA/B 3739B/C Test Semi-Rigid (KM-KM) Cable 3-67357-xx • Tighten using an 8 mm (5/16 in) torque end VNA RF Test Set RF (See Note 1) wrench set to 0.9 Nꞏm (8 lbfꞏin).
- Page 9 mmWave Module Connections Connect the 3739B/C Broadband Test Set Port-1 and Port-2 cables to the 3743A/AX, 3744A-EE, 3744A-EW, or 3744A-Rx Modules as shown below, observing the correct torque limits for each connector. See Figure 4 Table 4. Route the cable assemblies through the cable restraint. For ease of connection, the module can be removed from the bracket, then reinstalled after cables are secured.
- Page 10 • Tighten using a torque end wrench and a plain end wrench • 6 mm Torque End Wrench set to 0.45 Nꞏm (4 lbfꞏin). Recommended is Anritsu 01-504. • 6 mm / 7 mm Open End Wrench. Recommended is Anritsu 01-505.
- Page 11 OML/VDI Module Connections Connect the front panel cables between the 3739B/C Test Set, and the OML or VDI modules as shown in Figure Figure 6, and Figure 7, and as described in Table Table 6, and Table Caution To avoid connector damage, observe torque requirements where indicated. Frequency Calibration Power...
-
Page 12: Part Number Index
• Tighten using an 8 mm (5/16 in) torque end VNA RF Test Set RF (See Note 1) wrench set to 0.9 Nꞏm (8 lbfꞏin). • Recommended is Anritsu 01-201. Semi-Rigid (KM-KM) Cable 3-67357-xx • Tighten using an 8 mm (5/16 in) torque end VNA LO1... - Page 13 Ref IF – SMA Connector • Tighten using an 8 mm (5/16 in) torque end wrench set to 0.9 Nꞏm (8 lbfꞏin). • Recommended is Anritsu 01-201. RF Input – SMA Connector • Tighten using an 8 mm (5/16 in) torque end wrench set to 0.9 Nꞏm (8 lbfꞏin).
- Page 14 RF Input – K (2.92 mm) Connector • Tighten using an 8 mm (5/16 in) torque end wrench set to 0.9 Nꞏm (8 lbfꞏin). • Recommended is Anritsu 01-201. Ref. IF – SMA Connector • Tighten using an 8 mm (5/16 in) torque end wrench set to 0.9 Nꞏm (8 lbfꞏin).
- Page 16 Anritsu Company 490 Jarvis Drive Anritsu utilizes recycled paper and environmentally conscious inks and toner. Morgan Hill, CA 95037-2809 http://www.anritsu.com...
Need help?
Do you have a question about the VectorStar ME7838AX and is the answer not in the manual?
Questions and answers