Sentiotec 145 Instructions For Installation And Use Manual
Electric sauna heater
Hide thumbs
Also See for 145:
- Instructions for installation and use manual (96 pages) ,
- Instructions for installation and use (5 pages)

Related Manuals for Sentiotec 145


Summary of Contents for Sentiotec 145
- Page 1 145, 160, 180, 190 145E, 160E, 180E, 190E 245E, 260E, 280E, 290E Instructions for Installation and Use of Electric Sauna Heater Gebrauchs- und Montageanleitung des Elektrosaunaofens 145-190 145E-190E 21082018/Y05-0459...
-
Page 2: Table Of Contents
These instructions for installation and use are Diese Montage- und Gebrauchsanleitung richtet intended for the owner or the person in charge of sich an den Besitzer der Sauna oder an die für die the sauna, as well as for the electrician in charge Pflege der Sauna verantwortliche Person, sowie an of the electrical installation of the heater. -
Page 3: Instructions For Use
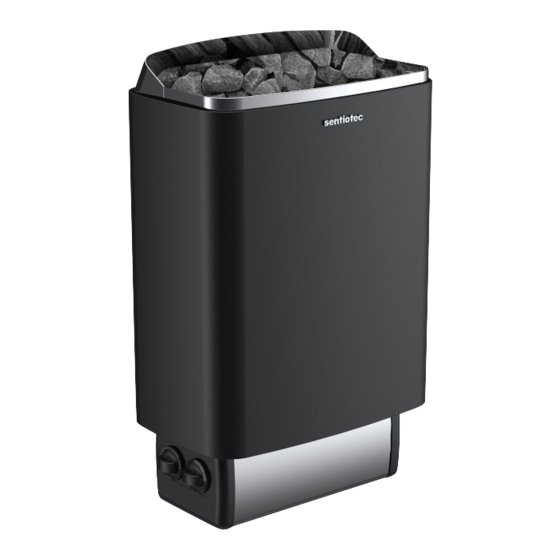
1. INSTRUCTIONS FOR USE 1. BEDIENUNGSANLEITUNG 1.1. Piling of the Sauna Stones 1.1. Aufschichten der Saunaofensteine The piling of the sauna stones has a great effect on Die Schichtung der Ofensteine hat eine große Aus- the functioning of the heater (figure 1). wirkung auf die Effizienz des Ofens (Abb. -
Page 4: Heating Of The Sauna
Gegenstände auf dem Ofen oder in the given safety distance. 1.6. unmittelbarer Nähe des Ofens liegen. 1.6. Heater models 145-190 are equipped with a Die Ofenmodelle 145-190 sind mit einer Zeit- • •... -
Page 5: Heater Off
1.3.3. Heater Off 1.3.3. Ofen aus The heater switches off, when the timer Der Ofen wird ausgeschaltet, wenn die turns the switch back to zero. You can Zeitschaltuhr den Schalter zurück auf null switch the heater off at any time by turn- gedreht hat. -
Page 6: Instructions For Bathing
1.5. Instructions for Bathing 1.5. Anleitungen zum Saunen Begin by washing yourself. Waschen Sie sich vor dem Saunen. • • Stay in the sauna for as long as you feel com- Bleiben Sie in der Sauna, solange Sie es als •... - Page 7 Check that the overheat protector has not gone Überprüfen Sie, ob der Überhitzungsschutz aus- • • off. The timer works but the heater does not gelöst wurde. Die Zeitschaltuhr läuft, aber der heat. ( 3.5.) Ofen wärmt nicht. ( 3.5.) The sauna room heats slowly.
-
Page 8: Sauna Room
2. SAUNA ROOM 2. SAUNAKABINE 2.1. Sauna Room Structure 2.1. Struktur der Saunakabine Figure 4. Abbildung 4. A. Insulation wool, thickness 50–100 mm. The A. Isolierwolle, Stärke 50–100 mm. Die Saunaka- sauna room must be insulated carefully so that bine muss sorgfältig isoliert werden, damit der the heater output can be kept moderately low. -
Page 9: Sauna Room Ventilation
2.2. Sauna Room Ventilation 2.2. Belüftung der Saunakabine The air in the sauna room should change six times Die Saunaluft sollte sechsmal pro Stunde ausge- per hour. Figure 5 illustrates different sauna room tauscht werden. Abb. 5 zeigt verschiedene Optio- ventilation options. -
Page 10: Instructions For Installation
Weight/Gewicht 16 kg Stones/Steine max 20 kg min. max. min. m³ m³ mm² mm² mm² 145/145E/245E 1900 5 x 1,5 3 x 10 4 x 2,5 3 x 16 3 x 2,5 1 x 20 160/160E/260E 1900 5 x 1,5... -
Page 11: Change From Right-Handed To Left-Handed Or Vice Versa (1)
3.1.1. Change from right-handed to left-handed or 3.1.1. Wechsel der Anschlußrichtung (1) vice versa (1) Die Steuergeräte der Sauna (Uhr und Thermostat) The controls of the heater (timer and thermostat) können an einem der beiden Enden der Anschlußge- can be installed at either end of the connection häuse angebracht werden. -
Page 12: Fastening The Heater On A Wall
electrical box. abgezogen. 3. Burst the pre- Für das machined hole Anschlußkabel wird on the end-piece, das vorgestanzte and push the Loch im Stirnstück connecting cable durchstoßen, durch to the cable welches das An- clamp and con- schlußkabel zur nector batten Zugentlastungs- through this hole. -
Page 13: Electric Heater Insulation Resistance
cable (figure 10: 4) must be of rubber cable entsprechendes Kabel verwendet. ACHTUNG! type H07RN-F or its equivalent.NOTE! Due PVC-isolierte Kabel dürfen wegen ihrer schlech- to thermal embrittlement, the use of PVC- ten Hitzebeständigkeit nicht als Anschlusskabel insulated wire as the connecting cable of the des Saunaofens verwendet werden. - Page 14 Abkühlen des Ofens zurück- down. gesetzt werden. 145-190 145-190 The reset button is located on the thermostat frame Der Rücksetzknopf befindet sich in der Elektro- on the electrical box (see fig. 12), and consequently, buchse im Rahmenteil des Thermostats (siehe Abb.
- Page 15 1 2 3 4 5 L1 L2 L3 1 2 3 4 5 L1 L2 1 2 3 4 5 Figure 13. Electrical connections of 1 heaters Figure 14. Electrical connections of 1-E and 2-E heaters Abbildung 13. Elektroanschlüsse des Saunaofens 1 Abbildung 14.
-
Page 16: Spare Parts
4. SPARE PARTS 4. ERSATZTEILE 1 2 3 4 Heating element 1500 W/230 V Heizelement 1500 W/230 V 145, 145E, 245E ZSK-690 Heating element 2000 W/230 V Heizelement 2000 W/230 V 160, 160E, 260E ZSK-700 Heating element 2670 W/230 V... - Page 20 GmbH Oberregauer Straße 48 A-4844 Regau, AUSTRIA T +43 7672 27720-800 F +43 7672 27720-801 info@sentiotec.com www.sentiotec.com...
Need help?
Do you have a question about the 145 and is the answer not in the manual?
Questions and answers