Advertisement
Quick Links
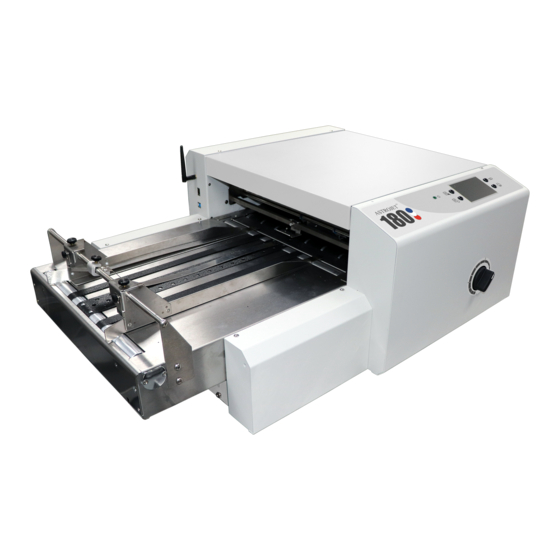
AstroJet AJ-180
Quick Start Guide
Step 1
Unpack Printer and Accessories
Place Printer on a stable surface. Save packaging
material.
Step 2
Connect Power to Printer
1. Check that the Printer
is set for the power
to be used (115V or
220V) [A].
2. Connect one end of
the power cord to the
rear receptacle on
the Printer.
3. Plug other end into a
115-220 Volt AC
(depending on
Printer voltage),
50/60 Hz. grounded
outlet.
DO NOT TURN POWER SWITCH ON YET
Connect Printer to Computer
USB 3.1 Port: Plug
USB cable into
connector [1]. Cable
used to connect
Printer to computer
must not exceed 6
feet long.
Ethernet (Network)
Port: Plug network
Ethernet cable into
connector [2].
Wi-Fi Port: Connect Wi-Fi antenna (included) to this
port [3] for wireless Printer monitoring or operation
through your network.
DO NOT CONNECT USB CABLE
OR NETWORK CABLE YET.
DO NOT TURN PRINTER POWER
SWITCH [1] ON YET.
Page 1
Advertisement

Related Manuals for AstroJet AJ-180


Summary of Contents for AstroJet AJ-180
- Page 1 AstroJet AJ-180 Quick Start Guide Step 1 Unpack Printer and Accessories Place Printer on a stable surface. Save packaging material. Connect Printer to Computer Step 2 USB 3.1 Port: Plug USB cable into Connect Power to Printer connector [1]. Cable used to connect 1.
- Page 2 Adjust Printer to Media Install Inkjet Cartridges Place one piece of media on center of conveyor portion The AJ-180 holds 8 Inkjet Cartridges. of Feeder. Adjust Side Guides [1] to media. Use Media 1. Remove inkjet Retainer Assembly [2] to help hold media down.
- Page 3 WiFi to your computer. Click “Yes” Step 6 To install Accessories and for Printer set-up or operation, please refer to “AstroJet AJ-180 Printer 4. The "Want to Install Printer…" window opens. Operator Manual” supplied with Printer. If that is correct. Click “Yes”.
Need help?
Do you have a question about the AJ-180 and is the answer not in the manual?
Questions and answers