
Related Manuals for Cabletron Systems SEH-24


Summary of Contents for Cabletron Systems SEH-24
- Page 1 SEH-22, SEH-24, SEH-32, AND SEH-34 10BASE-T STACKABLE HUB USER’S GUIDE The Complete Networking Solution™ CABLETRON SYSTEMS, P. O. Box 5005, Rochester, NH 03866-5005...
- Page 2 NOTICE NOTICE Cabletron Systems reserves the right to make changes in specifications and other information contained in this document without prior notice. The reader should in all cases consult Cabletron Systems to determine whether any such changes have been made.
-
Page 3: Fcc Notice
NOTICE FCC NOTICE This device complies with Part 15 of the FCC rules. Operation is subject to the following two conditions: (1) this device may not cause harmful interference, and (2) this device must accept any interference received, including interference that may cause undesired operation. -
Page 4: Program License Agreement
PROGRAM LICENSE AGREEMENT IMPORTANT: Before utilizing this product, carefully read this License Agreement. This document is an agreement between you, the end user, and Cabletron Systems, Inc. (“Cabletron”) that sets forth your rights and obligations with respect to the Cabletron software program (the “Program”) contained in this package. - Page 5 7013 (c) (1) (ii) and its successors, and use, duplication, disclosure by the Government is subject to restrictions as set forth in subparagraph (c) (1) (ii) of the Rights in Technical Data and Computer Software clause at 252.227-7013. Cabletron Systems, Inc., 35 Industrial Way. Rochester, New Hampshire 03867...
-
Page 6: Table Of Contents
2.1.6 AUI Cable Requirements for the EPIM-A and EPIM-X Modules... 2-7 NETWORK PORT SPECIFICATIONS ... 2-7 2.2.1 SEH-22 and SEH-24 Network Port Specifications... 2-8 2.2.2 SEH-32 and SEH-34 Network Port Specifications... 2-8 EPIM SPECIFICATIONS ... 2-10 2.3.1 EPIM-T ... 2-10 2.3.2... - Page 7 CONNECTING THE SEH TO THE POWER SOURCE ...3-8 CHAPTER 4 CONNECTING TO THE NETWORK CONNECTING THE SEH TO THE NETWORK ...4-1 4.1.1 Connecting Network Ports SEH-22 and SEH-24...4-1 4.1.2 Connecting Network Ports SEH-32 and SEH-34...4-3 4.1.3 Connecting a UTP Segment to an EPIM-T ...4-4 4.1.4...
-
Page 8: Chapter 1 Introduction
INTRODUCTION CHAPTER 1 INTRODUCTION Welcome to the Cabletron Systems SEH-22, SEH-24, SEH-32, and SEH-34 10BASE-T Stackable Hub User’s Guide. This manual explains installation instructions and provides reference information for the SEH-22, 24, 32, and 34. Note: The term SEH (Stackable Ethernet Hub) is used throughout this manual when describing features and functions that are common to the SEH-22, 24, 32, and 34. -
Page 9: Getting Help
INTRODUCTION 1.2 GETTING HELP If you need additional support related to the Cabletron Systems SEH, or if you have any questions, comments, or suggestions concerning this manual, contact Cabletron Systems Technical Support: By phone ... (603) 332-9400 ® By CompuServe ... -
Page 10: Seh Features
You can stack together up to five SEH hubs using Cabletron Systems’ external HubSTACK Interconnect cables. If you want to add management to the stack, Cabletron Systems offers the MicroMMAC and the SEHI intelligent hubs. You can stack up to four SEHs with one intelligent hub. -
Page 11: Stackable Capabilities
1.5 STACKABLE CAPABILITIES The SEH is a non-intelligent hub designed to be managed by either the Cabletron Systems SEHI intelligent hub or the Cabletron Systems MicroMMAC intelligent hub. Intelligent hubs serve as the logical “top” of the stack. They manage all SEH hubs in the stack providing full packet and error statistics for the entire stack, individual device, or individual port. -
Page 12: Related Manuals
Daughter Board Upgrade Kit You can upgrade the SEH-22 and the SEH-32 to 24 ports using the daughter board upgrade kit. The Cabletron part numbers for the upgrades are: • SEH-22: • SEH-32: HubSTACK Interconnect Cables You need Cabletron’s HubSTACK Interconnect cables to stack hubs together. -
Page 13: Chapter 2 Installation Requirements/Specifications
INSTALLATION REQUIREMENTS/SPECIFICATIONS CHAPTER 2 INSTALLATION REQUIREMENTS/SPECIFICATIONS This chapter describes network guidelines, power requirements, and operating specifications for the SEH. Be sure to read this chapter before you install the SEH. Your network must meet the requirements and conditions specified in this chapter to obtain satisfactory performance from this equipment. -
Page 14: Utp And Stp Cable Specifications For The Network Ports And Epim-T Module
Impedance Cabletron Systems 10BASE-T Twisted Pair products will work on twisted pair cable with 75 to 165 ohms impedance. Unshielded twisted pair cables typically have an impedance of between 85 to 110 ohms. - Page 15 INSTALLATION REQUIREMENTS/SPECIFICATIONS Delay The maximum propagation delay of a 10BASE-T link segment must not exceed 1000 nsec. This 1000 nsec. maximum delay limits the maximum link segment length to no greater than 200 meters. Crosstalk Crosstalk is caused by signal coupling between the different cable pairs contained within a multi-pair cable bundle.
-
Page 16: Multimode Fiber Optic Cable Specifications For The Epim-F1 And Epim-F2 Modules
INSTALLATION REQUIREMENTS/SPECIFICATIONS 2.1.3 Multimode Fiber Optic Cable Specifications for the EPIM-F1 and EPIM-F2 Modules Table 2-1 shows Multimode Fiber Optic Cable specifications for the EPIM-F1 and EPIM-F2 modules. Table 2-1. Multimode Fiber Optic Cable Specifications Cable Type 50/125 m 62.5/125 m 100/140 m Attenuation You must test the fiber optic cable with a fiber optic attenuation test... -
Page 17: Single Mode Fiber Optic Cable Specifications For The Epim-F3 Module
INSTALLATION REQUIREMENTS/SPECIFICATIONS 2.1.4 Single Mode Fiber Optic Cable Specifications for the EPIM-F3 Module Table 2-2 shows Single Mode Fiber Optic Cable specifications for the EPIM-F3. Table 2-2. Single Mode Fiber Optic Cable Specifications Cable Type 8/125-12/125 m Attenuation You must test the fiber optic cable with a fiber optic attenuation test set adjusted for an 1300 nm wavelength. -
Page 18: Thin-Net Network Requirements For The Epim-C Module
finished wall plates with BNC feed-throughs, then a reduced number of host connections may be required. For special network design, contact Cabletron Systems Technical Support. Grounding For safety, ground only one end of a thin-net segment. Do NOT connect EPIM BNC ports to earth ground. -
Page 19: Aui Cable Requirements For The Epim-A And Epim-X
The connector shell of the EPIM-A and the EPIM-X are connected to ground. 2.2 NETWORK PORT SPECIFICATIONS The SEH-22 and SEH-24 network ports are shielded RJ45 connectors that support both STP and UTP cabling. The SEH-32 and SEH-34 provide a 50 pin Champ style connector for network connections. The following sections provide specifications for each SEH model. -
Page 20: Seh-22 And Seh-24 Network Port Specifications
INSTALLATION REQUIREMENTS/SPECIFICATIONS 2.2.1 SEH-22 and SEH-24 Network Port Specifications The SEH-22 and SEH-24 provide RJ45 connections for network connections. Figure 2-1 shows the RJ45 pinouts. 1 2 3 4 5 6 7 8 Figure 2-1. RJ45 Network Ports 2.2.2 SEH-32 and SEH-34 Network Port Specifications The SEH-32 and SEH-34 provide 50 pin Champ connectors for network connections as shown in Figure 2-2. - Page 21 INSTALLATION REQUIREMENTS/SPECIFICATIONS Table 2-3. Champ Connector Pinouts 50 Pin Champ Connector Signal Wire Color RX 1- Blue/White TX 1- Orange/White RX 2- Green/White TX 2- Brown/White RX 3- Gray/White TX 3- Blue/Red RX 4- Orange/Red TX 4- Green/Red RX 5- Brown/Red TX 5- Gray/Red...
-
Page 22: Epim Specifications
INSTALLATION REQUIREMENTS/SPECIFICATIONS 2.3 EPIM SPECIFICATIONS EPIMs let you connect the SEH to the main network using different media types. Cabletron Systems offers a variety of EPIMs. The following sections explain specifications for each EPIM. 2.3.1 EPIM-T The EPIM-T is an RJ45 connector supporting UTP cabling. It has an internal Cabletron Systems TPT-T™... -
Page 23: Epim-F1/F2
2.3.2 EPIM-F1/F2 The EPIM-F1 and EPIM-F2 shown in Figure 2-4 support Multimode Fiber Optic cabling. Each EPIM has an internal Cabletron Systems FOT-F™ Fiber Optic Transceiver. The EPIM-F1 is equipped with SMA Connectors and the EPIM-F2 is equipped with ST Connectors. -
Page 24: Epim-F3
INSTALLATION REQUIREMENTS/SPECIFICATIONS 2.3.3 EPIM-F3 The EPIM-F3 shown in Figure 2-5 supports Single Mode Fiber Optic cabling. It has an internal Cabletron Systems FOT-F™ Fiber Optic Transceiver and is equipped with ST Connectors. Specifications for the EPIM-F3 are listed below. Note: Transmitter Power decreases as temperatures rise and increases as temperatures fall. -
Page 25: Duty Cycle
INSTALLATION REQUIREMENTS/SPECIFICATIONS Receive Sensitivity Maximum Receive Input Power Transmitter Power* (At 25 C into 8.3/125 m fiber) Less Power * Transmit Power Typical Power Coefficient (See Note Below)-0.15dBm/ Parameter Transmitter Peak Wave Length Spectral Width Rise Time/ Fall Time Duty Cycle Bit Error Rate: Note: The transmitter power levels given above are Peak Power Levels after optical overshoot. -
Page 26: Epim-C
2.3.4 EPIM-C The EPIM-C supports thin-net coaxial cabling and is equipped with an internal Cabletron Systems TMS-3™ Transceiver. You can use the TERM switch on the front of the EPIM-C to set the internal 50 Ohm terminator. This eliminates the need to connect the port to a tee-connector and terminator. -
Page 27: Epim-A And Epim-X (Aui Port)
INSTALLATION REQUIREMENTS/SPECIFICATIONS 2.3.5 EPIM-A and EPIM-X (AUI Port) The EPIM-A is a DB15 female connector used to attach segments to an external transceiver. The EPIM-X is equipped with dual internal transceivers. It has a DB15 male connector used to attach segments to an AUI cable. -
Page 28: Transceiver Requirements
SQE test interpret the SQE test pulse as a collision. 2.5 OPERATING SPECIFICATIONS This section describes the operating specifications for the SEH. Cabletron Systems reserves the right to change these specifications at any time without notice. GENERAL Delay Times (Start of Packets):... -
Page 29: Power Supply Requirements
INSTALLATION REQUIREMENTS/SPECIFICATIONS JAM Output: Fragment Extension: Fault Protection: POWER SUPPLY REQUIREMENTS Note: The SEH has a universal power supply. This unit allows you to use an input power from 90 to 264 VAC, 47-63 Hz. The power supply has two outputs of +5 volts and +12 volts. The maximum output power is 20 watts and the minimum efficiency is 65% under all conditions of line at full load. -
Page 30: Environmental Requirements
PHYSICAL Dimensions: Weight: Predicted MTBF: Page 2-18 +5 to +50 C -30 to +90 C 5 to 95% (non-condensing) 2.8H x 17.0W x 8.0D inches (7.2 x 43.6 x 20.5 cm) 4.9 lbs SEH-22/32: 753,629 hours SEH-24/34: 847,921 hours... -
Page 31: Chapter 3 Installation
You can install the SEH to your network as a stackable or stand-alone hub. If you want to install the SEH on a wall or a 19-inch rack, Cabletron Systems offers an accessory kit that includes Rack Mount Brackets, Wall Mount Brackets, Mounting Screws, and a Strain Relief Bracket. -
Page 32: Stacking The Seh
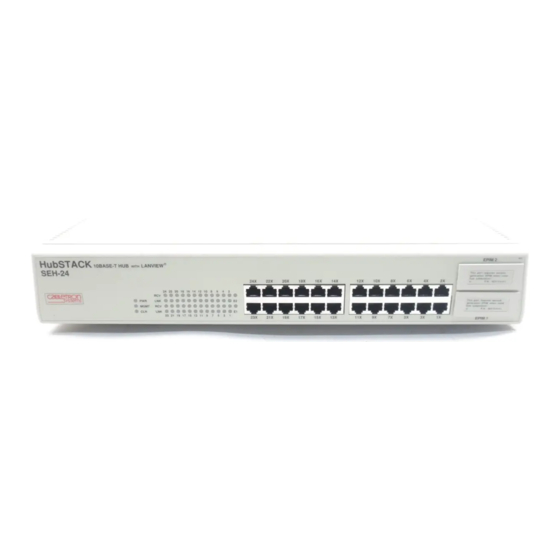
The rear panel of the SEH has an SEH Interconnect Bus In Port (female connector) and an SEH Interconnect Bus Out Port (male connector). You daisy chain units together using Cabletron Systems’ HubSTACK Interconnect cables. Table 3-1 describes each cable. - Page 33 2. Attach the other end of SEH HubSTACK Interconnect cable to the bus port labeled “IN” on the rear panel of the SEH next in the stack. 3. Attach up to four SEH hubs in the stack repeating steps 1 and 2. SEH-24 10BASE-T HUB LANVIEW®...
-
Page 34: Attaching The Strain Relief Bracket
If you disconnect one end of a HubSTACK Interconnect cable and leave the other end attached to the hub, ensure that you disconnect the cable from the “OUT” port as shown in Figure 3-2. This ensures that the HubSTACK Interconnect cable is terminated properly. SEH-24 10BASE-T HUB SEH-24 10BASE-T HUB... -
Page 35: Rack Mounting The Seh
SEH. HubSTACK 10BASE-T HUB SEH-24 Figure 3-4. Installing the Rack Mount Brackets 3. With the mounting brackets installed, position the SEH between the vertical frame members of the 19-inch rack and fasten it securely with the mounting screws as shown in Figure 3-5. -
Page 36: Wall Mounting The Seh
INSTALLATION 3.2.4 Wall Mounting the SEH When you wall mount the SEH, the cable connections must face down. Refer to Figure 3-6 and perform the following steps to wall mount the SEH. Note: 1/4-inch Molly screw anchors for wall mounting are not included with the SEH-ACCY-KIT package. -
Page 37: Free-Standing Installation
7 feet of its power source and with an unrestricted free surface area 21 inches wide, 18 inches deep and 6 inches high, as shown in Figure 3-7. 18 IN. HubSTACK SEH-24 6 IN. Figure 3-7. Shelf or Table-top Installation 21 IN. 10BASE-T HUB LANVIEW®... -
Page 38: Connecting The Seh To The Power Source
INSTALLATION 3.3 CONNECTING THE SEH TO THE POWER SOURCE Note: The SEH has a universal power supply. This allows you to connect the SEH to power sources from 90 Vac to 264 Vac, 47-63 Hz. To connect the SEH to the power source: 1. -
Page 39: Connecting Network Ports Seh-22 And Seh-24
Prior to connecting the network cabling check the connectors for the proper pinouts as shown in Chapter 2. 4.1.1 Connecting Network Ports SEH-22 and SEH-24 You attach unshielded twisted pair segments to the RJ45 Network Ports on the front panel of the SEH. Each twisted pair port on the SEH incorporates a Polarity Detection and Correction feature. -
Page 40: Connecting To The Network
Verify that the RJ45 connector on the twisted pair segment has the proper pinouts. Check the cable for continuity. Check that the twisted pair connection meets dB loss and cable specifications outlined Chapter 2. If a link still has not been established, contact Cabletron Systems Technical Support. Page 4-2... -
Page 41: Connecting Network Ports Seh-32 And Seh-34
4.1.2 Connecting Network Ports SEH-32 and SEH-34 The SEH-32 has a 50-pin Champ connector, while the SEH-34 has two 50-pin Champ connectors. This configuration of the SEH allows you to run a 50-pin feeder cable from the SEH to a punch down block. Each Champ connector supports 12 10BASE-T, twisted pair segments. -
Page 42: Connecting A Utp Segment To An Epim-T
Check that the 10BASE-T device and the SEH have power. b. Verify the cabling between the SEH and the 10BASE-T device. Check the cable for continuity. If a link has not been established, contact Cabletron Systems Technical Support. 4.1.3 Connecting a UTP Segment to an EPIM-T... -
Page 43: Connecting A Fiber Optic Link Segment To An Epim-F1
Check that the twisted pair connection meets dB loss and cable specifications outlined in Chapter 2. e. Check that the crossover switch is in the correct position. If a link still has not been established, contact Cabletron Systems Technical Support. 4.1.4 Connecting a Fiber Optic Link Segment to an EPIM-F1, EPIM-F2, or EPIM-F3 When connecting a fiber optic link segment to an EPIM-F1, F2, or F3... - Page 44 We recommend that you label the fiber optic cable to indicate which fiber is Receive and which is Transmit. When you buy fiber optic cable from Cabletron Systems, it is labeled so that: at one end of the cable, one fiber is labeled 1, and the other fiber is labeled 2.
- Page 45 F1/F2 SMA 905 Connectors Figure 4-4. The EPIM-F1, EPIM-F2 and EPIM-F3 3. Attach the fiber labeled 2 to the applicable transmit port labeled TX, on the module. 4. At the other end of the fiber optic cable, attach the fiber labeled 1 to the transmit port of the device.
-
Page 46: Connecting A Thin-Net Segment To An Epim-C
Verify that the fiber connection meets the dB loss specifications outlined in Chapter 2. If a link still has not been established, contact Cabletron Systems Technical Support. 4.1.5 Connecting a Thin-Net Segment to an EPIM-C... - Page 47 Connect a terminated thin-net segment to other female connector of tee-connector. CONNECTING TO THE NETWORK Attach thin-net segment directly to BNC connector when internal termination switch is set to on ( ). Figure 4-5. The EPIM-C Page 4-9...
-
Page 48: Connecting An Aui Cable To An Epim-A
CONNECTING TO THE NETWORK 4.1.6 Connecting an AUI Cable to an EPIM-A Caution: Ensure that the external transceiver to which the SEH will be connected does not have the signal quality error (SQE or “heartbeat”) test function enabled. The SEH will not operate if the transceiver has the SQE test function enabled, and the network will be unusable. -
Page 49: Connecting An Aui Cable To An Epim-X
1. Check that the SQE LED on the EPIM-X is off. If the SQE LED is on, check the position of the SQE switch. Note: If the SQE light remains on, even though the SQE switch is in the OFF position, contact Cabletron Technical Support. -
Page 50: Finishing The Installation
CONNECTING TO THE NETWORK ON Position (Toward Back of EPIM) OFF Position (Toward Front of EPIM) 4.2 FINISHING THE INSTALLATION The SEH is now ready for operation. Before placing the network into service, test the installation thoroughly, making sure that you can address all stations and that the SEH and all stations are indicating normal operation. -
Page 51: Chapter 5 Troubleshooting
This chapter contains instructions for using LANVIEW LEDs to troubleshoot physical layer network problems. 5.1 INSTALLATION CHECK-OUT After you connect the SEH to the network, verify that packets pass between all Ethernet devices connected to the SEH and any other devices connected to the network. -
Page 52: Using Lanview
The affected port remains segmented until a good packet is transmitted/ received without collisions. If the LNK LED is still not on, contact Cabletron Systems Technical Support. 5.2 USING LANVIEW The SEH incorporates the Cabletron Systems LANVIEW Status Monitoring and Diagnostics System. - Page 53 HubSTACK 10BASE-T HUB SEH-24 LED NAME LED COLOR (Power) Green (Solid) MGMT Green (Flashing) (Management) (Collision) Yellow (Flashing) (Receive) Green (Link) PWR (Green) When this LED is on it indicates that the SEH is receiving power. If this LED is off, it indicates a loss of input power. Check the input power source (circuit breaker, fuse, etc.).
- Page 54 TROUBLESHOOTING CLN (Red) This LED indicates that a collision has occurred on one of the ports. RCV (Yellow Flashing) When this LED flashes, it indicates that the SEH is receiving data packets from the associated port segment. Each SEH port has a corresponding RCV LED: •...
-
Page 55: Appendix B Twisted Pair Wiring Tables
TWISTED PAIR WIRING TABLES This appendix contains twisted pair wiring tables which will assist you if you are using a Punch Down block (see Figure A-1) to wire your twisted pair segments. The following tables are included in this appendix: •... - Page 56 TWISTED PAIR WIRING TABLES Note: Pins 25 and 50 on Champ connector are not used. Table A-1. Twisted Pair Wiring from an SEH-32/34 to a Punch Down Block From Into and Out of SEH-32/34 50-Pin Feeder Cable Port 12/24 48 Violet/Green RX+ 23 Green/Violet RX- 49 Violet/Brown TX+ 24 Brown/Violet TX-...
- Page 57 Table A-1. Twisted Pair Wiring from an SEH-32/34 to a Punch Down Block (Continued) From Into and Out of SEH-32/34 50-Pin Feeder Cable Port 8/20 40 Black/Gray 15 Gray/Black 41 Yellow/Blue 16 Blue/Yellow Port 7/19 38 Black/Green RX+ 13 Green/Black RX- 39 Black/Brown TX+ 14 Brown/Black TX- Port 6/18...
- Page 58 TWISTED PAIR WIRING TABLES Table A-1. Twisted Pair Wiring from an SEH-32/34 to a Punch Down Block (Continued) From Into and Out of SEH-32/34 50-Pin Feeder Cable Port 4/16 32 Red/Orange 33 Red/Green Port 3/15 30 White/Gray 31 Red/Blue Port 2/14 28 White/Green RX+ 29 White/Brown TX+ Port 1/13...
- Page 59 Table A-2. Twisted Pair Wiring from a Punch Down Block to a 10Base-T Device From Punch Down Block Port 12/24 B45 Violet/Green B46 Green/Violet B47 Violet/Brown B48 Brown/Violet Port 11/23 B41 Violet/Blue B42 Blue/Violet B43 Violet/Orange B44 Orange/Violet Port 10/22 B37 Yellow/Brown B38 Brown/Yellow B39 Yellow/Gray...
- Page 60 TWISTED PAIR WIRING TABLES Table A-2. Twisted Pair Wiring from a Punch Down Block to a 10Base-T Device (Continued) From Punch Down Block Port 8/20 B29 Black/Gray B30 Gray/Black B31 Yellow/Blue B32 Blue/Yellow Port 7/19 B25 Black/Green B26 Green/Black B27 Black/Brown B28 Brown/Black Port 6/18 B21 Black/Blue...
- Page 61 Table A-2. Twisted Pair Wiring from a Punch Down Block to a 10Base-T Device (Continued) From Punch Down Block Port 4/16 B13 Red/Orange B14 Orange/Red B15 Red/Green B16 Green/Red Port 3/15 White/Gray B10 Gray/White B11 Red/Blue B12 Blue/Red Port 2/14 White/Green Green/White White/Brown...
- Page 62 TWISTED PAIR WIRING TABLES Table A-3. Twisted Pair Wiring Summary SEH-32/34 Punch Champ Down Block Port 12 48 RX+ A45 RX+ 23 RX- A46 RX- 25 Pin Feeder 49 TX+ A47 TX+ Cable 24 TX- A48 TX- Port 11 46 RX+ A41 RX+ 21 RX- A42 RX-...
- Page 63 TWISTED PAIR WIRING TABLES Figure A-1. Punch Down Block Page A-9...
-
Page 64: Power Supply Cord
POWER SUPPLY CORD The mains cord used with this equipment must be a 2 conductor plus ground type with minimum 0.75 mm square conductors and must incorporate a standard IEC appliance coupler on one end and a mains plug on the other end which is suitable for the use and application of the product and that is approved for use in the country of application.
Need help?
Do you have a question about the SEH-24 and is the answer not in the manual?
Questions and answers