Table of Contents
Advertisement
Quick Links
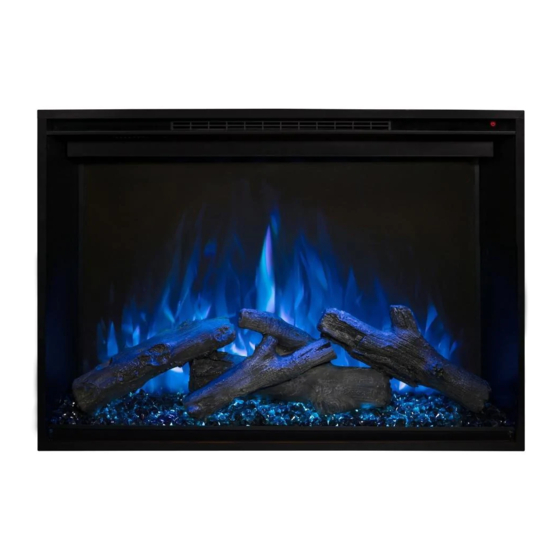
Redstone Built-in (or Insert) Electric Fireplace
Model#:
WARNING
CAUTION
AFFIX SERIAL NUMBER LABEL HERE
FOR FUTURE REFERENCE
RS-2621-AU
RS-4229-AU
OWNER'S MANUAL
AC 230V 50Hz 1465W (5000BTUs)
Read and understand this entire owner's manual, including all safety
information, before plugging in or using this product. Failure to do so could
result in fire, electric shock, or serious personal injury.
Keep this owner's manual for future reference. If you sell or give this
product away, make sure this manual accompanies this product.
RS-3021-AU
RS-5435-AU
RS-3626-AU
REV 2021.01.12
Advertisement
Table of Contents

Related Manuals for Modern Flames Redstone RS-2621-AU


Summary of Contents for Modern Flames Redstone RS-2621-AU
- Page 1 Redstone Built-in (or Insert) Electric Fireplace Model#: RS-2621-AU RS-3021-AU RS-3626-AU RS-4229-AU RS-5435-AU OWNER’S MANUAL AC 230V 50Hz 1465W (5000BTUs) Read and understand this entire owner’s manual, including all safety information, before plugging in or using this product. Failure to do so could WARNING result in fire, electric shock, or serious personal injury.
-
Page 2: Important Safety Information
IMPORTANT SAFETY INFORMATION! WARNING l Read all instructions before installing or using this heater. l Use a dedicated 10 Amp (or higher) breaker. l This heater is hot when in use. To avoid burns, DO NOT let bare skin touch hot surfaces. If provided, use handles when moving this heater. - Page 3 l This product is not intended to be a primary heat source. It is for supplemental heat only. l ALWAYS disconnect this unit from the power supply before performing any assembly or cleaning, or before relocating the electric fireplace. l ALWAYS store this heater in a dry location. NEVER use the fireplace if it has become wet. l NEVER plug this heater into an outlet that is old, cracked, or has any loose wires or connections.
-
Page 4: Parts And Hardware
Parts and Hardware C – Screws A – Fireplace B-Instruction manua D-Remote Control E-Driftwood Logs F-Small glacier crystals G - Screw cover H - 1 5/8” (41mm) Trim kit I – Hardware Kit... - Page 5 Specification and Dimensions PRODUCT DIMENSIONS WITH 5/8” (16mm) TRIM Model Number 24" 18- 7/8" 9- 7/8" 22- 3/4" 18- 1/2" 9- 1/4" 22- 3/4" RS-2621-AU [610mm] [479mm] [250mm] [578mm] [470mm] [234mm] [578mm] 29-1/4" 18- 7/8" 9- 7/8" 28" 18- 1/2" 9- 1/4"...
- Page 6 PRODUCT DIMENSIONS WITH 1-5/8” (41mm) TRIM Model Number 26" 20- 7/8" 9- 7/8" 22- 3/4" 18- 1/2" 9- 1/4" 22- 3/4" RS-2621-AU [660mm] [529mm] [250mm] [578mm] [470mm] [234mm] [578mm] 31-1/4" 20- 7/8" 9- 7/8" 28" 18- 1/2" 9- 1/4" 28" RS-3021-AU [793mm] [529mm]...
-
Page 7: Installation And Assembly
Installation and Assembly Select a suitable location that is not susceptible to moisture and is away from drapes, furniture, and high traffic areas. NOTE: Follow all National and local electrical codes. MINIMUM CLEARANCE TO COMBUSTIBLES Measurements are taken from the glass front. Bottom 0"... -
Page 8: Built-In Installation
Built-In Installation This fireplace is designed to be installed in two different methods: 1) Built-In Mounted (mounted in a wall that has been custom framed for this fireplace). Electrical power to be hardwired. 2) Insert Mounted (inserted into an existing fireplace). Electrical power to be plugged in to receptacle (power cord supplied). - Page 9 (Built-In Installation Continued) Hard Wiring Power-In WARNING TURN OFF THE FIREPLACE COMPLETELY AND LET COOL BEFORE SERVICING. ONLY A QUALIFIED SERVICE PERSON SHOULD SERVICE AND REPAIR THIS ELECTRIC FIREPLACE. Note: A qualified electrician must remove the supplied plug and cable and wire the fireplace directly to the household wiring.
- Page 10 (Built-In Installation Continued) Remove Front Glass A. With one hand on the front glass to prevent it from falling, remove the screws from the top of the glass. Set the screws aside. B. Lean the glass towards you. With hands on each side of the glass, carefully lift the front glass up and away from the fireplace.
- Page 11 (Built-In Installation Continued) Install Fireplace A. Remove power cord from rear of fireplace and complete hard-wiring (see “hard-wiring installation” section, page 8 in this manual). B. Insert the fireplace into opening and adjust feet to desired height. Secure by installing 4 screws (supplied) through the side holes.
- Page 12 (Built-In Installation Continued) D. Install Glacier Crystals and Logs Install logs first. Connect log-set by plugging the connector to the socket as shown below. Add Glacier Crystals around logs. Install glass front in reverse order from removal.
-
Page 13: Insert Installation
Insert Installation This fireplace is designed to be installed in two different methods: 1) Built-In Mounted (mounted in a wall that has been custom framed for this fireplace). Electrical power to be hardwired. 2) Insert Mounted (inserted into an existing fireplace). Electrical power to be plugged in to receptacle (power cord supplied). - Page 14 (Insert Installation Continued) Remove Front Glass A. With one hand on the front glass to prevent it from falling, remove the screws from the top of the glass. Set the screws aside. B. Lean the glass towards you. With hands on each side of the glass, carefully lift the front glass up and away from the fireplace.
- Page 15 (Insert Installation Continued) Install Fireplace A. Plug-in power cord to power outlet installed inside existing fireplace. B. Insert the fireplace in the opening until it is fully inserted and adjust feet to desired height. The fireplace is held in place by gravity and friction; no need to use screws. Power IN wires C.
-
Page 16: Operation
Operation Read and understand this entire owner’s manual, including all safety information, before plugging in or using this product. Failure to do so could result in electric shock, fire, serious injury, or death. Methods of Operation This electric fireplace can be operated by the TOUCH ON CONTROL PANEL, located on the UPPER right corner of the fireplace or by the battery-powered REMOTE CONTROL. - Page 17 Control Panel BUTTON FUNCTION ACTION & INDICATION ON: Enables control panel functions and 1. Press once: Indicator light turns on. remote control. Turns on flame. Power turns on. All functions enabled. OFF: Disables control panel functions and 2. Press again: Flame turns off. Unit goes POWER remote control.
- Page 18 Remote Control Operation BUTTON FUNCTION ACTION & INDICATION ON: Enables control panel functions and 1. Press once: Indicator light turns on. remote control. Turns on flame. Power turns on. All functions enabled. OFF: Disables control panel functions and 2. Press again. Flame turns off. Unit goes to POWER remote control.
- Page 19 HEATER button: Turns heater on and off. Turns the heater and blower on/off. NOTE: The heater only works when the Settings: flame is on. If the flame is off, the heater H0 - Heater and blower off will not turn on. H1 - Low Heater on with 733W NOTE: To prevent overheating, the heater HEATER...
-
Page 20: Temperature Limiting Control
When the heater is first turned on, a slight odor may be present. This is normal and NOTICE should not occur again unless the heater is not used for a long period of time. To improve operation, aim the remote control at the front of the fireplace. DO NOT NOTICE press the buttons too quickly. -
Page 21: Care And Maintenance
Care and Maintenance Cleaning ALWAYS turn the heater OFF and remove the power from the fireplace before cleaning, performing maintenance, or moving this fireplace. Failure to do so could result in electric shock, fire, or personal injury. NEVER immerse in water or spray with water. Doing so could result in electric shock, fire, or personal injury. - Page 22 Optional, Extra-Wide Trim Some “insert “installations require “Extra-Wide Trim” to cover existing fireplace edges. For this purpose, extra-wide black trim sets area available and sold separately. Each set come with an extra bottom piece of trim for low-clearance hearth installations. Part Trim Width Overall Size...
-
Page 24: Australia/New Zealand
DO NOT RETURN TO STORE! CALL US FIRST For immediate help with installation, product information or if your product arrives damaged, please call our toll-free number at: AUSTRALIA/NEW ZEALAND 07 5630 6837 (Monday - Friday, 9:00AM - 4:00PM, AEST) Or email us at: info@modernflames.com EUROPE +46 762 09 58 09...
Need help?
Do you have a question about the Redstone RS-2621-AU and is the answer not in the manual?
Questions and answers