Advertisement
Quick Links
Operating and
Installation Instructions
HƯỚNG DẪN SỬ DỤNG
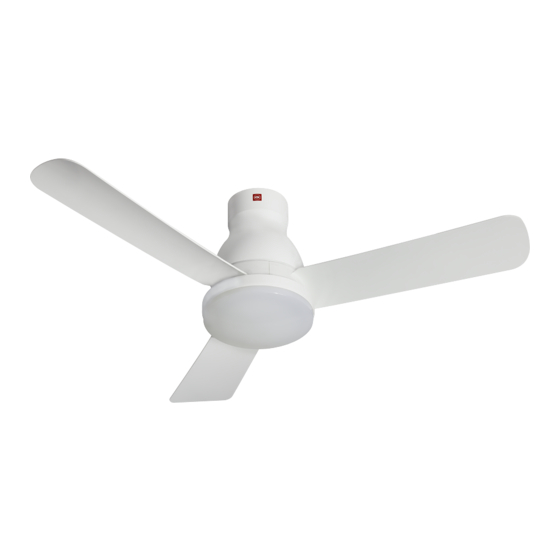
Ceiling Fan
Model No. /
Ki u máy
U48FP
Operating and
Installation Instructions
Ceiling Fan
Thank you for purchasing this KDK product.
Before operating this product, please read the instructions
carefully, and save this manual for future use.
Contents
Safety precautions
Name of parts
How to install
How to use
Maintenance
Specifi cations
Hướng Dẫn Sử Dụng và
Lắp Đặt
Quạt Trần
Cảm ơn quý khách hàng đã mua sản phẩm quạt KDK.
Trước khi sử dụng sản phẩm này, xin vui lòng đọc kỹ các hướng dẫn
và cất giữ sách hướng dẫn sử dụng này để tham khảo sau này.
Nội dung
Chú ý về an toàn
Các bộ phậ
n
Cách lắp đặt
Cách sử dụng
Bảo dưỡng
Thông số kỹ thuật
1
Safety precautions
COMPULSORY.
A state that may be caused by the
mishandling of products, which, if not
WARNING
avoided, may lead to the possibility of
death or serious injury of users.
WARNING
2
4
Follow strictly all the instructions given in this manual for
5-10
installation.
Electrical or installation work needs to be performed by a
10-15
qualifi ed individual.
Back cover
Installation error can cause fi re, electrical shock, injury or
Back cover
Ceiling Fan to drop.
This appliance is not intended for use by persons
(including children) with reduced physical, sensory or
mental capabilities, or lack of experience and knowledge,
unless they have been given supervision or instruction
concerning use of the appliance by a person responsible
for their safety. Children should be supervised to ensure
that they do not play with the appliance.
Switch off the power supply and wait until the Blades is
fully static, before cleaning or doing any maintenance jobs.
Can cause injury or electrical shock if Ceiling Fan move
suddenly.
Kindly refer to your authorized dealer for repairing or
maintenance.
Tighten the Blade Screws fi rmly using a screwdriver.
4
(250-300 N•cm)
Can cause injury if Blade drops.
4
Ensure that the ceiling hook can sustain more than
5-10
10 times the Ceiling Fan weight.
10-15
Can cause injury if Ceiling Fan drops.
Stop using the Ceiling Fan when any abnormality or failure
Bìa sau
occurs and turn "OFF" the Miniature Circuit Breaker
Bìa sau
(MCB).
Risk of smoke, fi re, electrical shock or drop.
Please contact your authorized dealer for repairing or
maintenance.
Dismantle the broken or damaged Ceiling Fan.
Can cause injury if Ceiling Fan drops.
Do not install the Ceiling Fan at oily and dusty places.
Can cause fi re or electrical shock due to short circuit.
Do not install the Ceiling Fan near fl ammable areas such
as a gas cooker.
Can cause fi re or electrical shock due to short circuit.
Do not install the Ceiling Fan near chemicals and alkali.
Can cause fi re or electrical shock due to short circuit.
Do not damage the wire during installation eg. deform due
to heat, twist, bend, etc.
Can cause fi re or electrical shock due to short circuit.
Do not use power supply other than rated voltage
mentioned.
Overheating can cause electrical shock or fi re.
Do not insert any metal items in the battery area with the
Battery.
Can cause fi re or electrical shock due to short circuit.
Do not hang onto the Ceiling Fan.
Can cause injury if Ceiling Fan drops.
Do not disassemble the Ceiling Fan unless stated by this
manual.
Must use only supplied parts.
Can cause fi re, electrical shock, injury or Ceiling Fan to drop.
Always follow these instructions
Can cause injury, damage or Ceiling Fan to drop.
PROHIBITED.
Do not sprinkle water to Ceiling Fan or do not wet the
Ceiling Fan.
Can cause fi re or electrical shock due to short circuit.
A state that may be caused by the
mishandling of products, which, if not
CAUTION
avoided, may result in the injury of users
or property damage.
CAUTION
To avoid the possibility of causing injury to users or
damage to properties, please follow all the explanation
written in this manual. The manufacturer will not be
responsible for any accidents or injuries caused by
defective, defi cient installation or installation which does
not follow the instruction manual.
Ceiling Fan must be mounted above 2.3 m from the fl oor
and 1 m from the wall to the Blade.
Can cause unstable air fl ow and affect the Ceiling Fan to
wobble.
Can cause injury if Ceiling Fan drops.
Refer to Step 2 -
on page 14 for the measurement method.
1
After installation make sure the Ceiling Fan does not
wobble extremely.
Can cause injury if Ceiling Fan drops.
Replace all the Blades if any of them breaks or cracks.
Wobbling can cause the Ceiling Fan to drop.
Do not install the Ceiling Fan at a wet, high temperature
and high humidity area such as shower room.
If an electrical current leakage occurs, it can cause electrical
shock or fi re easily.
This product is for in house use only. Do not install at a
windy places.
Can cause rust, discolour, damage or injury.
Do not install at places where there is high vibration and
impact.
Can cause injury if Ceiling Fan drops.
Avoid fi xing inside dome ceiling.
Can cause unstable air fl ow and affect the Ceiling Fan to
wobble.
Can cause injury if Ceiling Fan drops.
Do not expose yourself continuously to direct wind from
the Ceiling Fan.
It may cause discomfort.
Wipe away dirt with a clean soft cloth, ordinary soap and
water to keep the Ceiling Fan clean. Do not use solvents
(gasoline, petroleum, thinner, benzine, alcohol, cleaning
powder, alkaline detergent) or any other chemicals.
Can cause plastic part deformation and metal corrosion. Can
cause injury if parts drop.
Ensure that the Ceiling Hook ("J" Hook) or ("U" Hook) or
Hanger Base is not loosen. Tighten the Bolt and Nut of
the Pulley Set Plate fi rmly using a torque wrench.
(1500-1800 N•cm)
Wobbling can cause the Ceiling Fan to drop.
Refer to Step 2 on page 7 for the installation method.
After power failure recovery, the LED light will turn into
high brightness. Turn OFF the wall switch when the LED
Ceiling Fan is not in use for a prolonged period of time.
When the light is ON, do not direct view the light for a long
time.
Can cause discomfort to the eyes.
Do not use at the area near to hot spring and volcanic.
Can cause the lighting not lit.
2
Advertisement

Related Manuals for KDK U48FP


Summary of Contents for KDK U48FP
- Page 1 Switch off the power supply and wait until the Blades is Cảm ơn quý khách hàng đã mua sản phẩm quạt KDK. Can cause injury if Ceiling Fan drops. fully static, before cleaning or doing any maintenance jobs.
- Page 2 Các bộ phận Chú ý về an toàn Name of parts Phải luôn thực hiện theo các hướng dẫn này Để tránh khả năng người sử dụng bị chấn thương hay thiết bị bị hư hỏng, hãy tuân theo những hướng dẫn sau đây. Biểu tượng này thể...
- Page 3 How to install Cách lắp đặt Ø 8.5 mm Ø 6.5 mm 68 mm 125 mm 45 mm 30 mm 37.5 mm ■ Install the Blades Put the Motor Unit on the round 37.5 mm portion (INSTALLATION AREA ) of the PACK B as shown to assemble the Blade Assembly...
- Page 4 ■ Attention: Check point after installation Kiểm tra sau khi lắp ðặt It is recommended to user to install OFF/ ON switch on the wall for the Ceiling Fan, replacing existing regulator or new regulator point. Make sure Bolt and Nut are fully tightened and Cotter Pin is Phải đảm bảo tất cả...
- Page 5 vào Khe Cố Định của Nắp Chụp Dưới Ngắm thẳng và đặt Vòng Cố Định của Nắp Chụp Trên Móc vào cho đến khi nó được cố định hoàn toàn. (2 chiếc) được đặt trên phần đầu của Nắp Chụp Dưới Phải đảm bảo Nắp Chụp Trên Kiểm tra khoảng trống giữa Nắp Chụp Trên và...
- Page 6 ■ ■ ■ 1/f YURAGI (natural breeze) How to use Remote Control Cách sử dụng Điều Khiển Từ Xa Add smooth accent to air capacity and comfortable wind more naturally. To activate 1/f YURAGI function according to speed setting OFF/ON Button Nút OFF/ON Select a desired speed (speed 1~9).
- Page 7 Timer / Wall switch is ON and LED light is activated at the High brightness level Đồng hồ hẹn giờ Press for the fi rst time to set for the → → → → Medium brightness level → → → Speed 9 / →...
- Page 8 Air Delivery (m /min) Lưu Lượng Gió (m /min) Net Weight (kg) Trọng Lượng Tịnh (kg) KDK Company, Division of PES Printed in Malaysia Head Office: 4017, Takaki-cho, Kasugai, Aichi, Japan. U48FP8001ZM © KDK Company, Division of PES 2015 M1215-0...
Need help?
Do you have a question about the U48FP and is the answer not in the manual?
Questions and answers