Table of Contents
Advertisement
Quick Links
INSTALLATION
MANUAL
One-way Cassette Type
Digital Scroll and DC/AC Inverter Commercial Air-conditioner
KCOF-22 DN2.4
KCOF-36 DN2.4
KCOF-71 DN2.4
Original instructions The Digital Scroll and DC/AC Inverter share the same indoor units. Thank you very much for
purchasing our air conditioner,please read this manual carefully and keep it for future reference.
Advertisement
Table of Contents

Related Manuals for Kaysun KCOF-22 DN2.4


Summary of Contents for Kaysun KCOF-22 DN2.4
- Page 1 INSTALLATION MANUAL One-way Cassette Type Digital Scroll and DC/AC Inverter Commercial Air-conditioner KCOF-22 DN2.4 KCOF-36 DN2.4 KCOF-71 DN2.4 Original instructions The Digital Scroll and DC/AC Inverter share the same indoor units. Thank you very much for purchasing our air conditioner,please read this manual carefully and keep it for future reference.
-
Page 2: Table Of Contents
CONTENTS PAGE 2. ACCESSORIES Table.2-1 INSTALLATION PRECAUTION ..............1 Name Q'ty Outline Function UNIT STRUCTURE INTRODUCTION ............2 Indoor unit This manual (Please hand to user) INSTALLATION SPACE................2 installation manual INTDOOR UNIT INSTALLATION ..............2 For installing the suspender Installation paper plate DRAINPIPE INSTALLATION. -
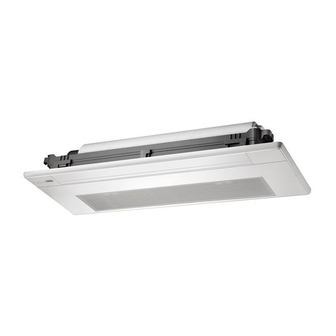
Page 3: Unit Structure Introduction
3. Unit structure introduction 4. INSTALLATION SPACE Please avoid installing in the following places Unit:mm ● A place with flammable gas or material. ● A saline place such as a seashore vicinity ● A place with sulphur gas. ● A place with oil gas, such as kitchen. ●... - Page 4 ● Steel roof beam structure Model 22-36 Unit:mm Install the supporting angle steel. Hanging screw bolt 1100 1290 1015 1235 Supporting angle steel Hanging bolts Fig.5-5 Please accord to the follow figure’s requirements to design the length Hoisting the indoor unit of the suspender bolt.
- Page 5 ● Install the panel component, and wiring (take 22-36 as an example, operation method of 71 are the same.) ● Two buckles on the panel component are used for assisting the panel installation, the installing method of the buckle as Fig.5.10 display.
-
Page 6: Drainpipe Installation
6. DRAINPIPE INSTALLATION Install the screw ● Before installation please check the connecting cable When connecting the pipe, please use the sealing material and between panel and air conditioner whether has clamped, if pipe glove. clamped, the panel will be unfairness after fastening the screws and damage the wires. -
Page 7: Install The Connecting Pipe
Please according to the tube hardness to choose proper 7. INSTALL THE CONNECTING PIPE support density, do not appear obvious dropping and deforma- tion situation. Dropping part will save the water and lead to poor drainage and abnormal noise. The connective length of indoor and outdoor piping and those height difference requirements. -
Page 8: Refrigerant Pipe Connection
Use frozen oil Fig.8-2 Fig.7-1 Table.8-1 Bend the pipe with thumb A(mm) Outside diameter Fig.7-2 Φ6.4mm 12.4 12.0 Φ9.5mm Make the ends Φ12.7mm 15.8 15.4 straight Fig.7-3 19.0 18.6 Φ15.9mm Fasten the nut Locate The Pipe ● Put the connecting tubing at the proper position, wrench the ●... - Page 9 9. WIRING Air Purging Attaching wiring ● Use a vacuum pump, to vacuum from the gas side refrigerant adding mouth of the outdoor unit. ● The air conditioner should use separate power supply with rated voltage. ● Don’t use the refrigerant of the outdoor unit to do the vacuum. (A certain volum e of refrigerant had been added into the ●...
- Page 10 Code Name Fan motor Connect the To panel GM1-2 Swinging motor outer network control/ module, short display box TRANSFORMER Water drainage pump connect if no this module. Water level sensor X Y E Electronic expansion valve Indoor temp. sensor Mid-pipe temp. sensor of evaporator CN5 CN20 CN15 CN10 Outlet temp.
- Page 11 Outdoor power supply RCCB Wire slot Grounding line Indoor unit Grounding line Indoor power supply RCCB Signal wire for communicate indoor unit and outdoor unit Fig.9-4 Indoor Unit Wiring Guideline Ribbon which can be used repeatedly Press down can loosen Caution! For wiring 5-core cable plug on the panel connects to CN22 convenience, two...
-
Page 12: Control Operation
10. CONTROL OPERATION Network address set ● Network address is set by communication of indoor and Horsepower set outdoor unit; the address is the same as indoor address, there is no need to set separately. ● The central control of indoor units can be done on outdoor unit, there is no need to control indoor unit separately, for details ●... - Page 13 Main board Code designation 0/1 definition of each dial code switch: means 0 means 1 ● 1 means factory test mode ● Reserved ● 2 means auto-addressing (Factory default is 0) mode (Factory default is 1234 1234 ● 00 means shutting down the unit ●...
-
Page 14: Test Operation
TEST OPERATION CAUTION The test operation must be carried out after the entire installation A protection feature prevents the air conditioner from being activated for has been completed. approximately 3 minutes when it is restarted immediately after shut off. Please confirm the following points before the test operation: ●... - Page 15 MD13I-024KW 16126000000044...
Need help?
Do you have a question about the KCOF-22 DN2.4 and is the answer not in the manual?
Questions and answers