Advertisement
Quick Links
INSTALLATION & OPERATION
GSM Retail Australia Pty Ltd ABN: 53 007 582 475
For Warranty and technical queries: 1300 373 199 Aust OR 0800 764 912 NZ
www.belliniappliances.com.au Model: BOT608B-F FINELINE:513641 AUST & NZ 60cm Electric Oven
INSTRUCTIONS
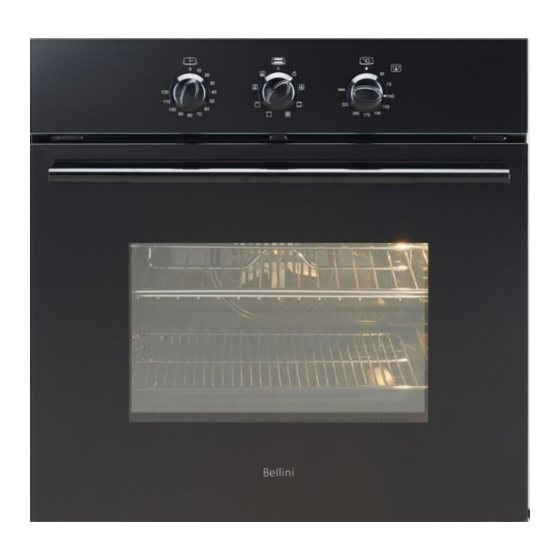
60cm Built In Electric Oven
Model No.
BOT608B
BOT608B-F
FINELINE: 5103641 Aus & NZ
V.6 JULY20
Advertisement

Related Manuals for Bellini BOT608B


Summary of Contents for Bellini BOT608B
- Page 1 FINELINE: 5103641 Aus & NZ GSM Retail Australia Pty Ltd ABN: 53 007 582 475 V.6 JULY20 For Warranty and technical queries: 1300 373 199 Aust OR 0800 764 912 NZ www.belliniappliances.com.au Model: BOT608B-F FINELINE:513641 AUST & NZ 60cm Electric Oven...
- Page 2 For all warranty and technical queries please contact 1300 373 199 GSM Retail Australia Pty Ltd ABN: 53 007 582 475 For Warranty and technical queries: 1300 373 199 Aust OR 0800 764 912 NZ www.belliniappliances.com.au Model: BOT608B-F FINELINE:513641 AUST & NZ 60cm Electric Oven...
-
Page 3: Table Of Contents
Maintenance and cleaning -------------------10 Warranty------------------------------------------ 13 GSM Retail Australia Pty Ltd ABN: 53 007 582 475 For Warranty and technical queries: 1300 373 199 Aust OR 0800 764 912 NZ www.belliniappliances.com.au Model: BOT608B-F FINELINE:513641 AUST & NZ 60cm Electric Oven... -
Page 4: Safety Instructions
The manual should be kept in a safe place for future reference. In case of failure, only the Authorised Technical Service may repair this oven. Otherwise the guarantee will be null and void. All Bellini Appliances are for domestic use only. - Page 5 flowing installing instructions. Grill The unit's power cord must be connected to a Do not cover the grill insert with foil, as fat built up properly grounded and protected, 220-240V may catch on fire. electrical outlet. Always ground fault Always keep the grill dish clean as any build up protection where required by the electrical code.
-
Page 6: Product Description
Product Description A. Minute Timer Knob D. Heating Indicator Light B. Function Select Knob E. Handle C. Temperature Select Knob F. 3 Layer Glass Door Accessories Accessory Name Picture Quantity 2 pcs Mounting Screws(ST4x20) Baking Pan & Rack 1 Pair Rack 2 pcs Tray handle... - Page 7 Technical data product dimensions electrical min. fuse max. power max. current model (L x W x D) mm connection rating rating rating All 2 models 595x596x575 220-240V/50Hz 2.7 – 3.22Kw 13.4A Heating elements Motor Oven lower heating el.: 1200Watt Oven inside heating el. 1900 Watt Oven upper heating el.: 1000Watt Total grill heating el.
-
Page 8: Installation
Installation The unit panels next to the appliance must be WARNING! Please follow the points below when heat resistant. In the case of veneered wood installing the appliance units, glue must be resistant to a temperature of 120°C. If the appliance is to be installed adjacent to vinyl Use an Authorised Person Installation should be carried out according to the wrapped surfaces, use an installation kit... - Page 9 The unit panels next to the appliance must be heat Cabinet Construction For Your Appliance The sizes of the unit for installing the appliance under resistant. In the case of veneered wood units, glues a worktop or in a column unit are shown in figure. must be resistant to a temperature of 120°C.
-
Page 10: Oven Setting
Oven Settings Preparing Your Oven 1. Please remove all stickers, leaflets and boxes from the door and from the floor of the oven before operation. 2. Please wipe out the oven interior prior to operation with warm soapy water and polish dry with a soft clean cloth. - Page 11 Function Selector function description When the selector knob is in any position other than the “0”position, the oven light Oven Light comes on. Select this function, the air at ambient temperature is distributed inside the oven for Defrost defrosting food more quickly and without proteins adulteration. Both the lower and upper heating elements operate together.
- Page 12 Select the Temperature To set the temperature, turn the temperature selector in a clockwise direction to the desired setting. An indicator light above the temperature selector will come on. A thermostat controls the temperature in your appliance. When the temperature is reached, the heating source switches itself off and the indicator light goes out.
-
Page 13: Maintenance And Cleaning
Maintenance & Cleaning WARNING! Before cleaning your oven, or performing maintenance, disconnect it from the power supply. Do not use steam cleaners. Do not line the oven bottom with aluminium foil, as the consequent accumulation of heat could compromise the cooking and damage the enamel. To protect against the risk of electrical shock, do not immerse the unit, cord or plug in water or other liquid or sprinkle water to clean the appliance! Do not clean the appliance when it is still hot! The inside and external surface of the oven should preferably... - Page 14 Replacement of the Oven Light Bulb WARNING! Ensure that the appliance is switched off before replacing the lamp to avoid the possibility of electric shock. Cut off the supply of power to the oven by turning off the omni-polar switch connecting it to the mains, or by removing the plug if it is accessible;...
- Page 15 Step 1 Step 2 Step 3 Step 4 Troubleshooting Faults Causes Remedies The upper crust is dark and Not enough heat from the bottom Use the natural convection position. the lower part too pale Use deeper cake tins. Lower the temperature. Put the cake on a lower shelf.
-
Page 16: Warranty
Consumer until the expiry of three (3) year (Warranty Period). If within the Warranty Period a manufacturing defect is discovered in the Bellini product or it fails to perform to the Company’s specifications as a result of some defect in materials, components or workmanship (Defect) then the Company will, at its option, repair the Bellini product or supply a replacement Bellini product free of charge. - Page 17 1.10 If you are required to transport the Bellini product to the Company or its service agent, you must ensure it is safely disconnected by a qualified tradesman and securely packed and insured. The Company does not accept any responsibility for loss or damage of the Bellini product prior to it being received by the Company or its service agent.
Need help?
Do you have a question about the BOT608B and is the answer not in the manual?
Questions and answers