Table of Contents
Advertisement
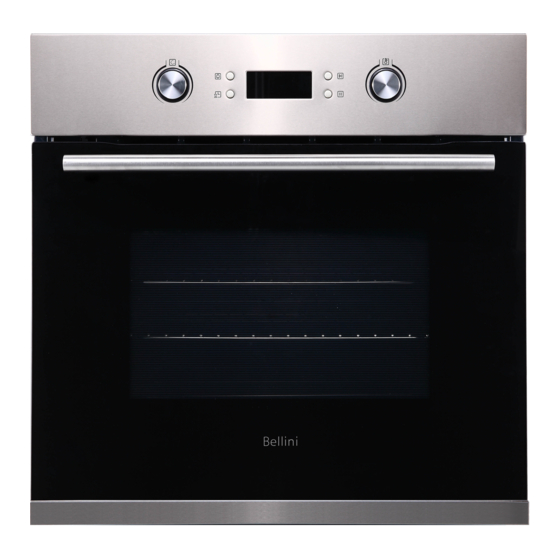
60cm Built In
Electric Oven
Installation and User manual
Content
Important Safety instructions-------------------- 2
Product description--------------------------------- 4
Installation-------------------------------------------- 7
Start using your oven------------------------------- 9
Troubleshooting --------------------------------------12
Maintenance and cleaning------------------------ 13
Warranty----------------------------------------------- 15
the nearest authorised service centre
20150813 issue 2
BOM609CX-F
BOM609CX
1
Advertisement
Table of Contents

Related Manuals for Bellini BOM609CX-F


Summary of Contents for Bellini BOM609CX-F
-
Page 1: Table Of Contents
Product description--------------------------------- 4 Installation-------------------------------------------- 7 Start using your oven------------------------------- 9 Troubleshooting --------------------------------------12 Maintenance and cleaning------------------------ 13 Warranty----------------------------------------------- 15 For warranty service call 1300 373 199(Australia) BOM609CX-F or 0508 123108(New Zealand) to connect you to BOM609CX the nearest authorised service centre... -
Page 2: Important Safety Instructions
Important Safety Instructions This manual explains the proper installation and use of your oven, please read it carefully before using even if you are familiar with the product. The manual should be kept in a safe place for future reference. General Warnings Child Safety ... - Page 3 To reduce the risk of fire, do not place or install Do not use the door as a shelf. this unit in areas where the ventilation or Do not push down when the oven door is open. circulation ducts may become blocked.
-
Page 4: Product Description
Product Description Function Selection Knob Select what function you want or +/- time digit Plus/minus Knob Increase/decrease temperature or time digit To enter into minute minder program before Minute Minder Button cooking start. LED display 1. To tell which function you choose 5. -
Page 5: Technical Specifications
Accessory Name Picture Quantity Baking tray 1 pair Grill rack Distant holder Screws(ST4x35) Technical Specifications product dimensions usable electrical max. power (h x w x d) mm net weight capacity connection rating 595 x 595 x 575 Approx. 35Kg 65 litres 220-240V/50Hz 3.0kW... -
Page 6: Installation
Installation WARNING! Please follow the points below when installing the appliance available from the vinyl-wrap supplier. Use an Authorized Person As stated in the local municipal building codes GSM cannot accept responsibility for damage and other relevant statutory regulations: caused by installation into low temperature ... - Page 7 Cut-out dimensions G560 E600 F570 min. A595 H560 D606 C575 B595 Remark: 1.Only plus deviations are admissible for all dimension. 2.The cabinet is not include the power switch or socket. NOTE: The number of a accessories included depends on the particular appliance purchased. Secure the oven to cabinet ...
-
Page 8: Start Using Your Oven
Start Using Your Oven Preparing Your Oven Please remove all stickers, leaflets and boxes from the door and from the floor of the oven before operation. Please wipe out the oven interior prior to operation with warm soapy water and polish dry with a soft clean cloth. - Page 9 Function Description Switch off function Oven Light Enables the user to observe the progress of cooking without opening the door The circulation of air at room temperature enables quicker thawing of frozen food, Defrost (Without the use of any heat). It's a gentle but quick way to speed up the defrosting time and thawing of ready-made dishes and cream filled produce etc.
- Page 10 Work With Timer Timer function enables you to set the oven start cooking at desired time and duration. O’clock setting – You need to set up current O’clock time before timer or minute minder function. 1. When the first time oven connects to power supplier, LED display shows “0:00”, a beep will be sounded and oven enters into standby mode.
-
Page 11: Child Lock
Work With Minute Minder The oven has a Minute Timer built inside to give a sound alert when time is up, but oven keep heating. This feature can remind you turn over food or add some condiment after a period of time of cooking. 1. -
Page 12: Troubleshooting
Troubleshooting In the event of an emergency, you should: Switch OFF all controls of the appliance Disconnect the mains plug Call the service centre Some minor faults can be fixed by referring to the instructions given in the table below. Before calling the customer support centre or the service centre check the following points that are presented in the table. -
Page 13: Maintenance And Cleaning
Maintenance and Cleaning WARNING! Before cleaning your oven, or performing maintenance, disconnect it from the power supply. Do not use steam cleaners. Do not line the oven bottom with aluminium foil, as the consequent accumulation of heat could compromise the cooking and even damage the enamel. ... - Page 14 Replacement of the Oven Light Bulb WARNING! In order to avoid the possibility of an electric shock ensure that the appliance is disconnected from the power supply before replacing the bulb. Set all control knobs to the “OFF” position (● / 0) ...
-
Page 15: Warranty
Consumer until the expiry of two (2) years (Warranty Period). If within the Warranty Period a manufacturing defect is discovered in the Bellini product or it fails to perform to the Company’s specifications as a result of some defect in materials, components or workmanship (Defect) then the Company will, at its option, repair the Bellini product or supply a replacement Bellini product free of charge. -
Page 16: For Warranty Service Call 1300 373 199(Australia)
1.10 If you are required to transport the Bellini product to the Company or its service agent, you must ensure it is safely disconnected by a qualified tradesman and securely packed and insured. The Company does not accept any responsibility for loss or damage of the Bellini product prior to it being received by the Company or its service agent.
Need help?
Do you have a question about the BOM609CX-F and is the answer not in the manual?
Questions and answers