
Related Manuals for Belling BFS54DODF


Summary of Contents for Belling BFS54DODF
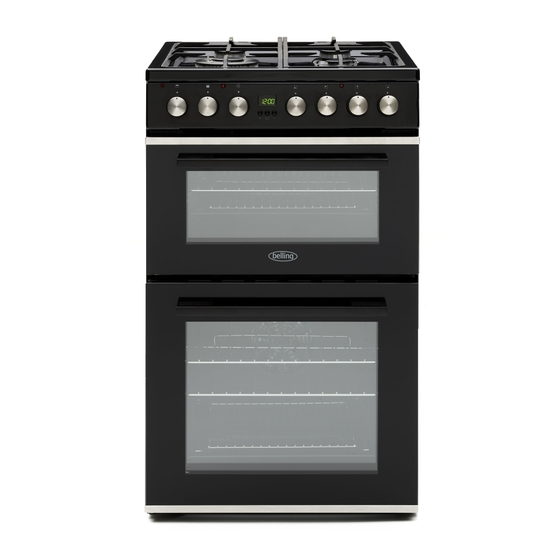
- Page 1 BFS54DODF Freestanding Double Oven with Gas Cooktop INSTRUCTION MANUAL PLEASE READ THE INSTRUCTION MANUAL CAREFULLY BEFORE USING THE UNIT. www.belling.com.au...
-
Page 2: Table Of Contents
CONTENTS 1. PRODUCT INSTALLER DETAILS 2. WARNINGS AND PRECAUTIONS a. IMPORTANT INFORMATION / CONDITIONS OF USE b. OTHER IMPORTANT SAFETY INFORMATION c. WARNINGS FOR USE OF OVEN, AND APPLIANCE HOB d. DISPOSAL OF PACKAGING e. INSTALLATION, CLEANING AND SERVICING 3. OPERATION a. -
Page 3: Product Installer Details
PRODUCT / INSTALLER DETAILS For future reference we suggest that you staple a copy of your purchase receipt here and complete the below so the information is always at hand. Product Details Model number: Description: Serial number: (Located on the product rating label) Purchase Details Date of purchase: Place of purchase:... - Page 4 CONGRATULATIONS Dear Customer, Congratulations on the purchase of your new product from Belling. We recommend you please take some time to read the instruction manual thoroughly to familiarise yourself with the functionality and operations to ensure optimum performance of your new appliance.
-
Page 5: Warnings And Precautions
WARNINGS & PRECAUTIONS IMPORTANT INFORMATION CONDITIONS OF USE This appliance is intended to be used for domestic use, not commercial use. SAFETY PRECAUTIONS • This appliance is not intended for use by persons (including children) with reduced physical, sensoryor mental capabilities, or lack of experience and knowledge, unless they have been given supervisionor instruction concerning use of the appliance by a person responsible for their safety. -
Page 6: Other Important Safety Information
WARNINGS & PRECAUTIONS OTHER IMPORTANT SAFETY INFORMATION THIS APPLIANCE MUST NOT BE USED AS A SPACE HEATER. DO NOT OBSTRUCT THE VENTILATION SLOTS ON FRONT OR BACK OF APPLIANCE. DO NOT REMOVE ANY LABELS OR USE ABRASIVE/ CORROSIVE CLEANERS ON. ACCORDING TO THE ELECTRICAL SAFETY REGULATIONS THE APPLIANCE EQUIPMENT MUST BE PROPERLY EARTHED. -
Page 7: Disposal Of Packaging
WARNINGS & PRECAUTIONS Disposal of your old machine This symbol on the product or on its packaging indicates that this product should not be treated as household waste. Instead it should be handed over to the applicable collection point for the recycling of electrical and electronic equipment. -
Page 8: Operation
OPERATION Product Description Hotplate burners 10. Oven Element (hidden under floor - with removable caps x 4 conventional models only) Cast Iron Trivets 11. Oven Element (fan forced models only) Control Panel 12. Fan & Element Cover Guide Bracket (fan forced models only) Shelf 13. -
Page 9: Front Control Panels
• Set the time on your oven in order for your oven to work. • Your Belling oven is fitted with a 3 button programmable timer, you must set the time of day before you can operate your appliance. -
Page 10: Oven Safety Warnings
OPERATION Preparing your product for the first time Oven shelf positions Fitting oven shelves • The main oven has 5 shelf positions • Ensure shelf orientation is correct (refer to choose from. Position 1 is the picture). position at the bottom of the oven •... -
Page 11: Oven Functions
OPERATION Using the Oven of your Electric Cooker Set: 1) Oven Function 2) Temperature Oven Light Turns on only the oven light, the light remains on for all other functions. Defrost The fan starts operating. To use this function, take your frozen food and place it in the oven on a shelf on the third slot from the bottom. - Page 12 OPERATION Single Grill The grill heating element will start operating. This function is ideal for grilling and toasting foods, use the upper shelves of the oven. Lightly brush the wire grid with oil to stop foods sticking and place foods in the centre of the grid. Always place a tray underneath to catch any drips of oil and fat.
-
Page 13: Oven Temperature
‘on & off’ during use is then normal. This means that oven temperature is being constantly maintained at the selected level. Using the Top Oven/Grill of your Electric Cooker BFS54DODF Oven/Grill Function ℃ Grill mode Select ‘Grill’ mode with cooking mode selection knob and turn cooking temperature selection knob to ‘Max’. -
Page 14: Using The Programmable Clock
OPERATION Using the Top Oven/Grill of your Electric Cooker (cont) Convection mode When set to Convection mode, the top and bottom heating elements operate together like a ‘normal’ conventional oven that you have probably used before. Convection mode is best suited for traditional baking and roasting and you should only use one shelf at a time, otherwise the heat distribution will be uneven. - Page 15 OPERATION Duration timer setting procedure Press “ ” selection button 3 times until “ ” heating indicator is flashing, then press “ + ” up key or the “ – ” down key to select the cooking duration time in hours. Then press the “...
-
Page 16: Cooking Guide
OPERATION Cooking Guide Fan-forced Conventional Dishes Thermostat Shelf Cook Time Thermostat Shelf Cook Time (°C) Position (min) (°C) Position (min) Layered Pastry 170 – 190 1, 2 or 3 35 – 45 170 – 190 1 or 2 35 – 45 Cake 150 –... -
Page 17: Using The Hotplates
OPERATION Using the hotplates of your cooker The hot control knobs The symbols on the control knobs mean the following No gas flow Maximum gas flow Minimum gas flow NOTE: All operating positions must be set between the maximum and minimum flow settings, and never between the maximum setting and the closed position. -
Page 18: Fitting Oven Accessories And Cleaning
FITTING ACCESSORIES & CLEANING Safety Warning Regarding Cleaning • Always make sure that the cooker is turned off before cleaning. • Always clean cooker immediately after use. • Do not use steam cleaners. These may cause moisture build-up. • Do not use caustic- based cleaners. These will damage aluminums parts, and remove enamel gloss. - Page 19 FITTING ACCESSORIES & CLEANING Cleaning the Gas Hob (cont.) Removing the burners • The burner caps and crowns are removable for Spark Plug Hole cleaning. Burner Crown • Flame port blockage should be removed by Thermocouple means of a match stick or brush. Flame Port Lighting plug •...
- Page 20 FITTING ACCESSORIES & CLEANING Removing the Inner Pane of Glass • Double oven door: Remove the seal G by unscrew the no.2 bolts (fig.1) • Gently pull out the inner pane of glass(fig.2) • Clean the glass with an appropriate cleaner. Dry thoroughly, and place on a soft surface. •...
-
Page 21: Hints And Tips / Solving Problems
HINTS AND TIPS Solving Problems If you have a problem with your appliance, check the table below before calling service. You may be able to avoid a service call by and avoid unnecessary inconvenience and expense. Problem Possible causes What to do No spark obtained when Power not turned on Switch on electricity... - Page 22 HINTS AND TIPS Problem Possible causes What to do Digital timer display Power failure or interruption Reset time of day flashing Household fuse blown or power Check fuses, power supply supply is off Unit smoking when first Protective oils being removed This is normal used Odour on first use of...
-
Page 23: Installation
INSTALLATION Installing your new cooker Safety warnings about installation • The cooker must be installed and serviced only by an authorized person. • A certificate of compliance must be supplied by Installer and is to be kept by the customer. •... - Page 24 INSTALLATION Installation Sequence • Determine position of cooker and ant-tilt plate. • Securely fix the anti-tilt plate to the floor with appropriate fasteners. • Fasten the stability bolt bracket to the front frame with the 2 screws supplied. • Reposition the cooker back into the anti-tilt plate and then mark the position of the stability bolt hole.
- Page 25 INSTALLATION Gas conversion Your appliance can be converted to Universal LPG by an authorized person. Replace the injectors as per the following injector size table and adjust the minimum flame to approximately 25% of high flame. Check turndown flame for stability and adjust as required. Follow all other instructions within this manual and AS/NZS 5601 as relevant for Universal LPG once converted.
- Page 26 INSTALLATION Checking gas pressures The cookers come in gas types: Natural gas and Universal LPG: If the cooker is required to use LPG, a conversion kit is included. Before installation check that the cooker is suitable for the gas supply. To do this check the gas type on the carton sticker or on the data plate behind the bottom of the oven door.
- Page 27 INSTALLATION Locating the cooker This appliance must be installed by an authorised person in accordance with this instruction manual, AS/NZS 5601 - gas installations (installation and pipe sizing), local gas fitting regulations, local electrical regulations, local water regulations, local health regulations, Building Code of Australia and any other government authority.
- Page 28 INSTALLATION Connection to the gas supply • This appliance is suitable for connection with rigid pipe or flexible hose. The isolating manual shut-off valve connection point must be accessible when the appliance is installed. • The flexible hose assembly must be certified to AS/NZS 1869 class B or D, be of appropriate internal diameter for the total gas consumption (10mm), be kept as short as possible (not exceeding 1200mm), must not be in contact with the floor or any hot surface or sharp surface.
- Page 29 INSTALLATION Natural Gas (the appliance test point is 1 Test Point location located at the regulator) 2 Gas inlet pipe 3 Elbow The supplied regulator must be fitted 4 Regulator to the appliance inlet connection. Gas pressure must be adjusted to 1.0 kPa when approximately 50% of the burners are on high flame.
- Page 30 INSTALLATION For LPG Cookers Adjust the regulator if necessary (this may be remote from the cooker) For natural gas cookers • Check the manometer zero point is correct. • Connect the manometer to the cooker pressure test point. This is located on the regulator or LPG inlet fitting.
-
Page 31: Technical Specifications
If the problem is dangerous, then disconnect the cooker. If there is a fault, then the customer should be advised to contact the manufacturer’s local service organization or the retailer. Model BFS54DODF Oven capacity (L) 35L+73L Voltage (V) - Page 32 TECHNICAL SPECS Ignition switch spark plug spark plug spark plug spark plug Ignition generator Heat dissipation fan 45 ℃ Temperature adjuster Thermostat switch 1 2 0 Top Grill L a m p ℃ Thermal cut-out Light FUNCTION SWITCH Thermostat switch Light Electronic timer Top Grill...
- Page 33 NOTES...
- Page 34 NOTES...
- Page 35 NOTES...
-
Page 36: Warranty
WARRANTY Congratulations on your new purchase and thank you for choosing Belling. Our dedication to quality and reliability allows us to cover Belling cooking appliances under a domestic warranty for 3 years that includes all parts and labour for even more peace of mind.
Need help?
Do you have a question about the BFS54DODF and is the answer not in the manual?
Questions and answers