
Related Manuals for Belling BFS60DOCER


Summary of Contents for Belling BFS60DOCER
- Page 1 BFS60DOCER Freestanding Double Oven with Ceramic Cooktop INSTRUCTION MANUAL PLEASE READ THE INSTRUCTION MANUAL CAREFULLY BEFORE USING THE UNIT. www.belling.com.au www.belling.co.nz...
- Page 2 Dear Customer, Congratulations on the purchase of your new product from Belling. We recommend you please take some time to read the instruction manual thoroughly to familiarise yourself with the functionality and operations to ensure optimum performance of your new appliance.
-
Page 3: Table Of Contents
CONTENTS 1.SAFETY INSTRUCTIONS ....................4 1.1 General Safety Warnings ....................4 1.2 Installation Warnings ......................6 1.3 During Use........................7 1.4 During Cleaning and Maintenance .................9 2.INSTALLATION AND PREPARATION FOR USE ............10 2.1 Instructions for the Installer ..................10 2.2 Electrical Connection and Safety.................. 11 2.3 Safety Chain .........................12 2.4 Adjusting the feet ......................12 3.PRODUCT FEATURES ....................13... -
Page 4: Safety Instructions
1. SAFETY INSTRUCTIONS • Carefully read all instructions before using your appliance and keep them in a convenient place for reference when necessary. 1.1 General Safety Warnings • This appliance can be used by children aged from 8 years and above and by persons with reduced physical, sensory or mental capabilities or lack of experience and knowledge if they have been given supervision or instruction concerning use of... - Page 5 • For models which incorporate a hob lid, clean any spillages off the lid before use and allow the cooker to cool before closing the lid. • Do not operate the appliance with an external timer or separate remote-control system. WARNING: To prevent the appliance tipping, the stabilising brackets must be...
-
Page 6: Installation Warnings
technicians may be dangerous. Do not alter or modify the specifications of the appliance in any way. Inappropriate hob guards can cause accidents. • Before connecting your appliance, make sure that the local distribution conditions (nature of the gas and gas pressure or electricity voltage and frequency) and the specifications of the appliance are compatible. -
Page 7: During Use
• The appliance must be installed by a licensed electrician. The manufacturer is not responsible for any damage that might be caused by incorrect placement and installation by unauthorised people. • When the appliance is unpacked, make sure that it has not been damaged during transportation. - Page 8 Do not leave the cooker unattended when cooking with solid or liquid oils. They may catch fire under extreme heating conditions. Never pour water on to flames that are caused by oil, instead switch the cooker off and cover the pan with its lid or a fire blanket.
-
Page 9: During Cleaning And Maintenance
1.4 During Cleaning and Maintenance • Make sure that your appliance is turned off at the mains before carrying out any cleaning or maintenance operations. • Do not remove the control knobs to clean the control panel. • To maintain the efficiency and safety of your appliance, we recommend you always use original spare parts and to call our authorised service agents when needed. -
Page 10: Installation And Preparation For Use
2. INSTALLATION AND Installation of the Cooker PREPARATION FOR USE • If the kitchen furniture is higher than the cooktop, the kitchen furniture must be WARNING : This appliance must be at least 10 cm away from the sides of installed by a qualified electrician appliance for air circulation. -
Page 11: Electrical Connection And Safety
2.2 Electrical Connection and Safety • A double pole disconnector (with at least 3 mm contact spacing) must be used in WARNING: The electrical connection order to meet the safety regulations. of this appliance should be carried out by an authorised service person or •... -
Page 12: Safety Chain
feet. The appliance is heavy and we recommend that a minimum of 2 people lift it. Never drag the appliance. 2.3 Safety Chain The appliance can be prevented from falling over by securing the supplied safety chain to the rear of the cooker. Use a wall plug to fasten the hook (1) to the kitchen wall and connect the safety chain (3) to the hook with the help of the locking... -
Page 13: Product Features
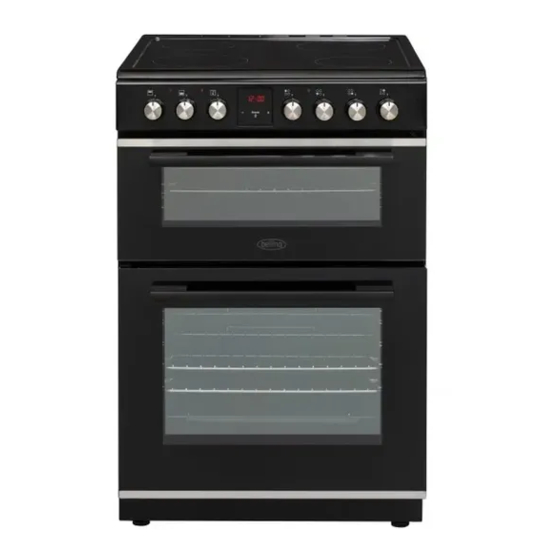
3. PRODUCT FEATURES Important: Specifications for the product vary and the appearance of your appliance may differ from that shown in the figures below. List of Components 1. Cooktop 2. Control Panel 3. Top Oven Door Handle 4. Top Oven Door 5. -
Page 14: Use Of Product
4. USE OF PRODUCT decreased or until one of the cooking zones is activated. 4.1 Hob controls Hints and Tips Ceramic Heater Important: When ceramic heaters are The ceramic heater is controlled by a 6 operated in higher heat settings, the position knob. - Page 15 well away from the hob during operation to cook on only one shelf at a time in this and until it has fully cooled after function. operation. Fan Function: Switch on the FAN function • If you notice a crack on the cooktop, using the main oven it must be switched off immediately control knob.
- Page 16 and place food in the centre of the grid. Keep children away from the oven during Always place a tray beneath the food to grilling and until it has fully cooled after use. catch any drips of oil or fat. Warning: The top oven door must be Warning: When grilling, the oven door kept open during use of this function.
- Page 17 Time adjustment The time must be set before you start using 2. Select the desired time period using the the oven. Following the power connection, “+” and “-” keys while the symbol “A” and “000” will flash on the display. is flashing.
- Page 18 will switch off and an audible warning will 2. Press “MODE” until sound. The symbols “A” and will flash. you see “dur” and Turn both control knobs to the “0” position symbol on the screen. and press any key on the timer to stop the The symbol “A”...
-
Page 19: Accessories
switch off, an audible warning will sound The Wire Grid and the symbols “A” and will flash. The wire grid is best used for grilling or for Turn both control knobs to the “0” position processing food in oven-friendly containers. and press any key to stop the sound. - Page 20 To remove the catalytic liner, remove the Do not use steam cleaners for cleaning any part of the appliance. screws holding each catalytic panel to the oven. Cleaning the Inside of the Oven • The inside of enamelled ovens are best cleaned while the oven is warm.
- Page 21 appliance on a regular basis. bracket (x) in the direction of C. • Wipe the enamelled parts with a soft cloth soaked in soapy water. Then, wipe them over again with a wet cloth and dry them. Do not clean the enamelled parts while they are still hot from cooking.
-
Page 22: Maintenance
5.2 Maintenance WARNING: The maintenance of this appliance should be carried out by an authorised service person or qualified technician only. Changing the Oven Lamp WARNING: Switch off the appliance and allow it to cool before cleaning your appliance. • Remove the glass lens, then remove the bulb. -
Page 23: Troubleshooting & Transport
6. TROUBLESHOOTING & TRANSPORT 6.1 Troubleshooting If you still have a problem with your appliance after checking these basic troubleshooting steps, please contact an authorised service person or qualified technician. Problem Possible Cause Solution Check the household fuse for the appliance. The hob or cooking zones There is no power supply. - Page 24 WARRANTY The warranty period is 3 years from the date of purchase in Australia and 2 years from the date of purchase in New Zealand. For service advice, please contact the Customer Care Centre on 1300 556 816 (AU) / +64 9 274 8265 (NZ).
Need help?
Do you have a question about the BFS60DOCER and is the answer not in the manual?
Questions and answers