
Related Manuals for Belling BFS60SCDF


Summary of Contents for Belling BFS60SCDF
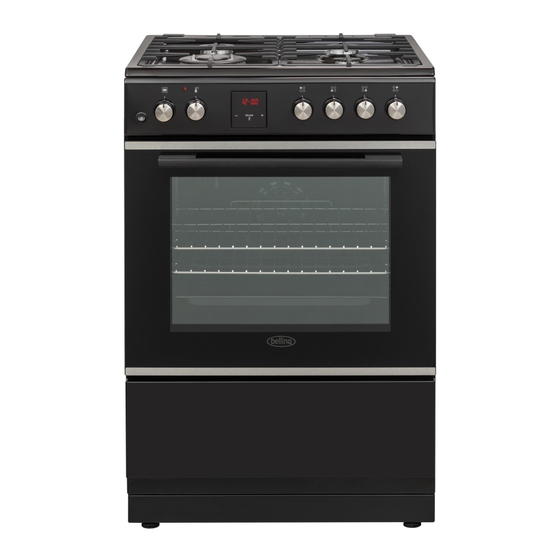
- Page 1 BFS60SCDF Freestanding Single Door Oven with Gas Cooktop INSTRUCTION MANUAL PLEASE READ THE INSTRUCTION MANUAL CAREFULLY BEFORE USING THE UNIT. www.belling.com.au www.belling.co.nz...
- Page 2 Dear Customer, Congratulations on the purchase of your new product from Belling. We recommend you please take some time to read the instruction manual thoroughly to familiarise yourself with the functionality and operations to ensure optimum performance of your new appliance.
-
Page 3: Table Of Contents
CONTENTS 1.SAFETY INSTRUCTIONS ....................4 1.1 General Safety Warnings ....................4 1.2 Installation Warnings ......................7 1.3 During Use........................8 1.4 During Cleaning and Maintenance ................10 2.INSTALLATION AND PREPARATION FOR USE ............11 2.1 Instructions for the Installer ..................11 2.2 Installation of the Cooker ....................12 2.3 Gas Connection ......................12 2.4 Gas Conversion (if available) ..................13 2.5 Electrical Connection and Safety (if available) .............14... -
Page 4: Safety Instructions
1. SAFETY INSTRUCTIONS • Carefully read all instructions before using your appliance and keep them in a convenient place for reference when necessary. 1.1 General Safety Warnings • This appliance can be used by children aged from 8 years and above and by persons with reduced physical, sensory or mental capabilities or lack of experience and knowledge if they have been given supervision or instruction concerning use of... - Page 5 • For models which incorporate a hob lid, clean any spillages off the lid before use and allow the cooker to cool before closing the lid. • Do not operate the appliance with an external timer or separate remote-control system. WARNING: To prevent the appliance tipping, the stabilising brackets must be...
- Page 6 technicians may be dangerous. Do not alter or modify the specifications of the appliance in any way. Inappropriate hob guards can cause accidents. • Before connecting your appliance, make sure that the local distribution conditions (nature of the gas and gas pressure or electricity voltage and frequency) and the specifications of the appliance are compatible.
-
Page 7: Installation Warnings
be taken while cleaning to avoid scratching. Avoid hitting or knocking the glass with accessories. • Make sure that the supply cord is not trapped or damaged during installation. If the supply cord is damaged, it must be replaced by the manufacturer, its service agent or similarly qualified persons in order to prevent a hazard. -
Page 8: During Use
• Protect your appliance from the atmosphere. Do not expose it to sun, rain, snow, dust or excessive humidity. • Materials around the appliance (i.e. cabinets) must be able to withstand a minimum temperature of 100°C. 1.3 During Use • When you first use your oven you may notice a slight smell. - Page 9 valve off when gas appliances are not in use. • Make sure the appliance control knobs are always in the “0” (stop) position when the appliance is not in use. • The trays incline when pulled out. Take care not to spill or drop hot food when removing it from the oven.
-
Page 10: During Cleaning And Maintenance
compartment may get hot when the appliance is in use. Avoid touching the inside surface. • Do not hang towels, dishcloths or clothes from the appliance or its handles. 1.4 During Cleaning and Maintenance • Make sure that your appliance is turned off at the mains before carrying out any cleaning or maintenance operations. -
Page 11: Installation And Preparation For Use
2. INSTALLATION AND PREPARATION FOR USE Air inlet section WARNING : This appliance must be min. 100 cm installed by a qualified electrician according to the instructions in this guide and in compliance with the current version AU/NZS3000. • Incorrect installation may cause harm and damage, for which the manufacturer accepts no responsibility and the warranty will not be valid. -
Page 12: Installation Of The Cooker
• The appliance should not be installed • There should be a minimum 2cm blank directly above a dishwasher, fridge, space around the appliance for air freezer, washing machine or clothes circulation. dryer. • If a cooker hood or cupboard is to be •... -
Page 13: Gas Conversion (If Available)
with gas must be changed once a year for your safety. • The hose must be kept clear of areas Gas pipe that may heat up to temperatures of more than 90°C. Seal • The hose must not be cracked, torn, Hose bent or folded. -
Page 14: Electrical Connection And Safety (If Available)
Changing injectors Valve with flame failure Valve with flame failure Hob burners device device • Cut off the main gas supply and unplug the appliance from the mains electrical supply. • Remove the burner caps and the adapters. Bypass screw Screw(inside the hole) •... -
Page 15: Safety Chain
• During installation, please ensure that insulated cables are used. An incorrect connection could damage your appliance. If the mains cable is damaged and needs to be replaced this should be done by a qualified personnel. • Do not use adaptors, multiple sockets and/or extension leads. -
Page 16: Adjusting The Feet
2.7 Adjusting the feet Your product stands on four adjustable feet. For safe operation, it is important that your appliance is correctly balanced. Make sure the appliance is level prior to cooking. To increase the height of the appliance, turn the feet anti-clockwise. To decrease the height of the appliance, turn the feet clockwise. -
Page 17: Product Features
3. PRODUCT FEATURES Important: Specifications for the product vary and the appearance of your appliance may differ from that shown in the figures below. List of Components 1. Cooktop 2. Control Panel 3. Oven Door Handle 4. Oven Door 5. Adjustable Feet Control Panel 6. -
Page 18: Use Of Product
4. USE OF PRODUCT 4.1 Use of Gas Burners Ignition of the burners The position symbol above each control knob indicates the burner that the knob controls. Manual ignition of the gas burners OFF position MAX position If your appliance is not equipped with an ignition aid, or if there is a failure in the electric network, follow the procedures listed below. - Page 19 Oven function control knob Rapid / Wok Burner 22-26 cm Turn the knob to the corresponding symbol Semi-rapid Burner 14-22 cm of the desired cooking function. For the details of different functions see ´Oven Auxiliary Burner 12-18 cm Functions`. Make sure that the tips of the flames do not Oven thermostat knob spread out from the outer circumference of the pan, as this may harm plastic...
-
Page 20: Use Of The Digital Touch Timer
4.3 Use of the Digital Touch Timer Fan Function: The oven’s thermostat and warning lights will switch on, and the upper and lower heating elements and fan will start operating. This function is good for baking pastry. Cooking is carried out by the lower and upper heating elements within the oven and by the fan, which provides air circulation, Function Description... - Page 21 10 hours can be set. Prepare the food for cooking and put it in the oven. 3. After a few seconds, the dot will stop 1. Select the desired cooking function and flashing and will the temperature using the control knobs. remain illuminated.
- Page 22 5. Press “MODE” until you see “end” and 3. Use the “+” and symbol on the screen. “-” buttons to set the The time and the desired finishing time. symbols “A” and will flash. 6. Select the desired finishing time using the 4.
-
Page 23: Accessories
4.4 Accessories The Wire Grid The Flap Drawer The wire grid is best used for grilling or for processing food in oven-friendly containers. Your appliance includes a drawer for storing accessories such as trays, shelves, grids, or small pots and pans. WARNING: The inner surface of the drawer may become hot during use. - Page 24 Removal of Catalytic Liner Do not use steam cleaners for cleaning To remove the catalytic liner, remove the any part of the appliance. screws holding each catalytic panel to the oven. Cleaning the Inside of the Oven • The inside of enamelled ovens are best cleaned while the oven is warm.
- Page 25 Cleaning the Enamelled Parts • Clean the enamelled parts of your appliance on a regular basis. • Wipe the enamelled parts with a soft cloth soaked in soapy water. Then, wipe them over again with a wet cloth and dry them.
-
Page 26: Maintenance
5.3 Maintenance WARNING: The maintenance of this appliance should be carried out by an authorised service person or qualified technician only. Other Controls • Periodically check the gas connection pipe. If a defect is found, contact an authorised service provider to have it changed. -
Page 27: Troubleshooting & Transport
6. TROUBLESHOOTING & TRANSPORT 6.1 Troubleshooting If you still have a problem with your appliance after checking these basic troubleshooting steps, please contact an authorised service person or qualified technician. Problem Possible Cause Solution The burners may be in the ´off` position. -
Page 28: Transport
Check that the recommended temperatures and shelf positions are being used. Do not frequently open the door unless you are Cooking is uneven Oven shelves are incorrectly cooking things that need to be turned. If you within the oven. positioned. open the door often, the interior temperature will be lower and this may affect the results of your cooking. -
Page 29: Technical Specifications
7. TECHNICAL SPECIFICATIONS 7.1 Injector Table INJECTOR ORIFICE NATURAL GAS (MM) UNIVERSAL LPG (MM) Low heat burner 0.90 0.50 Medium heat burner 1.18 0.65 High heat burner 1.55 0.85 Intense heat wok burner 1.75 0.98 EN - 29... - Page 30 LPG CONVERSION • If the outlet pressure is consistently too low thenthe inlet pressure may be too low This appliance is supplied set up for Natural and adjustmentof an upstream regulator Gas usage. A conversion kit is included with may be needed, or anupstream regulator the product for Universal LPG usage.
- Page 31 Top hat nut assembly, fully screwed down Turn top hat nut anti-clockwise and remove Configuration for Natural Gas Configuration for LPG EN - 31...
- Page 32 Bypass screw Flame siz e adjusted to maximum RepositionTop Control knob shaft Flame siz e adjusted to minimum EN - 32...
- Page 33 WARRANTY The warranty period is 3 years from the date of purchase in Australia and 2 years from the date of purchase in New Zealand. For service advice, please contact the Customer Care Centre on 1300 556 816 (AU) / +64 9 274 8265 (NZ).
Need help?
Do you have a question about the BFS60SCDF and is the answer not in the manual?
Questions and answers