Table of Contents

Related Manuals for Plockmatic PowerSquare 160


Summary of Contents for Plockmatic PowerSquare 160
- Page 1 Plockmatic PowerSquare™ 160 Right-to-Left Service Training Workbook Konica Minolta Issue 1. Published October 2018. Amended 27/02/2019. Name: ................Doc No. x05081...
- Page 2 © Watkiss Automation Limited 2018-2019 All Rights Reserved. Reproduction, adaptation, or translation without prior written permission is prohibited, except as allowed under the copyright laws. Warranty The information contained in this document is subject to change without notice. Watkiss Automation Limited makes no warranty of any kind with regard to this material, including, but not limited to, the implied warranties of merchantability and fitness for a particular purpose.
-
Page 3: Table Of Contents
Alignment and Level ........28 continued . . . Plockmatic PowerSquare™ 160, Service Training Workbook for KonicaMinolta Issue 1, October 2018. Amended 27/02/2019. - Page 4 PSQ160 Site Requirements ..... . 59 Glossary of booklet making terms ....66 Plockmatic PowerSquare™ 160 - Service Training Workbook...
-
Page 5: Introduction
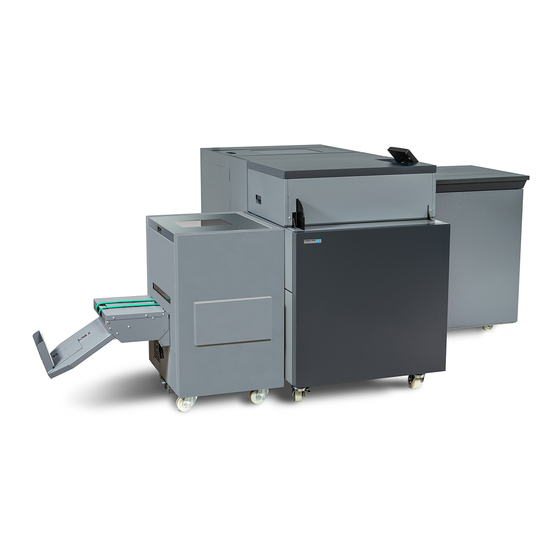
Introduction Introduction Figure 1. Plockmatic PowerSquare™ 160. Right to left with connecting bridge. Figure 2. Plockmatic PowerSquare™ 160. Hand feed model. Plockmatic PowerSquare™ 160 - Service Training Workbook... - Page 6 Introduction The Plockmatic PowerSquare™ 160 is an innovative, complete book making system for digital print applications. In a single machine it combines the four processes of stapling, folding, spine forming and trimming to produce SquareBack™ books up to 160 pages.
-
Page 7: Conventions In This Workbook
Introduction Conventions in this workbook The Plockmatic PowerSquare™ 160 is referred to by its code of PSQ160. this is an instruction or task that the trainer will do this is a task that the student will do This workbook refers to the following PSQ160 Service Manual: •... -
Page 8: Illustrated Parts Catalogues (Ipc)
Introduction Illustrated Parts Catalogues (IPC) The Plockmatic PowerSquare™ 160 is made from these modules: PSQ160 IPC Code Description P16x Complete M/C - PBAS Base Machine - PWAS Waste Bin Assembly - - PDEC Deck assembly - - PSK- Stacker - - PGUI... - Page 9 See Figure 4. Figure 4. Extract from PDEC. Fig.11. Part number information. Top-level assembly Sub assembly Component level Plockmatic PowerSquare™ 160 - Service Training Workbook...
-
Page 10: Product Overview
Section 3.2 When a set is complete it is moved to the staple position where it is stapled. The staple heads are underneath, the clinchers are on top. Section 3.4 Section 3.5 Plockmatic PowerSquare™ 160 - Service Training Workbook... - Page 11 Section 3.7 When driven onto the trim stop, the book is clamped in position. The fore-edge of the book is trimmed by the trimmer blade that moves horizontally. Section 3.7 Plockmatic PowerSquare™ 160 - Service Training Workbook...
- Page 12 Product Overview The book is released and conveyed by the outfeed mechanism to the stacker. Section 3.8 The finished books are stacked neatly, ready for the operator to remove. Section 3.8 Plockmatic PowerSquare™ 160 - Service Training Workbook...
-
Page 13: Description Of Operation
A4 (8½ x 11") portrait jobs are rotated around the turning-ball. The paper is driven against the sidelay by the angled, bridge drive-belt. The sidelay makes sure the paper aligns to the centre reference line of the bridge. Plockmatic PowerSquare™ 160 - Service Training Workbook... - Page 14 - Solid red: the machine is offline, e.g. changing paper size, or in an error state - Flashing red: The GUI is unresponsive. The DFA has lost communication with the GUI and generated the flashing red error. Reboot the PSQ160. Plockmatic PowerSquare™ 160 - Service Training Workbook...
-
Page 15: The Gathering Area - Online
Description of Operation The Gathering Area - Online Figure 7. Paper enters the infeed face-up Infeed Paper, face-up Clamp Infeed drum Gathering area Figure 8. Paper is gripped and rotated by the infeed drum Plockmatic PowerSquare™ 160 - Service Training Workbook... - Page 16 If the time between the operation of the sensors is too long or if a sensor remains covered, then a flow error or paper jam in the gathering area is indicated. Plockmatic PowerSquare™ 160 - Service Training Workbook...
-
Page 17: The Gathering Area - Hand Feed
If the machine is configured for ‘Auto Sensor’, then after a preset delay, the set will be progressed through the machine. If the machine is configured for ‘Manual Button’, then the user must press the green manual button to start the bookmaking process. Plockmatic PowerSquare™ 160 - Service Training Workbook... -
Page 18: Paper Transport
The clinchers move to match the spacing of the staple heads. The staple head and clincher axes are adjusted by stepper motors. Plockmatic PowerSquare™ 160 - Service Training Workbook... -
Page 19: Fold And Form
The fold blade retracts and the clamp closes on the book. The form roller rolls along the spine of the book to create the SquareBack book. The pressure applied is calculated by the PSQ160 or can be overridden on the touch screen by the operator. Plockmatic PowerSquare™ 160 - Service Training Workbook... -
Page 20: Trim
PSQ160 according to the size of the job. The operator can change the amount of trim from the touch screen if necessary. The trim axis is adjusted by a stepper motor. Plockmatic PowerSquare™ 160 - Service Training Workbook... -
Page 21: Outfeed And Stacker
An adjustable book stop makes sure the finished books stack correctly. • There is an optical sensor in the outfeed to detect jams. This sensor prevents the books on a full stacker from backing-up into the outfeed. Plockmatic PowerSquare™ 160 - Service Training Workbook... -
Page 22: User Interface (Gui) - Operator Menu
Green = the machine is running Amber = attention. Operator action is needed. Sheet Counter The sheet counter shows the number of sheets in the gathering area. The counter starts again with each book. Plockmatic PowerSquare™ 160 - Service Training Workbook... -
Page 23: Illustration - Hand Feed
Key Operator mode. See Section 4.11 ‘‘Key Operator Tiles and Windows’’ Messages Section 4.8 ‘‘The Messages Tile’’ Illustration - Hand Feed Plockmatic PowerSquare™ 160 - Service Training Workbook... -
Page 24: Window Controls
The following standard controls are used in the windows. Icon Function Touch to confirm the settings. Touch to cancel the changes you have made. Touch to return to the previous screen. Touch to turn a function on or off Plockmatic PowerSquare™ 160 - Service Training Workbook... -
Page 25: The Paper Size Window
Touch to select imperial or metric standard paper selection sizes. Job mimic Shows the paper orientation for booklet making. The red line indicates the fold and staple line. Sheet Length Shows the sheet length. Touch to adjust. Plockmatic PowerSquare™ 160 - Service Training Workbook... -
Page 26: The Book Size Window
Shows the size of the book after face-trimming. (Face Trim) Auto Book Width Depending on the size of the paper, the PSQ160 will calculate an automatic book width. To select a different book width touch the value to adjust. Plockmatic PowerSquare™ 160 - Service Training Workbook... -
Page 27: The Advanced Window
Staple Pitch Auto Use to turn on or off the automatic staple pitch. If you adjust the staple pitch value, Auto is turned off. Staple ON/OFF Use to turn stapling on or off. Plockmatic PowerSquare™ 160 - Service Training Workbook... -
Page 28: The Messages Tile
The operator that an action is needed soon, such as should take corrective action. empty the trim bin or replace a staple cartridge. Touch the tile to open the Message window with more information. Plockmatic PowerSquare™ 160 - Service Training Workbook... -
Page 29: The Message Window
The Job load/save window opens. Component - Function Table Component Function Current Setup Touch to display the current machine setup. Job List The list of saved jobs. Job Information Displays information about the job. Plockmatic PowerSquare™ 160 - Service Training Workbook... -
Page 30: Key Operator Tiles And Windows
Touch and hold to clear the machine counts. GRAND TOTALS. Shows the lifetime counts for the machine. These values cannot be reset. Information tile: Shows network and software details. The information may be needed when you ask for technical support. Plockmatic PowerSquare™ 160 - Service Training Workbook... -
Page 31: System Status Window
Offline / Not available Not implemented Figure 16. Motor (M.x) indicator key Perform the following tasks: Set the PSQ160 to make a preset size book: Set A3 paper size Save as “A3 Test” Plockmatic PowerSquare™ 160 - Service Training Workbook... -
Page 32: Advanced Operation
The operator can clear most paper or book jams. These procedures are described in the User Manual and include paper jams in the • connecting bridge • gathering area • staple area • fold and form area • trim area Plockmatic PowerSquare™ 160 - Service Training Workbook... -
Page 33: Book Quality And Machine Specifications
Note: A dirty sensor or a sensor covered by paper trimmings will give a jam error. Book Quality and Machine Specifications • Quality tolerance specification is included in this training workbook (see Section 15.) • Product specification is included in this training workbook (see Section 14.) Plockmatic PowerSquare™ 160 - Service Training Workbook... -
Page 34: User Interface - Service Overview
Refer to Section 6.14 - GUI Functions in the PSQ160 Service Manual. Access Service Level Figure 17. Home screen. Operator level. Advanced tile Clock Figure 18. Home screen. Key Operator level System Status tile Plockmatic PowerSquare™ 160 - Service Training Workbook... - Page 35 User Interface - Service Overview Figure 19. The Configuration tile Configuration tile Figure 20. Configuration window. Key Operator level. Access level list Up/Down arrows Figure 21. Configuration window. Service selection. Access level list Keypad Plockmatic PowerSquare™ 160 - Service Training Workbook...
- Page 36 Home screen or touch the ‘cog’ enter the Settings options. Review the following: 2.2 - Error Messages and Codes 6.13 - Access Service Level. Select the ‘Settings’ option. Plockmatic PowerSquare™ 160 - Service Training Workbook...
-
Page 37: Installation
Installation Detailed instructions for installing the PSQ160 are included in the service support material. • Plockmatic PowerSquare™ 160 Unpacking and Installation Instructions, Locate the Unpacking and Installation Instructions The PSQ160s used in the service training are already installed. With the training instructor, review the following: ... -
Page 38: Machine Areas
900-291 L6470PD stepper module PCBs 900-295 triple PSU module PCB The following components are located in the Uplift: Uplift conveyor drive motor Uplift cover sensor Uplift infeed sensor Uplift outfeed sensor Plockmatic PowerSquare™ 160 - Service Training Workbook... -
Page 39: Infeed/Gathering Area Module
The following components are located in the Infeed/Gathering Area The infeed drum drive Sidelays Endlays Infeed flow sensor Gather area cover sensor Gather area set sensor Infeed conveyor drive motor Plockmatic PowerSquare™ 160 - Service Training Workbook... -
Page 40: Paper Transport - Book Gathering
ADJ 4.5.1 - Align the Endlays to the Staple Position ADJ 4.5.2 - Calibrate the Endlays ADJ 4.5.3 - Set and Calibrate the Sidelays Use the RAPs to diagnose and repair the problem created by the trainer. Plockmatic PowerSquare™ 160 - Service Training Workbook... -
Page 41: Paper Transport - Book Transport
Transport motor - back left or back right Transport motor - front left or front right 900-303 Transport Control PCB Perform the following: ADJ 4.5.4 - Set the Flights Plockmatic PowerSquare™ 160 - Service Training Workbook... -
Page 42: Staple And Clinch
ADJ 4.6.1 - Check the Alignment of the Clinchers to the Staple Heads ADJ 4.6.2 - Adjust the Alignment of the Clinchers Use the RAPs to diagnose and repair the problem created by the trainer. Plockmatic PowerSquare™ 160 - Service Training Workbook... -
Page 43: Fold And Form
Form roller end B sensor (Front). Former flow sensor 900-213 Former Interface PCB Form Clamp Clutch Form roller drive motor Form clamp open sensor 900-306 Bookmaker Control PCB Plockmatic PowerSquare™ 160 - Service Training Workbook... - Page 44 ADJ 4.7.2 - Adjust the Fold Blade to Staple Alignment ADJ 4.9.3 - Check the Alignment of the Form Clamp to the Staple Position ADJ 4.9.2 - Check the Quality of the Spine Form - End to End Plockmatic PowerSquare™ 160 - Service Training Workbook...
-
Page 45: Trim
Review the following: ADJ 4.10.6 - Adjust the Trim Stop for Square ADJ 4.10.1 - Check the Calibration of the Trim Stop ADJ 4.10.2 - Calibrate the Trim Stop Plockmatic PowerSquare™ 160 - Service Training Workbook... -
Page 46: Outfeed And Stacker
This sensor prevents the books on a full stacker from backing-up into the outfeed. The following components are located in the Outfeed: Outfeed flow sensor Stacker drive motor Perform this task: 4.2.10 - Remove the Outfeed Stacker Plockmatic PowerSquare™ 160 - Service Training Workbook... -
Page 47: Preventative Maintenance
4.23.8 - Clean the Polyurethane Strips in the Form Clamp. Technical Maintenance The recommended service interval is every 12 months. In addition, after 1 million staples the staple heads must be replaced. Plockmatic PowerSquare™ 160 - Service Training Workbook... -
Page 48: Power And Control
In this particular instance the device fitted filters out undesirable harmonics which are outside the required harmonic distortion limits under operational conditions. Refer to the following: • 7.1 - PSQ160 High Voltage Connections Plockmatic PowerSquare™ 160 - Service Training Workbook... -
Page 49: Control
If a fault occurs, an error code is displayed on the GUI, for example: E38.307.0. The first digits are the node ID and tell the user where in the machine the fault has occurred. Plockmatic PowerSquare™ 160 - Service Training Workbook... - Page 50 Refer to the following: • 7.2.1 Bookmaker Module Electrical Layout Diagram • 7.2.2 Staple - Clinch Module Electrical Layout Diagram • 7.2.3 Transport Module Electrical Layout Diagram • 7.2.5 Bridge Electrical Layout Diagram Plockmatic PowerSquare™ 160 - Service Training Workbook...
-
Page 51: Component Locations
Terminal block • Mains power inlet socket • Fuse holders for the mains inlet fuses • Fuse holder for the inverter fuse • Reactor • EMC filter • 900-316 power and communications distribution PCB Plockmatic PowerSquare™ 160 - Service Training Workbook... - Page 52 Power and Control Figure 25. Electrical box. Overview. Item Description Plockmatic PowerSquare™ 160 - Service Training Workbook...
- Page 53 Power and Control Figure 26. Electrical box. Behind the mains inlet. Item Description Plockmatic PowerSquare™ 160 - Service Training Workbook...
- Page 54 Power and Control Figure 27. Electrical box. Rear view. Item Description Plockmatic PowerSquare™ 160 - Service Training Workbook...
-
Page 55: Dfa
Sheet exit - C0 End of set - C1 End of job - C3 Printer PSQ160 Sheet delivered - S3 Set delivered - S4 Full - S2 Offline - S4 Fault - S1 Plockmatic PowerSquare™ 160 - Service Training Workbook... -
Page 56: Software
‘Upgrade-Net’ or ‘Upgrade-USB’ command checks current machine software versions against released versions and automatically downloads as required. Individual control boards can be upgraded from the GUI. Figure 28. System window Upgrade-Net Upgrade-USB Refer to 6.9 - Software Update Plockmatic PowerSquare™ 160 - Service Training Workbook... - Page 57 6.12.1 - Procedure - the machine is connected to the internet Figure 29. Support window. Internet connection. 6.12.2 - Procedure - the machine is not connected to the internet Figure 30. Support window. Local file. Plockmatic PowerSquare™ 160 - Service Training Workbook...
-
Page 58: Replace Trimmer Blade
The following optional accessories for the PowerSquare are documented in separate Computer Based Training courses (CBTs). If time permits, a short introduction to these accessories will be included. • PBS - PowerSquare Book Stacker • P2T - PowerSquare 2-knife Trimmer Plockmatic PowerSquare™ 160 - Service Training Workbook... -
Page 59: Product Specifications
Maximum set thickness: 4mm, dependent on material. 80gsm bond paper Maximum set thickness: 4mm (approx 40 sheets 80gsm) Machine coated papers Maximum set thickness 3mm, dependent on material Plockmatic PowerSquare™ 160 - Service Training Workbook... - Page 60 Paper Input Input sheets must be of consistent size and cut square. Requirements Machine must be set to match paper size at the input to PowerSquare 160. Book quality is dependent upon quality of input sheets. Mechanical Connecting bridge with separate left-hand or right-hand input module.
- Page 61 In line with a policy of continual product improvement, the manufacturer reserves the right to alter the materials or specification of this product at any time without notice. Copyright © 2018 Watkiss Automation Limited Plockmatic PowerSquare™ 160 - Service Training Workbook...
-
Page 62: Quality Tolerances
Production may vary according to operating conditions. In line with a policy of continual product improvement, the manufacturer reserves the right to alter the materials or specification of this product at any time without notice. Plockmatic PowerSquare™ 160 - Service Training Workbook... -
Page 63: Psq160 Site Requirements
16.2 Floor surface and cover • Only install the PSQ160 on a level floor. • The PowerSquare 160 needs a solid and durable floor. Deep pile carpet and thick, cushioned underlays can cause problems when the machines are moved. 16.3 Access •... - Page 64 Europe : IEC83 'Schuko' UK : BS 1363 North America / Japan : NEMA 6-15 For other areas, contact supplier for the correct cable. Power standby: 40VA (10W) Consumption in operation: 700VA (500W) Plockmatic PowerSquare™ 160 - Service Training Workbook...
- Page 65 Section 16.11 ‘‘Online PSQ160 R2L’’ • Section 16.12 ‘‘Online PSQ160 R2L with PBS Bookstacker’’ • Section 16.13 ‘‘Online PSQ160 R2L with P2T 2-Knife Trimmer’’ • Section 16.14 ‘‘Online PSQ160 R2L with P2T and PBS’’ Plockmatic PowerSquare™ 160 - Service Training Workbook...
- Page 66 PSQ160 Site Requirements 16.11 Online PSQ160 R2L NOT TO SCALE Input for Mains Power Supply PSQ160 Connecting Bridge 1070 mm 825 mm 2495 mm Maintenance area: 2995 mm Plockmatic PowerSquare™ 160 - Service Training Workbook...
- Page 67 PSQ160 Site Requirements 16.12 Online PSQ160 R2L with PBS Bookstacker NOT TO SCALE Input for Mains Power Supply Connecting Bridge PSQ160 Book Stacker 2275 mm Maintenance area: 2775 mm Plockmatic PowerSquare™ 160 - Service Training Workbook...
- Page 68 PSQ160 Site Requirements 16.13 Online PSQ160 R2L with P2T 2-Knife Trimmer NOT TO SCALE Input for Mains Power Supply Connecting Bridge PSQ160 P2T Trimmer Input for Mains Power Supply 3040 mm Maintenance area: 3540 mm Plockmatic PowerSquare™ 160 - Service Training Workbook...
- Page 69 Online PSQ160 R2L with P2T and PBS NOT TO SCALE Input for Mains Power Supply PSQ160 Connecting Bridge P2T Trimmer Input for Mains Power Supply Book Stacker 2815 mm Maintenance area: 3315 mm Plockmatic PowerSquare™ 160 - Service Training Workbook...
-
Page 70: Glossary Of Booklet Making Terms
Booklet making by the stitch-fold-trim method (as with Watkiss equipment) is sometimes called saddle stitching, but this is not technically correct. Plockmatic PowerSquare™ 160 - Service Training Workbook... - Page 71 Name of a book which has a stapled square spine. Technology SquareBack developed and patented by Watkiss. Related terms: Square fold: term used to describe the Plockmatic product, which uses Watkiss technology under licence. Square edge: term used to describe the Plockmatic product, which is manufactured by Watkiss.
- Page 72 Glossary of booklet making terms Plockmatic PowerSquare™ 160 - Service Training Workbook...
- Page 76 Watkiss Automation Limited 1 Blaydon Road Middlefield Industrial Estate Sandy, Bedfordshire SG19 1RZ United Kingdom Tel: +44 (0)1767 685700 Fax: +44 (0)1767 689900 Email: info@watkiss.com Web: www.watkiss.com...
Need help?
Do you have a question about the PowerSquare 160 and is the answer not in the manual?
Questions and answers