Table of Contents
Advertisement
Quick Links
Advertisement
Table of Contents

Related Manuals for Plockmatic HCI3500


Summary of Contents for Plockmatic HCI3500
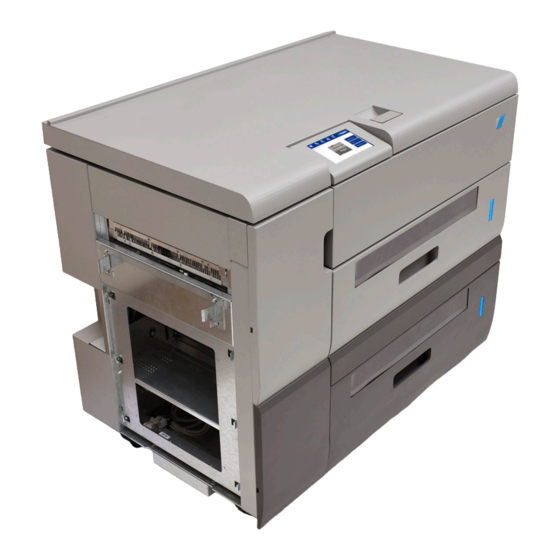
- Page 1 HCI3500 Installation Instruction x17162C 07 June 2018...
-
Page 2: Table Of Contents
1.2.10 Dock Downstream Device ................................1-11 1.2.11 Connect Electrical Connectors ................................. 1-11 1.2.12 Plug in Main Power ...................................1-12 1.2.13 Turning Off the Service Power Switch (If Necessary) ........................1-12 HCI3500 Installation Check ..................................1-13 1.3.1 Checking the software ..................................1-13 1.3.2 Checking the installation ...................................1-13... -
Page 3: Installation Requirements
Avoid multi-wiring. Be sure to ground the machine. Service Access Never place anything on the power cord • Universal Power Supply • 100-240V +6%/-10%, 50-60 Hz 705 mm 600 mm Operator Access 1150mm HCI3500 07 June 2018 1. Installation Procedure... -
Page 4: Hci3500 Installation
Front of the machine* Grounding Plate, Upstream Accessories box For part number information, see HCI3500 Parts Catalog. *Open the trays to reach this item. **Remove the back cover of the HCI3500 to reach this item. HCI3500 07 June 2018 1. Installation Procedure... - Page 5 Screw M6S M 4x10 washer o12,5*** Accessories box For part number information, see HCI3500 Parts Catalog **Remove the back cover of the HCI3500 to reach this item. ***The screws might be found either in a separate plastic bag or already mounted on the part.
-
Page 6: Mount Upstream Sheet Guides Or Decurler Paper Guide
HCI3500 Installation, Continued 2. Use screws [A] (2X) -”M6S M 3x5” to fasten Upstream Sheet Guides 1.2.2 Mount Upstream Sheet Guides or Decurler Paper Guide Screws to use 3. If the HCI is being installed to a Buffer unit, follow steps number 4 and... - Page 7 HCI3500 Installation, Continued 1.2.2 Mount Upstream Sheet Guides or Decurler Paper Guide (continued) NOTE! If the upstream device has a decurler installed, the Decurler Paper 8. Adjust Decurler unit to have paper path aligned. Slots [D] (2X) are Guide has to be used: follow the steps 6 to 8 of this procedure.
-
Page 8: Mount Downstream Docking Plate
HCI3500 Installation, Continued 1.2.4 Disconnect Power, Install Termination Plugs and Cable Protection 1.2.3 Mount Downstream Docking Plate 1. Ensure main power cord is unplugged and power is off 1. Place docking plate as shown 2. Install termination plugs as shown 2. -
Page 9: Adjust Machine Height
2. Reach in and pull green tab [A] up in order to open both trays on floor characteristics. 3. Locate the spanner [B] (behind cover of lower tray) 5. Place a spirit level on the paper path of the HCI3500 and raise/lower the casters until the machine is leveled. HCI3500 07 June 2018 1. -
Page 10: Mount Upstream Grounding Plate
HCI3500 Installation, Continued 1.2.6 Mount Upstream Grounding Plate 1.2.5 Adjust Machine Height (Continued) 1. Place grounding plate as shown 2. Use screws [A] (2X) - “M6S M 4x10 washer o12,5” - to fasten Upstream Grounding Plate Screws to use 6. Place the spirit level on the infeed middle cover and on the exit middle cover of the HCI to check that the machine is leveled. -
Page 11: Mount Downstream Grounding Plate
HCI3500 Installation, Continued 1.2.8 Dock to Upstream Device 1.2.7 Mount Downstream Grounding Plate 1. Open up upper tray (see earlier in procedure) 2. Remove locking screw [A] 1. Place grounding plate as shown 3. Pull out locking mechanism [B] 2. Use screws [A] (2X) - “M6S M 4x10 washer o12,5” - to fasten 4. -
Page 12: Install Paper Supports
3. Place the Paper Supports [B] in Paper Support Holder 1. Connect the upstream device connector [A] to the printer 4. Repeat the procedure for lower tray 2. Connect the downstream device connector [B] to the HCI3500 HCI3500 07 June 2018 1. -
Page 13: Plug In Main Power
1. Close trays and reinstall back cover be ignored. The default position for the Service Power Switch is off. The 2. Choose correct power cord and plug into HCI3500 and local power procedure in this section will only need to be followed if the Service Power source Switch is accidentally left on by a service technician. -
Page 14: Hci3500 Installation Check
1.3.1 Checking the software 1. Turn on the upstream device 2. Turn on the main power switch on the HCI3500 3. Press [Tools] 4. Press [Software version] to check installed software version 5. If needed, download and install latest software according to procedure described in system service manual 6.
Need help?
Do you have a question about the HCI3500 and is the answer not in the manual?
Questions and answers