Table of Contents
Advertisement
Available languages
Available languages
Quick Links
JKT-D10V
JKT-D18V
For household use
IH Rice Cooker
OPERATING INSTRUCTIONS
Thank you for purchasing this TIGER rice cooker/warmer.
Please read these instructions carefully before use and observe them during use.
Sử dụng trong gia đình
N i cơm đi n cao t n
HƯỚNG DẪN SỬ DỤNG
Cám ơn Quý Khách vì đã mua nồi cơm điện TIGER.
Xin hãy đọc và tuân thủ những hướng dẫn này một cách cẩn thận trước khi sử dụng.
JKT-D
Advertisement
Chapters
Table of Contents

Subscribe to Our Youtube Channel
Related Manuals for Tiger JKT-D


Summary of Contents for Tiger JKT-D
- Page 1 N i cơm đi n cao t n HƯỚNG DẪN SỬ DỤNG Cám ơn Quý Khách vì đã mua nồi cơm điện TIGER. Xin hãy đọc và tuân thủ những hướng dẫn này một cách cẩn thận trước khi sử dụng.
-
Page 2: Table Of Contents
Contents 1 Important Safeguards ....................4 2 Names and Functions of Component Parts ............. 9 Menu options and features ..................11 Tips on making delicious rice ..................12 3 Before Cooking Rice ....................14 4 How to Cook Rice ..................... 16 Appropriate amounts ....................17 Cooking time guidelines ....................17 5 Once the Rice Is Done Cooking ................ -
Page 3: Important Safeguards
Important Safeguards Read and follow all safety instructions before using the rice cooker. WARNING • The WARNINGS and CAUTIONS described below are intended to protect the user and other individuals from physical and property damage. To ensure safety, please follow them carefully. •... - Page 4 Important Safeguards WARNING CAUTION Stop using the rice cooker Do not use the rice cooker near walls This rice cooker is for household use. Be sure to hold the power plug when immediately in case of any or furniture. It can also be used in the following removing it from an outlet.
-
Page 5: Names And Functions Of Component Parts
Names and Functions of Component Parts Important Safeguards Check the following immediately after opening the packaging. CAUTION Steam cap (See P.30 to 31) Do not move the rice cooker while it Use and cook an appropriate amount Steam is cooking. of ingredients that can foam or vent Doing so may cause the contents to spill... -
Page 6: Menu Options And Features
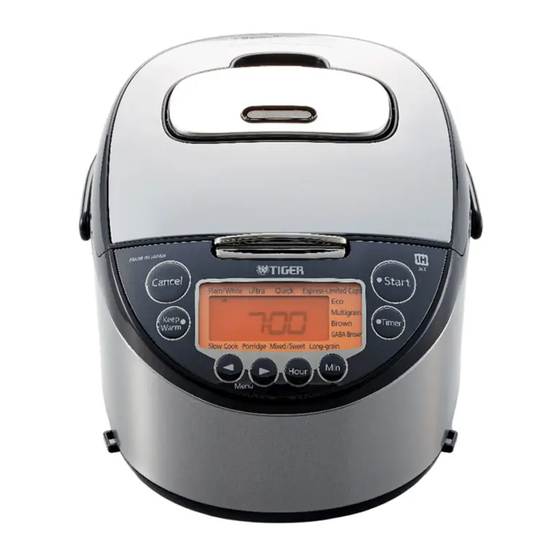
Names and Functions of Component Parts Menu options and features Operation panel Keep Timer Display Start lamp Warm Menu function Feature function Displays the symbol (menu Lit or blinks during availability availability cursor) and the present time, etc. cooking, etc. Plain/White Select when cooking white rice (rinse-free rice). -
Page 7: Tips On Making Delicious Rice
Read P.14 to 15 for preparations before cooking rice and P.16 to 20 for Tips on making delicious rice how to cook rice. Select high quality rice and store it in a Adding other ingredients to the rice • When cooking rinse-free rice, use the “Plain/ Cooking other grains together with brown White”... -
Page 8: Before Cooking Rice
Before Cooking Rice Measure the rice. Adjust the water level. Place the inner pot in the rice Connect the power plug to an Always use the measuring cup supplied with Place the inner pot on a level surface and cooker. outlet. -
Page 9: How To Cook Rice
How to Cook Rice Appropriate amounts Press the [ ] or [ ] Press the [Start] key. key to select the See P.12 to 13 for the appropriate amounts of other grains and ingredients. desired menu. Each time the [Menu] key Cooking time guidelines is pressed, the selected menu will change in the order shown below. -
Page 10: Once The Rice Is Done Cooking
Once the Rice Is Done Cooking Using the Timer Function Once the final steaming process Stir and loosen the cooked rice. Blinks begins, the remaining time will Be sure to stir and loosen the rice as soon as cooking is complete. be displayed. -
Page 11: Keeping The Rice Warm
Keeping the Rice Warm Using the Timer Function The Keep Warm function will especially maintain the „ Elapsed Keep Warm time display Press the [Start] key. Note shiny, delicious taste of white rice (rinse-free rice). The Timer lamp will turn on and Hold down the [Hour] key to display the elapsed The Keep Warm function will automatically engage ●... -
Page 12: Reheating Cooked Rice
Reheating Cooked Rice Slow Cooking “Slow Cook” Menu) For piping hot rice, reheat the rice that is being kept You can prepare the following dishes with ease. „ Basic cooking procedure Press the [Start] key. Blinks warm before serving it. See the recipes listed in “Menu guide”... - Page 13 Slow Cooking (“Slow Cook” Menu) Once cooking is completed, an Press the [ ] or [ ] Note alarm (8 long beeps) will sound key to select the ● If a longer cooking time is required, do not press (the Start lamp will turn off). “Slow Cook”...
-
Page 14: Cleaning And Maintenance
Cleaning and Maintenance Any repair services not described in this manual should be performed by an authorized The steam cap can be rinsed. service representative. (1) Wash it well using a sponge with detergent diluted with cold or lukewarm water. To maintain cleanliness, always clean the rice cooker on the same day it is used. - Page 15 Cleaning and Maintenance Removing and attaching the inner lid „ Parts to wash when dirty Inside and outside the rice cooker „ Removing the inner lid Wet a towel or cloth, wring out excess water, and wipe. Push down and pull the inner lid levers to the front to Inner lid Center sensor Heating plate...
- Page 16 Cleaning and Maintenance Removing and attaching the steam cap „ Installing the steam cap gaskets Set the gaskets securely onto the steam cap as Small gasket shown in the figure below. If the gaskets are not „ Removing the steam cap „...
-
Page 17: If Rice Does Not Cook Properly
If Rice Does Not Cook Properly Check the following if you experience a problem with the cooked rice or with the operation of the rice cooker, Problem Cause etc. There is a thin film covering A thin, tissue-like film is formed by melted and dried starch. This is not harmful to your Check point the rice. -
Page 18: If Cooking Is Not Performed Properly
If Cooking Is Not Performed Properly Troubleshooting Check the following if you experience a problem with cooked food. Check the following before requesting repair service. Check point Reference Symptom Check point Action page The rice is not cooked at all. Is the power plug properly connected Insert the power plug fully into an The food is not cooked at all. -
Page 19: If These Indications Appear
Troubleshooting Adjusting the steaming time (“Express-Limited Cups” menu) Reference Symptom Check point Action page The present time, preset timer Does “0:00” blink on the display The lithium battery has run out. Complete the following procedure from steps (1) to (6) each settings, and elapsed Keep Warm when the power plug is connected Contact the place of purchase. -
Page 20: Menu Guide
● This Menu guide uses an approximately 0.18 L measuring cup (included). ● A tablespoon is 15 mL. Menu guide ● A teaspoon is 5 mL. ● When too much of seasonings such as soy sauce, sweet cooking rice wine, etc. - Page 21 Sekihan Chinese Style Freshly Cooked Dishes Made So Easily Mixed/ Mixed/ Slow Cook Sweet Sweet (Red Bean Rice) Steamed Sweet Authentic dishes can be cooked easily by taking advantage of Menu Menu Menu seasonal ingredients. Rice 329kcal/ Note For 1 serving 426kcal/ ●...
-
Page 22: Setting The Present Time
Setting the present time Chicken and Slow Cook shimeji mushrooms The present time is displayed in a 24-hour format. Menu The time cannot be set while the following operations are performed. with tomato sauce • During cooking (slow cook), when the Keep Warm function is on, when the Timer function is set, when the Timer function is in use, during reheating, or during additional heating Quick recipe •... -
Page 23: Specifications
Specifications Unit size 1.0 L (5.5-cups) type 1.8 L (10-cups) type Rated voltage/Rated frequency 220 V 50 Hz Rated power input (W) 1,080 1,198 Plain/White 0.18 to 1.0 (1 to 5.5 cups) 0.36 to 1.8 (2 to 10 cups) Ultra 0.18 to 1.0 (1 to 5.5 cups) 0.36 to 1.8 (2 to 10 cups) Quick... - Page 24 Nội dung 1 Các biện pháp bảo vệ quan trọng ................46 2 Tên và chức năng các bộ phận cấu thành ............. 51 Các tùy chọn và tính năng của menu ................. 53 Mẹo để nấu cơm ngon ....................54 3 Trước khi nấu cơm ....................
-
Page 25: Các Biện Pháp Bảo Vệ Quan Trọng
Các biện pháp bảo vệ quan trọng Hãy đọc và làm theo tất cả các hướng dẫn an toàn trước khi sử dụng nồi cơm điện. CẢNH BÁO • Phần CẢNH BÁO và THẬN TRỌNG dưới đây nhằm bảo vệ người dùng và những người khác khỏi bị tổn hại về... - Page 26 Các biện pháp bảo vệ quan trọng CẢNH BÁO THẬN TRỌNG Khi bề mặt nồi cơm điện bị hỏng, hãy Không sử dụng nồi cơm điện trên bề Nồi cơm điện này sử dụng cho gia Tháo dây điện ra khi không sử dụng. tắt nguồn ngay lập tức.
-
Page 27: Tên Và Chức Năng Các Bộ Phận Cấu Thành
Tên và chức năng các bộ phận cấu thành Các biện pháp bảo vệ quan trọng Kiểm tra các bộ phận sau đây ngay sau khi mở bao bì. THẬN TRỌNG Nắp hơi (Xem Tr.72 đến 73) Không rửa toàn bộ nồi cơm điện. Không cầm nắp khi di chuyển nồi Lỗ... -
Page 28: Các Tùy Chọn Và Tính Năng Của Menu
Tên và chức năng các bộ phận cấu thành Các tùy chọn và tính năng của menu Bảng điều khiển Chức năng Chức năng Màn hình Đèn khởi động Menu Giữ ấm hẹn giờ Tính năng sẵn có sẵn có Hiển thị... -
Page 29: Mẹo Để Nấu Cơm Ngon
Đọc Tr.56 đến 57 để chuẩn bị trước khi nấu cơm và Tr.58 đến 62 để biết Mẹo để nấu cơm ngon cách nấu cơm. Chọn loại gạo chất lượng cao và cất giữ Bỏ thêm các nguyên liệu khác vào gạo Nấu các loại hạt khác cùng với gạo trắng Mức nước tương ứng (Sử... -
Page 30: Trước Khi Nấu Cơm
Trước khi nấu cơm Tính lượng gạo. Điều chỉnh mực nước. Đặt nồi trong vào nồi cơm điện. Cắm phích cắm điện vào ổ cắm. Luôn dùng cốc đong được cung cấp kèm Đặt nồi trong lên một mặt phẳng cân bằng và (1) Hãy chắc chắn đặt nồi đúng cách (không theo nồi cơm điện (cũng dành cho gạo không điều chỉnh mực nước theo mức tương ứng ở... -
Page 31: Cách Nấu Cơm
Cách nấu cơm Lượng thích hợp Nhấn nút [ ] hoặc Nhấn nút [Start] (Bắt Bật [ ] để chọn menu đầu). Xem Tr.54 đến 55 để biết lượng của các loại hạt khác và nguyên liệu thích hợp. mong muốn. Hướng dẫn về... -
Page 32: Khi Gạo Được Nấu Xong
Khi gạo được nấu xong Sử dụng chức năng Hẹn giờ Khi quá trình hấp cuối cùng Xới và làm tơi cơm chín. Nhấp nháy bắt đầu, thì thời gian còn lại sẽ Luôn xới và làm tơi cơm ngay khi nấu xong. •... -
Page 33: Giữ Ấm Cơm
Giữ ấm cơm Sử dụng chức năng Hẹn giờ Chức năng Giữ ấm đặc biệt sẽ duy trì sự sáng „ Hiển thị thời gian Giữ ấm đã trôi Chú ý Chú ý bóng, hương vị thơm ngon của gạo trắng (gạo không cần vo). -
Page 34: Hâm Nóng Cơm Chín
Hâm nóng cơm chín Hầm Menu “Slow Cook” (Hầm)) Để làm cơm nóng, hâm nóng cơm đang được giữ Bạn có thể chuẩn bị các món ăn sau đây một cách dễ „ Quy trình nấu ăn cơ bản Nhấn nút [Start] (Bắt Nhấp nháy ấm trước khi ăn. - Page 35 Hầm (Menu “Slow Cook” (Hầm)) Khi nấu xong, nồi cơm sẽ phát Nhấn nút [ ] hoặc Chú ý ra một tiếng báo (8 tiếng bíp dài) [ ] để chọn menu ● Nếu cần thêm thời gian nấu, không được nhấn (Đèn khởi động sẽ...
- Page 36 Vệ sinh và bảo dưỡng Bất kỳ dịch vụ sửa chữa nào không được mô tả trong hướng dẫn này đều cần được thực Có thể rửa nắp hơi. hiện bởi đại diện dịch vụ được ủy quyền. (1) Rửa sạch bằng miếng bọt biển với chất tẩy rửa pha loãng bằng nước lạnh hoặc nước ấm.
-
Page 37: 10 Vệ Sinh Và Bảo Dưỡng
Vệ sinh và bảo dưỡng Tháo và gắn nắp trong „ Các bộ phận phải vệ sinh khi bẩn Bên trong và bên ngoài nồi cơm điện „ Tháo nắp trong Lau chùi vệ sinh bằng khăn ướt vắt khô. Ấn xuống và... - Page 38 Vệ sinh và bảo dưỡng Tháo và gắn nắp hơi „ Lắp đặt ron nắp hơi Gắn ron chắc chắn lên nắp hơi như trong hình bên Ron nhỏ dưới. Nếu ron không được gắn chắc chắn, nó có „ Tháo nắp hơi „...
- Page 39 Nếu gạo không được nấu chín Kiểm tra những điểm sau đây nếu bạn cảm thấy có vấn đề với cơm chín hoặc hoạt động của nồi cơm điện, v.v. Vấn đề Nguyên nhân Điểm kiểm tra Có một màng mỏng che phủ Một màng mỏng, mịn được tạo thành bằng tinh bột khô...
-
Page 40: Khắc Phục Sự Cố
Nếu thức ăn không được nấu chín Khắc phục sự cố Kiểm tra những điểm sau đây nếu bạn cảm thấy có vấn đề với thực phẩm được nấu. Kiểm tra những điều sau trước khi yêu cầu dịch vụ sửa chữa. Điểm kiểm tra Trang Triệu chứng... -
Page 41: Nếu Những Dấu Hiệu Này Xuất Hiện
Khắc phục sự cố Điều chỉnh thời gian hấp (Menu “Express-Limited Cups” (Nồi siêu tốc)) Trang Triệu chứng Điểm kiểm tra Thực hiện tham khảo Thời gian hiện tại, cài đặt hẹn giờ Phần “0:00” có nhấp nháy trên màn Pin lithium cạn kiệt. -
Page 42: Hướng Dẫn Thực Đơn
● Hướng dẫn thực đơn này sử dụng cốc đong khoảng 0,18 lít (được kèm theo). ● Một thìa canh là 15 mL. Hướng dẫn thực đơn ● Một thìa cà phê là 5 mL. ● Khi bỏ quá nhiều gia vị như nước tương, rượu gạo nấu ngọt, v.v., thức ăn có thể... - Page 43 Sekihan Xôi kiểu Trung Dễ dàng nấu các món ăn mới nấu Menu Menu Menu Mixed/ Mixed/ Slow Cook (Xôi đậu đỏ) Quốc Có thể dễ dàng nấu các món ăn độc đáo bằng cách tận dụng Sweet Sweet các nguyên liệu theo mùa. 329kcal/Dành 426kcal/Dành Chú...
-
Page 44: Cài Đặt Thời Gian Hiện Tại
Cài đặt thời gian hiện tại Thịt gà và nấm shimeji Menu Slow Cook với sốt cà chua Thời gian hiện tại được hiển thị theo định dạng 24 giờ. Không thể cài đặt thời gian khi các hoạt động sau được thực hiện. •... -
Page 45: Thông Số Kỹ Thuật
Thông số kỹ thuật Kích thước đơn vị Loại 1,0 lít (5,5 cốc) Loại 1,8 lít (10 cốc) Nguồn điện áp định danh/Tần số 220 V 50Hz định danh Đầu vào công suất định danh (W) 1.080 1.198 Plain/White (Gạo thường/Gạo 0,18 đến 1,0 (1 đến 5,5 cốc) 0,36 đến 1,8 (2 đến 10 cốc) trắng) - Page 46 TIGER CORPORATION Head Office: 3-1 Hayami-cho, Kadoma City, Osaka 571-8571, Japan...
Need help?
Do you have a question about the JKT-D and is the answer not in the manual?
Questions and answers