Table of Contents
Advertisement
When using electrical appliances, basic safety precautions should
always be followed. Do not use the Emeril Lagasse Pressure
TM
Air Fryer Plus
until you have read this manual thoroughly.
Owner's Manual
Save These Instructions – For Household Use Only
MODELS: Y6D-AF-36B (6 qt.) - Y8D-AF-36B (8 qt.)
Visit TristarCares.com for tutorial
videos, product details, and more.
Guarantee Information Inside
Advertisement
Table of Contents

Related Manuals for Emeril Lagasse Pressure Air Fryer Plus Y6D-AF-36B


Summary of Contents for Emeril Lagasse Pressure Air Fryer Plus Y6D-AF-36B
- Page 1 MODELS: Y6D-AF-36B (6 qt.) - Y8D-AF-36B (8 qt.) When using electrical appliances, basic safety precautions should Visit TristarCares.com for tutorial always be followed. Do not use the Emeril Lagasse Pressure videos, product details, and more. Air Fryer Plus until you have read this manual thoroughly.
- Page 2 But before you begin, it's very important that you read this entire manual, making certain that you are totally familiar with this appliance's operation and precautions. 6- & 8-Quart Emeril Lagasse Pressure AirFryer™ Plus...
-
Page 3: Table Of Contents
Lid Assembly Preparing for Pressure Cooking Check Parts & Accessories Test Run Conducted with Water Only Instructions for Pressure Cooking Instructions for Air Frying Preset Cooking Programs General Pressure Cooking Time Charts 6- & 8-Quart Emeril Lagasse Pressure AirFryer™ Plus... -
Page 4: Important Safeguards
CUP). Overfilling can clog the Pressure Release cooled and all internal pressure has been released. Valve, which can cause excess pressure to develop. If the lid is difficult to open, this indicates that the Unit 6- & 8-Quart Emeril Lagasse Pressure AirFryer™ Plus... - Page 5 Valve and developing excess pressure (please refer recommend protecting your surface by placing a to the recipe). hot pad or trivet under the Emeril Lagasse Pressure AirFryer Plus for heat protection. Your manufacturer 19. CAUTION: NEVER deep fry or fill with oil. Do not use or installer may recommend that hot pans, pots, or this pressure cooker for pressure frying with oil.
- Page 6 Do not place anything on top of the appliance. 48. If the Emeril Lagasse Pressure AirFryer Plus is used improperly or for professional or semiprofessional 37. DO NOT place the Unit on stove top surfaces, purposes or if it is not used according to the including gas, glass, and electric stove tops.
-
Page 7: Attaching The Power Cord
CAUTION: Attaching the Power Cord • • Always attach electrical cord to the Emeril Lagasse Model Y6D-AF-36B has been designed for use with a Pressure AirFryer Plus before plugging the Unit into 3-prong, grounded, 120V dedicated electrical outlet only. -
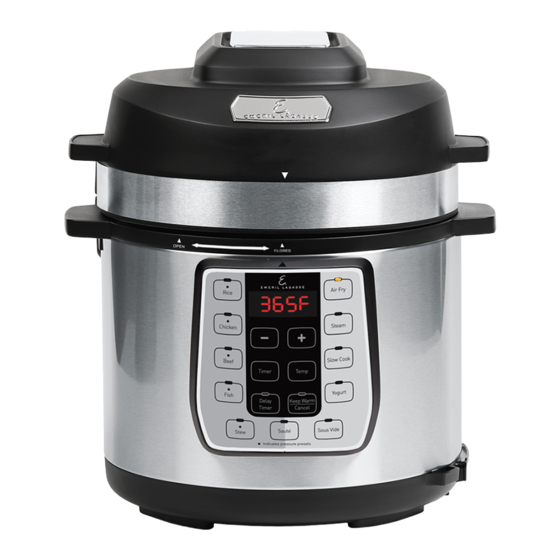
Page 8: Parts & Accessories
Release Valve Steam Release Switch Lid Handle Center Knob Pressure Release Float Valve Valve (underside) Rubber Gasket Steam Pressure Caution Label (Do Not Remove) Release Switch Float Valve Release Valve Lid Handle 6- & 8-Quart Emeril Lagasse Pressure AirFryer™ Plus... - Page 9 NOTE: Do not tilt or angle the lid when placing (Hot Air) or removing. Lift or lower the lid straight up or down to ensure that the wire harnesses in the lid and base connect properly. 6- & 8-Quart Emeril Lagasse Pressure AirFryer™ Plus...
- Page 10 The Max Fill Line in the Inner Pot is represented by "FULL CUP." Program LED Display Base Settings DO NOT fill past the Max Fill Line. Pressure Lid Underside Pressure Lid: Pressure Lid: (with Inner Lid) Inner Lid Center Gasket Inner Lid Outer Gasket 6- & 8-Quart Emeril Lagasse Pressure AirFryer™ Plus...
- Page 11 If any part appears damaged, do not use this product. Contact Customer Service using the contact information located in the back of this manual. For replacement parts, visit: www.PressureAirFryer.com. 6- & 8-Quart Emeril Lagasse Pressure AirFryer™ Plus...
-
Page 12: Features & Benefits
7. EXCESS PRESSURE RELEASE SYSTEM: The Pressure Release Valve regulates the pressure inside the Unit to a controlled value. When sufficient pressure has built up inside the Unit, the Pressure Release Valve opens to release excess pressure. 6- & 8-Quart Emeril Lagasse Pressure AirFryer™ Plus... -
Page 13: Special Features
Unit by opening the Pressure Release Valve. completely PTFE and PFOA free. WARNING: After sliding the Steam Release Switch from the Closed Position to the Open position, hot steam and/or liquid can emit 6- & 8-Quart Emeril Lagasse Pressure AirFryer™ Plus... -
Page 14: Releasing Pressure After Pressure Cooking
Releasing Pressure After Pressure Cooking NATURAL RELEASE AND RAPID RELEASE Natural release and rapid release are two common The Emeril Lagasse Pressure AirFryer Plus has a methods used to depressurize a pressure cooker safety mechanism that prevents the Pressure Lid once active cooking is complete. - Page 15 Steam Release Switch to the Open position, let doneness of food or to add additional ingredients to go of the Steam Release Switch, and wait for the the Emeril Lagasse Pressure AirFryer Plus, such as steam to evacuate. Once the steam has been when cooking a stew.
-
Page 16: Instructions For Pressure Lid Assembly
Lid onto the Center Knob on the underside of the Lid (see Fig. iii). 7. Ensure that the Inner Lid is facing outward and that the Inner Lid Rubber Gasket sits correctly and evenly on the Inner Lid. 6- & 8-Quart Emeril Lagasse Pressure AirFryer™ Plus... - Page 17 PRESSURE RELEASE VALVE ASSEMBLY NOTE: Do not attempt to assemble or disassemble the Pressure Release Valve when the Emeril Lagasse Pressure AirFryer Plus is in use. 1. Pull to remove the Pressure Release Valve (see Fig. ix). 2. Ensure that the Pressure Release Valve and holes are not blocked FIG.
-
Page 18: Preparing For Pressure Cooking
Closed Mark (see Fig. D). When the Pressure Lid is locked, the Release Switch will move to the 3. Remove the Pressure Lid. Place the Inner Lid Closed position (see Fig. E). 6- & 8-Quart Emeril Lagasse Pressure AirFryer™ Plus... - Page 19 FIG. E FIG. G (Open Position) (Closed Position) (Valve is Down and Closed) Note the slight Incline FIG. D FIG. F FIG. H (Locked Position) (Open Position) (Valve is Up and Open) 6- & 8-Quart Emeril Lagasse Pressure AirFryer™ Plus...
-
Page 20: Instructions For Pressure Cooking
1. Review PREPARING FOR PRESSURE COOKING (see p. 18) to learn about the Unit. 7. Attach the Power Cord into the Emeril Lagasse Pressure AirFryer Plus and then into a wall outlet (see ATTACHING THE POWER CORD, p. 7). When the 2. - Page 21 NOTE: Foods kept at Keep Warm mode for longer removing the Pressure Lid, gently tap/jiggle the Unit than 6–8 hours may lose their flavor and texture. after releasing pressure to burst the bubbles. 6- & 8-Quart Emeril Lagasse Pressure AirFryer™ Plus...
-
Page 22: Instructions For Air Frying
1. Review PREPARING FOR PRESSURE COOKING (see p. 18) to learn about the Unit. 6. Attach the Power Cord into the Emeril Lagasse Pressure AirFryer Plus and then into a wall outlet (see 2. Place the Emeril Lagasse Pressure AirFryer Plus ATTACHING THE POWER CORD, p. - Page 23 You can use the Pressure AirFryer Plus to reheat do so just before cooking and add only a small foods. Simply set the temperature and time to amount onto the potato. however warm you want your food. 6- & 8-Quart Emeril Lagasse Pressure AirFryer™ Plus...
-
Page 24: Preset Cooking Programs
The Keep Warm function for all presets (except Sous Vide and Yogurt) lasts for a maximum time of 24 hours. Foods kept at Keep Warm mode for longer than 6–8 hours may lose flavor and texture. 6- & 8-Quart Emeril Lagasse Pressure AirFryer™ Plus... -
Page 25: General Pressure Cooking Time Charts
Pearl onions, whole Potatoes, 1 ½-in. chunks Clams 2–3 Potatoes, whole, medium 10–11 Lobster (1 ½–2 lb) 2–3 Squash, acorn, halved Shrimp 1–2 Squash, summer, zucchini Fish, soup, or stock 1–4 5–6 6- & 8-Quart Emeril Lagasse Pressure AirFryer™ Plus... -
Page 26: Sous Vide
Timer Button and use the +/− Buttons to adjust the time to a custom time setting. Then, press the Temp Button and use the +/− Buttons to adjust the cooking temperature to your desired temperature. 6- & 8-Quart Emeril Lagasse Pressure AirFryer™ Plus... - Page 27 Filet or Steak 125° F (52° C) 45 mins. Eggs Poached 150° F (65° C) 1 hr. Vegetables Green Vegetables 180° F (82° C) 5–20 mins. Root Vegetables 180° F (82° C) 1.5–3 hrs. 6- & 8-Quart Emeril Lagasse Pressure AirFryer™ Plus...
-
Page 28: Yogurt
Inner Pot. to standby mode. 3. Press the Yogurt Button. The LED Display 7. Place the Glass Lid on the Emeril Lagasse will show "5:00." The Unit wil start heating up. Pressure AirFryer Plus. 4. Once the Unit reaches 180° F, the Unit will stop 8. - Page 29 (the flavor will be best within colander set over a bowl and let the yogurt the first week). 6- & 8-Quart Emeril Lagasse Pressure AirFryer™ Plus...
-
Page 30: Frequently Asked Questions
Yes! You may press the Timer Button and use the +/− Buttons to adjust the time to a custom time setting. Then, press the Temp Button and use the +/− Buttons to adjust the cooking temperature to your desired temperature. 6- & 8-Quart Emeril Lagasse Pressure AirFryer™ Plus... -
Page 31: Care & Cleaning
Any other Gasket to the Inner Lid. servicing should be performed by an authorized service representative. NOTE: Check before each use to make sure the Rubber Gasket is clean, flexible, and not torn. 6- & 8-Quart Emeril Lagasse Pressure AirFryer™ Plus... -
Page 32: Troubleshooting
Too much liquid in Unit Float Valve less liquid in future recipes. Unit turns off Appliance is overheated Unplug and let the Unit cool for 30 mins. in order to reset. unexpectedly CONTINUED ON NEXT PAGE 6- & 8-Quart Emeril Lagasse Pressure AirFryer™ Plus... - Page 33 Dimensions With Air Fryer Lid: 13.3"(D) x 12.3"(W) x 14.5"(H); Dimensions With Pressure Lid: 13.3"(D) x 12.3"(W) x 13.0"(H) AC 120V~60Hz 1550W 8 qt. 0–80 kPa 80–90 kPa Y8D-AF-36B Dimensions With Air Fryer Lid: 14.1"(D) x 13.3"(W) x 15.5"(H); Dimensions With Pressure Lid: 14.1"(D) x 13.3"(W) x 14.0"(H) 6- & 8-Quart Emeril Lagasse Pressure AirFryer™ Plus...
-
Page 34: 90-Day Guarantee
Write the return merchandise authorization number on the outside of the package. Send the product to the following return address: Emeril Lagasse Pressure AirFryer Plus Tristar Products 500 Returns Road, Wallingford, CT 06495 6- & 8-Quart Emeril Lagasse Pressure AirFryer™ Plus... - Page 36 We are very proud of the design and quality of our Emeril Lagasse Pressure AirFryer Plus This product has been manufactured to the highest standards. Should you have any questions, our friendly customer service staff is here to help you.
Need help?
Do you have a question about the Pressure Air Fryer Plus Y6D-AF-36B and is the answer not in the manual?
Questions and answers