
Related Manuals for Reflex Variomat 140 Series


Summary of Contents for Reflex Variomat 140 Series
- Page 1 25.09.2020 - Rev. A Variomat 140 Variomat VS 1-1 / 140 Variomat VS 1-2 / 140 Operating manual Original operating manual...
-
Page 2: Table Of Contents
7.3.3 Tank installation ..............9 13 Annex ................25 7.3.4 Hydraulic connection ............10 13.1 Reflex Customer Service ..............25 7.3.5 Fitting the thermal insulation .......... 11 13.2 Conformity and standards ..............25 7.3.6 Fitting the level sensor ............. 12 13.3... -
Page 3: Notes On The Operating Manual
Reflex Winkelmann GmbH accepts no liability for any damage resulting from Personnel requirements failure to observe the information in this operating manual. In addition to the... -
Page 4: Description Of The Device
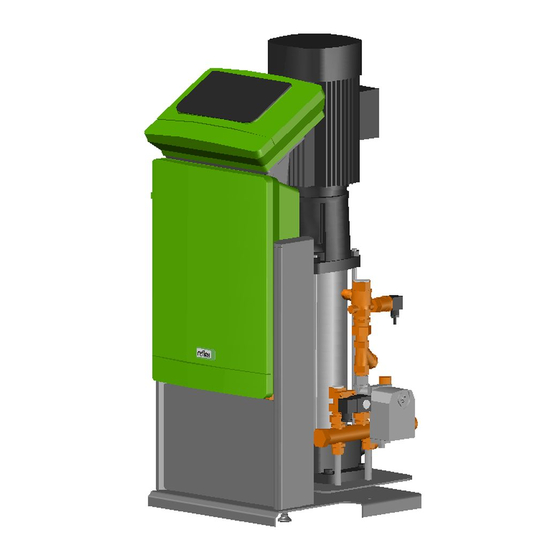
Connecting unit for "VF" primary vessel pump(s) Feed and drain cock "FD" • Operating unit for "LIS" level sensor "Reflex Control Touch" controller Heating system WV Make-up valve "VE" equalisation elbow "MAG" expansion vessel PIS Pressure sensor Reflex Fillset Impulse... -
Page 5: Scope Of Delivery
All digital inputs and outputs can be set freely as option. Settings – Plastic sleeve with operating manual. to be made by Reflex Customer Service, see chapter 13.1 "Reflex Customer Service" on page 25 Optional equipment and accessories Technical data The following optional equipment and accessories are available for this device: •... -
Page 6: Settings
I/O module (optional expansion module) Device controllers and I/O module in Master-Slave function Inputs, outputs • 6 floating relay outputs (changeover) • 3 digital inputs 230 V AC • 3 digital inputs 24 V AC • 2 Analogue outputs (these are not required, because they are already contained in the Control Touch controller). -
Page 7: I/O Module Default Settings
Default settings apply to software version V1.10 and higher. • All digital inputs and outputs can be set freely as option. The setting is carried out by Reflex Customer Service, see chapter 13.1 "Reflex Customer Service" on page 25 Signal... -
Page 8: Replacing The Fuses
Technical data Replacing the fuses Tanks DANGER Risk of electric shock! Risk of serious injury or death due to electric shock. Some parts of the main board may still carry 230 V voltage even with the device physically isolated from the 230 V power supply. •... -
Page 9: Installation Conditions
For add-on components, proceed as follows: – Provide an optional cold water inlet. Install the Reflex Exvoid (2) at the connection of the corresponding vessel. – Prepare a drain for the drain water. Remove the protective cap from the degassing valve. -
Page 10: Hydraulic Connection
Installation Comply with the following notes regarding the installation of the primary vessel • Align the primary vessel, see chapter 7.3.1 "Positioning" on page 9 . and the secondary vessels: • Connect the connection set (2) and (3) with the screw fittings and gaskets to the connections at the lower vessel flange of the primary vessel. -
Page 11: Fitting The Thermal Insulation
Fitting the thermal insulation Pressure expansion vessel If required, install a diaphragm expansion vessel MAG ≥ 35 litres (Reflex N, for example). It reduces the switching frequency and can be also used in the individual protection of the heat generators. According to DIN / EN 12828, the installation of valves between the device and the heat generator is required for heating systems. -
Page 12: Fitting The Level Sensor
Customer menu" on page 18 . • If you don't connect a Reflex Fillset upstream, use an "ST" dirt trap with a mesh size ≥ 0.25 mm for the make-up. Standard values for level measurements: ... -
Page 13: Electrical Connection
The vessel of the heat generator must be fitted with an individual protective device. District heating house substation • When using Reflex Fillsoft softening systems, always install the Fillset Impulse. Primary vessel –... -
Page 14: Terminal Plan, Connection Component
Installation Disconnect the system from the power source and secure it against Terminal Signal Function Wiring unintentional reactivation. number Remove the covers. DANGER Risk of serious injury or death due to electric shock. Some Factory- PU 2 pump parts of the device's circuit board may still be live with 230 V even after the provided device has been physically isolated from the power supply by pulling out of the mains plug. -
Page 15: Terminal Plan, Operating Unit
Commissioning 7.5.2 Terminal plan, operating unit Note! If required, please contact the Reflex Customer Service for the protocol of the RS-485 interface, details of the connections and information about the accessories offered. 7.5.3.1 Connecting the RS-485 interface Main circuit board of the Control Touch controller. -
Page 16: Variomat Switching Points
Commissioning Variomat switching points Step PM Code Description Select the primary vessel nominal volume The "P " minimum operating pressure is determined by the location of the pressurisation. The controller calculates the switching points for the solenoid Null balancing: The primary vessel must be empty! valve "PV"... -
Page 17: Filling The Tanks With Water
Wear suitable personal protective equipment (safety gloves and commission the device. In this case, please contact Customer Service, goggles). see chapter 13.1 "Reflex Customer Service" on page 25 . Vent the "PU" pumps as follows: Press "OK" to conclude the start routine. -
Page 18: Parametrising The Controller In The Customer Menu
Operation Continuous degassing Note! After commissioning and repairs to the connected system, select the continuous • Repeat venting after the first starting of the pump. It is possible degassing program. that downstream air cannot escape with the pumps stationary. •... -
Page 19: Summer Operation
Controller Functions: Controller Except for the display of information, the device is non-functional in Stop mode. 10.1 Operator panel Function monitoring is stopped. The following functions are deactivated: • The "PU" pump is switched off. • The "PV" motor ball valve in the "PV" overflow line is closed. •... -
Page 20: Configuring Settings In The Controller
Press "X" to cancel your input without saving the new settings. The controller automatically opens again the list. 10.3.2 Service menu This menu is protected with a password. It can be accessed only by the Reflex Customer Service. 20 — English Variomat 140 — 25.09.2020 - Rev. A... -
Page 21: Default Settings
Controller 10.3.3 Default settings Press "Degassing >". – The controller switches to the selected area. The device controller is shipped with the following default settings. Use the – Use the scroll bar to navigate "up" and "down" through the list. Customer menu to adjust these values to local conditions. -
Page 22: Degassing Programmes - Overview
Message causes can be eliminated by the operator or a specialist workshop. If • Automatic start after execution of the start routine during commissioning. this is not possible, contact the Reflex Customer Service. • Activated from the Customer menu. ... -
Page 23: Maintenance
Ensure that installation work for the electric connection of the device is Arrange for maintenance tasks must be carried out only by specialist carried out by an electrician, and in compliance with electrical personnel or Reflex Customer Service. engineering regulations. CAUTION... -
Page 24: Maintenance Schedule
Maintenance 11.1 Maintenance schedule 11.1.2 Cleaning the tanks The maintenance schedule is a summary of maintenance tasks to be carried out CAUTION regularly. Risk of injury due to pressurised liquid If installation, removal or maintenance work is not carried out correctly, there is a risk of burns and other injuries at the connection points, if pressurised Activity Interval... -
Page 25: Inspection
13.2 Conformity and standards national regulations for the operation of pressure equipment. Device conformity declarations are available on the Reflex homepage. Disassembly www.reflex-winkelmann.com/konformitaetserklaerungen DANGER Alternatively, scan the QR code: Risk of serious injury or death due to electric shock. - Page 26 Annex Installation and commissioning certificate - This device has been installed and commissioned in accordance with the instructions provided in the operating manual. The settings in the controller match the local conditions. Typ / Type: Fabr. Nr. / Serial-No. 26 — English Variomat 140 —...
- Page 27 Reflex Winkelmann GmbH Gersteinstraße 19 59227 Ahlen, Germany +49 (0)2382 7069-0 +49 (0)2382 7069-9546 www.reflex-winkelmann.com...
Need help?
Do you have a question about the Variomat 140 Series and is the answer not in the manual?
Questions and answers