Table of Contents
Advertisement
Quick Links
Advertisement
Table of Contents

Related Manuals for Planmeca ProScanner 2.0


Summary of Contents for Planmeca ProScanner 2.0
- Page 1 Planmeca ProScanner ® user's manual 30019182 30019182...
- Page 2 IEC 60364 - equipment is used according to the operating instructions. Planmeca pursues a policy of continual product development. Although every effort is made to produce up-to-date product documentation this publication should not be regarded as an infallible guide to current specifications. We reserve the right to make changes without prior notice.
-
Page 3: Table Of Contents
Image plate........................19 Light protection cover........................19 Assembly..............................20 Requirements..........................20 3.1.1 Installation/setup room....................20 3.1.2 System requirements....................20 3.1.3 Monitor......................... 20 Installation............................ 20 3.2.1 Setting up unit......................20 3.2.2 Electrical connections....................25 3.2.3 Network connections....................27 User's manual Planmeca ProScanner 2.0... - Page 4 Table of contents Commissioning..........................28 3.3.1 Network configuration....................28 3.3.2 Network protocols and ports..................28 3.3.3 Configuring unit in Planmeca Device Tool..............29 3.3.4 X-ray unit settings......................30 3.3.5 Acceptance tests......................31 Usage............................... 33 Correct use of image plates......................33 Operation............................35 4.2.1 Changing input unit cartridge..................
-
Page 5: Important Information
This user's manual represents part of the unit. If the instructions and information in this user's manual are not followed, Planmeca will not be able to offer any warranty or assume any liability for the safe operation and the safe functioning of the unit. - Page 6 Switch off and de-energise the unit (e.g. unplug from mains) Do not reuse Health Industry Bar Code (HIBC) Direct current (DC) Non-ionizing electromagnetic radiation This way up / store and transport in an upright position Keep dry Stacking limits Planmeca ProScanner 2.0 User's manual...
-
Page 7: Copyright Information
Personal injury due to fire • Personal injury due to thermal effects on the skin • Personal injury due to lack of hygiene, for example, infection You should therefore observe the safety information in the following sections. User's manual Planmeca ProScanner 2.0... -
Page 8: Intended Purpose
1 Important information 1.2.1 Intended purpose Planmeca ProScanner 2.0 The unit is intended exclusively for use in dental applications for the scanning and processing of image data on an image plate. Light protection cover The functions of the light protection cover are as follows: •... -
Page 9: General Safety Information
Instruct or have every user instructed in handling the unit. Installation and repairs Installation, readjustments, alterations, upgrades and repairs must be carried out by Planmeca or by qualified personnel specifically approved and authorised by Planmeca. 1.2.6 Electrical safety •... -
Page 10: Essential Performance Characteristics
Only use only original wear parts and replacement parts. Planmeca accepts no liability for damages or injury resulting from the use of non-approved accessories or optional accessories, or from the use of non- original wear parts or replacement parts. -
Page 11: Disposal
Restrict access to units to trustworthy users, e.g. via a user name and password • Make sure that only trustworthy content is downloaded • Only install software and firmware updates that have been authenticated by the manufacturer User's manual Planmeca ProScanner 2.0... -
Page 12: Product Description
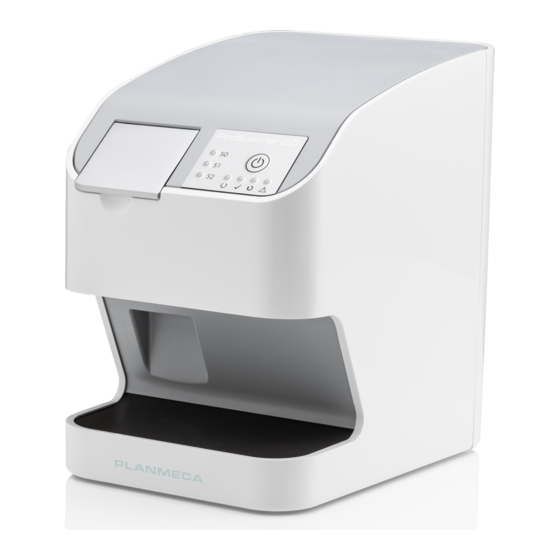
2 Product description 2 Product description 2.1 Overview 1 Planmeca ProScanner 2.0 image plate scanner 2 Cartridge for image plates (S0 up to S2) 3 Planmeca imaging plate 4 Planmeca light protection cover 5 Romexis and imaging software USB stick... -
Page 13: Accessories
Planmeca Imaging Plate, Size 2 (4pcs) • Planmeca Imaging Plate, Size 2 (12pcs) Light protection covers • Planmeca Light Protection Cover, Size 0 (100 pcs) • Planmeca Light Protection Cover, Size 1 (100 pcs) • Planmeca Light Protection Cover, Size 2 (300 pcs) •... -
Page 14: Wear Parts And Replacement Parts
For more information on the image plates, see section "Accessories" on page 9. For more information on wear parts and replacement parts, contact your local distributor through www.planmeca.com. 2.2 Technical data 2.2.1 Image plate scanner Electrical data for the unit... - Page 15 11:2009+A1:2010 Electromagnetic compatibility (EMC) interference immunity measurements cover Immunity to interference, discharge of static Compliant electricity IEC 61000-4-2:2008 ± 8 kV contact ± 2 kV, ± 4 kV, ± 8 kV, ± 15 kV air User's manual Planmeca ProScanner 2.0...
- Page 16 GSM 1800 1700 - 1990 CDMA 1900 GSM 1900 DECT LTE band 1, 3, 4, 25 UMTS Bluetooth 2400 - 2570 WLAN 802.11 b/g/n RFID 2450 LTE band 7 WLAN 802.11 a/n 5100 - 5800 Planmeca ProScanner 2.0 User's manual...
- Page 17 ± 8 kV contact ± 2kV, ± 4 kV, ± 8 kV, ± 15 kV air Immunity to interference, rapid transient bursts – Compliant I/O, SIP/SOP ports IEC 61000-4-4:2012 ± 1 kV 100 kHz repetition frequency User's manual Planmeca ProScanner 2.0...
-
Page 18: Image Plate
Relative humidity % < 80 Dimensions of intraoral image plates Size 0: 22 x 35 mm Size 1: 24 x 40 mm Size 2: 31 x 41 mm 2.2.3 Light protection cover Classification Medical Devices Directive (93/42/EEC) Class I Planmeca ProScanner 2.0 User's manual... -
Page 19: Type Plate
European Union guidelines. This equipment conforms to all relevant requirements. Dürr Dental hereby declares that the radio system type "Planmeca ProScanner 2.0" conforms to directive 2014/53/EU. The full text of the EU Declaration of Conformity is available at www.duerrdental.com. -
Page 20: Operation
4 Collection tray The image plate scanner is used to read image data stored on an image plate and to transfer the data to the imaging software (e.g. Planmeca Romexis) on a computer. The transport mechanism guides the image plate through the device. The image plate is read using a laser inside the scanner unit. - Page 21 8 Display for cartridge S0 The status LEDs display the following status messages: Device starts Communication display Standby Ready to scan Image plate currently being processed Cartridge for image plate missing Error A message is displayed in the software User's manual Planmeca ProScanner 2.0...
-
Page 22: Cartridges (S0-S2)
According to the image plate used, the cartridge corresponding to the size of the image plate must be inserted in the device. The cartridge that is currently in the device is indicated via the LEDs on the device. Planmeca ProScanner 2.0 User's manual... -
Page 23: Image Plate
The positioning aid is visible on the X-ray image and makes it easier to align the image correctly during diagnosis. NOTE Use only Planmeca imaging plates with the unit. The unit is unable to read any other types of image plates. 2.4 Light protection cover The light protection cover protects the image plate against light. -
Page 24: Assembly
3 Assembly 3 Assembly NOTE Only qualified specialists or employees trained by Planmeca are permitted to install, connect and start using the unit. 3.1 Requirements 3.1.1 Installation/setup room The room chosen for set up must fulfil the following requirements: •... - Page 25 3.2.1.2 Wall-mounted installation The unit can be mounted on a wall with the wall mounting bracket (optional article Wall mounting Plate for ProScanner 2.0). The following information is supplementary to the device user's manual. As a general rule, the user's manual for the device must also be observed.
- Page 26 The load rating of the wall and the fastening material must be suitable for a weight of approx. 5 kg (device + wall bracket). 1. Place the wall mounting bracket in place horizontally and secure using appropriate materials. 2. Remove rear rubber feet and the screws under them. Planmeca ProScanner 2.0 User's manual...
- Page 27 3. Remove the unit's rear side cover: Remove the cover plugs and the attachment screws under the edge of the rear side cover. 4. Pull the lower edge of the rear side cover out (1) and remove it downwards (2). User's manual Planmeca ProScanner 2.0...
- Page 28 When operating the device, the rear side cover must be mounted. Mount cover by slotting the top edge into place (1), then closing the cover (2) and securing with screws. Make sure the cables are correctly fed through the bottom edge of the cover. Planmeca ProScanner 2.0 User's manual...
-
Page 29: Electrical Connections
Mains voltage must match the information shown on the type plate of the power supply unit NOTE Only the supplied power supply unit may be used. Connection 1. Attach the matching country-specific adapter to the power supply unit. User's manual Planmeca ProScanner 2.0... - Page 30 5. Plug the mains plug into the power outlet. 6. Refit the cover. NOTE The cover on the rear must be correctly fitted when the device is operated within the patient environment. Planmeca ProScanner 2.0 User's manual...
-
Page 31: Network Connections
PC system, both in and outside the patient environment • Only connect peripheral units (such as computers, monitors or printers) that conform at least to the requirements set out in IEC 60950‑1 (EN 60950‑1) User's manual Planmeca ProScanner 2.0... -
Page 32: Commissioning
Configure the network settings of the unit using the software or, if applicable, the touch screen. Check the firewall and release the ports, if applicable. 3.3.2 Network protocols and ports Port Purpose Service 45123 UDP, 45124 UDP Unit recognition and configuration Planmeca ProScanner 2.0 User's manual... -
Page 33: Configuring Unit In Planmeca Device Tool
1. Start Planmeca Device Tool. 2. From the Device Tool launcher, select ProScanner 2.0. 3. Select the Planmeca ProScanner 2.0 unit from the left most device panel (if not yet selected). The connected ProScanner 2.0 should become visible in the Proscanner 2.0 devices list. -
Page 34: X-Ray Unit Settings
3 Assembly Romexis user's manual (publication For more information see the number 10014593) 3. Start ProScanner 2.0 image capturing. Romexis user's manual , section Image For more information see the capturing with ProScanner 2.0. 3.3.4 X-ray unit settings NOTE If 60 kV can be set on the X-ray unit, this setting is preferred. -
Page 35: Acceptance Tests
The constancy tests, which must be carried out at regular intervals by the surgery personnel, are based on the results of the acceptance test. For more information, see the Planmeca intraoral imaging system constancy tests manual (publication number 10009324). Electrical safety checks •... - Page 36 3 Assembly NOTE A sample template for a handover protocol is included in section "Sample handover protocol template" on page 61. Planmeca ProScanner 2.0 User's manual...
-
Page 37: Usage
If the light protection cover has been damaged in the patient's mouth, rinse the mouth thoroughly with lots of water. Do not swallow the water in the process. • Image plates must only be read using an image plate scanner that is approved by the manufacturer. User's manual Planmeca ProScanner 2.0... - Page 38 If the image plate has been stored for longer than one week, erase the image plate prior to use. • Do not store image plates under hot or moist conditions. Observe the correct ambient conditions (see section "Technical data" on page 10). Planmeca ProScanner 2.0 User's manual...
-
Page 39: Operation
Loss of image information and equipment damage if an incorrect cartridge is used. Always use the correct size of cartridge for the image plate being used. Before each scanning process, compare the image plate size with the LED display on the control element. User's manual Planmeca ProScanner 2.0... - Page 40 1. Check that the correct cartridge has been inserted with the display (S0, S1, S2). If the incorrect cartridge has been inserted, it must be removed and the correct cartridge inserted. 2. Open the cover. Planmeca ProScanner 2.0 User's manual...
- Page 41 4 Usage 3. Remove cartridge. The green cartridge display extinguishes. When the device is ready to scan, the green status LED flashes in addition. User's manual Planmeca ProScanner 2.0...
-
Page 42: Capturing X-Ray Images
WARNING Danger due to multiple use of products that are designed for single usage. The disposable article is damaged after use and can no longer be used. Dispose of disposable items after a single use. Planmeca ProScanner 2.0 User's manual... - Page 43 1. If using it for the first time or if it has been stored for over a week: erase the image plate (see section "Erasing image plate" on page 48). 2. Completely slide the image plate into the light protection cover. The black (inactive) side of the image plate must be visible. User's manual Planmeca ProScanner 2.0...
- Page 44 Damage to the image plate caused by a sharp-edged holding system Only use holding systems that will not damage the light protection cover or the image plates in any way. Do not use holding systems with sharp edges. Planmeca ProScanner 2.0 User's manual...
- Page 45 Clean and disinfect the light protection cover before removing the image plate. 2. In the event of heavy soiling, e.g. from blood, dry clean the light protection cover and protective gloves, e.g. wipe with a clean cellulose cloth. User's manual Planmeca ProScanner 2.0...
-
Page 46: Scanning Image Data
6. Tear off the light protection cover. 4.2.3 Scanning image data Starting image plate scanner and software NOTE The reading-out process is described using the Planmeca Romexis imaging software. Romexis user's manual , section ProScanner For further information see the 2.0 single image capturing. - Page 47 The green status LED lights up. Scan the image plate at this point (and not before). Scanning image plate NOTE To avoid the mix up of X-ray images, only scan the X-ray images from the selected patient. 1. Open the cover. User's manual Planmeca ProScanner 2.0...
- Page 48 The image plate must not be pulled out of the light protection cover before placement on the input unit. There is the risk of image information being erased by ambient light (see section "Correct use of image plates" on page 33). Planmeca ProScanner 2.0 User's manual...
- Page 49 3. Slide the image plate out of the light protection cover downwards into the unit. The image plate must be inserted fully into the input unit. Make sure that only the image plate, and not the light protection cover, is inserted into the unit. User's manual Planmeca ProScanner 2.0...
- Page 50 4 Usage 4. Remove the empty light protection cover. Planmeca ProScanner 2.0 User's manual...
- Page 51 After it has been scanned, the image plate is erased and drops into the collection tray. 1. When the green status LED lights up, the image is saved to Planmeca Romexis. User's manual Planmeca ProScanner 2.0...
-
Page 52: Erasing Image Plate
Due to an error, the image data on the image plate has not been erased (software error message). As erasing of the image plate is always done by the ProScanner 2.0 after each scan of an image plate, for erasure of the image plate, please introduce the image plate to be erased unexposed by X-ray into the scanner as described in "Scanning image data"... -
Page 53: Image Plate Scanner
The manufacturer recommends ID 213, ID 212 or ID 212 forte instrument disinfectants for the cartridges if an immersion disinfection system is being used; these disinfectants have been subjected to material compatibility testing • Allow the cartridges to completely dry before using them User's manual Planmeca ProScanner 2.0... -
Page 54: Light Protection Cover
Disinfect the image plate storage tray using a disinfection wipe • Alternatively, the image plate storage tray can be treated in a thermal disinfector or steam steriliser Do not exceed a temperature of 134°C when doing this. Planmeca ProScanner 2.0 User's manual... -
Page 55: Maintenance
Annually Visually inspect the device. Check the image plates for signs of scratches and change if necessary. Remove dust and dirt from accessible parts. Carry out a system check. Every 3 years Exchange the cartridges. User's manual Planmeca ProScanner 2.0... -
Page 56: Troubleshooting
Image plate falls out of unit and no image appears on monitor Possible cause Remedy Correct image plate not used Only use Planmeca imaging plates. X-ray image too dark Possible cause Remedy X-ray dose too high Check X-ray parameters. - Page 57 Ghosting or double exposure on X-ray image Possible cause Remedy Image plate exposed twice Only expose the image plate once. Image plate not sufficiently erased Check the erasure unit is working correctly. Inform a service technician if the problem persists. User's manual Planmeca ProScanner 2.0...
- Page 58 Shadow on X-ray image Possible cause Remedy Image plate removed from the light protection Do not handle image plates without a light cover before scanning protection cover. Store the image plate in a light protection cover. Planmeca ProScanner 2.0 User's manual...
- Page 59 X-ray tube and the patient. Check X-ray tube. Software unable to combine the data to make complete image Possible cause Remedy The X-ray dose on the image plate was Increase X-ray dose. insufficient User's manual Planmeca ProScanner 2.0...
- Page 60 Turn the unit so that the light does not fall directly onto the input unit. X-ray image with small bright spots or clouding Possible cause Remedy Micro scratches on the image plate Replace the image plate. Planmeca ProScanner 2.0 User's manual...
- Page 61 Do not push out the image plate until the torn-off and before pushing into the input unit, the image light protection cover has been placed on the plate is pushed out of the light protection cover input unit. User's manual Planmeca ProScanner 2.0...
-
Page 62: Software Errors
Network cable not installed Install the network cable. software No DHCP server connected It may take some time for the imaging software to detect the unit. Update the unit list. Network configuration incorrect Configure the network correctly. Planmeca ProScanner 2.0 User's manual... - Page 63 Inform a service technician if the problem persists. Unit ejects the image plate Correct image plate not used Only use Planmeca imaging without the image data being plates. transmitted to the imaging The ejected image plate can be software.
-
Page 64: Appendix A: Resolution Data
Intra Size 1 (2 x 4) 2.3 MB Intra Size 2 (3 x 4) 3.0 MB A.3 Contact information Distributor Planmeca Oy, Asentajankatu 6, FIN-00880, Helsinki, Finland Phone: +358 20 7795 500, Fax: +358 20 7795 555, http://www.planmeca.com Manufacturer DÜRR DENTAL SE Höpfigheimer Str. 17... -
Page 65: Sample Handover Protocol Template
Appendix A: Resolution data A.4 Sample handover protocol template User's manual Planmeca ProScanner 2.0... - Page 68 Planmeca Oy | Asentajankatu 6 | 00880 Helsinki | Finland tel. +358 20 7795 500 | fax +358 20 7795 555 | sales@planmeca.com | www.planmeca.com 2160200008L02 ...
Need help?
Do you have a question about the ProScanner 2.0 and is the answer not in the manual?
Questions and answers