Table of Contents
Advertisement
Quick Links
Advertisement
Table of Contents

Related Manuals for typical GT1790A


Summary of Contents for typical GT1790A
- Page 1 GT1790A INSTRUCTION BOOK...
-
Page 2: Table Of Contents
Contents Important Safety Instructions..........................1 Specifications................................1 Specifications.............................1 List of standard sewing shapes........................2 Structure..............................3 III. Installation................................5 IV. Operation Preparation............................15 Lubrication...............................15 Attaching the needle..........................15 Threading the needle thread........................16 Threading the bobbin case........................16 Adjusting bobbin thread tension......................17 Installing bobbin case..........................17 Installing the knife........................... - Page 3 Adjusting the needle-to-hook relation.....................66 Adjusting the needle thread trimmer....................... 68 Adjusting the presser bar pressure......................69 Adjusting the bobbin presser unit......................69 Thread tension............................70 Replacing the fuse........................... 71 VII. Standard Parts..............................72 Cloth cutting knife........................... 72 Throat plate..............................72 Presser..............................72 IX. Trouble and Corrective Measures........................79 X.
-
Page 4: Important Safety Instructions
Important Safety Instructions Never operate the sewing machine before adding lubricant into the oiling tank. When operation is completed, please remove dust from the hook bobbin thread cutting knife and check whether the lubricant is sufficient. Be sure to return the activating pedal to the home position after the machine has started to run. A detector is installed so that this sewing machine cannot be operated in the state that the machine head is tilted. -
Page 5: List Of Standard Sewing Shapes
List of standard sewing shapes - 2 -... -
Page 6: Structure
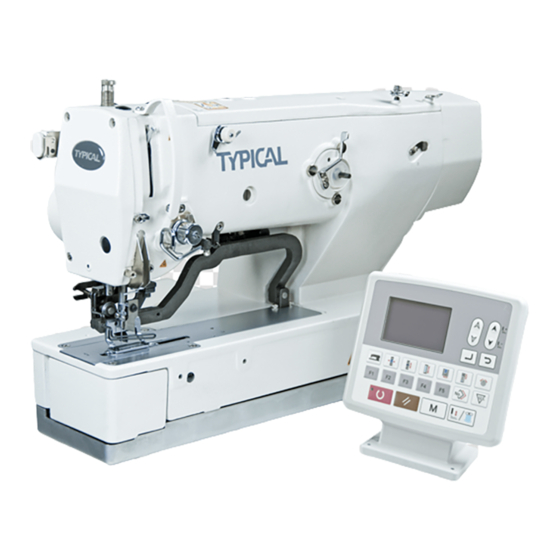
Structure - 3 -... - Page 7 CSM-1790A is composed of the following components Power switch ❶ Sewing machine head (CSM-1790A) ❷ Operation panel ❸ Electrical box ❹ Pressor lifting pedal ❺ Thread stand device ❻ - 4 -...
-
Page 8: Installation
III. Installation (1) Table Assembly Fix control box⑽ and power switch⑿ on the table. Fix the power switch⑿ with fixing strip. Pass four bed base fixed screws (4) through bed base. Install rubber cushions ⒃ to holes⒄ (4) for fixing bed base and the fixe the bed base⒂. Fix machine head support bar⑾... - Page 9 (2) Connecting the power cord Voltage specification Power source specifications are indicated on the voltage indication tag and the rating label. Please choose cables according to the specification. Voltage indication tag Rating label Please do not run the machine under different voltage specifications. Connection for single phase 200V, 220V, 230V and 240V Light blue Light blue Table...
- Page 10 (3) Installation of the sewing machine main unit When handling sewing Caution machine, be sure to perform the work with two persons or more. Install hinges❶ and bearing blocks❷ (❷-1: rubber, ❷-2: metal) on machine head position 2, and fix hinge plates on the sewing machine head with setscrews❸...
- Page 11 (5) Connection of machine head tilting detector Connect the safety switch connector❶ to the connector❷ on the machine head side. (6) Installation of the hook oil-proof plate (7) Installation of operation panel Please fix the operation panel❶ with 4 wood screws❷...
- Page 12 (8) Connection of the cable Sewing machine head SDC printed circuit board Operation panel MAIN printed circuit board Electric bobbin winding device (optional) SDC printed circuit board As shown in the figure, pass 4 cables, which are on the right part of cables connected to the MAIN printed circuit board, through cable clamp A and insert them to corresponding connectors (CN38, 39, 41, 42).
- Page 13 (9) Handling of the cord 1) Please tilt the sewing machine slowly while confirm that no cable is forcibly pulled. 2) As shown in the figure, secure cables with cable fixing plate❶. When tilting the sewing machine, please make sure that the machine head support bar❷ has been installed on the table.
- Page 14 (10) Installation of the eye protective cover Warning Be sure to attach this cover to protect the eyes from the disperse of needle breakage. Please make sure the eye protective cover❶ has been installed before operating the sewing machine. When placed longitudinally When placed horizontally Operator Operator...
- Page 15 - 12 -...
- Page 16 (12) Guide rod Securely fit the thread guide rod so that two side holes in the thread guide rod face the thread guide. Guide rod (13) Installation of thread stand Assemble the thread stand into the holes on the top right of the table. Tighten the setscrew❶...
- Page 17 (14) Installation of auxiliary table Fix the auxiliary table mounting plate① (2) with bolts③ (4) on the auxiliary table temporarily. Fix the auxiliary table ② with bolts③ (2) on the sewing machine bed temporarily. Fix the bolts③ (4) to remove the clearance between the sewing machine bed and the auxiliary table.
-
Page 18: Operation Preparation
IV. Operation Preparation Lubrication ! Warning Please turn off the power switch and confirm that the motor has stopped before operation to prevent personal injuries caused by unexpected start. Lubricant Lubricant amount supply tube adjustment diagram Less Lubricant amount More Lubricating oil to oiling tank ♦... -
Page 19: Threading The Needle Thread
Threading the needle thread ! Warning Please turn off the power switch and confirm that the motor has stopped before operation to prevent personal injuries caused by unexpected start. (Cotton thread, (Synthetic spun thread) filament thread) Thread as per the order as shown above. The threading can be done easily by using the needle threader supplied with the machine. -
Page 20: Adjusting Bobbin Thread Tension
Adjusting bobbin thread tension Adjust the bobbin thread tension as given below when the bobbin thread is pulled up at the position where thread slit❶ of bobbin case comes up. Hold the thread end coming from the bobbin case with hand, shake it up and 0.05 〜0.15N Purl stitch down lightly and the bobbin case will drop slightly. - Page 21 - 18 -...
-
Page 22: Installing The Knife
Installing the knife ! Warning Please turn off the power switch and confirm that the motor has stopped before operation to prevent personal injuries caused by unexpected start. Please change new knife according to the following steps. After removing the knife setscrew, the knife❶ and washer can be removed easily. -
Page 23: Operation Of The Sewing Machine
V. Operation of the Sewing Machine Description operation panel switch - 20 -... - Page 24 Name Function Name Function LCD display Display data such as pattern No., Overedging Width This key selects overedging width shapes, etc. display. ❶ Every time this key is pressed, S005 and S006 will be displayed alternately. Ready key Press this key when sewing starts. Pitch key This key selects pitch of parallel After pressing the key, change-over...
-
Page 25: Basic Operation Of The Sewing Machine
Basic operation of the sewing machine Turn on the power switch When the sewing machine power is switched on for the first time after the you purchase the machine, language selection screen A will be displayed. After the language has been selected, please press Return key❾... -
Page 26: Pedal Operation Method
Pedal operation method The following 4 types of pedal operation methods for this sewing machine can be selected. Please select your favorite highly-efficient operation method. (1) Setting method for pedal type Invoke setting parameters of pedal type Under input mode with Set Ready LED switch off, press Mode key❹... - Page 27 (2) Pedal action descriptions 2-pedal type 1-pedal (without intermediate 1-pedal (with intermediate 1-pedal (with pedal-return position) position) function) Initial position Initial position Initial position Initial position Presser: Intermediate Presser intermediate Presser: Maximum position①. Presser: Maximum position①. position ② or Sewing position②.
-
Page 28: Inputting The Presser Type
Inputting the presser type (1) Setting procedure of the presser type Call the presser type setting parameter Press “Mode” key❹ and memory switch (level 1) edit screen A is displayed. Select the presser type Press Data Change key❼ , and the picture is changed as shown in the illustration below. -
Page 29: Selecting Pattern
Selecting pattern (1) Select from the pattern selection screen Set the mode to the input mode Under the input mode where Set Ready LED goes out, pattern selection is enabled. In sewing mode, press Ready key ❷ change over the mode to input mode. Call the pattern selection screen The currently selected pattern No. -
Page 30: Change Needle Thread Tension
Change needle thread tension Needle thread tension can be changed while performing trial sewing since the data related to the needle thread tension can be set by the sewing mode as well. Call thread tension setting data at parallel section Press “Thread Tension”... - Page 31 Purl stitch Purl stitch When applying higher tension to the needle thread to permit it to pass straight through fabric, the purl stitch is formed by the bobbin Whip stitch thread which is pulled over from both sides to the center line. Whip stitch Whip stitch The whip stitch is formed in zigzag showing the needle thread...
-
Page 32: Performing Re-Sewing
Performing re-sewing When stop switch A is pressed during sewing operation, the sewing machine will stop. At this moment, error display screen B is displayed to inform that the stop switch is pressed. To continue performing sewing from some point in sewing Error No. - Page 33 Press Reset key❸ to release the error. Then the step motion screen C is displayed. Return the pressor to the sewing object setting position Press again Reset key❸ and the presser returns to the sewing object setting position (starting position). Perform again the sewing work from the start.
-
Page 34: Winding Bobbin Thread
Winding bobbin thread (1) Winding the bobbin Set the bobbin Fit a bobbin fully onto the bobbin winder shaft. Take the thread from the spool and pass it through the guides in the numerical order as shown in the figure, and wind the end of the thread several times around the bobbin. - Page 35 Direction A: Decrease Direction B: Increase - 32 -...
-
Page 36: Using The Counter
Using the counter (1) Setting procedure of the counter value Call counter setting screen When Counter key is pressed under the input mode where Set Ready LED goes out, the counter screen A for setting the counter is displayed. Counter value can only be set under the input mode. - Page 37 (2) Counter type ①Sewing up counter Each time the sewing of one shape is performed, the existing value is counted up. Existing value and counter setting ②Sewing down counter Each time the sewing of one shape is performed, the existing value is counted down. When the existing value reaches "0", count-up screen is displayed.
-
Page 38: Using The Initial Value Management
10. Using the initial value management This sewing machine has the initial value for the most appropriate sewing shapes (31 shapes). Refer to “XI. Table of initial value data for each shape” p.76. When creating new sewing data, it is convenient to create it by copying the initial value. - Page 39 confirmed through the steps above to the normal pattern. Refer to “V-14. Copying sewing pattern ” P.39 for the copying procedure. - 36 -...
-
Page 40: Changing Sewing Data
11. Changing sewing data (1) Initial sewing data when purchasing Patterns from 1 to 10have been already registered at the time of your purchase. Only the initial values of different square types for cloth cutting length are input into the sewing data. Refer to “XI. -
Page 41: Method Of Setting Sewing Data With/Without Edit
12. Method of setting sewing data with/without edit This sewing machine has been set so as not to be capable of editing sewing data items which are less frequently used at the time of your purchase. When you desire to set the data more closely in accordance with the sewing products, set the sewing data item to the edit possible state and use the machine. -
Page 42: Sewing Data List
13. Sewing data list ☆Sewing data are those that could be input into 99 patterns from 1-99. Such sewing data can be input into each pattern. When purchasing, the sewing machine has been set in the state that the data which is necessary to set “With/without edit”... - Page 43 Item Setting range Edit unit Remarks Correction of right bar-tacking width S010 -1.00 ~ 1.00 0.05 mm This item adjusts right-side outer shape of bar-tacking section and the overedging section. Both 1 and 2 bar-tacking sections are corrected. Top of Bottom of straight square type Bottom of...
- Page 44 Item Setting range Edit unit Remarks Reinforcement of radial shape S021 0.200 ~ 2.500 0.025 mm This item sets sewing pitch of bar-tacking section. Top of round Top of semilunar Top of square type type type Bottom of Bottom of Bottom of Bottom of Bottom of...
- Page 45 Item Setting range Edit unit Remarks Crosswise compensation of needle entry of basting S040 0.0 ~ 1.0 0.1 mm This item sets the amount to move needle entry position to the right or left when performing basting more than two cycles.
- Page 46 Item Setting range Edit unit Remarks ACT timing adjustment at the start of 2 bar-tacking S061 -5 ~ 5 1 stitch This item adjusts needle thread tension output start timing at 2 bar-tacking section. S062 Number of stitches for bar-tacking at the start of 0 ~ 8 1 stitch sewing...
- Page 47 Item Setting range Edit unit Remarks Maximum speed limitation S084 400 ~ 4200 100sti/min This item sets max. speed limitation of the sewing machine. The maximum value of data edit is the prescribed speed of maximum speed limitation of the memory switch data K007.
-
Page 48: Copying Sewing Data
14. Copying sewing data Data of pattern No. which has been already registered can be copied to pattern No. which has not been used. Overwriting copy of the pattern is prohibited. When you desire to overwrite, perform it after erasing the pattern once. -
Page 49: Edit/Check The Data Other Than Sewing Data
15. Edit/check the data other than sewing data The screen for editing/checking the various data is invoked by selecting the menu on the mode screen. Set the mode to the input mode Under the input mode where Set Ready LED goes out, the mode screen can be invoked. - Page 50 Selecting the menu Items which can be registered on the key are displayed. Press Item Selection key ❻ to select the menu. After Edit key❽ is pressed during the menu selection, the following screens can be invoked. Memory switch 1 Refer to “V-21.
-
Page 51: Using Parameter Register Key
16. Using parameter register key Register parameters which are frequently used into parameters register key for use. Registered parameters can be selected by pressing only the parameter register key under the input mode. (1) Method of registration Set the mode to the input mode Under the input mode where Set Ready LED goes out, setting is enabled. -
Page 52: Performing Continuous Sewing
17. Performing continuous sewing The sewing machine can achieve continuous sewing of plural pattern without raising presser. The sewing machine can sew the maximum of six types of shapes automatically in one cycle. Moreover, it can register the maximum of 20 data. Please copy it before use if required. - Page 53 (2) Editing method of continuous sewing data Set the mode to the input mode Under the input mode where Set Ready LED goes out, the continuous-sewing data entry is enabled. In sewing mode, press Ready key❷ to change over the mode to input mode. Call the edited continuous sewing data NO.
- Page 54 Change selected editing point data Press Data Change key❼ to change editing point data selected. When the editing point is pattern No. The selected pattern No. is displayed in a state under which it is selectable. When the editing point is at the jump feed The numerical value can be edited within range of ±120mm.
-
Page 55: Performing Cycle Sewing
18. Performing cycle sewing The sewing machine can perform the sequential sewing of plural cycle sewing pattern data. The maximum of 30 patterns can be input, so you can use it when sewing the buttonholes of two or more different sewing products. Moreover, it can register the maximum of 20 data. - Page 56 (2) Editing method of cycle sewing data 1) Set the mode to the input mode Under the input mode where Set Ready LED goes out, the continuous-sewing data entry is enabled. In sewing mode, press Ready key ❷ to change over the mode to input mode.
- Page 57 4) Change selected editing point data Press Data Change key❼ to change editing point data selected. The selected pattern No. is displayed in a state under which it is selectable. In addition, Press Reset key❸ to delete pattern data of editing point. Press and hold Reset key ❸...
-
Page 58: Change The Name Of Cycle Sewing/Continuous Sewing Data
19. Change the name of cycle sewing/continuous sewing data 1) Set data name to editing state Refer to “V-17. Performing continuous sewing” p.43 “V-18. Performing cycle sewing” p.46a. 2) Select data name's editing point Press Item Selection key❻ and then the editing point will move sequentially. -
Page 59: Description Of Plural Motions Of Knife
20. Description of plural motions of knife This sewing machine can automatically actuate the knife plural times and sew a buttonhole larger than the size of knife by setting the size of knife attached from the operation panel. Set and use this function when sewing various sewing shapes without replacing the knife. -
Page 60: Changing Method Of Memory Switch Data
21. Changing method of memory switch data 1) Set the mode to the input mode Under the input mode where Set Ready LED goes out, changing of memory switch is enabled. In sewing mode, press Ready key❷ to change over the mode to input mode. -
Page 61: List Of Memory Switch Data
22. List of memory switch data (1) Level 1 ☆Memory switch data (level 1) are the motion data that the sewing machine has in common and the data that operate on all sewing patterns in common. Item Setting range Edit unit Initial value U001 Presser lifter maximum position... - Page 62 Item Setting range Edit unit Initial value Cloth cutting knife size U018 3.0 ~ 32.0 0.1mm 32.0mm Input knife size used. Plural motions of cloth cutting knife disabled/enabled U019 Disabled Disabled Enabled Thread trimming detection function disabled/enabled U020 Enabled Disabled Enabled U021 Selection of presser position when Ready key is on (up/down)
- Page 63 (2) Level 2 ☆Press mode switch for 3seconds to enable editing. Item Setting range Edit unit Initial value K001 Select pedal 1-pedal Set pedal type Refer to “V-3. Pedal operation method” p.21 (Without intermediate position) 2-pedal 1-pedal 1-pedal 1-pedal (Without intermediate (With neutral (With return pedal) position)
- Page 64 Item Setting range Edit unit Initial value Pattern selection function under sewing mode disabled/enabled K018 Disabled Disabled Enabled Thread trimming during continuous stitching permitted/prohibited K019 Permitted Permitted Prohibited K021 Release amount of bobbin thread trimmer at the start 0~15 1 pulse of sewing This item sets the amount of releasing the bobbin thread trimmer at the start of sewing.
-
Page 65: Adjusting Pedal Depression Value
23. Adjusting pedal depression value Depress the pedal or input pedal depression value from operation panel to adjust pedal depression value. 1) Call the pedal depression value adjustment value. Select "adjust pedal depression value" from the menu on mode screen and press Edit key❽ and then screen A for adjustment of pedal depression value will be displayed. -
Page 66: Adjusting The Contrast
24. Adjusting the contrast The contrast of the display on the panel can be adjusted in five steps. 1) Call contrast adjustment screen Select the contrast adjustment from the menu on mode screen and press Edit key ❽ , and then screen A for contrast adjustment value will be displayed. -
Page 67: Communication
26. Communication The sewing machine may adopt USB flash disk for data input and output. 1) Set the mode to the communication mode “V-15. Edit/check the data other than sewing data” , refer to model screen to select communication p.40 mode. - Page 68 4) Select No. Press Item Selection key ❻ to select file No. B to be read. Press Data Change key ❼ to select file No. C to be written. Press Ready key ❷ to write data. - 65 -...
-
Page 69: Maintenance
VI. Maintenance 1. Adjusting the needle-to-hook relation Please turn off the power switch and confirm that the motor has stopped before operation to ! Warning prevent personal injuries caused by unexpected start. Adjust the needle-to-hook relation when the needle enters the center of the needle hole in the throat plate. (1) Needle bar height 1) Drop the needle bar to the lowest point. - Page 70 (2) Adjustment of needle-to-hook relation 1) Rotate hand driving wheel in accordance with regular rotation direction to lift needle from the lowest point. 2) Insert part [2] B of timing gauge into the gap between the bottom end of needle bar and throat plate, where the needle bar touches the timing gauge.
-
Page 71: Adjusting The Needle Thread Trimmer
Adjusting the needle thread trimmer Please turn off the power switch and confirm that the motor has stopped before operation to ! Warning prevent personal injuries caused by unexpected start. (1) Adjusting the thread grasping force of the needle thread trimmer If the needle thread trimmer fails to provide consistent thread grasping force, the needle thread can slip off at the beginning of sewing. -
Page 72: Adjusting The Presser Bar Pressure
Adjusting the presser bar pressure Please turn off the power switch and confirm that the motor has stopped before operation to ! Warning prevent personal injuries caused by unexpected start. The presser bar pressure shall be set for each pattern respectively. 1) Set the mode to the input mode Under the input mode where Set Ready LED goes out, pattern can be changed. -
Page 73: Thread Tension
Thread tension (1) Thread take-up spring ((purl stitch) The thread take-up amount of thread take-up spring① is 8 to 10mm, and the appropriate pressure at the start is approximately 0.06 to 0.1N. To change the stroke of the thread take-up spring, loosen screw②, insert a thin screwdriver into the slot of thread tension post③, and turn it. -
Page 74: Replacing The Fuse
Replacing the fuse To avoid electrical shock hazards, turn off the power and wait for 5 minutes before opening the cover. A Danger Be sure to turn off the power switch before opening the cover of control box and replacing the fuse with specified capacity. Turn OFF the power switch after the sewing machine stops. -
Page 75: Standard Parts
VII. Standard Parts Cloth cutting knife A Knife size (inch) B Knife size (mm) C Mark D Part No. CS2702047F CS2702047K 7/16 11.1 CS2702047I 12.7 CS2702047L 9/16 14.3 CS2702047V 15.9 CS2702047M 11/16 17.5 CS2702047A 19.1 CS2702047N 22.2 CS2702047P 25.4 CS2702047Q 1-1/4 31.8 CS2702047S... - Page 76 VIII. List of Error Code Error Description Reset method Reset location code E001 EEP-ROM initialization of main control PCB Turn OFF the When no data is written into EEP-ROM, or data power is damaged, initialization of the data is automatically informed. E007 Main shaft motor-lock Turn OFF the...
- Page 77 Error Description Reset method Reset location code E042 Calculation error Restart by Data input screen Calculation of sewing data cannot be performed. reset E043 Enlargement error Restart by Data input screen Stitching pitch exceeds 5mm. reset Stop switch E050 Restart by Step screen When stop switch is pressed during machine reset...
- Page 78 E201 X position error E202 X shaft overcurrent E203 X shaft immovable E204 X shaft out of control E212 Y shaft overcurrent E213 Y shaft immovable E214 Y shaft out of control E222 Overcurrent of presser foot motor E223 Presser foot motor immovable E224 Presser foot motor out of control E231...
- Page 79 Error Description Reset method Reset location code E485 Number of times of basting unsetting error Re-input by Sewing data edit screen [S034] When the number of times of basting is not set reset Basting stitch (OFF//Number of (OFF) for “Basting+ Cloth cutting knife shape". times) (during continuous sewing) Standard screen...
- Page 80 Error Description Reset method Reset location code E498 Presser size error (Width direction: right and Re-input by (During individual sewing/cycle left) reset sewing) When stitching data exceeds the size of both right Sewing data edit screen and left of width direction of presser. [S005]Left overedging width (during continuous sewing) Standard screen...
- Page 81 Error Description Reset method Reset location code E904 Abnormality of solenoid power Turn OFF the When the solenoid power of the servo-control power PCB is out of the range of the specified values. Abnormality of temperature of heat sink E905 Turn OFF the for servo control PCB power...
-
Page 82: Trouble And Corrective Measures
IX. Trouble and Corrective Measures Troubles Causes Corrective measures Page Needle thread Thread tension at parallel section is too Decrease the thread tension at parallel breakage high. section. Thread take-up spring tension is too strong Decrease the tension of the thread and stroke is too large. - Page 83 Troubles Causes Corrective measures Page Needle thread Tension at the start of sewing is too low. Increase tension at the start of sewing. breaks at the start of sewing, or the wrong side of seam is dirty. The knife does not Check whether thread...
-
Page 84: Table Of Initial Value Data For Each Shape
X. Table of Initial Value Data for Each Shape Shape selection level 3 (31 shapes) Item Unit Shape selection level 2 (20 shapes) Shape selection level 1 (12 shapes) Sewing shape Cloth cutting length Right knife groove width Left knife groove width Left overedging width Ratio of right and left shapes (compared with that of left sides) Pitch at parallel section... - Page 85 ISO14001 international CE Ecolabelling Energy ISO9001 Product Conservation XI’AN TYPICAL INDUSTRIES CO., LTD. Vetron Typical Europe GmbH No. 335, South Taibai Road Clara-Immerwahr-Str. 6 Xi’an 710068, P.R.China 67661 Kaiserslautern, Germany Tel.: +86-29-88279093 / / 88279150 / / Tel. +49 6301 320 75-0...
Need help?
Do you have a question about the GT1790A and is the answer not in the manual?
Questions and answers