Table of Contents
Advertisement
Advertisement
Table of Contents
Troubleshooting

Subscribe to Our Youtube Channel
Related Manuals for typical GC6760 SERIES


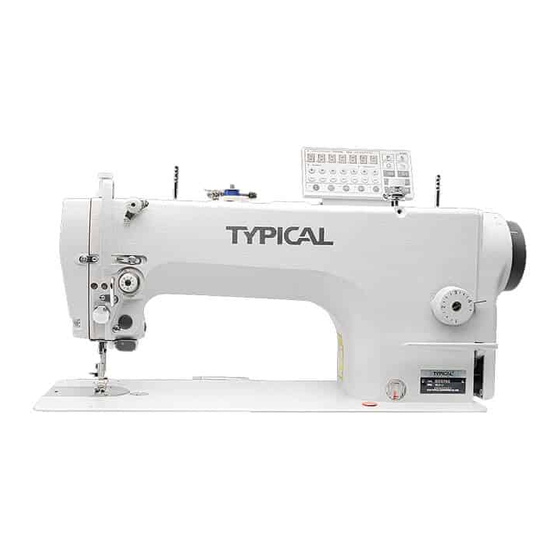
Summary of Contents for typical GC6760 SERIES
- Page 1 GC6760 SERIES SETUP, INSTRUCTION- & SERVICE MANUAL...
- Page 2 TYPICAL GC6760 Series...
- Page 3 TYPICAL GC6760 Series Thank you for purchasing a TYPICAL sewing machine. Please read the safety instructions carefully before you start the machine. With industrial machines you normally work directly in front of the moving parts like the needle or the take-up-lever.
-
Page 4: Table Of Contents
TYPICAL GC6760 Series CONTENT 1 // SAFETY 7 // THREAD TENSION General safety instructions Setting the lower thread tension Important points for the user Setting the upper thread tension Operating and technical staff Adjusting the foot pressure Safety symbols Adjusting the thread length at... -
Page 5: Safety
TYPICAL GC6760 Series 1 // SAFETY 1/1 General Safety Instructions This manual and the warning symbols on the machine should The connecting cable must be equipped with a country-specific ensure the safe use of the machine, so that no accidents and connecting plug. -
Page 6: 1/4 Safety Symbols
TYPICAL GC6760 Series 1 // SAFETY 1/4 Safety Symbols Caution When ignoring this sign injury or damage to the machine or equipment can occur A triangle always means „“Danger““. The picture inside the triangle shows the kind of danger that can occur. Injury is possible when ignored. - Page 7 TYPICAL GC6760 Series 1 // SAFETY 1/5 Warning signs on the machine The following warning signs are on the machine. Please follow these whenever you use the machine. If they are not readable or removed please contact your TYPICAL-Dealer. Caution Moving parts can cause injuries.
-
Page 8: Technical Data
TYPICAL GC6760 Series 2 // TECHNICAL DATA • Stitch type 301 • Max. sewing speed 4.000 s.p.m. (GC6760 MD3) • Max. stitch length 5,5 mm (GC6760 HD3) • Max. foot lift 16 mm with knee lever • Floating foot fine adjustment for better sewing quality • Adjustable take up lever (58 -62 mm) for better sewing... -
Page 9: The Main Parts
TYPICAL GC6760 Series 3 // NAMES OF THE MAIN PARTS Bobbin winder 11// Stitch length regulator Thread wiper 12// Hand wheel Lifting lever 13// Tread stand Back tack button Sewing foot Control circuit Knee lever Safety devices Main switch Oil sight window... -
Page 10: Installation
TYPICAL GC6760 Series 4 // INSTALLATION Caution Please note that the machine may only be installed by qualified personnel. Caution Contact your TYPICAL-Dealer or an electrician when work on the power supply is necessary. Caution The weight of the machine is 46 kg. The installation should be taken out by two persons. -
Page 11: 4/4 Re-Positioning The Machine
TYPICAL GC6760 Series 4 // INSTALLATION 4/1 Work place Never place the machine next to a TV, radio or cordless phone. This devices could be interfered by the machine. Don´t use extension leads on the machine. Plug it directly into the socket. -
Page 12: 4/5 Table Top Drawing
TYPICAL GC6760 Series 4 // INSTALLATION 4/5 Table Top Drawing The table top should have a strength of 40 mm to hold the weight of the machine and stand the vibration of the machine. Drill the required holes like shown in the drawing. -
Page 13: 4/6/1 Controller And Connecting Rod
TYPICAL GC6760 Series 4 // INSTALLATION 4/6 Setup 4/6/1 Control and connecting rod (1) Control (2) Screws (3x) (3) Nuts (3x) (4) Spring washer (3x) (5) Washer (3 x) (6) Connecting rod (7) Nut 4/6/2 Main on/off switch (1) Main on/off switch... -
Page 14: Machine Head
TYPICAL GC6760 Series 4 // INSTALLATION 4/6/4 Rubber cushion and knee lever rod (1) Rubber cushion (2x) (2) Nägel (4 Stück) (3) Kniehebelstange 4/6/5 Machine head (1) Hinges (2 x) (2) Machine head (3) Sewing head support Make sure that the sewing head support is absolute secure positioned. -
Page 15: 4/6/7 Thread Stand
TYPICAL GC6760 Series 4 // INSTALLATION 4/6/7 Thread stand (1) Thread stand Tighten the nut (4) to secure both rubber rings (2) and washer (3). The thread stand must sit firm and shouldn´t move. - Page 16 TYPICAL GC6760 Series 4 // INSTALLATION 4/6/8 Assembly and adjusting of the knee lever (1) Knee lever pad (2) Holder Put the holder (2) on the bold (3) and tighten screw (4). 2. Turn the hand wheel until the feed dog is positioned underneath the needle plate.
-
Page 17: 4/7 Lubrication
TYPICAL GC6760 Series 4 // INSTALLATION 4/7 Lubrication Caution The machine must only be plugged in when the all the lubricating work is complete. Injuries could occur when the foot pedal is touched accidently. Always wear protective glasses and safety gloves when you work with lubricating oil and grease to avoid contact with the eyes and skin that may cause inflammations. -
Page 18: 4/8 Test Run
TYPICAL GC6760 Series 4 // INSTALLATION 4/8 Test run Caution Never touch moving parts with your hands or tools while machine is running. It can lead to injury or damage to the machine. Switch on machine. 2. Test if the machine, by lightly touching pedal (1) in direction B, starts to sew at slow speed. -
Page 19: Setting Up
TYPICAL GC6760 Series 5 // SETTING UP 5/1 Inserting needle Caution Switch off machine before you insert the needle. You can injure yourself, when the foot pedal is touched by accident. Turn the hand wheel to bring the needle bar is in the highest position. - Page 20 TYPICAL GC6760 Series 5 // SETTING UP 5/3 Bobbin winding Caution Do not touch moving parts. This can lead to injury or damage to the machine. Switch on machine. 2. Place bobbin (1) on the bobbin winder spindle (2) 3. Wind the thread a view times in the shown direction on the bobbin (1) 4.
-
Page 21: 5/4 Inserting The Bobbin
TYPICAL GC6760 Series 5 // SETTING UP 5/4 Inserting the bobbin case Caution Switch off machine before inserting the bobbin case. Injury may occur if foot pedal is pressed accidently. Turn the hand wheel until needle is above the needle... - Page 22 TYPICAL GC6760 Series 5 // SETTING UP 5/6 Adjusting the stitch length Press the lock lever on the adjusting knob (1) upwards. Now it is unlocked. 2. Turn the adjusting knob (2) that the desired stitch length is shown on the highest position of the knob. The higher the number the longer is the stitch.
-
Page 23: Sewing
TYPICAL GC6760 Series 6 // SEWING Caution Make sure all safety devices are in place before you start the machine. Injury may occur if these devices are missing. Caution If the machine starts accidently by touching the foot pedal injury may occur. - Page 24 TYPICAL GC6760 Series 6 // SEWING 6/2 Set the stop for the stitch condensing With the TYPICAL GC6760 Series you can achieve stitch condensing by a setting on the revers lever. Loosen screw (1) 2. Set the stop for the stitch condensing (2) on the red mark and tighten screw (1) again.
-
Page 25: Thread Tension
TYPICAL GC6760 Series 7 // THREAD TENSION For an even stitch the upper and lower tension must be adjusted to an optimal setting. Upper thread Lower thread In this case is the upper thread tension is to loose or the lower thread tension to tight. -
Page 26: Adjusting The Foot Pressure
TYPICAL GC6760 Series 7 // THREAD TENSION For an even stitch you also have to achieve an optimal foot pressure. This means as soft as possible, but hard enough that Upper thread the material doesn‘t shift. In this case the foot pressure is to light. -
Page 27: Cleaning & Maintenance
27 27 TYPICAL GC6760 Series 8 // CLEANING AND MAINTENANCE Caution Switch off machine before you start cleaning it. Injury may occur if foot pedal is pressed accidently. Caution Always wear protective glasses and safety gloves when you work with lubricating oil and grease to avoid contact with the eyes and skin that may cause inflammations. -
Page 28: Daily Cleaning And Maintenance
TYPICAL GC6760 Series 8 // CLEANING AND MAINTENANCE 8/1 Daily cleaning and maintenance Regular cleaning and maintenance will guarantee perfect running of the machine and will help to extend the economic life-time of your sewing machine. The following cleaning work should be done daily. - Page 29 TYPICAL GC6760 Series 8 // CLEANING AND MAINTENANCE 8/1/2 Checking the transmission oil level When the machine is tilted backwards for a while the oil amount in the felt will diminish put the oil level on the oil sight window (1) will raise. The exact amount of oil can´t be read.
-
Page 30: Checking The Oil Level
TYPICAL GC6760 Series 8 // CLEANING AND MAINTENANCE 8/1/3 Refi ll oil Use only oil which is recommended by TYPICAL. Remove rubber plug (2) 2. Refi ll oil until oil level is approx. 1 mm above the center mark on the oil sight window. Replace only 10 mm at one time. -
Page 31: Checking The Needle And Thread
TYPICAL GC6760 Series 8 // CLEANING AND MAINTENANCE 8/1/5 Checking needle and thread Check if the needle is bend or the point is broken off. Replace if necessary. 2. Check the upper treading of the machine. -
Page 32: Lubricating
TYPICAL GC6760 Series 8 // CLEANING AND MAINTENANCE 8/2 Lubricating Use only grease which is recommended by TYPICAL. Switch machine off on the main switch. 2. Remove the screws which are marked with arrows. 3. Grease the marked spots until grease is coming out slightly. -
Page 33: Hook Lubrication
TYPICAL GC6760 Series 9 // ADJUSTING THE HOOK LUBRICATION Caution Do not touch any moving parts like the hook or the feeding mechanism, when you check the hook oil level with the help of an oil check paper. Injury may occur. -
Page 34: Adjustments
TYPICAL GC6760 Series 10 // ADJUSTMENTS Caution Maintenance and inspection of the sewing machine should be done by qualified technicians. Caution Work on electric parts can only be taken out by qualified personnel. Please contact your TYPICAL dealer or an electrician. - Page 35 TYPICAL GC6760 Series 10 // ADJUSTMENTS 10/1 Adjust the safety switch The safety switch (1) is normally at position A. Make sure that the distance between the safety switch (1) and the table top is correct for proper functioning. It can be...
- Page 36 TYPICAL GC6760 Series 10 // ADJUSTMENTS 10/2 Adjust the take up spring The pre-set position of the take up spring (1) is 6 to 8 mm (4 to 6 mm for the specification H) above the upper edge of the thread guide when the sewing foot is lowered.
-
Page 37: Adjusting The Presser Foot Height
TYPICAL GC6760 Series 10 // ADJUSTMENTS 10/3 Adjust the thread control The basic setting for the tread control (1) is with the screw (2) in the centre of the long slot of the thread control. Loosen the screw (2) to adjust the thread control (1). - Page 38 TYPICAL GC6760 Series 10 // ADJUSTMENTS 10/5 Adjust the feed dog height The feed dog (1) should be 1.0 mm (M-Version) or 1.2 mm (H-Version) above the needle plate on the turning point. (M): 1 mm (H): 1.2 mm Turn the hand wheel, to bring the feed dog (1) to the highest position.
- Page 39 TYPICAL GC6760 Series 10 // ADJUSTMENTS 10/6 Adjust the feed dog angle The feed dog (1) must be parallel with the needle plate surface when it exits the needle plate. Turn the hand wheel until the feed dog (2) is the same (M): 1 mm height as the needle plate.
-
Page 40: Pre-Adjustment Of The Needle Bar Height
TYPICAL GC6760 Series 10 // ADJUSTMENTS 10/7 Pre-adjustment of the needle bar height The needle height should be pre-adjusted that the lower end of the needle bar (1) touches the gauge (2) when it is in the lowermost position. Remove the presser foot (3), needle plate (4) and feed dog (5). - Page 41 TYPICAL GC6760 Series 10 // ADJUSTMENTS 10/8 Adjust lower feeding movement The point of the needle must be, depending on the machine A (M) B (H) version, (M=2 mm, H=4 mm) above the needle plate (2) , when Max. Max.
-
Page 42: Adjusting The Hook Distance, Needle Bar Raise And Needle Height
TYPICAL GC6760 Series 10 // ADJUSTMENTS 10/9 Adjusting the hook distance, needle bar rise and needle height The point of the hook (3) must be in the center of the needle (4) when the needle bar (1) is 1.8 mm (2.2 mm version H) after the lower turning point and must have a distance of 0 to 0.05 mm... -
Page 43: Adjusting The Thread Cutter
43 43 TYPICAL GC6760 Series 10 // ADJUSTMENTS 10/10 Adjusting the thread cutter 10/10/1 Pre-adjusting the roller lever The distance between the roller and the shaft must be about 3 mm when the lever (1) (Illustration 1) is touching the stop (2) at position (A) (Illustration 2). -
Page 44: 10/10/3 Setting The Movable Thread Catcher
TYPICAL GC6760 Series 10 // ADJUSTMENTS 10/10/3 Setting the movable thread catcher The cutting edge must be about 1 to 1.5 mm behind the knife edge of the stationary knife (2) when the movable thread catcher (Illustration 1) is on the front turning point. -
Page 45: 10/10/4 Timing The Cam
TYPICAL GC6760 Series 10 // ADJUSTMENTS 10/10/4 Timing the cam The take up lever must be 2 mm before the upper turning point when the movable thread catcher is at the foremost turning point and the treads are cut. Loosen screws (1) (Illustration 1) so you can just turn the cam. - Page 46 TYPICAL GC6760 Series 10 // ADJUSTMENTS 10/10/5 Setting the tension release The tension discs (1) (Illustration 2) should be about 0.5 to 1.0 mm apart when the lever (A) (Illustration 2) is at the left position. Turn the hand wheel until the needle is coming up from the lower turning point and the point of the needle is in line with the needle plate.
-
Page 47: Adjusting The Foot Pedal
TYPICAL GC6760 Series 10 // ADJUSTMENTS 10/11 Adjusting the foot pedal Components of the speed control unit: A Spring for the forward force adjustment Decrease Increase B Bolt for the revers force adjustment C Pedal / pedal arm D Transmission shaft for the pedal... -
Page 48: Adjusting The Electric Back-Tack Switch On The Machine Head
TYPICAL GC6760 Series 10 // ADJUSTMENTS 10/12 Sewing of stretch- or high pile material When sewing stretch- or high pile material it can happen, that the material is pushed apart by the pressure of the foot. The seam is stretched and puckered. To get a better better result... -
Page 49: Error Messages & Possible Troubleshooting
TYPICAL GC6760 Series 11 // ERROR MESSAGES & POSSIBLE TROUBLESHOOTING Check the following points before you send a service- or repair request when you have problems with the machine. Switch the machine of and contact a qualifi ed technician or your dealer if you can not rectify the fault with the help of this instructions. - Page 50 TYPICAL GC6760 Series 11 // ERROR MESSAGES & POSSIBLE TROUBLESHOOTING 11/4 Missing stitches when you start sewing Missing stitches when you start sewing can have various reasons. Check if the tension on the take up spring is to tight. 2. Check if the take up spring is in the right position.
- Page 51 TYPICAL GC6760 Series 11 // ERROR MESSAGES & POSSIBLE TROUBLESHOOTING 11/6 Irregular stitch length Irregular stitch length can have various reasons. Check the foot pressure and adjust if necessary. 2. Check the feed dog height. 3. Check if the bobbin is scratched.
- Page 52 TYPICAL GC6760 Series 11 // ERROR MESSAGES & POSSIBLE TROUBLESHOOTING 11/9 Lower thread builds knots not the beginning / Bobbin spins when thread is cut Knots on the beginning of the seam or the spinning of the bobbin when the tread is cut can have various reasons.
- Page 53 TYPICAL GC6760 Series 11 // ERROR MESSAGES & POSSIBLE TROUBLESHOOTING 11/11 Faulty thread cutting It can have various reasons when the upper and lower thread are not cut properly. Check if the stationary or movable knife is blunt or damaged. Replace if necessary.
- Page 54 TYPICAL GC6760 Series 11 // ERROR MESSAGES & POSSIBLE TROUBLESHOOTING 11/14 Machine doesn‘t start In case the machine doesn‘t start, when you switch it on and press the foot pedal, check if the power plug (1) is plugged into the control.
-
Page 55: Disposal Of Machine
TYPICAL GC6760 Series 12 // DISPOSAL OF MACHINE The orderly disposal of the machine is the responsibility of the customer. Materials used for the machine are steel, aluminum, brass and various plastic material. The electronic parts contain various plastic material and copper. - Page 56 GC6760 This machine may only be operated by adequately trained operators only after having completely read and understood the instruction manual. Parts are subject to changes in design without prior notice. Certifi cate of the Certifi cate of the Certifi cate of the Certifi...
Need help?
Do you have a question about the GC6760 SERIES and is the answer not in the manual?
Questions and answers