Table of Contents
Advertisement
Advertisement
Table of Contents

Subscribe to Our Youtube Channel
Related Manuals for typical GT856D


Summary of Contents for typical GT856D
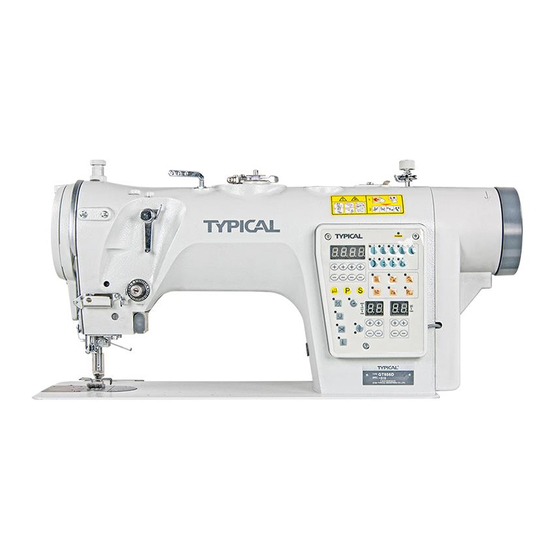
- Page 1 GT856D INSTRUCTION BOOK...
-
Page 3: Table Of Contents
Content Control Box Hardware ..................3 Inner structure of the Control Box ............3 External Interface of the Control Box ............4 Power Specification .................. 7 Change the Fuse ..................7 The Introduction to the Operation Panel and the Sewing Operations .... 8 Operation Panel Introduction .............. -
Page 4: Control Box Hardware
1 Control Box Hardware 1.1 Inner structure of the Control Box Servo Motor Driver Step Motor Driver Control Board Transformer 5V DC... -
Page 5: External Interface Of The Control Box
1.2 External Interface of the Control Box Control box Power Line RS232 Interface Operation Panel Interface Sensor Interface Servo Motor Encoder Interface Solenoid Interface Servo Motor Interface Zigzag Motor Interface Feed Motor Interface Foot lift Solenoid Interface... - Page 6 Control Box’s External Interface Specification: 1. Control Box’s Power Wiring This interface input AC220V to the Control Box. In the general condition,Power Wiring is connected to the power button which is under the sewing plate. The list of the Power wiring Color Signal Brown...
- Page 7 This interface is connected to the servo motor encoder signal plug. The list of the J5 Interface Signal Signal Signal Up Needle Position Signal Encoder A Phase Signal Encoder B Phase Signal Hall V Phase Signal Hall W Phase Signal Hall U Phase Signal 6.
-
Page 8: Power Specification
The list of the J3 Interface Signal Signal Signal Red(A+) Green(A-) Yellow(B+) Blue(B-) 10 .Foot-lifting Solenoid Interface (J9) This interface is use to connect to the solenoid which is used to lift the foot. The list of the J9 Interface Signal Signal signal Foot Lift solenoid... -
Page 9: The Introduction To The Operation Panel And The Sewing Operations
2 The Introduction to the Operation Panel and the Sewing Operations 2.1 Operation Panel Introduction Key/Display Name Function Basic pattern No. 1 Select basic pattern No. 1 Basic pattern No. 2 Select basic pattern No. 2 Basic pattern No. 3 Select basic pattern No. -
Page 10: Start Up
ROM pattern Select ROM-stored pattern Zigzag width Set work zigzag width Baseline position Set baseline position Left/Right Stop Set left stop or right stop option of sewing Start condensation Set parameters for start condensation sewing End condensation Set parameters for end condensation sewing Stitch-counted Sew Set parameters for Stitch-counted sewing Up Down Stop Switch... -
Page 11: Sewing Of The Standard Patterns
Initialization success,the operation panel will enter ready mode, then you can begin your sewing work. 2.3 Sewing of the Standard Patterns ■Operation steps Turn on the Power.The control panel is at the initial condition. The typical setting status is as follows. Main display show Max.Width(mm) -
Page 12: Sewing Of The Left/Right Scallop Pattern
1 (24 stitch) 5 - 1 - 2 (12 stitch) 5 - 2 - Left callop stitch 3 (24 stitch) 5 - 3 - 4 (24 stitch) 5 - 4 - 1 (24 stitch) 6 - 1 - 2 (12 stitch) 6 - 2 - Right callop stitch... -
Page 13: Sewing Of The Left/Right Bline Stitch Pattern
Press the Standard Pattern 5 key. The indicator nearby that key will turn on.At same time the main display area show 5-3- for a second and show the work width of the pattern after that. If you want to change pattern shape, press “Set” key. The width data in main display area will blink. -
Page 14: Sewing Of The Left/Right T Stitch Pattern
2.6 Sewing of the left/right T Stitch pattern For example:Sewing the Left T Stitch with 5 straight stitch and 2 repeated T stitch( 7 =02 ) ■Operation Steps Press the Standard Pattern 7 key. The indicator nearby the key will turn on.At same time the main display area show 7-05 for a second and show the work width of the pattern after that. -
Page 15: Work Zigzag Width Setting
2.8 Work zigzag width setting Zigzag width unit: 1.0mm Max. zigzag width: 8.0mm Setting precision : 0.1mm ■Operation Steps Asume the control panel is at the normal condition. Press “Set” key, then press “Zigzag width” key. The width data shown in the main display blinks. -
Page 16: Start Condensation Operation
3.1 – 4.0 4000 4.1 - 6.0 3500 6.1 - 8.0 3000 Max. sewing speed according max zigzag pitch length Max.feed pitch length(mm) Max.Speed(spm) 5000 0.1 – 2.0 3500 2.1 - 3.0 3000 3.1 - 4.0 2500 4.1 - 5.0 2000 2.11 Start Condensation Operation Panel section concerned with start condensation setting is as below. - Page 17 the main display will show the pattern width. Press “Width” key, the main display will show the pattern width. Press down the pedal to start sewing.If the indicator for start condensation is on, then the specified numbers of stitches for condensation is sewed first, then follwed is the normal sewing.
-
Page 18: End Condensation Operation
2.12 End Condensation Operation ■ Operation Steps Press “End condensation” key in the normal state, the indicator nearby the key will be lit up. The main display will show the number of condensation stitches in the “C” side. Such as “C-**” Press “End condensation”... -
Page 19: Setting The Position Of The Sewing Base Line
rpm, the end condensation is sewed by the speed of 1200 rpm.when the work speed is less than 1200 rpm, it is done as work speed. The condition for end condensation to work is: all of the C,D,U value is larger than 0 and the indicator for end condensation is on. -
Page 20: Needle Up/Down Stopping
stop,or press “N2+” key to set free stop, or press “N3+” key to set “end stop” state. Press “Set” key to confirm the change. The display stop blinks. Note: “Stitch-counted Sew” will not consider the setting of left/right stopping. 2.15 Needle Up/Down Stopping When the “Up /Down Stop”... -
Page 21: The Enable And Disable Of The Presser Foot Lifter
number of stitches in horizontal side.Such as “F-**”. If you want to change this value, press the corresponding “+”/ “-” key. The biggest stitch number is 99. Press “Width” key, the main display show the work width. Press pedal forward to start sewing. After the number of stitches set by vertical side in “E-**”... -
Page 22: The Use Of Reverse Button
U-Disk. When the U-Disk contain valid patterns is inserted to the USB socket in the GT856D control box, user can sew these patterns directly. Also, user can copy pattern datas from U-Disk to control box or from control box to U-Disk. - Page 23 To use patterns in a U-Disk, just plug the U-Disk to the USB device socket in the GT856D control box. After that, when you want to select a ROM pattern, you can only “see” the patterns in the U-Disk.The patterns stored in the machine can not be select at this state.
-
Page 24: Download Pattern From Pc To Machine
3 Download Pattern From PC to Machine The machine can store up to 1000 ROM patterns. User can edit these patterns from PC and download them to the machine through RS232 port. The pattern edit tool in PC is “Style Edit”. The following is the main view of the edit tool. The following is the view of the download dialog. - Page 25 For the detailed introduction to the edit tool, please refer to its manual. Here we only introduce the operation in the panel about how to enter the communication control mode to receive patterns. ■Operation Steps 1) Press “N1+” key and “N4+” key simutaneously. “Prog” will show on main display.
-
Page 26: Create Pattern Through Control Panel
4 Create Pattern Through Control Panel User can create new pattern directly through the control panel.It is useful when the user can not get a computer to create a pattern. The operation steps to do this job is described below by 2 examples. - Page 27 P001. (3) Use “+”/“-” key to choose the pattern number you want to use,e.g. P200. (4) Press N1- key, the display will show the stitch number “n 1” (5) Press N1- key, the display will show “0.0” as current value of the x coordinate of stitch No.
- Page 28 (7) Press N1+ key to enable the X/Y alternative input. (8) The display will show “o -4.0”, here “o” indicates that the the X/Y alternative input is enabled. If you press the N1+ again, the display will show “-4.0” which mean the X/Y alternative input is disabled.
-
Page 29: Setting The System Parameter
5 Setting the System Parameter User can solve some sewing faults or adjust the sewing to the optimum condition by use system parameter setting. 5.1 The list of the System Parameter Parameter Function Description Range Default value Unit Remark Items P-01 Max. - Page 30 P-20 Feed forward direction compensation pulse count P-21 Feed reverse direction compensation pulse count P-22 Working time on the Test 1~60 Run mode P-23 Pause time on the Test 1~60 Run mode P-24 Max.sewing speed of the patterns with variable feed 400~3500 3500 pitch...
-
Page 31: The Setting Of The System Parameters
P-43 Sew speed of 3rd stitch 100~5000 1200 P-44 Sew speed of 4th stitch 100~5000 2400 P-45 Sew speed of 5th stitch 100~5000 3600 P-46 Slope adjust for pedal 1~100 P-47 Reserved Reserved P-48 Reserved Reserved P-49 Reserved Reserved P-50 Reserved Reserved P-51... -
Page 32: The Description Of Specific Parameters
5.3 The Description of Specific Parameters (1) Adjust the up needle positioning Please press the “Half stitch motion” key two times. If you find out that the needle bar position is not in the “U” and “D” position respectively,you need to adjust the up needle position. -
Page 33: The Test Of Input Device
6.1 The Test of Input Device If something is wrong with X/Y origin sensor, safe switch, reverse-feed switch,pedal switch, servo encoder and the key in the control panel, you may need to enter the input device test mode to locate the fault. To enter the mode, keep pressing the key “N1+”... -
Page 34: Error Code And Processing Method
Test Feed motor. press “N4+”, motor move forward, press “N4-”, motor move backward. Test control panel display element. Press pedal to trigger. Indicator is light on one by one. Then Digit is show one by one. Test Thread Trimmer. press “N4+” or “N4-”, the Trimmer do a action. Test Thread Nipper. - Page 35 Er23 No sewing pattern Choose another sewing pattern Sewing pattern contain Er24 Modify the sewing pattern invalid data Stitch number of current Er45 sewing pattern exceed Reduce the total stitch number of current pattern. the Max. stitch limit Pattern already exist in Er55 Whether overwrite the pattern with same number U-Disk...
-
Page 36: Appendix-Rom Pattern Table
8 Appendix—ROM Pattern Table Pattern Pattern Pattern... - Page 37 Pattern Pattern Pattern...
- Page 38 Pattern Pattern Pattern...
- Page 39 Pattern Pattern Pattern...
- Page 40 Pattern Pattern Pattern...
- Page 41 Pattern Pattern Pattern...
- Page 42 Table Pattern Pattern Pattern...
- Page 43 Certi cate for Energy international ISO9001 ISO14001 international CE Ecolabelling Product Conservation Product XI’AN TYPICAL INDUSTRIES CO., LTD. VETRON TYPICAL EUROPE GmbH No. 335, South Taibai Road Clara-Immerwahr-Str. 6 Xi’an 710068, P.R.China 67661 Kaiserslautern, Germany Tel.: +86-29-88279093 / / 88279150 / / 88279151 Tel.: +49 6301 320 75-0...
Need help?
Do you have a question about the GT856D and is the answer not in the manual?
Questions and answers