
Related Manuals for typical GC2605


Summary of Contents for typical GC2605
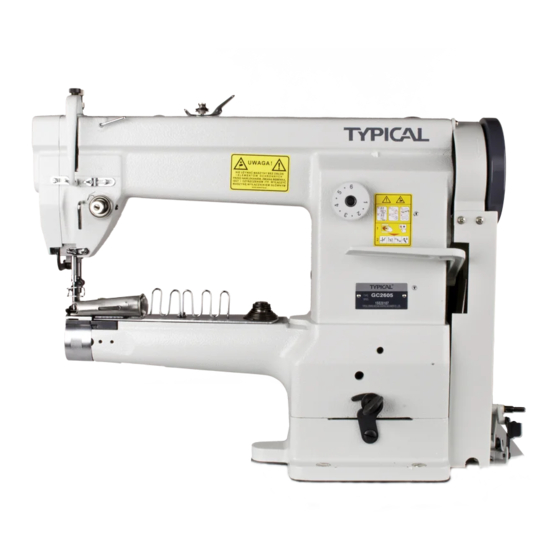
- Page 1 GC2605 Cylinder Bed Compound Feed Binding Machine Operation Instruction/Parts Manual...
- Page 2 TYPICAL SEWING MACHINE WANPING MACHINERY CO.,LTD. 63391278 POST. CODE: 215223...
- Page 3 Contents 1. Brief introduction 2. Main specifications 3. Installation and preparation 3.1 Installation 3.1.1 Location of the machine 3.1.2 Installing drip pan 3.1.3 Installing machine head 3.1.4 Mounting rock shaft bracket of knee lifter 3.1.5 Installing motor 3.1.6 Connecting the clutch lever to the pedal 3.1.7 Installing the bobbin winder 3.1.8 Installing the thread unwinder 3.2 Preparation...
- Page 4 6.2 Adjusting the feed dog 6.3 Adjusting the tension releasing mechanism 6.4 Adjusting the pressure of presser foot 6.5 Timing feed adjustment 6.6 Presser foot alternate lift amount adjustment 6.7 Presser foot total lift amount adjustment 6.8 Presser feet gauge adjustment 7.
- Page 5 Operation Instruction...
- Page 6 Model GC 2605 cylinder bed compound feed binding sewing machine is constructed with single straight needle, link thread take-up with needle bearing, precise spiral bevel gear transmition, big rotating hook withdouble capicity and forward or reverse sewing. It has the advantages of stable motion, small moment of force, low noise, beautiful plat stitches in appearance.
- Page 7 3.1.5 Installing the motor (Fig.4) Align machine balance wheel belt groove A with motor pulley belt groove B by moving motor C leftward or rightward. Be sure the belt is not touch with the table. 3.1.6 Connecting the clutch lever to the pedal (Fig.5) 1) The optimum tilt angle of pedal A with floor is approx.
- Page 8 3.2 Preparation 3.2.1 Cleaning the machine Before the head is packed, all the parts of the machine are coated with preventive grease, which may be hardened and contaminated by dust during long storage and shippment. This grease must be removed by clean cloth with gasoline.
- Page 9 Oil applied to hole A is distribulated to the parts F. G. H. I and J through wicks, as shown in Fig.9. Oil applied to the hole B is through oil distributor to the parts C, D and E, as shown in Fig.10. The upper bevel gear cases in Fig.11, are packed with fine grease, which should be replenished period- ically as may be consumed gradually after a long time...
- Page 10 4.2 Coordination among the needle, the thread and the sewing material × × 17 Nm 110- Needle number is DP 17, 135 1 8 0 ( # 1 8 ~ # 2 4 ) Selection to the needle size should be based upon the thread and matesials to be sewn.
- Page 11 4.4.2 Winding adjustment The wound bobbin thread should be neat and tight. If it is not tight, adjust the thread tension by turning tension stud thumb nut A of the bobbin winder tension bracket. If the wound bobbin thread is not neat, tension bracket C can be moved to be adjusted.
- Page 12 When drawing the bobbin thread, hold the tip of the needle thread by hand, turn the balance wheel to lower the needle bar and then, to lift it to its highest position, Pull the needle thread and then the bobbin thread is drawn up.
- Page 13 It is a common practice to check the bobbin thread tension as shown in Fig.21. In case of polyester thread 14 tex(42s), hold the end of the thread and vibrate the bobbin case up and down. If the bobbin case falls down slowly, the proper tension is obtained.
- Page 14 5.2 Adjusting the thread guide The position of the thread guide affects sewing quality, so it must be adjusted according to the materials to be sewn. Thread guide Position Leftward Center Rightward Material Heavy Light Medium Weight 5.3 Adjusting the tension of needle thread and bobbin thread Fig.24 shows the various type of stitch forms probably to happen when sewing.
- Page 15 6.1 Timing between the needle and the rotating hook 6.1.1 Adjusting the position of needle bar (Fig.27) Turn the balance wheel to locate the needle bar at its lowest position, remove the rubber plug in face plate A, then loosen the needle bar connecting stud clamping screw B and move the needle bar C vertically to make the centre of needle eye D concidence with inside surface E of bobbin case holder.
- Page 16 6.2 Adjusting the position of the feed dog (Fig.31) The standard position of the feed dog is that the clearance from the throat plate slit to the front end D of the fully advanced feed dog is 1.5mm. When adjusting. fix the feed dog in the position where the feed dog fully advances.
- Page 17 6.6 Adjusting the alternate lift amount of the presser feet (Fig.35) The lift amount of walking presser foot is within 5mm When sewing medium or heavy material, and the lift amount of the psesser foot is about 3mm. The lift amount of these two presser feet can be changed slightly according to the nature of materials or requirements in Forward...
- Page 18 6.8 Adjusting the clearness between the presser foot and the walking presser foot (Fig.37) In sewing, to prevent the walking presser foot from striking on the presser foot at the end of feeding, a proper clearness C of approx.15mm should be kept between them, as shown in Fig.37b.
- Page 19 Remedy Trouble Possible Causes ① Needle too thin or bent. Change the needle with a new one. Refer to Fig 13 on Page 5 ② Wrong set of needle. Needle Support the materials gently with hand ③ Push or pull the materials with hand breakage while sewing while sewing...
- Page 20 Parts Manual...
- Page 21 1314 43 44 6162...
- Page 22 Item Description Part number Quantity Cylinder bed 40T4-401 37T4-403 Bolt Bolt Arm dowel pin Base plate 37T4-401 Model plate 40T4-402 Trade mark 40T4-414 Trade mark rivet Face plate 35T4-402a Sight window rubber plug(19) 22T1-003C3 Rubber plug(11.8) 22T1-003C4 Face plate thread guard 22T1-003C5 Screw 22T1-003C6...
- Page 23 1314 43 44 6162...
- Page 24 Item Description Part number Quantity Thread guide 35T4-405 Cylinder cover plate 40T4-404 Binding tape frame 40T4-405 Washer 22T1-007 Screw 22T1-006 Screw 40T2-206 Spring spacer 40T2-207 Coil spring 40T2-211 Screw 40T2-210 Feed dog support set shaft complete 40T2-209 Edge folder complete 40T4-406 40T4-409 Screw...
- Page 25 13 14...
- Page 26 Item Description Part number Quantity Thread take-up crank 33T1-001 Thread take-up lever 33T1-004B1 Thread take-up lever eyelet bushing 33T1-004B2 Thread take-up link 33T1-003A1 Thread take-up link oil wick 33T1-003A2 Thread take-up link hinge pin 33T1-002 Thread take-up link hinge pin set screw J0.0.40 Needle bearing 19242/8...
- Page 28 Item Description Part number Quantity Arm shaft 33T1-008 Arm shaft flanged bushing (front) 33T1-007D1 Arm shaft bushing oil felt 33T1-007D2 Arm shaft bushing set screw J0.0.40 Arm shaft bushing (middle) 33T1-009E1 Collar 22T3-002B1 Collar set screw 22T3-003B2 Feed and feed lifting eccentric sleeve complete 22T3-009D1a2 Feed and feed lifting eccentric 40T2-214...
- Page 30 Item Description Part number Quantity Rotating hook shaft assembly 33T1-021L Rotating hook shaft bushing(front) 40T1-101 Rotating hook shaft bushing(front)screw J0.0.40 Rotating hook shaft bushing(rear) 37T1-103 Rotating hook shaft bushing(rear)screw J0.0.81 Rotating hook shaft collar 37T1-102 Rotating hook shaft collar set screw 22T2-013 Rotating hook assembly 37T1-104...
- Page 32 Item Description Part number Quantity Stitch length dial 33T2-012 Stitch length adjusting screw 33T2-009 Screw 22T5-006C3 Screw bushing 36T5-007D4 Stop pin 22T5-008 Spring 22T5-009 O-type ring Stitch length adjusting swing bar 33T2-013-A Set screw 17T5-010 Hinge pin 33T2-024-A Stitch J0.0.81 Stitch length link 33T2-025-A Connecting pin...
- Page 34 Item Description Part number Quantity Feed shaft 40T2-205 Front crank 40T2-213 Screw 22T1-011 Feed rock shaft and feed lifing rock shaft collar 37T2-208 Screw 22T2-013 Feed crank 37T2-212 Feed rock shaft crank set screw 37T2-210 Link connecting stud 37T2-213 Link connecting stud snap ring Screw 17T5-019 Feed linking rock shaft...
- Page 36 Item Description Part number Quantity Presser bar lifter 334T3-304 Presser bar lifter position screw 22T7-001A2 Presser bar lifting cam 33T3-004 Knee lifter bellcrank(left) 22T7-004B1a Tension releasing cam 22T7-004B1b Knee lifter bellcrank (left) screw 22T7-004B1c Screw for knee lifter bellcrank hinge 22T7-004B2 Knee lifter drawing bar 22T7-004B3...
- Page 37 42 28...
- Page 38 Item Description Part number Quantity Oil felt 34T5-501 Screw 35T5-503 34T5-503 Press bar spring 35T5-501 Screw J0.0.40 Needle bar move stand shaft 35T5-504 Spring bar 35T5-505 Presser foot up and down link 35T5-507 Connector 35T5-509 Slot for slide block 35T5-513 Slide block 33T1-013 Screw...
- Page 40 Item Description Part number Quantity Oil wick fixing plate assembly 22T8-011C Oil wick fixing plate screw 22T8-012 Oil wick fixing hook screw 22T8-011C4 Oil wick fixing hook 22T8-011C5 Small oil reservoir 33T4-005B1 Small oil reservoir oil pad 33T4-005B3 Small oil reservoir screw 33T4-005B2 Oil wick of oil wick fixing plate 22T8-011C3...
- Page 42 Item Description Part number Quantity Knee lifter pushing rod 37T6-601 Knee lifter pushing rod screw 37T6-602 Hexagon nut Table 37T7-701 Round head wood screw Knee lifter rock shaft stop dog 33T5-001E1 Knee lifter bellcrank joint 33T5-005 Knee lifter bellcrank 32T6-009 Knee lifter knee plate assembly 32T6-010F Knee lifter lifting crank...
- Page 43 9 10...
- Page 44 Item Description Part number Quantity Small oil pot 33TF-011 Hinge case 33T7-003 Hinge hook 33T7-002 Spool stand complete 33TF-019 Bobbin case 33T1-027 Accessories bag 33TF-010 Needle 1F-009 37TF-007 Washer 37TF-008 Spring washer 37TF-009 Screw 37TF-006 Wood screw 33TF-017 Washer for woody screw 33TF-018 Bobbin winder complete S14420020...
Need help?
Do you have a question about the GC2605 and is the answer not in the manual?
Questions and answers
Mi máquina corta el hilo cose unas 10 puntadas y lo corta justo abajo por donde está la aguja
The GC2605 sewing machine cutting the thread after about 10 stitches could be caused by:
1. Needle thread tension being too strong — reduce the needle thread tension.
2. Poor quality thread — change to a better quality thread.
3. Needle being too thin or rough — replace with a proper needle.
4. Bobbin thread tension being too strong — reduce the bobbin thread tension.
5. Thread wound on bobbin unevenly — rewind the bobbin properly.
6. Needle hole of the throat plate being rough or worn out — replace or polish the throat plate.
This answer is automatically generated