
Related Manuals for BQS BSFIX123


Summary of Contents for BQS BSFIX123
- Page 1 BSFIX123 968B-01 PLUS Apto para Suitable for Approprié à 9-36 MANUAL DE INSTRUCCIONES MANUAL DE INSTRUÇÕES INSTRUCTIONS MANUAL...
- Page 2 BSFIX 123 Instrucciones de uso - Sistema de retención infantil Grupo 1/2/3. De 9 a 36 kg (de 9 meses a 12 años aprox.) Instruction manual - Child safety seat Group 1/2/3. From 9 to 36 kg (from 9 moth to 12 years approx) Instruções de utilização - Dispositivo de retenção para crianças Grupo 1/2/3.
-
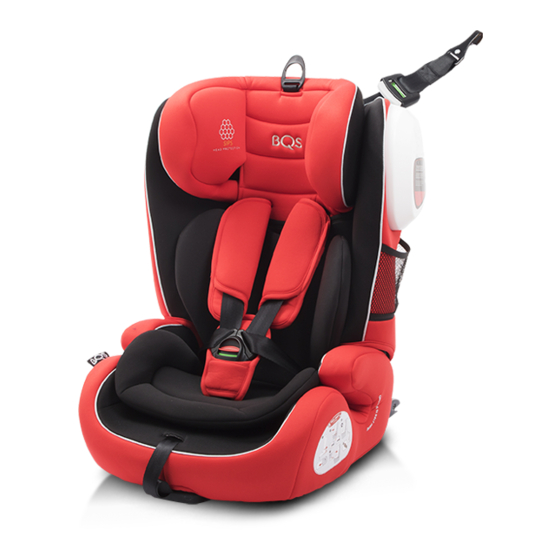
Page 3: Vista General
7. El grupo de peso y la clase de tamaño iSoFiX 16. Es peligroso realizar cualquier tipo de alteración o 1. VISTA GENERAL IMPORTANTE para los que está destinado el dispositivo son: incorporación a la silla de seguridad sin la aprobación Lea cuidadosamente antes de instalar Grupo 1, para niños de 9 a 18 kg. -
Page 4: Puestos De Instalación En El Vehículo
La silla ofrece diferentes opciones de montaje. La Abra la hebilla del arnés presionando el botón 2. PUESTOS dE INSTALACIÓN EN EL VEHÍCULO siguiente tabla indica los tipos de instalación para rojo (fig.1.4). cada grupo: dÓNdE: En los asientos traseros del vehículo INSTALACIÓN INSTALACIÓN CAPÍTULO... - Page 5 • Los cierres del broche encajan sin que se oiga un clic. la parte trasera de la silla o pasándolos directamente a través del ojal correspondiente de la silla en el caso (19) Placa de • Resulta difícil insertar los cierres del broche en la fig. 4 fig. 5 retención de de que estén unidos y no exista conector.
- Page 6 1. Regule la altura del reposacabezas hasta su posición estén retorcidas y que estén correctamente insertadas Para ajustar la altura del reposacabezas: (11) Regulador más baja siguiendo los pasos descritos en el punto 3.11. en las ranuras de la funda. fig.
- Page 7 3. Tire del regulador iSoFiX para extraer ambos (18) Brazos de fig. 11 fig. 13 fig. 14 fig. 15 brazos de bloqueo (18). Mueva ambos brazos de bloqueo iSoFiX. bloqueo de un lado a otro hasta que oiga el clic que indica que están completamente acoplados (fig.11).
- Page 8 10. Enganche el mosquetón de seguridad (14) en el • Las correas de los hombros (9) estén correctamente ajustadas y no estén retorcidas. punto de anclaje del Top Tether recomendado en el fig. 18 fig. 19 manual de su vehículo (fig. 15). • Los protectores para los hombros estén al mismo nivel que los hombros del niño.
- Page 9 3. Coloque la parte del cinturón diagonal (21) y la parte ¡PRECAUCIÓN! La parte diagonal del cinturón no ¡PRECAUCIÓN! Los brazos de bloqueo sólo estarán del cinturón de regazo (23) del lado de la hebilla del debe dirigirse nunca hacia el deflector del cinturón correctamente acoplados si ambos botones de vehículo por debajo del reposabrazos y por la guía Guía para el...
-
Page 10: Limpieza Y Mantenimiento
4. Tirando del regulador iSoFiX vuelva a deslizar los • La hebilla del cinturón del vehículo no esté entre la 7. LIMPIEZA y MANTENIMIENTO INSTRUCCIONES dE guía de color rojo claro (25) y el reposabrazos del brazos de bloqueo iSoFiX en la silla. LAVAdO: 30 °C ·... -
Page 11: Vista Geral
7. o grupo de peso e o tipo de tamanho iSoFiX para 16. não tente desmontar, modificar ou acrescentar 1. VISTA GERAL IMPORTANTE os quais o dispositivo se destina são: Grupo 1, para qualquer peça à cadeira de criança ou ao arnês Leia cuidadosamente antes de instalar crianças dos 9 aos 18 kg. -
Page 12: Postos De Instalação No Veículo
A cadeira oferece diferentes opções de montagem. arnês está esticado e a fivela fechada. Abra a fivela 2. POSTOS dE INSTALAçãO NO VEÍCULO A tabela seguinte indica os tipos de instalação para do arnês (4) pressionando o botão vermelho (fig. cada grupo: 1.4). - Page 13 • Os fechos do encaixe já não entram (saem quando são 3. Solte os protetores de ombros desencaixando-os introduzidos na fivela). do conector que os une e que se encontra na parte (19) Placa de fig. 4 fig. 5 retenção da • Os fechos do encaixe encaixam, mas não se ouve um traseira da cadeira ou passando-os diretamente fivela do cinto.
- Page 14 1. Regule a altura do apoio para a cabeça até à posição CUIDADO! Confirme se as correias do arnês não estão Para ajustar a altura do apoio para a cabeça: (11) Regulador de mais baixa seguindo os passos descritos no ponto torcidas e se estão corretamente inseridas nas ranhuras fig.
- Page 15 * Com a abertura virada para cima dentro dos dois (18) Braços de pontos de fixação iSoFiX (24) do seu veículo (fig. 10). fig. 11 fig. 13 fig. 14 fig. 15 bloqueio iSoFiX. 3. Retire o regulador iSoFiX para extrair ambos Regulador os braços de bloqueio (18).
- Page 16 8. Retire o regulador iSoFiX e empurre a cadeira de • As correias dos ombros estão corretamente ajustadas e não estão torcidas. segurança contra o encosto, exercendo pressão fig. 18 fig. 19 firme e constante sobre os dois lados até que fique •...
- Page 17 4. Passe a parte do cinto diagonal (21) pela guia do cinto Para segurança da criança, antes de cada viagem no CUIDADO! os braços de bloqueio apenas estarão marcada a vermelho do apoio para a cabeça até veículo, certifique-se de que: Guia do cinto.
-
Page 18: Limpeza E Manutenção
Grupo 2 e 3 (ISOFIX e cinto do veículo) 7. LIMPEZA E MANUTENçãO INSTRUçÕES dE CUIdAdO! Se a criança tentar abrir a fivela do cinto 1. Desaperte a fivela do cinto do veículo que fixa a LAVAGEM: 30 °C · Limpar a seco com (4), evite que ela o faça o mais rapidamente possível. - Page 19 7. The iSoFiX weight group and size class for which 16. Do not disassemble, modify, or add any piece to 1. OVERVIEW IMPORTANT INFORMATION the device has been designed are: Group 1, for the child seat or harness, as this would seriously Please read the following instructions children between 9 and 18 kg.
- Page 20 The seat offers a number of assembly options. The ensuring the harness is taut and the buckle closed. 2. USES IN THE VEHICLE following table shows the installation types for each open the harness buckle (4) by pressing the red group: button (fig.1.4).
- Page 21 • The buckle clasps come together without making a without a connector, by passing them directly through (19) Belt buckle click. the corresponding holes in the seat. fig. 4 fig. 5 retention • It becomes difficult to insert the clasps into the plate.
- Page 22 To do this: To adjust the height of the headrest: (11) Headrest height IMPORtANt! Make sure the harness straps are not fig. 9 adjuster. 1. Adjust the headrest to its lowest position following 1. Pull the headrest height adjuster (11) and the headrest twisted and are correctly inserted into the slots in the the steps described in point 3.11.
- Page 23 3. Pull the iSoFiX adjuster to extract both arms (18) iSoFiX (18). Move the locking arms from side to side until fig. 11 fig. 13 fig. 14 fig. 15 locking you hear the click indicating that they are fully arms. locked (fig.11).
- Page 24 10. Hook the safety clasp (14) to the Top Tether anchor • The shoulder protectors (3) are on a level with the point recommended in your vehicle instruction fig. 18 child’s shoulders. fig. 19 manual (fig. 15). • The clasps (26) are correctly inserted into the belt buckle (4).
- Page 25 IMPORTANT! The vehicle seat buckle should not rest • The Top Tether fits tightly over the seat back and the 7. Shake the safety seat to make sure it is properly between the light-red-coloured belt guide (25) and the tension indicator (34) is green. installed and check the safety buttons again to arm rest.
-
Page 26: Cleaning And Maintenance
3. Press the iSoFiX system unlock buttons (17), first 8. RETIRAR LA SILLA dE SEGURIdAd on one side, then the other, in order to free the seat from the vehicle iSoFiX anchoring system. The IMPORTANT! Remove the safety seat from the vehicle. buttons will change from partially green to red. - Page 27 Parque Empresarial Zuatzu Edificio Donosti, 2ª planta Oficina 3 20018 San Sebastián (Gipuzkoa) Spain t. (00 34) 943 833 013 f. (00 34) 943 833 004...
Need help?
Do you have a question about the BSFIX123 and is the answer not in the manual?
Questions and answers