
Subscribe to Our Youtube Channel
Related Manuals for ADVATEK LIGHTING PixLite T8-S Mk2


Summary of Contents for ADVATEK LIGHTING PixLite T8-S Mk2
- Page 1 PixLite T8-S Mk2 User Manual Hardware Rev 1.0 - 1 - www.advateklights.com PixLite T8-S Mk2 User Manual V210222...
-
Page 2: Table Of Contents
7.3 - Outputs 7.4 - Hardware Test Pattern 8 - Firmware Updates 8.1 - Performing a Standard Update 8.2 - Performing a Recovery Firmware Update 9 - Specifications 9.1 - Operating Specifications - 2 - www.advateklights.com PixLite T8-S Mk2 User Manual V210222... - Page 3 10 - Troubleshooting 10.1 - LED Codes 10.2 - No Power/Status LEDs On 10.3 - No Pixel Control 10.4 - Other Issues 10.5 - Reset to Factory Defaults 11 - Disclaimer - 3 - www.advateklights.com PixLite T8-S Mk2 User Manual V210222...
-
Page 4: Introduction
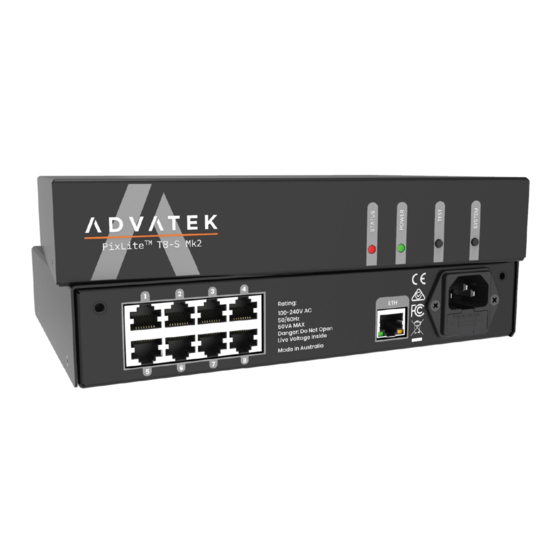
2 - Introduction This is the user manual for the PixLite T8-S Mk2 pixel controller, hardware version 1.0. The PixLite T8- S Mk2 controller s convert E1.31 (sACN) or Art- Net protocols from a lighting console, media server or computer lighting software into various pixel LED protocols. -
Page 5: Safety Notes
Power to the device is protected by a 250V 1A glass fuse (F1A L 250V). This fuse should only be replaced by someone with proper technical knowledge or instruction. For more information on supplying power, see Section 5.1. - 5 - www.advateklights.com PixLite T8-S Mk2 User Manual V210222... -
Page 6: Physical Installation
Figure 1: Mounting Plates Assembled to Controller 3. Assemble the unit onto the wall / ceiling using four screws of a type suitable for the mounting surface (not supplied), as shown in Figure 2 below. The - 6 - www.advateklights.com PixLite T8-S Mk2 User Manual V210222... - Page 7 4mm in thread diameter and at least 10mm long. Figure 2: Mounting Plates Assembled to Wall/Ceiling - 7 - www.advateklights.com PixLite T8-S Mk2 User Manual V210222...
-
Page 8: Direct Panel Mount
2. From the bottom side of the panel, use four M4 machined thread screws to assemble the controller to the panel, as shown in Figure 4 below. The screws should be 8mm in length, plus the thickness of the panel. - 8 - www.advateklights.com PixLite T8-S Mk2 User Manual V210222... - Page 9 Figure 4: Controller Assembled onto Panel - 9 - www.advateklights.com PixLite T8-S Mk2 User Manual V210222...
-
Page 10: 19" Rack Mount
The second option is to mount two controllers side by side in a single rack slot, as shown in Figure 6 below. Use optional mounting kit (part number MNT0202) for this configuration. - 10 - www.advateklights.com PixLite T8-S Mk2 User Manual V210222... -
Page 11: Single Controller Configuration
Figure 7: Single Brackets Assembled to Controller 2. Assemble the controller to the 19” rack using the supplied pan head screws, washers and nuts, as shown in Figure 8 Figure 9 below. - 11 - www.advateklights.com PixLite T8-S Mk2 User Manual V210222... -
Page 12: Dual Controller Configuration
Figure 9: Single Controller Assembled to Rack 4.3.2 - Dual Controller Configuration 1. Using the twelve supplied countersunk screws, assemble the two brackets to the controller, as shown in Figure 10 below. - 12 - www.advateklights.com PixLite T8-S Mk2 User Manual V210222... - Page 13 2. Assemble the controller to the 19” rack using the supplied pan head screws, washers and nuts, as shown in Figure 11 Figure 12 below. Figure 11: Nuts Fitted to Rack - 13 - www.advateklights.com PixLite T8-S Mk2 User Manual V210222...
- Page 14 Figure 12: Dual Controller Assembled to Rack - 14 - www.advateklights.com PixLite T8-S Mk2 User Manual V210222...
-
Page 15: Electrical Connections
5 - Electrical Connections 5.1 - Supplying Power Power for the PixLite T8-S Mk2 controller is applied via the supplied AC power cable. The controller is shipped with a 2m long IEC lead with a region specific power plug which should be connected to the AC mains supply. The IEC input socket on the rear... -
Page 16: Connecting The Transmitter To Receivers
Receivers are connected to the transmitter via the RJ45 jacks on the rear panel of the PixLite T8-S Mk2. Each jack is labelled with its output number 1-8. These ports are not network ports, and should not be connected to any networking equipment, as shown Figure 15 below. -
Page 17: Expanded Mode
PixLite T8-S Mk2 in this mode when using it. It is advantageous to use this mode with data-line only pixels compared to normal mode, because the refresh rates will be improved. -
Page 18: Network Configuration
Figure 17: Network Layout using a Server and Switch Figure 17 shows a typical network topology for the PixLite T8-S Mk2 controller(s) LAN. Installations using multicast sACN will benefit from the use of IGMP Snooping enabled network equipment when there are more multicast universes on the network than any one PixLite is using. -
Page 19: Ip Addressing
IP address or times out to its default IP. After this, the power LED will remain on solid and the status LED will flash, indicating it is in run mode and ready for use. - 19 - www.advateklights.com PixLite T8-S Mk2 User Manual V210222... -
Page 20: Using A Switch/Direct
IP address other than the default. Figure 19 shows a screenshot of typical computer network settings to communicate with a PixLite T8-S Mk2 controller for the first time without a router. - 20 - www.advateklights.com... -
Page 21: Forcing The Default Ip Address
You should now be able to set up your PC’s network settings to find the controller at this IP and change the IP settings to a preferred static IP address. - 21 - www.advateklights.com PixLite T8-S Mk2 User Manual V210222... -
Page 22: Operation
7.4 - Hardware Test Pattern The controller features a built-in test pattern to assist in troubleshooting during an installation. To put the controller into this mode, press and hold the ‘Test’ button for 3 - 22 - www.advateklights.com PixLite T8-S Mk2 User Manual V210222... - Page 23 Advatek Assistant. In this way you can test if that part of your configuration is correct and isolate other possible problems with the incoming Ethernet data side. - 23 - www.advateklights.com PixLite T8-S Mk2 User Manual V210222...
-
Page 24: Firmware Updates
The controller is capable of having its firmware updated (new software). An update is typically performed to fix problems or to add new features. To perform a firmware update, ensure that you have your PixLite T8-S Mk2 controller connected to the LAN network as per Section 6.1. -
Page 25: Performing A Recovery Firmware Update
5. Click on the update button. The update will only take about 5 seconds, and a message box will pop up once the update is completed. 6. The controller should now be operating with the new firmware. - 25 - www.advateklights.com PixLite T8-S Mk2 User Manual V210222... -
Page 26: Specifications
100-240 Input Voltage Range V AC (50/60 Hz) Max Current Consumption Ambient Operating Temperature -10 to +60 °C 9.2 - Mechanical Specifications The PixLite T8-S Mk2 controller has dimensions as below. Dimension Metric Imperial Length 221mm 8.7" Width 160mm 6.3"... -
Page 27: Fault Protection
ESD protection is present on all data line outputs and all Ethernet input lines. All pixel outputs and the Ethernet input are protected against direct shorts to each other as well as to external voltages of up to +/- 24V. - 27 - www.advateklights.com PixLite T8-S Mk2 User Manual V210222... -
Page 28: Troubleshooting
If the lights are not turning on at all then double check all power connections and fuses. The PixLite T8-S Mk2 has a fuse located in a recess inside the IEC socket at the rear of the unit that may need to be replaced. See Section 5.1. -
Page 29: No Pixel Control
3. Power up the controller. 4. Wait for both LEDs to flash together. 5. Release both buttons and power down. 6. Power up the controller. It will now have factory default configuration. - 29 - www.advateklights.com PixLite T8-S Mk2 User Manual V210222... -
Page 30: Disclaimer
Art-Net™ Designed by and Copyright Artistic Licence Holdings Ltd. This product has been manufactured by: Advatek Lighting Pty Ltd 16 / 52 Corporate Blvd Bayswater, 3153 VIC, AUSTRALIA - 30 - www.advateklights.com PixLite T8-S Mk2 User Manual V210222...
Need help?
Do you have a question about the PixLite T8-S Mk2 and is the answer not in the manual?
Questions and answers