Table of Contents
Advertisement
Quick Links
Item # 1005566740
Model # JS-3425-A
Item # 1005566742
Model # JS-3425-C
USE AND CARE GUIDE
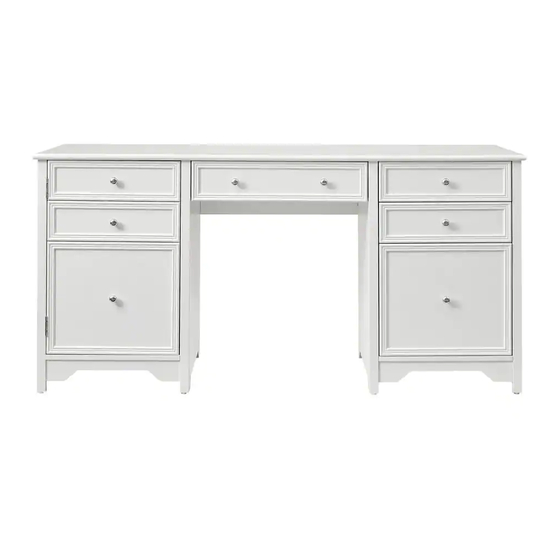
BRADSTONE EXECUTIVE DESK
Questions, problems, missing parts? Before returning to the store,
call Home Decorators Collection Customer Service.
8 a.m. – 7 p.m., EST, Monday – Friday, 9 a.m. – 6 p.m., EST, Saturday
1-800-986-3460
HOMEDEPOT.COM/HOMEDECORATORS
THANK YOU
We appreciate the trust and confidence you have placed in Home Decorators Collection through the purchase of this Bradstone
Executive Desk. We strive to continually create quality products designed to enhance your home. Visit us online to see our full
line of
products available for your home improvement needs. Thank you for choosing Home Decorators Collection!
Advertisement
Table of Contents

Related Manuals for Home Decorators Collection BRADSTONE JS-3425-A


Summary of Contents for Home Decorators Collection BRADSTONE JS-3425-A
- Page 1 THANK YOU We appreciate the trust and confidence you have placed in Home Decorators Collection through the purchase of this Bradstone Executive Desk. We strive to continually create quality products designed to enhance your home. Visit us online to see our full line of products available for your home improvement needs.
-
Page 2: Table Of Contents
Table of Contents Table of Contents..............2 Pre-assembly (continued)..........4 Safety Information............... 2 Package Contents............4 Pre-assembly................ 3 Notification................5 Planning Assembly............3 Assembly................. 6-15 Tools Required..............3 Maintenance................16 Care and Cleaning.............16 Hardware Included............3 Troubleshooting..............16 Safety Information DANGER CAUTION □ Do not use power tools to assemble your item. -
Page 3: Pre-Assembly
Pre-assembly PLANNING ASSEMBLY Keep children and pets away from build area. Make sure your area is large enough to unpack, sort and assemble the unit. TOOLS REQUIRED Small head Large head Phillips Phillips screwdriver screwdriver (Not Included) (Not Included) HARDWARE INCLUDED NOTE: Hardware not shown to actual size. -
Page 4: Pre-Assembly (Continued)
Pre-assembly (continued) PACKAGE CONTENTS Part Description Part Description Quantity Quantity Top panel Right Drawer back panel Right drawer left side panel Left side panel Right drawer right side panel Right side panel Right drawer bottom panel Left bottom panel Right drawer top panel Right bottom panel File drawer back panel Front bottom panel... -
Page 5: Notification
Notification NOTE: UPON OPENING THOROUGHLY CLEAN ALL WOODS SURFACES TO REMOVE DUST AND DIRT THAT MAY HAVE SETTLED ONTO FINISH DURING SHIPMENT. IN ORDER TO PREVENT DAMAGE DURING ASSEMBLY, PLEASE ASSEMBLE THIS ITEM WITH AT LEAST TWO PEOPLE. NOTE:TURN THE CAM-BOLT SCREWS UNTIL THEY SHOULDER ARE TIGHT,THE SHOULDER SHOULD BE AGAINST THE SURFACE OF THE PART. -
Page 6: Assembly
Assembly Assembly File drawer. d) Insert wood dowel (CC) into panel (X&Y) , then rotate the cam lock (DD) tight to a) Insert wood dowel (CC) into panel (W) ,then assemble panel (X&Y) and panel (A1) . assemble panel (W) and panel (X&Y) by rotating the flat head screw (HH). - Page 7 Assembly Assembly right drawer a) Connect the back panel(R) and the side panel(S&T) d) Connect the right drawer top panel(V) with small Cam with the flat head screw(HH) lock (DD) b)Insert the bottom panel(U) in alignment with the slot position e) Connect the handle(GG) with the cross round head bolt (FF) through the drawer panel c) Insert bolt (EE) into panel (V).
- Page 8 Assembly Assembly middle drawer a) Connect the back panel(C1) and the side panel(D1/E1) d) Connect the middle drawer top panel(G1) with small with the flat head screw(HH) cam lock(DD) b) Insert the bottom panel(F1) in alignment with the slot position e)Connect the handle(GG) with the cross round head bolt(FF) c) Insert bolt (EE) into panel (G1) Small...
- Page 9 Assembly c) Insert big Cam lock Bolt(BB) into left side panel(B) and Assembly left cabinet middle left vertical panel(G) a) Left bottom panel (D) pre-assembled with big cam lock bolt (BB) d) Connect left side panel(B) /middle left vertical panel(G) / front left horizontal panel(I) / Back horizontal panel(K) /left bottom panel(D) / Front bottom panel(F) with big cam lock(AA) b) Connect front bottom panel(F) and left bottom panel(D)
- Page 10 Assembly c)Insert big Cam lock bolt(BB) into right side panel(C) and Assembly Right cabinet middle right vertical panel(H) a) Right bottom panel(E) pre-assembled with big lock bolt (BB) d) Connect right side panel(C) /middle right vertical panel(H) /front right horizontal panel (J) /Back horizontal panel(K) /right bottom panel(E) / b) Connect front bottom panel(F) and right bottom panel(E) with Front bottom panel(F) with big Cam lock (AA) big Cam lock(AA)
- Page 11 Assembly Assemble the left and right cabinets and the middle back panel (P) /horizontal panel(L) b)Connect the horizontal panel(L) and the middle back panel(P) with a) Right and left cabinet body pre installed with big Cam lock (AA) , and then lock them with flat head screw(HH) big cam lock bolt(BB) It takes 2 adults to safely assemble this step...
- Page 12 Assembly Assemble the top panel(A)&back panel(Q/O) c) Connect the top panel with the big cam lock(AA) a) Top panel pre- installed with big lock Bolt ( BB) b) Connect the top panel (A) d) Install the back panel (Q/ O) through the back panel hole It takes 2 adults to safely with the round head screw( II), and install the hole cover (JJ) assemble this step...
- Page 13 Assembly lnserting the drawer lnsert the drawer into the assembled body as shown. 1.Pull out slide. Slide bearings forward. 2.Push slide back inside. 3.Insert into slide slot correctly, Repeat for every slide! push the drawer into the cabinet body with even force NOTE: Make sure the slide piece is at the front end of the glide when installing the drawer into the body.
- Page 14 Assembly Install door panel a) Install the door panel(N) with the screw(KK), and connect b) Install the layer board support (LL) and movable shelf(M) the handle(GG) with the round head bolt(FF) through the door panel hole It takes 2 adults to safely assemble this step layer board Cross round...
- Page 15 Assembly Adjust door panel(N) and assemble anti-tipping hardware package(MM) b) Lock the two hardware on the product and the other two hardware lock on the wall, then lock the product with a plastic band. a)Adjust door panel(N) ADJUST MAGNETIC CLAMP Wall Wall Floor...
-
Page 16: Maintenance
Maintenance □ If your furniture is stained or otherwise damaged during use, contact a professional for repairs. Care and Cleaning □ Use a soft, clean cloth that will not scratch the surface when dusting. □ Use of furniture polishes is not necessary. Should you choose to use polishes, test the polish in an inconspicuous area before using over the entire surface of the product.
Need help?
Do you have a question about the BRADSTONE JS-3425-A and is the answer not in the manual?
Questions and answers