Table of Contents
Advertisement
Available languages
Available languages
Quick Links
Advertisement
Chapters
Table of Contents

Related Manuals for Intek ET Series


Summary of Contents for Intek ET Series
- Page 1 PROFESSIONAL HANDHELD TRANSCEIVER PC PROGRAMMABLE SERIES MT-446ET PMR 446 VERSION 16CH / 0.5W E.R.P. MT-174ET VHF FM VERSION 136-174 MHz 16CH / 5W MT-460ET UHF FM VERSION 400-470 MHz 16CH / 4W INSTRUCTION MANUAL MANUALE DI ISTRUZIONI...
-
Page 2: Table Of Contents
INTEK S.R.L. declines any responsibility concerning any modification of the product, made by the user or by a third party, after delivery of the product. -
Page 3: General Information
As regulations are usually subject to possible modifications, please check the current regulations in your country with your dealer or local supplier. INTEK does not take any responsibility for illegal use and operation of this product not in accordance with the regulation of the country where the product is used. -
Page 4: Unpacking And Checking Parts - Supplied Accessories
Unpacking and Checking Parts - Supplied Accessories Unpacking and checking parts Carefully unpack the product. Please identify all the parts listed below, before wasting the packaging. If any part is missing or if the packaging shows any damage, please contact your dealer immediately. Supplied accessories Rubber flexible antenna with SMA connector (only models MT-174ET and MT-460ET) 7.2V 1800mAh Li-Ion Rechargeable Battery Pack... -
Page 5: Preliminary Steps
Preliminary Steps Battery charging Connect the 230VAC adaptor charger to the desk type battery charger and to a 230VAC outlet. The Green Led will light to confirm that the charger is powered. Insert the empty battery or the transceiver with the battery pack in the battery charger. - Page 6 Preliminary Steps To install the battery Please align the two battery slots with the fit runner on the lower side of the transceiver. Press the battery downward untill the locker placed on the rear side of the radio hooks and fastens the battery. To remove the battery To remove the battery, press the battery locker [1] placed on the rear side of the radio and slide the battery [2] away from the radio.
- Page 7 Preliminary Steps Install the external earset-microphone jack rubber cover. If an external earset-microphone (or the programming cable) is not used, please install the earset-microphone jack rubber cover. Install the earset-microphone jack rubber cover, by matching the three rubber tabs with the holes on the radio, as showed on the drawing. If the earset-microphone jack rubber cover is removed, radio will not be splash proof.
-
Page 8: Getting Acquainted With The Product
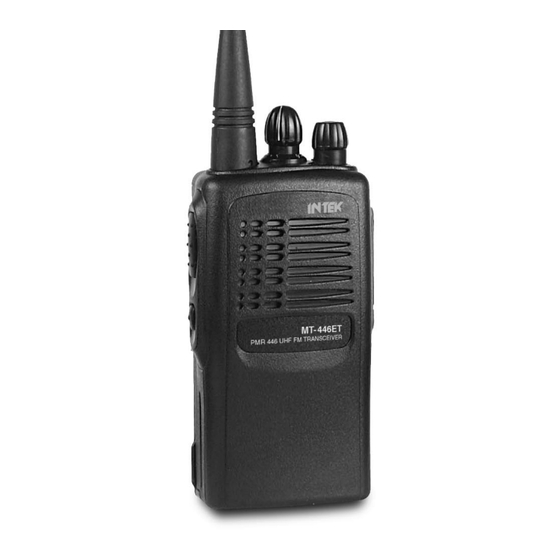
Getting Acquainted with the Product GETTING ACQUAINTED WITH THE PRODUCT Antenna Fixed non removable rubber flexible antenna on model MT-446ET. Rubber flexible antenna with SMA connector on models MT-174ET and MT-460ET. Channel Selector Turn the selector to select the desired channel from 1 to 16. Power ON switch and volume control Switch on the transceiver turning the knob clockwise or counterclockwise to switch it off. -
Page 9: Getting Started
Getting Acquainted with the Product - Getting Started SIDE Key This key is programmable by using dedicated software (free download at www.intek-radios.com). Please refer to the funcions list at page 11. The default setting is the MONITOR function (see page. 10). - Page 10 Getting Started - Advanced Functions Transmission In order to transmit, press the PTT key (7) and speak with your normal voice, keeping the microphone at about 4 cm from your mouth. The LED indicator (6) will light in red color. Release the PTT key (7) at the end of transmission.
-
Page 11: Automatic Channel Scanning
Advanced Functions Monitor This function can be enabled by programming Side key (8) (default setting). When no signal is received, the Squelch circuit automatically disables the speaker, so the background noise desappears. To manually disable the Squelch, press the SIDE key (8). This function may be useful when you want to adjust the volume, when you want to receive a weak signal or when you want to listen to a channel screened by CTCSS/DCS. -
Page 12: Programmable Side Key
Programmable Side Key You can program the Side key (8), by using the dedicated PC software. The programmable fuctions are as follow : Function Description DTMF ON / OFF (*) Enable / disable DTMF Function Monitor The radio will un-mute only when it receives a carrier signal. Monitor Momentary Squelch OFF The radio will un-mute no matter there is a carrier signal or not. -
Page 13: Specification - Optional Accessories
NOTICE ! (*) The transmitter RF output power levels are user programmable by PC, using the programming software (free download at www.intek-radios.com). The power levels must be programmed in accordance with the regulations of the country where the product is used. -
Page 14: Mt-446Et Frequency/Channels Programming - User Information
MT-446ET Channels Programming - User Information FREQUENCY / CHANNELS PROGRAMMING (factory default programming) FREQUENCY FREQUENCY CTCSS / DCS CHANNEL TONE 446.00625 446.00625 446.01875 446.01875 446.03125 446.03125 446.04375 446.04375 107.2 446.05625 446.05625 110.9 446.06875 446.06875 114.8 446.08125 446.08125 118.8 446.09375 446.09375 123.0 446.00625 446.00625... -
Page 15: Mt-174Et / Mt-460Et Frequency / Channels Programming
MT-174ET / MT-460ET Channels Programming FREQUENCY / CHANNELS PROGRAMMING FREQUENCY FREQUENCY CTCSS / DCS CHANNEL TONE .......................................................................................................... -
Page 16: Ctcss / Dcs - Tone Frequency Chart
CTCSS Tone Frequency Chart - DCS Tone Frequency Chart CTCSS - TONE FREQUENCY CHART (50 TONES) 67.0 82.5 100.0 123.0 15 1.4 171.3 18 9.9 210.7 250.3 69.3 85.4 103.5 127.3 15 6.7 173.8 192.8 218 .1 254.1 71.9 88.5 107.2 131.8 159.8... -
Page 17: Indice - Importante
INTEK s.r.l. declina qualsiasi responsabilità relativamente a modifiche della programmazione del ricetrasmettitore, eseguite dall’utente o da terzi, dopo la consegna del prodotto. -
Page 18: Informazioni Per L' Utente
Informazioni per l' utente Grazie ! Vi ringraziamo per aver scelto INTEK per applicazioni civili. Siamo certi che questo ricetrasmettitore di facile uso vi consentirà di comunicare in modo affidabile e di svolgere le vostre attività professionali con la massima efficienza. Questo ricetrasmettitore incorpora la più avanzata tecnologia e sarete soddisfatti del suo livello di qualità... -
Page 19: Disimballaggio E Verifica Delle Parti - Accessori Forniti
Disimballaggio e verifica delle parti - Accessori forniti Disimballaggio e verifica delle parti Disimballate accuratamente il ricetrasmettitore. Si raccomanda di identificare tutte le parti elencate nella tabella seguente, prima di eliminare l’imballo. Se vi sono stati danni o mancanze durante la spedizione, contattate immediatamente il vostro fornitore. -
Page 20: Preparazione
Preparazione Ricarica della batteria Collegare l’adattatore 230V alla presa posta sul retro del caricatore da tavolo, come mostrato dal disegno. Collegare l' adattatore alla presa 230VAC. Il LED verde si illuminerà. Inserire la batteria scarica o il ricetrasmettitore con la batteria installata nel caricabatteria. - Page 21 Preparazione Installare la batteria Fare coincidere le 4 scanalature della batteria con le guide corrispondenti sulla parte posteriore del ricetrasmettitore. Fare scivolare la batteria sul retro del ricetrasmettitore fino a quando il blocco posto alla base della radio si aggancia e blocca la batteria. Rimuovere la batteria Per rimuovere la batteria premere sul blocco [1] posto alla base della radio e far scivolare via la batteria [2] dalla radio.
- Page 22 Preparazione Installare la chiusura per la presa earset-mic Se non si utilizza un microfono-altoparlante esterno (o il cavo di programmazione), coprire la presa con il coperchio in gomma in dotazione. Applicare il coperchio facendo coincidere i 3 dentelli in gomma con i 3 fori posti sul lato destro della radio come mostrato nel disegno.
-
Page 23: Familiarizzare Con Il Prodotto
Familiarizzare con il prodotto FAMILIARIZZARE CON IL PRODOTTO Antenna Antenna fissa in gomma, non rimuovibile sul modello MT-446ET. Antenna flessibile in gomma con connettore SMA sui modelli MT-174ET e MT-460ET. Selettore dei canali Ruotare il selettore per selezionare il canale desiderato da 1 a 16. Interruttore di accensione e controllo volume Ruotare la manopola in senso orario per accendere il ricetrasmettitore e in senso antiorario per spegnerlo. -
Page 24: Operazioni Di Base
Tasto SIDE Questo tasto è programmabile tramite software per PC dedicato (liberamente scaricabile dal sito www.intek-radios.com). Per l' elenco delle funzioni fare riferimento alla tabella a pag. 26. Di default, questo tasto è programmato come funzione Monitor (vedi pag. 25). - Page 25 Operazioni di base - Funzioni supplementari Trasmissione Per effettuare una chiamata, premere il tasto PTT (7) e parlare con un volume di voce normale, tenendo il microfono a circa 4 cm dalla vostra bocca. L' indicatore LED (6) sarà acceso in colore rosso. Rilasciare il tasto PTT (7) al termine della conversazione.
-
Page 26: Funzioni Supplementari
Funzioni supplementari Monitor Questa funzione può essere abilitata programmando il tasto laterale Side (8) (settaggio di fabbrica). Quando non viene ricevuto alcun segnale, il circuito di silenziamento (Squelch) automaticamente inibisce l’altoparlante, così da far scomparire il rumore di fondo. Per disattivare manualmente il silenziamento (Squelch), premere il tasto laterale SIDE (8). -
Page 27: Programmazione Tasto Laterale Side
Programmazione tasto laterale Side Il tasto laterale Side (8) può essere programmato utilizzando il software per PC dedicato. Le funzioni programmabili che si possono assegnare al tasto Side (8) sono le seguenti : Funzione Descrizione DTMF ON / OFF (*) Abilita / disabilita la funzionen DTMF Monitor Consente di monitorare il canale in uso, ma solo se presente un... -
Page 28: Specifiche Tecniche - Accessori Opzionali
(*) I livelli di potenza RF del trasmettitore sono programmabili dall' utente utilizzando il software di programmazione per PC (liberamente scaricabile dal sito www.intek-radios.com). I livelli di potenza devono essere programmati in accordo con le normative del paese dove il prodotto viene utilizzato. -
Page 29: Programmazione Canali Mt-446Et / Avviso Agli Utenti
Programmazione canali MT-446ET - Avviso agli utenti PROGRAMMAZIONE CANALI FREQUENZA DI FREQUENZA DI CANALI CTCSS / DCS TRASMISSIONE RICEZIONE 446.00625 446.00625 446.01875 446.01875 446.03125 446.03125 446.04375 446.04375 107.2 446.05625 446.05625 110.9 446.06875 446.06875 114.8 446.08125 446.08125 118.8 446.09375 446.09375 123.0 446.00625 446.00625 127.3... -
Page 30: Programmazione Canali Mt-174Et / Mt-460Et
Programmazione canali MT-174ET / MT-460ET PROGRAMMAZIONE CANALI FREQUENZA DI FREQUENZA DI CANALI CTCSS / DCS TRASMISSIONE RICEZIONE ...................................................................................................... -
Page 31: Tabella Dei Toni Ctcss / Tabella Dei Toni Dcs
Tabella dei toni CTCSS - Tabella dei toni DCS TABELLA DEI TONI CTCSS (50 TONI) 67.0 82.5 100.0 123.0 15 1.4 171.3 18 9.9 210.7 250.3 69.3 85.4 103.5 127.3 15 6.7 173.8 192.8 218 .1 254.1 71.9 88.5 107.2 131.8 159.8 177.3... -
Page 32: Avvertenze Importanti / Garanzia Limitata
MT-446ET / MT-174ET / MT-460WET N. di serie : Data: Timbro e firma del rivenditore Prodotto importato e distribuito da INTEK S.R.L. Via G. Marconi, 16 - 20090 Segrate (MI) - Tel. 02-26950451 - Fax. 02-26952185 www.intek-radios.com / e-mail : info@intek-radios.com - 31 -... -
Page 33: Declarations Of Conformity
Manufacturer : INTEK S.R.L. Via G. Marconi, 16 20090 Segrate, Italy Tel. 3902 2695 0451 / Fax. 3902 2695 2185 E-mail : info@intek-radios.com Contact Reference : Armando Zanni Tel. 3902 2695 0451 / Fax. 3902 2695 2185 E-mail : info@intek-radios.com Segrate, 15/05/2014 dr. - Page 34 Manufacturer : INTEK S.R.L. Via G. Marconi, 16 20090 Segrate, Italy Tel. 3902 2695 0451 / Fax. 3902 2695 2185 E-mail : info@intek-radios.com Contact Reference : Armando Zanni Tel. 3902 2695 0451 / Fax. 3902 2695 2185 E-mail : info@intek-radios.com Segrate, 14/05/2014 dr.
- Page 35 Manufacturer : INTEK S.R.L. Via G. Marconi, 16 20090 Segrate, Italy Tel. 3902 2695 0451 / Fax. 3902 2695 2185 E-mail : info@intek-radios.com Contact Reference : Armando Zanni Tel. 3902 2695 0451 / Fax. 3902 2695 2185 E-mail : info@intek-radios.com Segrate, 16/05/2014 dr.
Need help?
Do you have a question about the ET Series and is the answer not in the manual?
Questions and answers