
Related Manuals for Intek KT-900EE


Summary of Contents for Intek KT-900EE
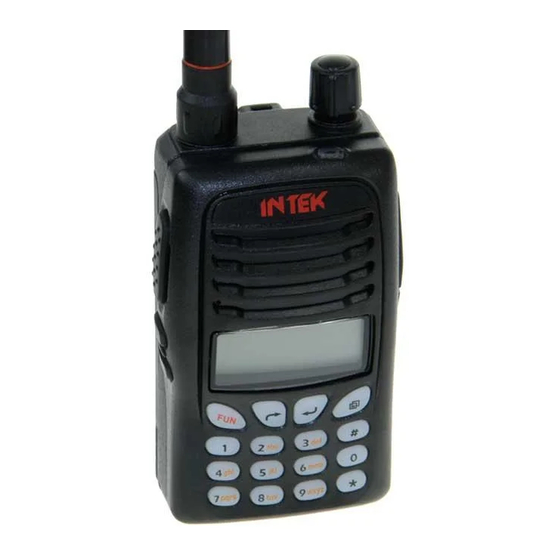
- Page 1 DUAL BAND AMATEUR RADIO VHF / UHF FM HANDHELD TRANSCEIVER 144-146 MHz / 128CH / 5W 430-440 MHz / 128CH / 4W PC PROGRAMMABLE INSTRUCTION MANUAL MANUALE DI ISTRUZIONI...
-
Page 2: Declaration Of Conformity
(to EC Directive 2006/95, 2004/108, 99/5) DECLARATION OF CONFORMITY With the present declaration, we certify that the following products : INTEK KT-900EE comply with all the technical regulations applicable to the above mentioned products in accordance with the EC Directives 2006/95/EC, 2004/108/EC, 99/5/EC. -
Page 3: Table Of Contents
INTEK S.R.L. declines any responsibility concerning any modification of the product, made by the user or by a third party, after delivery of the product. -
Page 4: General Information
As regulations are usually subject to possible modifications, please check the current regulations in your country with your dealer or local supplier. INTEK does not take any responsibility for illegal use and operation of this product not in accordance with the regulation of the country where the product is used. -
Page 5: Unpacking And Checking Parts
Unpacking and Checking Parts - Supplied Accessories Unpacking and checking parts Carefully unpack the product. Please identify all the parts listed below, before wasting the packaging. If any part is missing or if the packaging shows any damage, please contact your dealer immediately. Supplied accessories Rubber flexible antenna with SMA connector 7.4V 1200mAh Li-Ion Rechargeable Battery Pack... -
Page 6: Preliminary Steps
Preliminary Steps Battery charging Connect the 230VAC adaptor charger to the desk type battery charger and to a 230VAC outlet. The red Led will flash to confirm that the charger is powered. Insert the empty battery or the transceiver with the battery pack in the battery charger. - Page 7 Preliminary Steps To remove the battery To remove the battery pack, press the battery lock on the radio (item 1) and push back the battery pack, as showed in the drawing (item 2). Warning ! Please do not waste used batteries into the environment and do not trash them with the common garbage.
- Page 8 Preliminary Steps To install / to remove the belt clip If necessary, attach the belt clip to the tranceiver, making it slide along the fit runner placed on the rear side of the battery (1) untill the lock will hook. To remove the belt clip press the lock and slide the belt clip away from the battery (2).
-
Page 9: Getting Acquainted With The Product
Getting Acquainted with the Product GETTING ACQUAINTED WITH THE PRODUCT Antenna Rubber flexible antenna with SMA connector. Power ON Switch and Volume Control Switch on the transceiver turning the knob clockwise or counterclockwise to switch it off. To increase the volume, turn the knob clockwise or counterclockwise to decrease it. RX/TX LED Indicator The LED indicator will light in green colour when the radio is receiving a signal and in red colour during transmission. - Page 10 Getting Acquainted with the Product Keypad Backlighted rubber Keypad. FUN (Exit) Key This key is used in combination with other keys for select different functions. It is also used to exit the programming menu. 10. Microphone Built-in microphone. PTT key (Push-To-Talk) To transmit, press and keep pressed the PTT key (11), then speak into the microphone (10) with your normal voice.
- Page 11 Getting Acquainted with the Product LCD DISPLAY Signal Digital Bar Meter Indicates the received signal strenght in the receive mode. FM Icon Indicates that the receiver is in FM RADIO mode. S Icon When the dual watch function is OFF, it indicates the secondary receiving frequency. Please refer to Dual Watch function (MENU 32) at page 18-19.
-
Page 12: Getting Started
Getting Acquainted with the Product - Getting Started Numerical Indication It shows the selected Channel/Memory Number and the function number in the Menu Mode. Battery Level Indicator It shows the current battery level condition. Channel Scanning Icon This Icon is lighed when the selected channel is programmed to the scanning list. Please refer to SCNADD function (MENU item 24) at page 17. -
Page 13: Menu Shortcut Keys
Getting Started - Menu Shortcut Keys Frequency Mode In FREQUENCY MODE, press the UP/DOWN keys (6) to select the desired frequancy, or use numeric keys (8) to manually input the desired frequency number. (NOTE: The defaults frequency step is 12.5KHz. Refer to STEP function at page 16 to select the desired frequency step. Transmission / Receiving In order to transmit, press the PTT (11) key and speak with your normal voice, keeping the microphone at about 4 cm from your mouth. -
Page 14: Menu Operation
Menu Operation FUN + MENU Store the frequency on selected channel Press and Hold the FUN key for 2 Seconds to Unlock the Keypad. FUN + LAMP FM Radio Mode / Transceiver Mode switch. MENU + * Keypad lock LAMP Press and Hold the LAMP key for 2 Seconds to transmit the calling tone. - Page 15 Menu Operation VOX : Handsfree Operation (MENU 03) In MENU mode, select the item 03 (N); the VOX indication (W) will appear on the LCD display (5). Press MENU key (7) to confirm and press the UP/DOWN keys (6) to select OFF (function disabled) or the desired VOX level from 1 (low sensitivity) to 9 (high sensitivity).
- Page 16 Menu Operation MEM-CH : Emergency Channel Setting (MENU 08) In MENU mode, select the item 08 (N); the MEM-CH indication (W) will appear on the LCD display (5). Press MENU key (7) to confirm and press the UP/DOWN keys (6) to select the desired emergency channel (from 001 to 128).
- Page 17 Menu Operation SQL : Squelch Level Setup (MENU 14) In MENU mode, select the item 14 (N); the SQL indication (W) will appear on the LCD display (5). Press MENU key (7) to confirm and press the UP/DOWN keys (6) to select the desired Squelch level from 0 (squelch opening) to 9 (lowest Squelch sensitivity).
- Page 18 Menu Operation Press the UP/DOWN keys (6) to select the desired CTCSS or DCS tone number or select OFF to disable the function. Press the MENU key (7) to confirm the operation then press the UP/DOWN keys (6) to select other functions or press the FUN key (9) to return to standby status. T : Transmitting CTCSS / DCS Tones (MENU 19) In MENU mode, select the item 19 (N);...
- Page 19 Menu Operation FMR : FM Radio Signal Monitor (MENU 23) In MENU mode, select the item 23 (N); the FMR indication (W) will appear on the LCD display (5). Press MENU key (7) to confirm and press the UP/DOWN keys (6) to select ON (function enabled) or OFF (function disabled).
- Page 20 Menu Operation Press the MENU key (7) to confirm the operation then press the UP/DOWN keys (6) to select other functions or press the FUN key (9) to return to standby status. ARS : Auto Repeater Shift (MENU 28) In MENU mode, select the item 28 (N); the ARS indication (W) will appear on the LCD display (5). Press MENU key (7) to confirm it and press the UP/DOWN keys (6) to select ON (function enabled) or OFF (function disabled).
- Page 21 Menu Operation ON : The frequency showing arrowhead is main frequency, the frequency without showing arrowhead is secondary frequency. The main frequency can be used for transmitting and receiving. When the secondary frequency receives an incoming signal, the arrowhead will move to secondary frequency, the secondary frequency can be used for transmitting and receiving and it becomes the main frequency.
-
Page 22: Fm Radio Mode
FM Radio Mode - User Information FM RADIO MODE OPERATION (87.5 - 108 MHz) Press FUN key (9) and Lamp key (12) to enter the FM Radio Mode; the FM Icon (B) appears on the LCD (5). The LCD display (5) will also show the RADIO indication in upline "A" (W) and the selected frequency in downline "B"... -
Page 23: Specifications
Specifications - Optional Accessories SPECIFICATIONS General Frequency VHF 144-146 MHz (136.000 - 174.9875 MHz) (*) UHF 430-440 MHz (400-470.9875 MHz) (*) Channels Channel spacing 5, 6.25, 10, 12.5, 25 KHz DC input voltage 7.4 VDC Operating temperature -20/+55° Dimensions mm 58 x 95 x 40 (main body) Weight 220 gr. -
Page 24: Indice
INTEK s.r.l. declina qualsiasi responsabilità relativamente a modifiche della programmazione del ricetrasmettitore, eseguite dall’utente o da terzi, dopo la consegna del prodotto. -
Page 25: Informazioni Per L' Utente
INTEK declina qualsiasi responsabilità relativamente ad un uso degli apparecchi non autorizzato o non conforme alle norme di legge. -
Page 26: Disimballaggio E Verifica Delle Parti
Disimballaggio e verifica delle parti - Accessori forniti Disimballaggio e verifica delle parti Disimballate accuratamente il ricetrasmettitore. Si raccomanda di identificare tutte le parti elencate nella tabella seguente, prima di eliminare l’imballo. Se vi sono stati danni o mancanze durante la spedizione, contattate immediatamente il vostro fornitore. -
Page 27: Preparazione
Preparazione Ricarica della batteria Collegare l’adattatore 230V alla presa posta sul retro del caricatore da tavolo, come mostrato dal disegno. Collegare l' adattatore alla presa 230VAC. Il LED rosso inizierà a lampeggiare. Inserire la batteria scarica o il ricetrasmettitore con la batteria installata nel caricabatteria. - Page 28 Preparazione Rimuovere la batteria Per rimuovere la batteria premere sul blocco posto nella parte alta della radio (punto 1) ed estrarla dalla stessa come mostrato nel disegno (punto 2). Avvertenze ! Non disperdere batterie esaurite nell’ambiente e non gettarle tra i rifiuti ordinari. Utilizzate gli appositi contenitori per la raccolta delle batterie usate o restituite le batterie da eliminare al vostro fornitore.
- Page 29 Preparazione Installare la clip da cintura Se necessario, applicare la clip da cintura al ricetrasmettitore, facendola scivolare nell’apposita scanalatura posta sul retro della batteria fino a quando il blocco metallico si aggancia (1). Per rimuovere la clip premere sul blocco metallico e farla scivolare via dalla batteria (2).
-
Page 30: Familiarizzare Con Il Prodotto
Familiarizzare con il prodotto FAMILIARIZZARE CON IL PRODOTTO Antenna Antenna in gomma con connettore SMA. Interruttore ON-OFF / Comando di volume Ruotare la manopola in senso orario per accendere il ricetrasmettitore e in senso antiorario per spegnerlo. Ruotare la manopola in senso orario per aumentare il volume e in senso antiorario per diminuirlo. - Page 31 Familiarizzare con il prodotto Tastiera Tastiera in gomma retroilluminata Tasto FUN (Exit) Questo tasto è utilizzato in combinazione con altri tasti per selezionare diverse funzioni. Esso è anche utilizzato per uscire dalla Modalità MENU. 10. Microfono Microfono entro contenuto. Tasto PTT (Push-To-Talk) Per effettuare una chiamata, premere e tenere premuto il tasto PTT (11), quindi parlare nel microfono con un volume di voce normale.
- Page 32 Familiarizzare con il prodotto DISPLAY LCD Strumento a barre S-Meter indica l' intensità del segnale in ricezione. In assenza di segnale, l' indicatore è spento. Icona FM Indica che il ricevitore è in modalità Radio FM. Icona S Se la funzione Dual Watch è disattivata, l' icona S indica la frequenza di ricezione secondaria. Fare riferimanto alla funzione Dual Watch (MENU 32) a pag.
- Page 33 Familiarizzare con il prodotto - Operazioni di base Icona ANI Non disponibile su questo modello. Indicazione numerica Indica il canale/memoria selezionato. Nella modalità menu indica il numero della funzione visualizzata in quel momento. Indicatore di stato di carica della batteria Indica lo stato della carica della batteria.
-
Page 34: Operazioni Di Base
Operazioni di base OPERAZIONI DI BASE Accensione Accendere il ricetrasmettitore ruotando in senso orario la manopola ON/OFF-Volume (2) fino a quando non si sente un click, il ricetrasmettitore è ora nella modalità stand-by. La radio emetterà un beep e per un istante tutte le indicazioni del display saranno illuminate, a conferma del corretto funzionamento della radio. -
Page 35: Comandi Veloci Da Tastiera
Comandi veloci da tastiera - Utilizzo del menu COMANDI VELOCI DA TASTIERA Ogni funzione del menu e altre funzioni aggiuntive possono essere attivate velocemente premendo il tasto FUN (9) seguito da uno dei tasti numerici della tastiera, compresi i simboli # e * . Questo consente un uso veloce e immediato di ogni funzione della radio senza dover ricorrere alle procedure del menu. -
Page 36: Utilizzo Del Menu
Utilizzo del menu SCAN : Modalità di scansione (MENU 01) Nella modalità MENU selezionare la funzione 01 (N); l' indicazione SCAN (W) comparirà sul display LCD (5). Premere il tasto MENU (7) per confermare e premere i tasti UP/DOWN (6) per selezionare i modi CO, TO o SE. - Page 37 Utilizzo del menu ROG : Impostazione del tono Roger Beep (MENU 05) Nella modalità MENU selezionare la funzione 05 (N); l' indicazione ROG (W) comparirà sul display LCD (5). Premere il tasto MENU (7) per confermare e premere i tasti UP/DOWN (6) per selezionare il tono desiderato (1, 2 o 3) o selezionare OFF per disattivare la funzione Roger Beep.
- Page 38 Utilizzo del menu POW : Selezione della potenza RF del trasmettitore (MENU 10) Nella modalità MENU selezionare la funzione 10 (N); l' indicazione POW (W) comparirà sul display LCD (5). Premere il tasto MENU (7) per confermare e premere i tasti UP/DOWN (6) per selezionare i modi HIGH o LOW.
- Page 39 Utilizzo del menu SAVE : Power Save (MENU 15) Nella modalità MENU selezionare la funzione 15 (N); l' indicazione SAVE (W) comparirà sul display LCD (5). Premere il tasto MENU (7) per confermare e premere i tasti UP/DOWN (6) per selezionare ON (funzione attivata) o OFF (funzione disattivata).
- Page 40 Utilizzo del menu OFFSET : Offeset della frequenza TX / RX (MENU 20) Nella modalità MENU selezionare la funzione 20 (N); l' indicazione OFFSET (W) comparirà sul display LCD (5). Premere il tasto MENU (7) per confermare e premere i tasti UP/DOWN (6) per selezionare il valore di OFFSET desiderato, da 00.000 a 69.9875 MHz, oppure digitare direttamente la frequenza di Offset utilizzando la tastiera numerica (8).
- Page 41 Utilizzo del menu Premere il tasto MENU (7) per confermare la selezione e premere i tasti UP/DOWN (6) per selezionare altre funzioni del MENU o premere il tasto FUN (9) per tornare in modalità Stand-by. SCNADD : Aggiungere / togliere canali dalla lista di scansione (MENU 24) Nella modalità...
- Page 42 Utilizzo del menu Premere il tasto MENU (7) per confermare la selezione e premere i tasti UP/DOWN (6) per selezionare altre funzioni del MENU o premere il tasto FUN (9) per tornare in modalità Stand-by. ARS : Funzione Auto Repeater Shift (MENU 28) Nella modalità...
- Page 43 Utilizzo del menu DW : Impostazione della funzione Dual Watch (MENU 32) Nella modalità MENU selezionare la funzione 32 (N); l' indicazione DW (W) comparirà sul display LCD (5). Premere il tasto MENU (7) per confermare e premere i tasti UP/DOWN (6) per selezionare le opzioni OFF, ON o AUTO.
-
Page 44: Radio Fm 88-108 Mhz
Utilizzo del menu - Radio FM 87.5-108 MHz Funzione Tone Squelch (CTCSS) / (DCS) Ogni canale può essere associato ad un tono di protezione CTCSS/DCS pre-programmato. Un tono CTCSS/DCS è un tono non udibile che permette di escludere (e quindi di non ascoltare) comunicazioni da altri ricetrasmettitori che stanno usando lo stesso canale. -
Page 45: Specifiche Tecniche
Specifiche tecniche - Accessori opzionali SPECIFICHE TECNICHE Generali Gamma di frequenza VHF 144-146 MHz (136.000 - 174.9875 MHz) (*) UHF 430-440 MHz (400-470.9875 MHz) (*) Canali Step di frequenza 5, 6.25, 10, 12.5, 25 KHz Tensione di alimentazione 7.4 VDC Temperatura di funzionamento -20/+55°... -
Page 46: Avvertenze Importanti / Avviso Agli Utenti
KT-900EE N. di serie: Data: Timbro e firma del rivenditore Prodotto importato e distribuito da INTEK S.R.L. Via G. Marconi, 16 - 20090 Segrate (MI) - Tel. 02-26950451 - Fax. 02-26952185 www.intek-com.it / e-mail : intek.com@intek-com.it - 44 -... -
Page 47: Notes
Notes - 45 -...
Need help?
Do you have a question about the KT-900EE and is the answer not in the manual?
Questions and answers