Table of Contents
Advertisement
Available languages
Available languages
Quick Links
Advertisement
Table of Contents

Related Manuals for Vortice VORT HRW 60 HP MONO


Summary of Contents for Vortice VORT HRW 60 HP MONO
- Page 5 Libretto istruzioni Instructions Booklet Livret d’istructions Betriebsanleitung VORT HRW 60 HP MONO COD. 5.571.084.115 22/10/2018...
-
Page 6: Table Of Contents
Vortice non potrà essere ritenuta responsabile per Struttura e dotazione ......7 eventuali danni a persone o cose causati dal Installazione . -
Page 7: Descrizione Ed Impiego
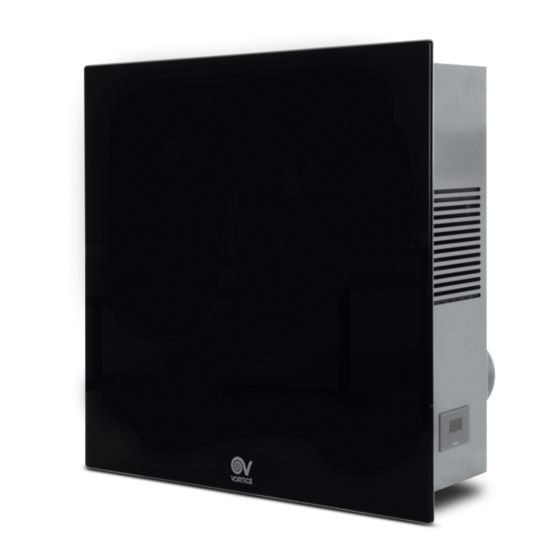
ITALIANO Descrizione ed impiego Questo prodotto è un sistema di ventilazione controllata (VMC) a doppio flusso con pompa di calore, recuperatore di calore passivo e bypass. Il prodotto è stato progettato per essere installato a parete, all’interno di singoli ambienti residenziali o commerciali privi di sistemi centralizzati. -
Page 8: Sicurezza
ITALIANO Fig. 5 La figura che segue illustra, invece, il corretto orientamento dell’apparecchiatura e i vari elementi d’imballo dopo l’apertura del cartone. Le operazioni di disimballo devono essere eseguite con cura, al fine di non danneggiare l’involucro dell’apparecchiatura qualora si operi con coltelli o taglierini, per aprire l’imballo in cartone. Prima di eliminare gli imballi, secondo le norme di protezione ambientale in vigore, assicurarsi che tutti gli accessori in dotazione siano stati tolti dagli stessi. - Page 9 ITALIANO Avvertenza: questo simbolo indica che è necessario prendere precauzioni per evitare danni al prodotto • Non aprire o smontare il prodotto quando questo è alimentato elettricamente. • Non versare o spruzzare acqua sul prodotto o al suo interno. Precauzioni per evitare danni al prodotto: •...
-
Page 10: Conformità Alle Direttive E Ai Regolamenti Europei
ITALIANO Conformità alle Direttive e ai Regolamenti Europei Il prodotto è destinato all’uso domestico/commerciale e conforme alle seguenti direttive europee: • Direttiva 2001/95/CE sicurezza generale dei prodotti; • Direttiva 2011/65/CE riguardante la restrizione all’uso di determinate sostanze pericolose nella apparecchiature elettriche ed elettroniche (RoHS);... -
Page 11: Installazione
ITALIANO Installazione Attenzione: l’installazione, la messa in servizio e la manutenzione del prodotto devono essere eseguiti da personale qualificato e autorizzato. Non tentare di installare il prodotto da soli. Predisposizione del luogo di installazione Fig. 7 - Spazi minimi L'installazione del prodotto deve avvenire a parete e in un luogo idoneo, ossia tale da permettere le normali operazioni di uso e regolazione nonché... - Page 12 ITALIANO Fig.10 e Fig.11 Per la realizzazione dei canali d’aria è necessario eseguire dei carotaggi con idonea fresa. È sempre preferibile mantenere una lieve pendenza verso l’esterno. ø 125 mm 1 ÷ 3° Per le quote utili alla realizzazione dei due canali, vedere “Fissaggio del prodotto a parete”. Fig.
- Page 13 ITALIANO Tabella forature: Vedi Fig. 14 e 15 Viti 5x50 testa svasata Ø10 mm 6 mm Ø Tassello minimo 8 mm 320 100 160 340 540 430 514 84 12 mm ø 125 mm ø 125 mm Fig. 16 Prospetto forature Serrare tutte le viti a testa svasata in modo tale da bloccare a muro la piastra di fissaggio.
- Page 14 ITALIANO Fig. 18 Completare il fissaggio dell’apparecchiatura spingendola completamente contro la piastra a parete e bloccandola nel lato superiore mediante le due apposite viti. Fig. 19 Dopo il fissaggio della piastra è necessario fissare sul lato esterno le due bocchette fornite (previste per i canali di areazione).
- Page 15 ITALIANO Fig. 23 Dopo l’innesto del tubo di scarico condensa, è possibile fissare con mano il coperchio bocchetta: è sufficiente esercitare una moderata pressione. Fig. 24 Eseguire le stesse operazioni anche per l’altra bocchetta dell’aria, escluse le operazioni di fissaggio dell’ugello. Click! Fig.
-
Page 16: Funzionamento
ITALIANO Funzionamento Motori L’apparecchio è equipaggiato di due motori brushless studiati per garantire bassissimi consumi, grazie alla loro elevata efficienza, azionanti due ventole centrifughe che estraggono l’aria viziata ed umida dai locali di servizio (cucine, bagni, lavanderie, ecc.) ed immettono aria fresca esterna nei locali abitativi (soggiorni, sale da pranzo, camere da letto, ecc.); Scambiatore di calore I due flussi d’aria, in ingresso ed uscita, si incontrano nell’apparecchio (senza peraltro mai venire a contatto diretto, per non pregiudicare la qualità... -
Page 17: Utilizzo
ITALIANO Utilizzo Generalità Tutte le funzioni dell’apparecchio sono controllabili tramite un pannello comandi cablato, dotato di schermo touch: A: area touch B: display Significato delle icone/tasti dell’area touch 1: accendere/spegnere; 2: visualizzare T ext / data e ora (ultime due righe display); 3: uscire senza salvare e tornare alla pagina precedente;... - Page 18 ITALIANO NIGHT SILENT 25 / 01 / 18 08:07 25 / 01 / 18 08:07 E’ possibile variare il tipo di dati visualizzati nella parte bassa del display, utilizzando il tasto F. Le visualizzazioni possibili sono: data e ora; temperatura esterna. SILENT SILENT Ext+21°...
- Page 19 ITALIANO MAIN MENU PASSWORD USE MENU ALARM SETUP INFO Impostazioni dell’installatore (password 023) Il menu dell’installatore presenta le seguenti opzioni INSTALL LANGUAGE MBUS ID SETP2 TEMP SETP1 TEMP F.LIFETIME LANGUAGE E’ la variabile che definisce la lingua dei testi del pannello. Il valore di default, modificabile, è: ENG INSTALL LANGUAGE MBUS ID...
- Page 20 ITALIANO SETP2 TEMP E’ il valore di soglia della temperatura esterna, al di sopra del quale si attiva automaticamente la pompa di calore per raffreddare l’aria immessa all’interno. Il valore di default, modificabile, è 26° C. INSTALL LANGUAGE +26°C MBUS ID SETP2 TEMP SETP1 TEMP E’...
- Page 21 ITALIANO Funzioni utente (password 013) Il menu utente presenta le seguenti opzioni per tutte è possibile selezionare “SI/NO”). N.B. il sistema gestisce automaticamente eventuali conflitti e sovrapposizioni tra funzioni comuni a diverse modalità, di volta in volta abilitando o disabilitando alcune funzioni. Esempio: quando viene attivata la modalità Holiday YES —> vengono automaticamente impostati: Passivo YES, Bypass NO, Act Prog NO.
- Page 22 ITALIANO Scarico condensa Quando la vasca di raccolta della condensa è piena si accende automaticamente la pompa di scarico per 70 s e l’apposito sensore controlla il livello. Qualora il livello della condensa non scenda entro un certo tempo preimpostato viene visualizzato un allarme bloccante.
- Page 23 ITALIANO DATE&HOUR Con questa opzione è possibile accedere all’impostazione di Data e Ora nel modo seguente: 1. ricercare la variabile interessata alla modifica, premendo 2. selezionare la variabile, premendo 3. ricercare il valore desiderato, premendo 4. memorizzare il valore scelto, premendo 5.
-
Page 24: Dati Dimensionali
ITALIANO INFO Con questa opzione è possibile visualizzare le seguenti informazioni informazioni di sistema: hmi; firmware scheda; file di configurazione. USE MENU MAIN MENU S:0.9 6.0 ALARM M:0.9 6.0 SETUP CFG:6.0 INFO Dati dimensionali [mm] [mm] [mm] [mm] [mm] [mm] [mm] [mm] [mm] Condizioni di funzionamento... -
Page 25: Schemi Di Collegamento
ITALIANO Schemi di collegamento Fig. 31 L’ apparecchiatura necessita di essere alimentata da rete elettrica esterna. La posa dell’impianto elettrico può essere eseguita con tubo sottotraccia (incassato) oppure a vista, mediante canale esterno a parete. Fig. 32 Infatti, la struttura dell’apparecchiatura è stata progettata per consentire l’ingresso dei cavi di alimentazione sia sul lato posteriore sia dall’alto. - Page 26 ITALIANO Attenzione: L’allacciamento dell’apparecchiatura deve essere eseguita da parte di personale professionalmente qualificato. Attenzione La linea di alimentazione elettrica alla quale l’apparecchiatura sarà collegata deve essere protetta da un adeguato interruttore magnetotermico differenziale. 33.1 33.1 Mains 2 poles switch MAINS 230V ~50Hz Connessioni opzionali Fig.
-
Page 27: Manutenzione E Pulizia
ITALIANO Manutenzione e pulizia Attenzione: Eventuali riparazioni dell’apparecchiatura devono essere eseguite da personale qualificato. Riparazioni improprie possono mettere l’utente in serio pericolo. Se la vostra apparecchiatura necessita di qualsiasi riparazione, contattate il servizio assistenza. Attenzione: Prima di intraprendere qualsiasi operazione manutentiva accertarsi che l’apparecchiatura non sia e non possa accidentalmente essere alimentata elettricamente. - Page 28 ITALIANO Filtro aria estratta Fig. 37 L’aria viziata, prelevata dall’ambiente interno, attraversa un filtro collocato in alto a sinistra. Fig. 38 Per estrarre il filtro è necessario aprire il relativo alloggiamento come indicato. Fig. 39 Dopo l’apertura dell’alloggiamento è sufficiente estrarre il filtro tirandolo verso l’alto mediante l’apposita linguetta. Per il rimontaggio del filtro è...
-
Page 29: Description And Use
ENGLISH Description and use The product is a double flow controlled ventilation system (VMC) with heat pump, passive heat recovery unit and bypass. The product has been designed to be wall-mounted in individual residential or commercial environments without centralised systems. The equipment is provided with a heat pump and connections to the outside environment which enable correct air exchange and, at the same time, the recovery of residential heat. -
Page 30: Safety
ENGLISH Fig. 5 The figures below illustrate the correct orientation of equipment and the various packaging elements after the cardboard is opened. Unpacking operations must be carried out carefully so as not to damage equipment casing when using knives or cutters to open cardboard packaging. - Page 31 ENGLISH Caution: this symbol indicates that care must be taken to avoid damaging the appliance • Do not open or disassemble the product while it is being electrically powered. • Do not pour or spray water on the product or inside it. Precautions to prevent damage to the product: •...
-
Page 32: Compliance With European Directives And And Regulations
ENGLISH Compliance with European Directives and Regulations This equipment is a domestic/commercial use product in compliance with the following European Directives: • Directive 2001/95/EC on general product safety • Directive 2011/65/EC on the restriction of the use of certain hazardous substances in electrical and electronic equipment (RoHS) •... -
Page 33: Installation
ENGLISH Installation CAUTION!: product installation, commissioning and maintenance must be performed by qualified, authorised personnel. Do not attempt to install the product by yourself. Preparing the installation site Fig. 7 - Minimum spaces The product should be installed on a wall and in a suitable location, that is in a place that allows for normal operation and adjustment operations as well as routine and special maintenance. - Page 34 ENGLISH Fig.10 and Fig.11 To create the air channels, perform core drilling using a suitable cutter. It is always preferable to keep a slight slope outward. ø 125 mm 1 ÷ 3° The useful dimensions of the two channels are shown in the paragraph “Fixing the product to the wall”. Fig.
- Page 35 ENGLISH Drilling table: See Fig. 14 e 15 5x50 countersunk head screw Ø10 mm 6 mm Ø Minimum dowel 8 mm 320 100 160 340 540 430 514 84 12 mm ø 125 mm ø 125 mm Drilling profile Fig. 16 Tighten all countersunk head screws so as to block the fixing plate to the wall.
- Page 36 ENGLISH Fig. 18 Complete equipment fixing by pushing it completely against the wall plate and locking it into the upper side by means of the two corresponding screws. Fig. 19 After having fixed the plate, you need to fix the two supplied air vents for the ventilation channels on the outside. To secure the air vents, similarly to the instructions provided above for the plate, simply position in in the hole made, mark holes and drill.
- Page 37 ENGLISH Fig. 23 After the condensate drain pipe is engaged, it is possible to hook the vent cover with one hand, exerting moderate pressure. Fig. 24 Perform the same operations also for the other air vent, except the nozzle fixing operations. Click! Fig.
-
Page 38: Function
ENGLISH Function Motors The appliance is equipped with two brushless motors specifically designed to guarantee very low energy consumption thanks to their high efficiency. These motors drive two centrifugal fans which extract the stale damp air from service rooms (kitchens, bathrooms, washrooms, etc) and introduce fresh external air into living areas (sitting rooms, dining rooms, bedrooms, etc.). -
Page 39: Use
ENGLISH General All device functions can be controlled via the wired control panel equipped with touch screen: A: touch area B: display Meaning of icons/buttons in the touch area 1: On/off 2: View T ext / date and hour (last two rows of the display) 3: Exit without saving and return to the previous page 4: Speed increase either moving the cursor to the line above or increasing the value... - Page 40 ENGLISH NIGHT SILENT 25 / 01 / 18 08:07 25 / 01 / 18 08:07 You can change the type of data shown on the bottom of the display by using the button F. The possible displays are: Date and hour Outside temperature SILENT SILENT...
- Page 41 ENGLISH MAIN MENU PASSWORD USE MENU ALARM SETUP INFO Installer settings (password 023) The installer menu offers the following options: INSTALL LANGUAGE MBUS ID SETP2 TEMP SETP1 TEMP F.LIFETIME LANGUAGE This is the variable that defines the panel text language. The editable default value is: ENG. INSTALL LANGUAGE MBUS ID...
- Page 42 ENGLISH SETP2 TEMP The outside temperature threshold over which the heat pump activates automatically to cool the air introduced inside. The editable default value is 26°C. INSTALL LANGUAGE +26°C MBUS ID SETP2 TEMP SETP1 TEMP The outside temperature threshold under which the heat pump activates automatically to heat the air introduced inside. The editable default value is 18°C.
- Page 43 ENGLISH User functions (password 013) The user menu offers the following options: (you can select "YES/NO" for each). Note: the system automatically manages any conflicts and overlaps between functions common to different modes, enabling or disabling certain functions on a case by case basis. Example: when Holiday YES —> mode is activated, the following are automatically set: Passive YES, Bypass NO, Act Prog NO.
- Page 44 ENGLISH Condensate drain When the condensate collection tank is full, the drain pump switches on automatically for 70 s and the corresponding sensor checks the level. A locking alarm is displayed if the condensate level does not fall within the pre-set time. After having checked the discharge pipe and resolved the drain lock, you can reset the error and the device will resume operation (answer "YES"...
- Page 45 ENGLISH DATE&HOUR You can access the Date and Hour setting as follows with this option: 1. Search for the variable you wish to change, pressing 2. Select the variable, pressing 3. Search for the desired value, pressing 4. Store the selected value, pressing 5.
-
Page 46: Dimensional Data
ENGLISH INFO You can view the following system information with this option: Board firmware Configuration files USE MENU MAIN MENU S:0.9 6.0 ALARM M:0.9 6.0 SETUP CFG:6.0 INFO Dimensional data Fig. 30 [mm] [mm] [mm] [mm] [mm] [mm] [mm] [mm] [mm] Operating conditions This device is certified for operation in the temperature ranges shown in the table below. -
Page 47: Electrical Connections
ENGLISH Electrical connections Fig. 31 Equipment must be powered by means of an external electrical mains. Installation of the electrical system can be carried out with a trace system (built-in) or surface mounted by means of an external wall channel. Fig. - Page 48 ENGLISH CAUTION!: Equipment connection must be carried out by professionally qualified personnel. CAUTION!: The electrical power line to which the equipment will be connected must be protected by a suitable differential thermal magnetic switch. 33.1 33.1 Mains 2 poles switch MAINS 230V ~50Hz Optional connections...
-
Page 49: Maintenance And Cleaning
ENGLISH Maintenance and cleaning CAUTION!: All equipment repairs must be carried out by qualified personnel. Improper repairs can put the user in serious danger. If your equipment needs repair, contact service assistance. CAUTION!: before undertaking any maintenance operations, make sure that equipment is not and cannot accidentally be powered electrically. - Page 50 ENGLISH Extracted air filter Fig. 37 Stale air is extracted from the inside through a filter located in housing at the top left. Fig. 38 To remove the filter, open its housing as shown in the figure below. Fig. 39 After opening the housing, simply pull out the filter by pulling it up with the corresponding tab.
-
Page 51: Description Et Mode D'employ
TAGLIANDO INTERVENTO IN GARANZIA CERTIFICATE OF WORK PERFORMED UNDER GUARANTEE COUPON INTERVENTION SOUS GARANTIE DATA INTERVENTO TIMBRO CENTRO ASSISTENZA DATE OF WORK - DATE INTERVENTION STAMP OF TECHNICAL ASSISTANCE CENTRE - CACHET SERVICE APRES-VENTE TAGLIANDO INTERVENTO IN GARANZIA CERTIFICATE OF WORK PERFORMED UNDER GUARANTEE COUPON INTERVENTION SOUS GARANTIE DATA INTERVENTO TIMBRO CENTRO ASSISTENZA... -
Page 52: Sécurité
Company will consider written applications for transfer. Should Assistenza Tecnica autorizzati da VORTICE ELETTROSOCIALI SPA, any defect arise in any Vortice product and a claim under guarantee il cui indirizzo è disponibile sull’elenco telefonico alfabetico o become necessary, the appliance should be carefully packed and contattando il numero verde 800.555.777. - Page 53 GARANZIA - GUARANTEE - GARANTIE Per poter usufruire della garanzia il cliente deve compilare e rispedire a VORTICE ELETTROSOCIALI SPA, entro 8 giorni dall’acquisto, la “Parte 2” del tagliando di garanzia, all’indirizzo e con le modalità in tale parte riportate.
Need help?
Do you have a question about the VORT HRW 60 HP MONO and is the answer not in the manual?
Questions and answers