Table of Contents
Advertisement
Quick Links
Advertisement
Table of Contents

Related Manuals for Pulsar AXION LRF XQ38


Summary of Contents for Pulsar AXION LRF XQ38
- Page 1 Quick Start Guide AXION LRF XQ38 Thermal Imaging Scope...
- Page 2 Внимание! Эксплуатация данного продукта в жилой зоне может создавать радиопомехи. Для получения подробной информации о приборе скачайте полное руководство по эксплуатации: https://www.pulsar-nv.com/glo/products/33/thermal-imaging-scopes/axion-xq-lrf/ Внимание! Использование других не упомянутых здесь элементов управления и настройки или других методов эксплуатации может подвергнуть Вас опасному для здоровья излучению.
- Page 3 AXION LRF Quick Start Guide ENGLISH Thermal Imaging Scope AXION LRF FRANÇAIS Imageur thermique AXION LRF 7-12 DEUTSCH Wärmebildgerät AXION LRF 13-18 ESPAÑOL Monocular térmico AXION LRF 19-24 ITALIANO Termovisore AXION LRF 25-30 РУССКИЙ Тепловизор AXION LRF 21-36 v.0121...
-
Page 4: Starting Operation
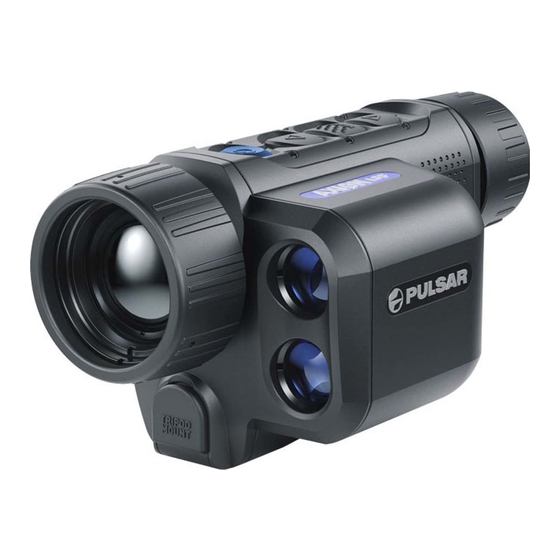
ENGLISH Starting Operation POWERING ON AND IMAGE SETTING • Open the lens cover (7). Secure the cover with to the strap using the built-in magnet in the cover. • Press the ON/OFF button briefly to turn on the device. • Adjust the eyepiece diopter ring until the symbols in the display are sharp. -
Page 5: Buttons Operation
LED indicator displays the current status of the device: LED Indicator Operating Mode Device is turned on The device is turned on/battery charge < 10% Buttons Operation Short press Long press Turn on device Turn off device ON/OFF button Turn on display Turn off display Device calibration UP/ZOOM... - Page 6 sold separately. • Connect the plug of the USB Type-C cable (16) to the USB Type-C connector of the Power Adapter (15). • Plug the Power Adapter (15) into a 100-240 V socket (17). • Connect the other end of the USB Type-C cable (16) to the USB Type-C (14)
-
Page 7: Installing Battery Pack
Installing Battery Pack (18) on the rechargeable battery (11). • Put the lock-cover (11) • Insert the rechargeable battery along the guide into the battery compartment (19). (11) (18) • Lock the battery by turning the lock-cover clockwise until it stops. (11) counterclockwise to remove the batteries (18). -
Page 8: Specifications
Specifications MODEL AXION LRF XQ38 77428 Microbolometer Type uncooled Resolution, Pixels 384x288 Pixel Pitch, µm Frame rate, Hz Optical characteristics Optical magnification, x Smooth digital zoom 3.5-14 Digital Zoom, x Lens focus, mm Focal ratio, D/f' Minimum Focusing Distance, m... -
Page 9: Package Contents
Package Contents • Axion LRF XQ Thermal Imager • APS 5 rechargeable battery • 2 lock-cover of APS 5 battery • Battery Pack Charger • Power Adapter • USB Type-C Cable • Carrying case • Hand strap • Quick User Manual •...
Need help?
Do you have a question about the AXION LRF XQ38 and is the answer not in the manual?
Questions and answers