Advertisement
Table of Contents
- 1 Video Recording
- 2 Battery Pack
- 3 Description of Controls
- 4 Using the Battery Pack
- 5 Installation
- 6 Safety Measures
- 7 Operation
- 8 Sensor Calibration
- 9 External Power Supply
- 10 Main Menu Functions
- 11 Menu Contents
- 12 Status Bar
- 13 Usb Connection
- 14 Wireless Remote Control
- 15 Maintenance and Storage
- 16 Troubleshooting
- Download this manual
Advertisement
Table of Contents

Related Manuals for Pulsar HELION XQ28F


Summary of Contents for Pulsar HELION XQ28F
- Page 1 HELION Thermal Imaging Scope HELION Thermal Imaging Scope To Order Visit: www.tester.co.uk / Call: 01642 931 329...
- Page 2 Visit: www.tester.co.uk / Call: 01642 931 329...
- Page 3 Thermal Imaging Scope HELION 1-26 Lunette d'imagerie thermique HELION 27-52 Attention! 53-80 Wärmebildgerät HELION Helion thermal imaging monoculars require a license if 81-108 exported outside your country. Monocular térmico HELION 109-134 Termovisore HELION Attention! Les monoculaires d'imagerie thermique Helion nécessitent РУССКИЙ...
- Page 4 MODEL HELION XQ19F XQ28F XQ30F XQ38F XQ50F MODEL HELION XP28 XP38 XP50 SKU# SKU# 77391 77392 77393 77394 77395 77403 77404 77405 Microbolometer: Microbolometer: Type uncooled uncooled uncooled uncooled uncooled Type uncooled uncooled uncooled 384x288 384x288 384x288 384x288 384x288 640x480 640x480 640x480 Resolution, pixels...
-
Page 5: Video Recording
BATTERY PACK: This product is subject to change in line with improvements to its design. The latest edition of this user manual is available online at www.pulsar-nv.com Quick-release Li-Ion battery packs IPS5/IPS10 Operating time in Wi-Fi mode up to 16 hours* Operation on АА... -
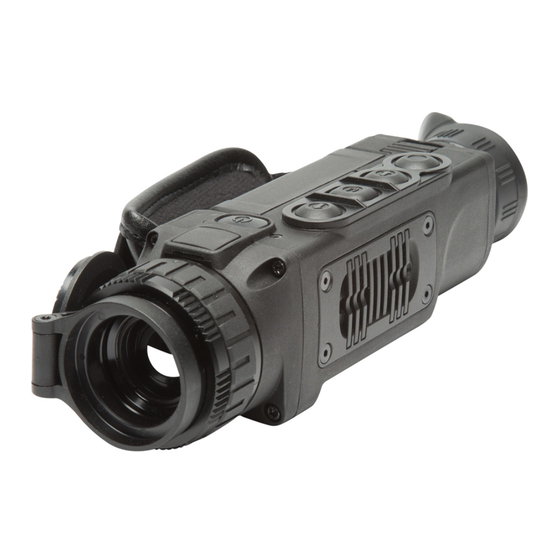
Page 6: Description Of Controls
Charging: DESCRIPTION OF CONTROLS Lift the lever (C) of the charging base. Remove the protective cover from the Battery Pack. BUTTON OPERATING MODE FIRST SHORT OTHER SHORT LONG PRESS Install the Battery Pack into the charging base as shown in Pic.3; PRESS PRESSES click the lever (C). -
Page 7: Installation
INSTALLATION: Connect the external power supply to the USB port (4) of the device (Pic. 1 on the flyleaf). Remove the protective cover from the Battery Pack. The device switches to operation from external power supply, and the Lift the lever (13). IPS5 Battery Pack will begin slowly charging. -
Page 8: Main Menu Functions
Mode М (manual). Close the lens cover, turn the device on with a Notes. short press of the ON button (11). Having finished calibration, open - actual magnification is the product of the basic magnification value and the lens cover. continuous digital zoom value. - Page 9 Menu contents and description Enter the submenu with a short press of the M button. Wi-Fi Select one of the palettes below with a short press Wi-Fi ON/OFF of the UP (10)/ DOWN (8) buttons. Confirm selection with a short press of the M Turn Wi-Fi on with a short press of the M (9) button.
- Page 10 The default password “12345” appears on the Time setup display. Enter the submenu "Time" with a short press of Time Set the desired password with the UP (10) and the M (9) button. DOWN (8) buttons (button UP to increase value; Select the desired time format with a short press button DOWN to reduce).
- Page 11 Remote control (bought separately) Restore default settings Before operating the remote control (RC), Enter the Reset submenu with a short press of the Reset M (9) button. Remote remember to activate it as follows: Control With a short press of the UP/ DOWN buttons Press the M button, countdown starts (30 sec), select “Yes”...
-
Page 12: Status Bar
12:30AM With a short press of the UP/ DOWN buttons move the marker to align it with a defective pixel. Switch the direction of the marker from horizontal to vertical and vice versa with a short press of the M button. (1) Colour palette Align the defective pixel with the fixed cross in the (shown only if the “Black Hot”... - Page 13 Turn on the wireless module with a long press of the UP (10) button. Photo mode. Photography Wi-Fi operation is shown in the status bar as follows: Switch to the Photo mode with a long press of the button. Take a picture with a short press of the REC button. The image Connection status Status bar indication freezes for 0.5 sec and a photo is saved to the internal memory.
-
Page 14: Usb Connection
PC via Wi-Fi in real time mode. You can find further seconds to exit automatically. guidelines on Stream Vision online at www.pulsar-nv.com Note: The Stream Vision application allows you to update the firmware features of your thermal imager. -
Page 15: Wireless Remote Control
Connection modes: TECHNICAL INSPECTION Memory card (external memory). In this mode the device is detected by the computer as a flash card. This mode is designed for Check: work with the files saved in device's memory. The device's functions External view (there should be no cracks on the housing). are not available in this mode;... - Page 16 Follow the link to read FAQs on thermal vision Problem Check Corrective action http://www.pulsar-nv.com/support/faq/ The image is blurry, Calibration is required. Carry out calibration according with vertical stripes to Section “SENSOR CALIBRATION”. and uneven background. The image is too Brightness or contrast level Adjust brightness/contrast with is too low.
- Page 17 To order Pulsar Helion XQ28F Thermal Monocular/ Scope Call: 01642 931 329 or Visit: www.tester.co.uk Visit: www.tester.co.uk / Call: 01642 931 329...
Need help?
Do you have a question about the HELION XQ28F and is the answer not in the manual?
Questions and answers