Pulsar Telos XP50 Manual
Hide thumbs
Also See for Telos XP50:
- Quick start manual (48 pages) ,
- Manual (55 pages) ,
- Manual (72 pages)
Table of Contents

Related Manuals for Pulsar Telos XP50


Summary of Contents for Pulsar Telos XP50
- Page 1 Manual for Telos Specifications You can learn more about the main parameters here. Model XP50 77493 Microbolometer Type uncooled Resolution, Pixels 640x480 Pixel Pitch, µm NETD, mK < 18 Frame Rate, Hz Optical Characteristics...
-
Page 2: Operational Characteristics
Magnification, x Smooth Digital Zoom, x 2.5-10 Digital Zoom, x x1 - x4 Lens Focus, mm Relative Aperture, D/f' Minimum Focus Distance, m/y 5 / 5.5 Exit Pupil Diameter, mm/inch 4 / 0.16 Angular Field of View (Horizontal x 12.4х9.3 Vertical), degree Linear Field of View, m at 100 m 21.8... -
Page 3: Video Recorder
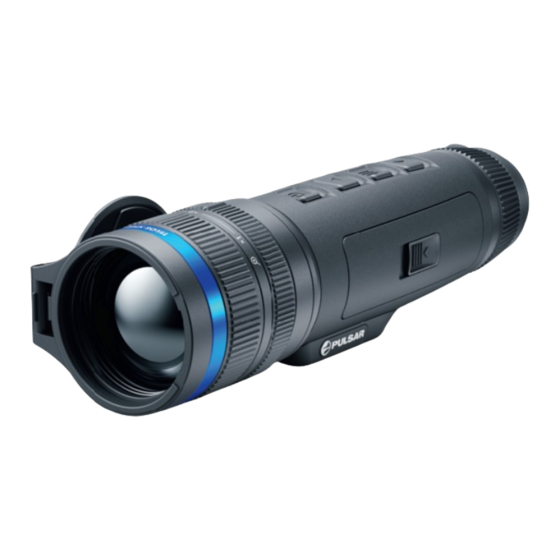
External Power Supply 5 V, 9 V (USB Type-C) Battery Run Time at t=22°C, hours* Degree of Protection, IP Code IPX7 (IEC60529) Operating Temperature Range, °C -25 … +40 / -13 – +104 / °F Dimensions, mm/inch 238x72x62 / 9.37x2.83x2.44 Weight (with battery), kg/oz 0.67 / 23.6 Video Recorder... - Page 4 About the device Description Telos thermal imaging monoculars are designed for use both at night-time and during the day and provide exceptional image quality even in adverse weather conditions (fog, smog, rain) and beyond obstacles like branches, tall grass, dense foliage, etc. known to hinder target detection. Unlike night-vision devices based on electron-optical converters, thermal imaging devices do not need an external light source and are resistant to bright light.
- Page 5 Lens cloth • Warranty card • Components and Controls 1. Lens cover 2. Lens focus ring...
- Page 6 3. Digital zoom adjustment ring 4. Tripod socket 5. Battery compartment 6. LPS7i battery 7. Battery compartment cover 8. Battery protective cover 9. ON/OFF/Calibration button UP/REC button MENU button DOWN/MODE button Eyepiece diopter adjustment ring Operation status LED indication Microphone USB Type-C connector LED indication of battery charge in the device LED indicator (14) displays the current status of the device:...
- Page 7 8-colour display palette • 3 calibration modes: Manual, Semi-Automatic, Automatic • Detection range up to 1800 m/1969 yds • Smooth digital zoom 2.5-10x • Three levels of sensitivity enhancement: Normal, High, Ultra • Stadiametric Rangefinder • Display-Off function • Defective pixel repair •...
- Page 8 Do not charge the battery immediately after brining it from cold to warm. Wait • at least 30 minutes for the battery to warm up. Do not leave the battery unattended while charging. • Do not use the power adapter and wireless charger if they have been modified •...
- Page 9 Option 1. USB Charging Install the LPS7i battery in the battery compartment of the device. 2. Connect the USB cable (20) to the USB Type-C connector (16) of the device. 3. Connect the other end of the USB cable (20) to the Power Adapter (21) by removing the USB Type-A adapter.
-
Page 10: Led Indication
Battery charge level is from 76% to 99% Battery is full Option 2. Charging the battery via USB 1. Remove the protective cover (8). 2. Connect the plug of the USB Type-C cable (20) to the USB Type-C connector (18) of the battery. 3. - Page 11 Option 3. Wireless Charging 1. Place the battery (6) with the sign side on the wireless charger* (22). For more efficient wireless charging, align the lightning bolt icon on the battery with the centre of the charger platform (22). 2. Turn on the wireless charger according to its instruction manual. 3.
- Page 12 2. Insert the battery (6) into the battery compartment (5) until you hear a click. The battery contacts must face the top of the device (see diagram). 3. To remove the battery (6), slide the switch (A) on the cover (7) to the left...
-
Page 13: Getting Started
External Power Supply Power can be supplied from an external source such as a 5 V or 9 V power bank. 1. Connect the external power source to the USB Type-C connector (16) on the device. 2. The device will switch to draw power from the external source while the LPS7i battery is gradually recharged. -
Page 14: Operation
7. Calibrate the image by briefly pressing the ON/OFF (9) button (if the SA or M calibration mode has been selected). Close the lens cover when calibrating manually. 8. Select the required amplification level (“Normal” , “High” “Ultra” ) by briefly pressing the DOWN/MODE (12) button. 9. - Page 15 Turn display on short press Calibrate the microbolometer short press Switching amplification levels short press Turn on/off the White Hot palette long press Video Recorder Button Start/pause/resume video recording short press Stop video recording long press Switch to video / photo long press Capture a photo short press...
- Page 16 Enter quick menu short press Switch between quick menu options short press Increase value short press Decrease value short press Exit quick menu long press Interface Status Bar The status bar at the bottom of the display shows current operating statuses via icons, including: Colour Mode: •...
- Page 17 - charge level if the device is charging and powered by a battery - no battery, the device is connected to an external power supply Quick Menu The quick menu is used to quickly access the settings for brightness, contrast, and use the stadiametric rangefinder.
- Page 18 To maintain brightness and contrast settings when changing amplifying levels, • activate User Mode. Stadiometric Rangefinder - change the position of special marker lines to determine the distance to the object being observed by pressing the UP (10)/DOWN (12) buttons (for more details see the Stadiametric Rangefinder section).
- Page 19 General View of Menu Tab 1 Tab 2...
- Page 20 , High , Ultra sensitivity enhancement features are the latest in software algorithm offerings from Pulsar that enhance the quality of detection and object recognition, regardless of observation conditions. When the temperature contrast decreases due to conditions such as fog, precipitation or high humidity, increasing the amplification level can optimize the image picture.
- Page 21 Colour palette selection. White Hot is the default display mode. To select an alternative palette, do the following: 1. Press and hold the MENU (11) button to enter the main menu. 2. Use the UP (10)/DOWN (12) buttons to select Colour Modes icon.
- Page 22 3. Press the MENU (11) button briefly to turn the mode on/off. Icon Brightness Adjust brightness level of the icons and screensavers (Pulsar, Display off) on the display. 1. Press and hold the MENU (11) button to enter the main menu.
- Page 23 1. Press and hold the MENU (11) button to enter the main menu. 2. Use the UP (10)/DOWN (12) buttons to select the PiP Mode icon. 3. Press the MENU (11) button briefly to turn on/off. Wi-Fi Activation Turning Wi-Fi on/off 1.
- Page 24 5. Press and hold the MENU (11) button to save your password and exit the submenu. Access Level Setup This option allows you to configure the appropriate access level to your device made available to the Stream Vision 2 application. Owner level.
- Page 25 Microphone Turning microphone on/off This item allows you to enable (or disable) the microphone for recording sound during video recording. 1. Press and hold the MENU (11) button to enter the main menu. 2. Use the UP (10)/DOWN (12) buttons to select Microphone icon.
- Page 26 M mode (Manual) Close the lens cover (1). • Press the ON/OFF (9) button briefly. • Open the lens cover (1) after the calibration is completed. • SA mode (Semi-Automatic) The user independently determines the need for calibration (according to the •...
- Page 27 Language Language selection 1. Press the MENU (11) button briefly to enter the Language menu item. 2. Use the UP (10)/DOWN (12) buttons to select one of the available interface languages: English, German, Spanish, French, Russian, Italian, Portuguese, Dutch, Danish, Norwegian, Swedish, Polish, Czech, Hungarian. 3.
- Page 28 5. Press the MENU (11) button to select the minutes. 6. Press the UP (10)/DOWN (12) buttons to select the minute value. 7. Press and hold the MENU (11) button to save the time and exit the submenu. Units of Measure Rangefinder units of measure 1.
- Page 29 3. To turn off video compression, briefly press the MENU (11) button. Default Settings Factory reset 1. Press the MENU (11) button briefly to enter the Default Settings menu item. 2. Use the UP (10)/DOWN (12) buttons to select Yes to restore default settings or No to cancel.
- Page 30 Units of Measure – Meters • Video Compression – On • Wi-Fi Band – 5 GHz • Attention! When restoring the factory defaults the date, time and user pixel map are saved. Format This function enables you to format the Flash memory card. All files will be deleted.
- Page 31 Telos thermal monoculars allows the user to remove any defective pixels on the display, as well as cancel removal, via the device’s firmware. Step 1. Enter the menu to fix the defective pixels 1. Press and hold the MENU (11) button to enter the main menu. 2.
- Page 32 3. With a short press of the UP (10)/DOWN (12) buttons move the marker to align it with a defective pixel. 4. Switch the direction of the marker from horizontal to vertical and vice versa with a short press of the MENU (11) button. 5.
-
Page 33: Information Icon
6. Using the UP (10)/DOWN (12) buttons, select Yes if you want to return to the factory pixel map and select No if you do not. 7. Confirm your selection with a short press of the MENU (11). Device Information This menu item allows the user to view the following information about the device: SKU Number... - Page 34 Video mode. Video recording 1. Switch to Video mode by pressing and holding the UP/REC (10) button. 2. The icon and the remaining recording time in HH:MM (Hours:Minutes) format are displayed in the upper left corner, for example 4:20. 3. Press the UP/REC (10) button briefly to start video recording. 4.
-
Page 35: Specifications
Photo Mode. Capturing an image 1. Switch to the Photo mode by pressing and holding the UP/REC (10) button. 2. Press the UP/REC (10) button briefly to take a photo. The icon flashes – the photo file is being saved to the built-in SD card. Notes: You can enter and operate the menu during video recording. - Page 36 To increase the digital zoom, turn the adjustment ring (3) clockwise. • To decrease the digital zoom, turn the adjustment ring (3) counterclockwise. • PiP Function The PiP (Picture-in-Picture) function allows you to see both the main image and a magnified image in a dedicated window. To turn on and off the PiP function see the PiP Mode section.
-
Page 37: Connection Status
Display-Off Function This function darkens the screen, which aids the user’s concealment. However, the device stays on. When this function is in use, the device switches to the standby mode, which allows it to be switched on instantly. 1. When the device is on, press and hold the ON/OFF (9) button. The display will turn off, the current time and the "Display off"... - Page 38 Wi-Fi is switched on, device connected The device is recognized by an external device as TELOS_XXXX where • XXXX are the four last digits of the serial number. After entering the password (default: 12345678) on a mobile device • (see Password Setup subsection of the Wi-Fi Settings section for more information on setting a password) and setting up a connection, the...
- Page 39 3. You will see on the display: measurement bars, icons of three reference objects and respective distances for the three objects. 4. Position the lower fixed bar under the object being ranged. 5. By pressing the UP (10)/DOWN (12) buttons, move the upper horizontal bar relative to the lower fixed bar until the object fits entirely between the two bars.
- Page 40 USB Connection 1. Connect one end of the USB cable to the USB Type-C port (16) of your device and the other end to the USB port of your PC / laptop using a USB Type-A adapter. 2. Turn the device on with a short press of the ON/OFF (9) button (a device that has been turned off cannot be detected by your computer).
- Page 41 When the USB is disconnected from the device when in the Power mode, the • device keeps operating with the Battery Pack if it is available and sufficiently charged. Memory Card (external memory) In this mode the device is detected by the computer as a flash card. This •...
- Page 42 3. Launch Stream Vision 2 and go to section “Settings”. 4. Select your Pulsar device and press “Check firmware update”. 5. Wait for the update to download and install. Pulsar device will reboot and will be ready to operate. Important: if your Pulsar device is connected to a phone or mobile device, please turn on •...
-
Page 43: Maintenance
Store the device in a carrying case. Remove the Battery Pack for long-term • storage. Troubleshooting For technical support please contact support@pulsar-vision.com. Answers to frequently asked questions about the devices can also be found in section. The device does not turn on... - Page 44 Battery Pack is discharged. Solution Charge the Battery Pack. The device does not operate from an external power source Possible cause The USB cable is damaged. Solution Replace the USB cable. Possible cause The external power supply is discharged. Solution Charge the external power supply (if necessary).
- Page 45 The image is too dark Possible cause Brightness or contrast level is too low. Solution Adjust the brightness or contrast level in the Quick Menu. Colour bars appear on the display or the image disappears Possible cause The device was exposed to static electricity during operation. Solution After exposure to static electricity, the device may either reboot automatically or require turning off and on again.
- Page 46 Possible cause The device is in an area with too many Wi-Fi networks that may be causing signal interference. Solution To ensure a stable Wi-Fi connection, relocate the device to an area with fewer or no Wi-Fi networks. Possible cause The device has a 5 GHz network enabled, but the smartphone only supports 2.4 GHz.
- Page 47 In warm climates, objects in the background of a thermal image heat up differently because of thermal conductivity, generating a high temperature contrast and a sharper thermal image. In cold climates, objects in the background of a thermal image will cool down to roughly the same temperature, which leads to a greatly reduced temperature contrast and a degraded image quality.
Need help?
Do you have a question about the Telos XP50 and is the answer not in the manual?
Questions and answers