Advertisement
Quick Links
Thank you for purchasing this Texsport arbor. Please read and understand each step of the set-up instructions. We encourage you to set-up this
arbor at least once prior to your camping trip, ensuring that you have a satisfactory understanding of the set-up process. We hope you enjoy your
new arbor and that it will give you many years of camping pleasure.
PARTS LIST:
A ......4 Sets of Steel Leg Poles
B........2 Sets of Thick Fiberglass
Roof Poles
C........4 Sets of Thin Fiberglass
Frame Poles
D ......1 Arbor Skin
E ........Arbor Stakes, Ropes and
Clews
NOTE:
The site should be flat and have no
depressions that could collect rain
water.
STEP 1 - Spread out arbor skin.
STEP 4 - Assemble the 4 thinner
frame poles (C). Push 1 pole
through side roof sleeves. Do this
with the other 3 remaining poles.
STEP 7 - Assemble 2 sections of
the 3 section steel leg pole. Insert
the top of the assembled pole
section into the remaining bottom
hole of the molded joint. Repeat
this step with the remaining 3
corners.
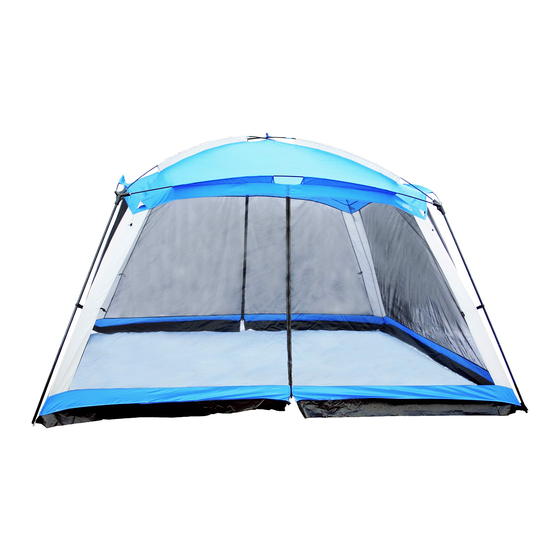
STEP 10 - Connect the last section
of the leg poles to raise arbor to
full height. This is what your
arbor should like now.
INSTRUCTIONS
Item 02853 • Montana Screen
Item 02855 • Wyoming
o not apply excessive force to this product.
C
STEP 2 - Assemble all your poles.
Select the 2 thickest fiberglass
roof poles (B) and push them
through the roof arbor sleeves di-
agonally across the top. Insert
into the center corner joint
STEP 5 - Insert each end of the
side frame poles into the molded
4 joint sections.
STEP 8 - Insert the pin located at
the bottom of the arbor skin into
the bottom of the pole to secure
legs.
STEP 11 - Stake down your arbor
through the rings at all 4 corners.
NOTE - IN HIGH WINDS, IT IS
NECESSARY TO GUY ROPE YOUR
ARBOR SO IT DOES NOT FLY
AWAY. PLEASE FOLLOW THESE IN-
STRUCTIONS TO GUY ROPE YOUR
ARBOR.
rbor (non-screen)
D
B
STEP 3 - Once the arbor poles are
placed, tie the poles together
with the ties provided in the
center.
STEP 6 - This is what your assem-
bled roof should look like.
STEP 9 - Snap on the speed clips
to the steel legs to secure arbor
to frame.
STEP 12 - Insert the guy rope into
the clew in this order pictured
above. Through the bottom hole.
Up through the back of the mid-
dle hole. Up through the top hole.
rbor
E
A
Advertisement

Subscribe to Our Youtube Channel
Related Manuals for Texsport Montana Screen Arbor


Summary of Contents for Texsport Montana Screen Arbor
- Page 1 (non-screen) Thank you for purchasing this Texsport arbor. Please read and understand each step of the set-up instructions. We encourage you to set-up this arbor at least once prior to your camping trip, ensuring that you have a satisfactory understanding of the set-up process. We hope you enjoy your new arbor and that it will give you many years of camping pleasure.
- Page 2 REPAIR: For small tears use a an adhesive backed rip-stop nylon patch. We recommend Texsport Nylon rbor Repair Kit which may be found at your local outdoor outfitter or camping store.
Need help?
Do you have a question about the Montana Screen Arbor and is the answer not in the manual?
Questions and answers