Table of Contents
Advertisement
Quick Links
Advertisement
Table of Contents

Related Manuals for AEG LF6ES8431A


Summary of Contents for AEG LF6ES8431A
- Page 1 LF6ES8431A User Manual Washing Machine USER MANUAL...
-
Page 2: Table Of Contents
AEG manufacturer’s warranty provided with your product. Products must be used, installed and operated in accordance with this manual. You may not be able to claim on the AEG manufacturer’s warranty in the event that your product fault is due to failure to adhere to this manual. -
Page 3: Safety Information
ENGLISH Warning / Caution-Safety information General information and tips Environmental information Subject to change without notice. SAFETY INFORMATION Before the installation and use of the appliance, carefully read the supplied instructions. The manufacturer is not responsible for any injuries or damage that are the result of incorrect installation or usage. - Page 4 1.2 General Safety Do not change the specification of this appliance. • This appliance is intended to be used in household • and similar applications such as: staff kitchen areas in shops, offices and other – working environments; farm houses;...
-
Page 5: Safety Instructions
ENGLISH approved by AEG (see more details in chapter "Accessories - Stacking kit"). 2. SAFETY INSTRUCTIONS 2.1 Installation • Always use a correctly installed shockproof socket. The installation must comply • Make sure that the parameters on the with relevant national rating plate are compatible with the regulations. -
Page 6: Installation
2.5 Service • Make sure that there is access to the tap after the installation. • To repair the appliance contact the Authorised Service Centre. 2.4 Use • Use original spare parts only. WARNING! 2.6 Disposal Risk of injury, electric shock,... - Page 7 ENGLISH 4. Open the door and remove the 8. Pull up the appliance in vertical polystyrene piece from the door seal position. and all the items from the drum. 5. Carefully put the appliance down on 9. Remove the power supply cable and its rear side.
- Page 8 11. Pull out the plastic spacers. 12. Put the plastic caps, that you find in the user manual bag, in the holes. The appliance must be level and stable. A correct adjustment of the appliance level prevents the vibration, noise and the movement of the appliance when in operation.
- Page 9 ENGLISH 45º 45º 20º 20º If this occurs, close the water tap and contact the authorized service centre to replace the hose. 3.5 Water drainage The drain hose should be positioned at a height of not less than 60 cm and not Make sure that the inlet hose more than 100 cm from the floor.
- Page 10 5. Without the plastic hose guide, to a sink spigot - Remove the plastic Make sure that the drain membrane from the sink trap spigot. hose end is not immersed in 6. Connect the drain hose to the spigot the water.
-
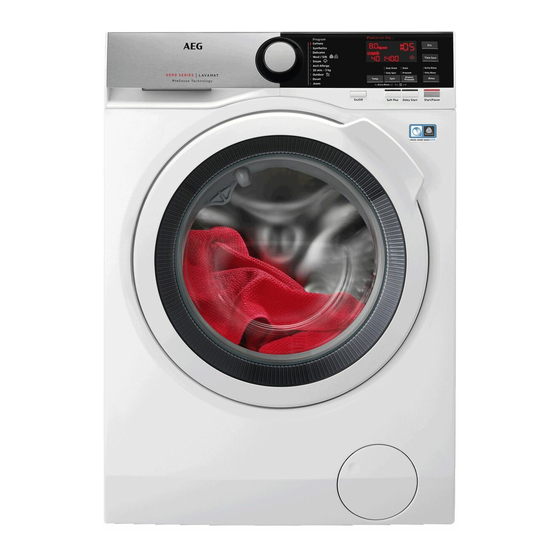
Page 11: Product Description
ENGLISH 4. PRODUCT DESCRIPTION 4.1 Appliance overview 11 12 Worktop Drain hose Detergent dispenser Inlet hose connection Control panel Mains cable Door handle Transit bolts Rating plate Hose support Drain pump filter Feet for levelling the appliance The rating plate reports the model name (A), product number (B), electrical ratings (C) and serial number (D). -
Page 12: Control Panel
5. CONTROL PANEL 5.1 Control panel description 11 10 Program dial Delay start touch button Display Soft Plus touch button Eco touch button Spin reduction touch button Time Save touch button • Rinse Hold option Rinse touch button • Extra Silent option •... -
Page 13: Dial And Buttons
ENGLISH Maximum load indicator. The indicator flashes during the laundry load estimation (refer to ProSense load detection paragraph) . Maximum laundry indicator. It blinks if the laundry amount exceeds the declared load. Door locked indicator. Delay start indicator. The digital indicator can show: •... - Page 14 For more details, refer to Stand-by must drain the water to unlock the paragraph in Daily Use chapter. door. If you touch the Start/Pause button, 6.2 Introduction the appliance performs the spinning phase and drains the water. The options/functions are...
- Page 15 ENGLISH 6.6 Soft Plus Before setting this option, select a suitable Set the Soft plus option to optimise the washing program for the fabric softener distribution and improve garments. The appliance the fabric softness. will performs the most fitting spin cycle for your It is suggested when you use the fabric garments care (e.g.
-
Page 16: Programs
• If your laundry is normally or lightly The appliance decreases the washing soiled, it may be advisable to shorten temperature and extends the washing the washing program. Touch this time to obtain a good washing efficiency button once to decrease the duration. - Page 17 ENGLISH Program Program description Washing programs White cotton items. This program removes micro-organ- isms thanks to a washing phase with the temperature main- Anti-Allergy tained above 60°C for several minutes. This helps remove germs, bacteria, micro-organism and particles. An additional rinsing phase ensures a proper removal of detergent residues and pollens/allergenic items.
- Page 18 Program temperature, maximum spin speed and maximum load Program Default tempera- Reference spin Maximum load ture speed Temperature Spin speed range range Washing programs 40 °C 1400 rpm Cottons 8 kg 95 °C - Cold 1400 rpm - 400 rpm 40 °C...
- Page 19 ENGLISH Program options compatibility ■ ■ ■ ■ ■ ■ ■ ■ ■ Spin ■ ■ ■ ■ ■ ■ ■ Rinse Hold ■ ■ ■ Extra Silent ■ ■ ■ ■ ■ ■ ■ ■ ■ Only Drain ■ ■...
-
Page 20: Settings
7.2 Woolmark Apparel Care - Blue The wool wash cycle of this machine has been approved by The Woolmark Company for the washing of wool garments labelled as «hand wash» provided that the garments are wash- ed according to the instructions issued by the manufacturer of this washing machine. -
Page 21: Before First Use
ENGLISH 9. BEFORE FIRST USE During installation or before first use you may observe some water in the appliance. This is a residual water left in the appliance after a full functional test in the factory to ensure the appliance is delivered to customers in perfect working order and is no cause for concern. - Page 22 10.3 Filling the detergent and 10.4 Check the position of the additives flap 1. Pull out the detergent dispenser until it stops. 2. Press the lever down to remove the dispenser. Before using the detergent dispenser, make sure that...
- Page 23 ENGLISH With the flap in the In case a selection is not position DOWN: possible, no indicator comes • Do not use on and an acoustic signal gelatinous or thick sounds. liquid detergents. • Do not put more 10.6 Starting a program liquid detergent than Touch the Start/Pause button to start the the limit shown on...
- Page 24 1. Touch the Start/Pause button to About 20 minutes after the pause the appliance. The related program start, the program indicator flashes. duration could be adjusted 2. Touch the Delay Start button again depending on the repeatedly until the display shows capacity of water the desired delay time.
- Page 25 ENGLISH 10.11 Cancelling a running 10.13 End of the program program When the program has finished, the appliance stops automatically. The 1. Press the On/Off button to cancel acoustic signals operate (if they are the programme and to deactivate active). the appliance.
-
Page 26: Hints And Tips
1. If necessary, touch the Spin button to • You do not use the appliance for 5 decrease the spin speed proposed minutes before you touch the Start/ by the appliance. Pause button. 2. Touch the Start/Pause button: Press the On/Off button to activate the appliance again. - Page 27 ENGLISH • Do not wash laundry without hems or avoid waste and protect the with cuts. Use a washing bag to wash environment: small and/or delicate items (e.g. • Use only detergents and other underwired bras, belts, tights, etc. ). treatments specially made for washing machines.
-
Page 28: Care And Cleaning
(the program before drying your environment is protected too!). laundry in a tumble dryer. This will • Loading the appliance to the save energy during drying! maximum capacity indicated for 11.5 Water hardness each programs helps to reduce energy and water consumption. - Page 29 ENGLISH and/or formation of mould in the detergent dispenser drawer, once in a while carry out the following cleaning procedure: 1. Open the drawer. Press the catch downwards as indicated in the picture and pull it out. Clean it when needed, using ammonia cream cleanser agent without scratching the seal surface.
- Page 30 4. Insert the detergent drawer into the guide rails and close it. Run the rinsing program without any clothes in the drum. 2. Place a suitable bowl below the drain pump access to collect the water that flows out.
- Page 31 ENGLISH 6. Repeat the steps 4 and 5 until the water stops to flow out. 7. Turn the filter anti-clockwise to remove it. 12. Close the pump cover. 8. If it is necessary, remove fluff and objects from the filter recess. 9.
-
Page 32: Troubleshooting
12.9 Emergency drain 2. Remove the inlet hose from the appliance by loosening the ring nut. If the appliance cannot drain the water, carry out the same procedure, described in 'Cleaning the drain pump' paragraph. If necessary, clean the pump. - Page 33 ENGLISH persists, contact the Authorised Service • - The mains supply is unstable. Centre. Wait until the mains supply is stable. In case of major problems, the acoustic • - No communication between signals operate, the display shows an electronic elements of the appliance. alarm code and the Start/Pause button Switch it off and switch on again.
- Page 34 Problem Possible solution • Make sure that the water tap is open. • Make sure that the pressure of the water supply is not too low. For this information, contact your local water authority. • Make sure that the water tap is not clogged.
- Page 35 ENGLISH Problem Possible solution • Make sure that a washing program that ends with water in tub, has been selected. • Make sure that the washing program is finished. • Set the drain or the spin program if there is water in the You cannot open the ap- drum.
-
Page 36: Technical Data
2. Disconnect the mains plug from the CAUTION! mains socket. Risk of burns! Make sure 3. Open the filter flap. that the water 4. Pull the emergency unlock trigger temperature is not too downward once. Pull it downward high and the laundry is not once again, keep it tensed and, in hot. -
Page 37: Accessories
15.2 Fixing plate kit If you install the appliance on a plinth WARNING! that is not an accessory supplied by AEG, Do not put the tumble dryer secure the appliance in the fixing plates. under the washing machine. Verify the compatible... - Page 38 • To start the program, touch the Start/ • Push the On/Off button to turn the Pause button (4). appliance off. • The appliance starts. • At the and of the program, remove the laundry. 16.2 Cleaning the drain pump filter...
-
Page 39: Warranty
This document sets out the terms and Appliance not having purchased conditions of the product warranties the Appliance for re-sale, and for AEG Appliances. It is an important ‘your’ has a corresponding document. Please keep it with your meaning. proof of purchase documents in a safe 2. - Page 40 Electrolux or its ASC used for purposes other than may use refurbished parts to repair those for which the Appliance your Appliance. You agree that any was intended, including replaced Appliances or parts where the Appliance has become the property of Electrolux.
- Page 41 Important Notice Before calling for service, please ensure that the steps listed in clause 8 above have been followed. SERVICE AUSTRALIA aeg.com/au FOR SERVICE FOR SPARE PARTS or to find the address of your nearest au- or to find the address of your nearest spare...
- Page 44 www.aeg.com/au...
Need help?
Do you have a question about the LF6ES8431A and is the answer not in the manual?
Questions and answers