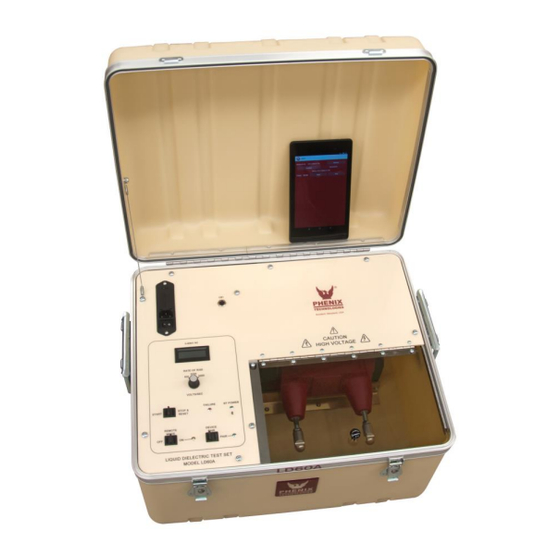
Summary of Contents for Phenix LD60A
- Page 1 User’s Manual LIQUID DIELECTRIC TEST SET MODEL NUMBER LD60A VERSION 3.4 Copyright © Phenix Technologies, Inc. Rev 2/28/2018 Rev 8/26/2019 (format) LD60A...
-
Page 2: Table Of Contents
TABLE OF CONTENTS Section Number DANGER / GENERAL SAFETY PRECAUTIONS DESCRIPTION SPECIFICATIONS INSTALLATION AND GROUNDING INSTRUCTIONS OPERATING INSTRUCTIONS CALIBRATION ELECTRICAL SCHEMATICS MAINTENANCE AND TROUBLESHOOTING PARTS LIST PARTS ORDERING INFORMATION RETURNED MATERIAL CUSTOMER COMMENTS / SUGGESTIONS LD60A... - Page 3 DANGER / WARNINGS WARNING !! Complete Grounding of this unit is necessary for the safe operation of this equipment. Disconnect inputs before ungrounding this equipment LD60A...
- Page 4 • DO NOT operate damaged equipment. Remove power, and do not use the equipment until safe operation can be verified by service-trained personnel. Phenix Technologies, Inc. assumes no liability for unsafe or improper use of test equipment. LD60A...
-
Page 5: Description
SECTION 1: DESCRIPTION The Liquid Dielectric Test Set, Model LD60A, is designed to test and measure the dielectric breakdown of insulating oil used in transformers, capacitors, bushings, etc. in accordance to ASTM D877 and ASTM D1816. The standard test set also satisfies the requirements of IEC, VDE, and BS standards. -
Page 6: Specifications
Memory Voltmeter Scale of 0-60,000 Volts, Accuracy 1% of Full Scale 21 1/4” W x 16 3/4” D x 13 3/4” H Dimensions (540 mm W x 426 mm D x 350 mm H) Weight 55 lbs. (25 kg) LD60A... -
Page 7: Installation And Grounding Instructions
4. Check that your input voltage corresponds with the input of the test set. 5. Check that your supply outlet provides a ground. 6. Connect the power cord to the outlet. 7. The test set is now installed and ready for operation. LD60A... -
Page 8: Operating Instructions
SECTION 4: OPERATING INSTRUCTIONS LD60A (Shown with Cover removed) 1. AC Power Cord connector. CAUTION: Facility power must be grounded. 2. Meter displays rise in voltage 0-60 kV. Operator selects rate of rise by turning dial to 500, 2000, or 3000 Volts. - Page 9 4. Switch to start position. It will automatically raise the voltage to the breakdown level, indicate “failure,” and the breakdown level can be read on the voltmeter. The Android tablet (Option) provides a convenient remote mode control option using Bluetooth technology. LD60A...
- Page 10 The app communicates with the LD60A via a Bluetooth link. To use the app, the LD60A must be put in Remote Mode. With the LD60A powered on, push the Remote Mode switch to ON. Launch the LD60A app, then press “Connect.” The Bluetooth link will automatically shut down after 5 minutes of inactivity.
- Page 11 Device is off Pair LED Indication Steady green Bluetooth connection established Blinks continuously Communication with host over a Bluetooth connection The Pair LED blinks alternately with the BT Power LED: the device is in pairing mode LD60A...
- Page 12 Remove the test sample of oil and repeat the above procedure for other samples. NOTICE: The voltmeter may continue to rise slightly after the failure indicator is tripped. This meter response delay should be ignored. The final voltage reading is the breakdown point. LD60A...
- Page 13 To return to zero, switch the stop-reset switch down as labeled. Continue test as per ASTM D1816. Remove the test sample of oil and repeat the above procedure for other samples. LD60A...
- Page 14 9. Unit under test and comparison cell should agree. If a discrepancy is found, LD unit being checked should be sent for recalibration. 10. Turn Input Power switch off and back on to shut off high voltage and reset unit. 11. Check 15 KV, 30 KV, and 45 KV settings. LD60A...
-
Page 15: Calibration
For any internal changes, modifications, or calibrations found necessary, please return to the factory. Calibration of LDCU If your unit includes the optional LDCU unit, it should be sent to Phenix Technologies factory for recalibration at periodic intervals, not to exceed 12 months. LD60A... -
Page 16: Electrical Schematics
ELECTRICAL SCHEMATICS Drawing Number Description 9101060 LD60A LIQUID DIELECTRIC TEST SET LD60A... -
Page 17: Maintenance And Troubleshooting
Is the compartment lid closed? Check that the micro switch is clicking when closing the lid. • Have you turned the toggle switch to start position? • Have you reset the test set before start-up? The voltmeter does not show any reading. • Check test procedure start as above. • Check fuse F2. LD60A... -
Page 18: Parts List
RIBBON CBL 1150191 RIBBON CONNECTOR 1863037 ROTARY SWITCH ROCKER SWITCH, 120V, 5A, MOM-OFF-MOM, SPDT SW3-6 1866015 LIMIT SWITCH ROCKER SWITCH, 120V, 5A, MOM-OFF-MOM, DPDT ROCKER SWITCH, 120V, 5A, ON-MOM, SPDT 1890105 VARIABLE TRANSFORMER 7010993797 PCB1402: LD60A WITH BLUETOOTH 38322205 GA1-2205 LD60A... -
Page 19: Parts Ordering Information
When your purchase order is received at our office, a representative of Phenix Technologies will contact you to confirm the current price of the part being ordered. If a part you order has been replaced with a new or improved part, an Applications Engineer will contact you concerning any change in part number. -
Page 20: Returned Material
Serial Number Reason for Return Cause of Defect If Phenix Technologies, Inc. deems return of the part appropriate, it will then issue an "Authorization for Return." If return is not deemed advisable, other inspection arrangements will be made. NOTE: Material received at this plant without the proper authorization shall be held as "Customer's Property"... -
Page 21: Customer Comments / Suggestions
SECTION 11: CUSTOMER COMMENTS / SUGGESTIONS Phenix Technologies made significant efforts to ensure that the information in this Operator’s Manual is correct. If there are concerns or comments as you have used this information, Phenix Technologies appreciates any feedback. Unit Serial Number:...


Need help?
Do you have a question about the LD60A and is the answer not in the manual?
Questions and answers