Advertisement
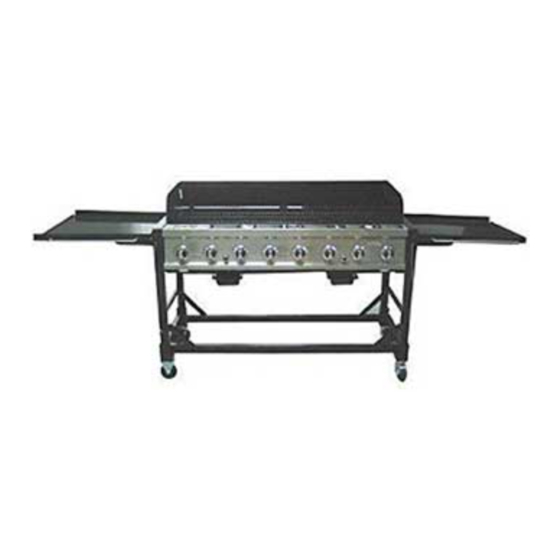
8 Burner Event Grill
Model: GR2039201-MM-00
For Outdoor Use Only
Thank you for purchasing this outdoor cooking appliance.
Please read Safety and Precaution statements, Grill Maintenance, Leak Testing Regulator /
Cylinder connection and Lighting Grill before using grill for first time,
This instruction manual contains important information necessary for the proper assembly
and safe use of the appliance.
Read and follow all warnings and instructions before assembling and using the appliance.
Follow all warnings and instructions when using the appliance.
Keep these manual for further reference.
At Rankam, we're the expert on this product and trained to help you with:
Assembly Questions
Grill operation
Replacements of damaged or missing parts, please contact toll Free (888) 837-1380
GR2039201-MM-00-English
OPERATOR'S MANUAL
20130829-V1
Advertisement
Table of Contents

Related Manuals for Rankam GR2039201-MM-00


Summary of Contents for Rankam GR2039201-MM-00
- Page 1 Read and follow all warnings and instructions before assembling and using the appliance. Follow all warnings and instructions when using the appliance. Keep these manual for further reference. At Rankam, we’re the expert on this product and trained to help you with: Assembly Questions Grill operation...
-
Page 2: For Your Safety
Never obstruct the flow of ventilation air around this grill housing. Never disconnect the gas regulator or any gas fitting while this grill is lit. A lit grill can ignite leaking gas and cause a fire or explosion which could result in property damage, personal injury or death. GR2039201-MM-00-English 20130829-V1... - Page 3 A tank placed on the right will operate the four right-side burners. A tank placed on the left will operate the four left-side burners. Hardware list Description Diagram Phillips Head Screws 1/4” x 15mm Phillips Head Screws 1/4” x 12mm Washer Ø18 x Ø7 x 1mm GR2039201-MM-00-English 20130829-V1...
-
Page 4: Product Diagram
Right side shelf DQ08A-03-26 Regulator DQ08A-03-24 Igniter rod DQ08A-03-34 Baffle Board Assy DQ08A-03-37 Burner Assy DQ08A-03-03 Grill body front panel DQ08A-03-09 Right Valve Install Plank Assy DQ08A-03-17 Right Valve Windpipe Assy DQ08A-03-30 Igniter Cover DQ08A-03-29 Igniter DQ08A-03-15 Control Panel GR2039201-MM-00-English 20130829-V1... -
Page 5: Component List
2 pieces D: Universal Caster E: Grease Receptacle F: Side Handle 2 pieces 1 piece 2 pieces G: Flame Tamer H: Grease Tray I: Cooking Grid 8 pieces 2 pieces 3 pieces J: Gas Tank Holder 2 pieces GR2039201-MM-00-English 20130829-V1... - Page 6 Unfold the Cart Legs and align the Cart Frame Bracket to the legs. Then tighten the bracket with the pre-assembled Butterfly Head Screws. CAUTION: Do not stand, lean or apply pressure to the Cart Frame Bracket once assembly. Cart frame bracket Front Cart frame bracket GR2039201-MM-00-English 20130829-V1...
- Page 7 Position Grease Receptacles E to the Holders on the left and right upper bar of cart. Slide the Grease Tray H to the slots underneath Grease Receptacle E. The Grease Tray is required to be present and centered for safety. GR2039201-MM-00-English 20130829-V1...
- Page 8 Make sure that bottom four corners of grill body must be sitting on the SEAT on each leg. Then lock each leg by closing the latch of each buckle on legs and grill body. Warning: Always keep the latches locked. Latch Grill Body Seat GR2039201-MM-00-English 20130829-V1...
- Page 9 Unfold the left and right panel of wind shield and insert the small flag on bottom edge of panel to the slot on grill body frame. Small Flag 8. Install Heat Plates Place the Flame Tamer - G over the burners. GR2039201-MM-00-English 20130829-V1...
-
Page 10: Electrode Check
+ve outside Igniter Cap Electrode Check With the assistance of another person, perform this Electrode Check before proceeding This test will ensure that the Spark Electrode Tips are properly positioned so your grill lights easily and properly. P 10 GR2039201-MM-00-English 20130829-V1... - Page 11 Cart Legs onto Cart Frame. See Fig.1. 5. With an assistant, lift and position Grill Bowl onto the folded Cart. See Fig.2. 6. Be sure grill is secured tightly and covered when being transported. Latch Fig.1 Fig.2 P 11 GR2039201-MM-00-English 20130829-V1...
- Page 12 Do not leave grill unattended when is use.. Allow the grill to cool before moving or storing. Do not use your grill as a heater This grill is not intended to be installed in or on recreational vehicles and/ or boats. P 12 GR2039201-MM-00-English 20130829-V1...
- Page 13 LP Gas tank section of this manual. Always keep new and exchanged LP Gas tanks in an upright position during use, transit or storage. Leak test new and exchange LP Gas tanks BEFORE connecting one to your grill. P 13 GR2039201-MM-00-English 20130829-V1...
- Page 14 Cylinders Installation Code The handling, storage, and transportation of all sizes of gas cylinders must be in accordance with ANSI/NFPA 58, Storage and Handling of liquid Petroleum Gases, or the CSA B149.1, Natural Gas and Propane Installation Code. P 14 GR2039201-MM-00-English 20130829-V1...
- Page 15 Disconnecting a Liquid Propane Gas (LPG) Tank From Your Grill Make sure the Burner Valves and LP Gas tank valve are off. (Turn clockwise to close.) Detach the hose and regulator assembly from the LP Gas tank valve by turning the Quick Coupling Nut counterclockwise. P 15 GR2039201-MM-00-English 20130829-V1...
-
Page 16: Grill Lighting Instructions
Be sure each LP Gas tank is filled and lock Casters to prevent movement during grill operation. Open the left and right Lids before lighting the grill. Check that the end of each Burner Tube is properly located over each Valve Orifice. P 16 GR2039201-MM-00-English 20130829-V1... - Page 17 13. To light the four left-side burners repeat step 7 and 8 then press the left-side Electric Igniter. DANGER The gas pressure regulator provided with this appliance must be used. This regulator is set for an outlet pressure of 11 iwc. P 17 GR2039201-MM-00-English 20130829-V1...
- Page 18 Turn the Control Knobs to OFF position. Open the Grill Lids. Put out any flame with a Class B fire extinguisher. Once the grill has cooled down, clean the Burner Tubes and Burner according to the cleaning instructions in this Operator’s Manual. P 18 GR2039201-MM-00-English 20130829-V1...
- Page 19 1. Turn all Burner Valves to the full OFF position. 2. Turn the LP gas tank valve to the full OFF position. 3. Disconnect the regulator from the gas tank. Inspect the hose with regulator assembly P 19 GR2039201-MM-00-English 20130829-V1...
- Page 20 1. Turn all Burner Valves to the full OFF position. 2. Turn the LP Gas tank valve to the full OFF position. 3. Detach the LP Gas regulator assembly from your gas grill. P 20 GR2039201-MM-00-English 20130829-V1...
- Page 21 For safe operation ensure the Gas Valve Assembly Orifice is inside the Burner Tube before using your grill. See figure. If the Orifice is not inside the Burner Tube, lighting the Burner may cause explosion and/ or fire resulting in serious bodily injury and/or property damage. P 21 GR2039201-MM-00-English 20130829-V1...
-
Page 22: Troubleshooting
You may need to purge air from the gas line or does not light reset the regulator excess gas flow device. Note: This procedure should be done every time a new LP Gas tank is connected to your grill. P 22 GR2039201-MM-00-English 20130829-V1... - Page 23 All parts to be replaced will need to be shipped before replacement items will be sent. Follow the Customer Service Representative’s instructions exactly. If a return is necessary, it must be packed carefully and shipped prepaid. P 23 GR2039201-MM-00-English 20130829-V1...
- Page 24 Should you encounter any problems, CONTACT US FIRST DO NOT return product to the store! Rankam Metal Products Manufactory Ltd. 1618 W.Rosecrans Ave., Gardena, CA90249. Email: CustomerService@rankam.com Toll Free (888) 837 – 1380 Hours of Operation 8a.m.-5p.m. Pacific Standard Time...
Need help?
Do you have a question about the GR2039201-MM-00 and is the answer not in the manual?
Questions and answers