Table of Contents
Advertisement
R
HARDWIRE
CONTROL PANEL/COMMUNICATOR
"Classic" GEM-RP2ASe2, GEM-RP3DGTL, and GEM-RP4RFC/GEM-RP4C Keypads and
the "K Series" GEM-K2AS, GEM-K3DGTL, and GEM-K4/GEM-K4RF Keypads
GEMINI
SYSTEM ARMED
01/01/97 12:00AM
A
1 2
R
B
4
5 6
C
7 8 9 0
COMPUTERIZED SECURITY SYSTEM
"K Series" GEM-K2AS
Quick Start (for GEM-K2AS):
1.
Refer to the wiring diagram, connect Siren, Aux. Power,
PGM Output, Remote Bus, Earth Ground, Zone and Tele-
phone Wiring. NOTE: See Installation Instructions (WI1424).
2.
Connect AC power first and then the battery.
3.
Configure the keypad (see page 55).
4.
Access the Easy Menu Driven (Dealer Program) Mode:
Press
456789
Dealer Code
Press NO until "TURNON PROG Y/N" appears on the keypad display.
Press NEXT/YES to enter Dealer Program Mode. See page 5.
© NAPCO 2006
Publicly traded on NASDAQ
G E M - P 1 6 6 4
Programming the GEM-P1664 Control Panel with the
"K Series" GEM-K4/GEM-K4RF
READY
READY
AC ON
AC ON
NEXT/YES
3
E
D
PRIOR/NO
F
AREA
G
R
R
Symbol: NSSC
PROGRAMMING
INSTRUCTIONS
WIRELESS
GEMINI
SYSTEM ARMED
32
01/01/97
INTERIOR
A
1 2
R
B
4
5 6
C
7 8 9 0
COMPUTERIZED SECURITY SYSTEM
"K Series" GEM-K3DGTL
Quick Start (for GEM-K3DGTL):
1.
Refer to the wiring diagram, connect Siren, Aux. Power,
PGM Output, Remote Bus, Earth Ground, Zone and Tele-
phone Wiring. NOTE: See Installation Instructions (WI1424).
2.
Connect AC power first and then the battery.
3.
Configure the keypad (see page 55).
4.
Access the Easy Menu Driven (Dealer Program) Mode:
Press
456789
Dealer Code
Press NO until "17" appears on the keypad display.
Press NEXT/YES to enter Dealer Program Mode. See page 5.
ENT A1
12:00AM
BYPASS
FIRE/TBL
SYS TBL
CHIME
NEXT/YES
3
E
D
PRIOR/NO
F
AREA
G
R
R
WI1423A 1/06
Advertisement
Table of Contents

Related Manuals for NAPCO GEMINI GEM-P1664


Summary of Contents for NAPCO GEMINI GEM-P1664
- Page 1 Press NO until “17” appears on the keypad display. Press NEXT/YES to enter Dealer Program Mode. See page 5. Press NEXT/YES to enter Dealer Program Mode. See page 5. © NAPCO 2006 WI1423A 1/06 Publicly traded on NASDAQ Symbol: NSSC...
- Page 2 CONTROL PANEL FIRMWARE VERSION 01 OR LATER. IMPORTANT NOTE This manual supports the keypad programming of the GEM-P1664 control panel with the NAPCO "classic" GEM- RP2ASe2, GEM-RP3DGTL and GEM-RP4RFC series keypads as well as the GEM-K2AS, GEM-K3DGTL and GEM- K4RF "K Series" keypads. The new "K Series" models offer the new STAY and AWAY buttons with simplified function- ality, along with the new MENU and ENTER buttons.
-
Page 3: Table Of Contents
EXPERIENCE AND INSTALLATION EQUIPMENT. THE UNIT IS DESIGNED TO BE PROGRAMMED USING AN IBM-COMPATIBLE COMPUTER WITH NAPCO PCD-WINDOWS SOFTWARE. AFTER PROGRAMMING, BE SURE TO RUN THE PCD-WINDOWS ERROR-CHECK UTILITY TO GUARD AGAINST PROGRAMMING CONFLICTS FOR THE TYPE OF SERVICE SELECTED FOR THE INSTALLATION. -
Page 4: System Programming Options
For direct high-speed data transfer to the control panel from a desktop computer, connect the download jack (JP2) on the panel to the LOCAL jack (J3) on the Napco PCI2000/3000 computer interface using the supplied 6- conductor cable. (Refer to PCI2000/3000 Installation Instructions WI443 for wiring diagram and procedures). -
Page 5: Easy Menu Driven Program Mode
Should it be necessary to create a new custom default program, (a) from the Dealer Program Mode, press the button to enter the Direct Address Program Mode; (b) access Location 2285 (Clear Program); (c) press the button and start over. NAPCO Security Systems GEM-P1664 Programming Instructions... -
Page 6: Gem-Rp2Ase2/Gem-K2As Keypad
Areas 1-4. The Direct Address Program Mode can then be used to remove zone from Area 1 and place them in Areas 2, 3 or 4. See Zone Options. NAPCO Security Systems GEM-P1664 Programming Instructions... - Page 7 Valid entries are from 01 to 64. Directly enter each zone number, including leading zeros. Zn#XX • Press to save and then repeat for any additional zone(s), press the NEXT/YES button to proceed. (Direct Entry) NAPCO Security Systems GEM-P1664 Programming Instructions...
- Page 8 Press the NEXT/YES but- _ _ _ _ _ _ ton to proceed. NOTE: Central Station Receiver 2 and 3 Telephone Numbers can only be entered in Direct Address (Direct Entry) Programming. See CS Receiver Options. NAPCO Security Systems GEM-P1664 Programming Instructions...
- Page 9 Options Level (OPT). Refer to the table on the next page for the available area options. Note: Duplicate ACC __ User Codes are not allowed; therefore a duplicate Code entered in the LCD Window will erase when (Direct Entry) pressed. NAPCO Security Systems GEM-P1664 Programming Instructions...
- Page 10 Example. A 2-point transmitter has the RF ID number 287613:1. Map point 1 to Zone 6 and point 2 to Zone 9. If a receiver is already installed in the panel, Napco transmitter wireless points can be programmed automatically (“enrolled”) 1.
- Page 11 The key fob is converted to a “panic only” device. ZONE DESCRIPTIONS: GEM-RP2ASe2 cannot be used to enter Zone Descriptions. To enter Zone Descriptions, you must use the GEM-RP1CAe2 Keypad / GEM-K1CA Keypad (See WI1422) or the Napco PCD-Windows Quickloader Software. Dealer Code D Cod e Directly enter the Dealer Code (default = 456789), including leading zeros.
- Page 12 Data and System Status Data (similar to a new panel). (Direct Entry) Access address 2286, then press the button. Data entry is not allowed. NOTE: Some features (schedules) can only be programmed again with the Downloading Software. NAPCO Security Systems GEM-P1664 Programming Instructions...
-
Page 13: Gem-Rp3Dgtl/Gem-K3Dgtl And Gem-Rp4Rfc/Gem-K4Rf Keypad
Press the NEXT/YES button to proceed. INTERIOR BYPASS FIRE/TBL SYS TBL CHIME NOTE: Exit/Entry Zones will have an entry delay of 30 seconds and an exit delay of 60 seconds. (Direct Entry) NAPCO Security Systems GEM-P1664 Programming Instructions... - Page 14 Press the NEXT/YES button to pro- ceed. INTERIOR BYPASS FIRE/TBL SYS TBL CHIME NOTE: A PGM2 Output Timeout of 15 Minutes will automatically be programmed. (Direct Entry) NAPCO Security Systems GEM-P1664 Programming Instructions...
- Page 15 INTERIOR BYPASS FIRE/TBL SYS TBL CHIME The SIA CP-01 Features are designed to reduce the incidence of false alarms. NOTE: Do not (Press YES or NO) enable unless reporting, otherwise system trouble Fail to Communicate may occur. NAPCO Security Systems GEM-P1664 Programming Instructions...
- Page 16 ANY User Code as the same digits entered for the “Ambush Prefix”. If the programmed code is less than 6 digits, press to set the cursor to USER OPTIONS. Refer to the tables on the next page for the available User Option data entries. NAPCO Security Systems GEM-P1664 Programming Instructions...
- Page 17 3. Open the loops of points 1, 2 and 3. 4. Install the transmitter battery. The keypad will beep 3 times to If a receiver is already installed in the panel, Napco transmitter indicate that three points have been programmed.
- Page 18 NOTE: If assigning a key fob to a zone, the “ON/OFF” buttons on the key fob will no longer arm/ disarm the system. The key fob is converted to a “panic only” device. NAPCO Security Systems GEM-P1664 Programming Instructions...
- Page 19 ZONE DESCRIPTIONS: GEM-K3DGTL cannot be used to enter Zone Descriptions. To enter Zone Descriptions, you must use the GEM-K1CA Keypad or the Napco Quickloader Software. DATE ENTRY: GEM-K3DGTL cannot be used to enter the date. To enter Date, you must use the GEM-K1CA Keypad (Version 5 or later) or the Napco Quickloader Software.
-
Page 20: Direct Address Program Mode
(The panel and keypad version appears briefly on the keypad display). 4. Press C to exit Easy Menu Driven Program Mode & enter Direct Address Program Mode. (For keypad display examples when in Program Mode, see next page). NAPCO Security Systems GEM-P1664 Programming Instructions... -
Page 21: Keypad Address Program Mode Display
C O M P U T E R I ZE D S E C U R I T Y S Y S T E M To exit, press C. NOTE: Press 0 button to clear character at cursor. Select NEXT/PRIOR Address. Press to jump to next programming block. * Press through for 10-15, respectively. NAPCO Security Systems GEM-P1664 Programming Instructions... -
Page 22: Direct Address Programming Example
It is using number buttons (0-9). Select NEXT/ PRIOR/NO recommended that the panel be uploaded to Napco's Quickloader software following any keypad programming and that PRIOR address 4. Press to save. -
Page 23: Conventions Used In This Manual
DATA ENTRY SELECTIONS ENTRY PRESS KEYPAD minor field alterations to an existing panel program. It is TOTAL DISPLAYS (BINARY VALUE CIRCLED) recommended that the panel be uploaded to NAPCO's ENTER DATA PROGRAM THE DATA ENTRIES PCD-Windows software following keypad blank •... -
Page 24: System Delays & Timeouts
4. For more information on a programming B. Divide it by 16 option refer to the Glossary at the end of 1 Quotient Left Digit this manual. 4. Press to save. 16 20 4 Remainder Right Digit NAPCO Security Systems GEM-P1664 Programming Instructions... -
Page 25: System Output Timeouts
1. Enter in 1st and 2nd Leading Digits in right digit only (left digit is not used) as shown. Pager Format LEFT RIGHT (2nd Digit) blank (•) 2. Valid entries are: 0-9. [Default = blank (•) blank (•)] 3. Press to save. NAPCO Security Systems GEM-P1664 Programming Instructions... -
Page 26: System Options
2045 is not left blank (•), then the 2-digit Global Ambush Code is the two digits entered in address Ambush Code 2045. [Default = blank (•) blank (•)] Enter in address location (both left and right digits) ; valid entries are 1-9. Press to save. NAPCO Security Systems GEM-P1664 Programming Instructions... -
Page 27: System Options
2. Add the data values (ex: F=15=(1+2+4+8) from the selected options. See page 23). 3. Enter in address location (left and right digits). NOTE: Dark shaded data value box shows option not available. 4. Press to save. NAPCO Security Systems GEM-P1664 Programming Instructions... - Page 28 2-digit “Global Ambush Code” in Address 2045. If Address 2045 is left blank (•), then, the 2-digit “Global Ambush Code” 4. Press to save. will be “99”. NAPCO Security Systems GEM-P1664 Programming Instructions...
- Page 29 2. Add the data values (ex: F=15=(1+2+4+8) from the selected options. See page 23). 3. Enter in address location (left and right digits). NOTE: Dark shaded data value box shows option not available. 4. Press to save. NAPCO Security Systems GEM-P1664 Programming Instructions...
-
Page 30: Cs Receiver Options
2. Enter up to 20 digits from left to right. NOTE: Leave trailing boxes blank (•). For a zero, press G0. 3. Valid entries are: 1-9, B = button, C = button, D = 3 sec. pause, E = Wait for dial tone, F = ignore location. Press to save. NAPCO Security Systems GEM-P1664 Programming Instructions... -
Page 31: Cs Subscriber Id Options
Enter 3 or 4 digits (depending on the CS receiver format) for each subscriber number from left to right. NOTE: Leave trailing boxes blank (•). For a zero, press G0. Valid entries are: 1-9, 0 and B-F. NOTE: A is not permitted. Press [Enter] or [ON/OFF] to save. NAPCO Security Systems GEM-P1664 Programming Instructions... -
Page 32: Cs System Reporting Options
2. Add the data values (ex: F=15=(1+2+4+8) from the selected options. See page 23). automatically to Rotary Dialing. Leave blank (•) to select Rotary Dialing. 3. Enter in address location (left and right digits). NOTE: Dark shaded data value box shows option not available. Press to save. NAPCO Security Systems GEM-P1664 Programming Instructions... -
Page 33: Cs Zone Reporting Options
MODEM CODES determine the zone types reported for the following formats: SIA and ADEMCO Point ID. Gas Alarm 1. Select the desired Modem Code for each zone from the table shown. Heat Alarm Auxiliary Alarm 2. Press to save. 24 Hour Auxiliary NAPCO Security Systems GEM-P1664 Programming Instructions... -
Page 34: Cs User Reporting Options
2. Add the data values (ex: F=15=(1+2+4+8) from the selected options. See page 23). 3. Enter in address location (left and right digits). NOTE: Dark shaded data value box shows option not available. 4. Press to save. NAPCO Security Systems GEM-P1664 Programming Instructions... -
Page 35: Cs User Reporting Options
2. Add the data values (ex: F=15=(1+2+4+8) from the selected options. See page 23). 3. Enter in address location (left and right digits). NOTE: Dark shaded data value box shows option not available. 4. Press to save. NAPCO Security Systems GEM-P1664 Programming Instructions... -
Page 36: Ezm Group Options
1. Select option from the table shown. 2. Enter in corresponding right digit address location (left digit is not used). NOTE: Dark shaded data value box shows option not available. 3. Press to save. NAPCO Security Systems GEM-P1664 Programming Instructions... -
Page 37: Area Bell Control Options
(1,2,3,4) accordingly. For example, if you wish to grant an Area 1 keypad the ability to turn off an Area 2 PGM2 output, enter "2" in Address 1485. Enter digit in address location. NOTE: Dark shaded data value box shows option not available. Press to save. NAPCO Security Systems GEM-P1664 Programming Instructions... - Page 38 (1,2,3,4) accordingly. For example, if you wish to grant an Area 1 keypad the ability to turn off an Area 2 PGM2 output, enter "2" in Address 1485. Enter digit in address location. NOTE: Dark shaded data value box shows option not available. Press to save. NAPCO Security Systems GEM-P1664 Programming Instructions...
- Page 39 (1,2,3,4) accordingly. For example, if you wish to grant an Area 1 keypad the ability to turn off an Area 2 PGM2 output, enter "2" in Address 1485. Enter digit in address location. NOTE: Dark shaded data value box shows option not available. Press to save. NAPCO Security Systems GEM-P1664 Programming Instructions...
- Page 40 (1,2,3,4) accordingly. For example, if you wish to grant an Area 1 keypad the ability to turn off an Area 2 PGM2 output, enter "2" in Address 1485. Enter digit in address location. NOTE: Dark shaded data value box shows option not available. Press to save. NAPCO Security Systems GEM-P1664 Programming Instructions...
-
Page 41: Keypad Options
KEYPAD OPTIONS: Select options for any of the 7 keypads. Select the desired option entering the option number (1-8) for each digit. Enter corresponding option number in address location. NOTE: Dark shaded data value box shows option not available. Press to save. NAPCO Security Systems GEM-P1664 Programming Instructions... -
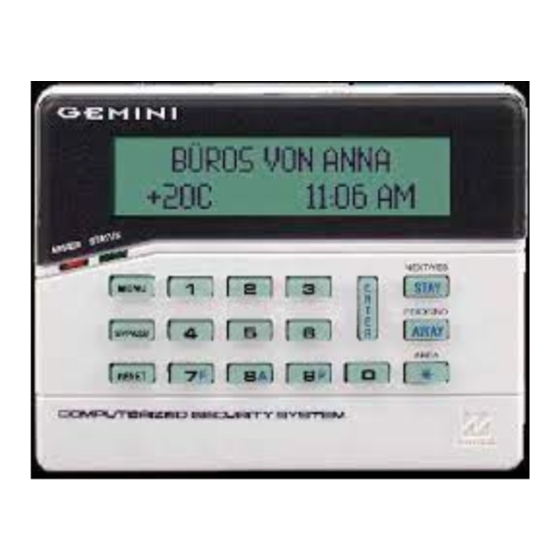
Page 42: Temperature Display At Keypad
Note: If these three addresses are set and power (AC and battery) are subsequently removed, they keypad will indicate that the time and date are lost and will need to be reset. See WI1425 for more information. *This feature not evaluated by UL. NAPCO Security Systems GEM-P1664 Programming Instructions... -
Page 43: Zone Options - Zones 1 To 16
0490 Priority with Bypass 4 2 1 4 2 1 Auto-Bypass NOTE: Dark shaded boxes = option not available. 4 2 1 See Direct Address Programming Example page 22. Selective Bypass 4 2 1 NAPCO Security Systems GEM-P1664 Programming Instructions... -
Page 44: Zone Options - Zones 17 To 32
--Pulse Alarm Output is enabled for the zone number(s) entered in “FIRE ZONES ENTER ZONE #” or “2-WIRE FIRE ZNS ENTER ZONE #”. --Fire is enabled for the zone number(s) entered in “FIRE ZONES ENTER ZONE #”. --2-Wire Smoke Detector is enabled for the zone number(s) entered in “2-WIRE FIRE ZNS ENTER ZONE #”. NAPCO Security Systems GEM-P1664 Programming Instructions... -
Page 45: Zone Options - Zones 33 To 48
0490 Priority with Bypass 4 2 1 4 2 1 Auto-Bypass NOTE: Dark shaded boxes = option not available. 4 2 1 See Direct Address Programming Example page 22. Selective Bypass 4 2 1 NAPCO Security Systems GEM-P1664 Programming Instructions... -
Page 46: Zone Options - Zones 49 To 64
--Pulse Alarm Output is enabled for the zone number(s) entered in “FIRE ZONES ENTER ZONE #” or “2-WIRE FIRE ZNS ENTER ZONE #”. --Fire is enabled for the zone number(s) entered in “FIRE ZONES ENTER ZONE #”. --2-Wire Smoke Detector is enabled for the zone number(s) entered in “2-WIRE FIRE ZNS ENTER ZONE #”. NAPCO Security Systems GEM-P1664 Programming Instructions... -
Page 47: External Relay Control
RELAY # AREA Timeout Event ID COND. RELAY # AREA Timeout Event ID COND. RELAY # AREA Timeout Event ID COND. (•) (•) (•) (•) (•) (•) CONTINUED ON NEXT PAGE [Default = blank (•) blank (•) from address 1489-1608] NAPCO Security Systems GEM-P1664 Programming Instructions... - Page 48 5A. Select Alarm Type and Timeout Type from Table 5A (shown on next page); enter in corresponding address location (left digit). 5B. Select Activation from from Table 5B (shown on next page); enter in corresponding address location (right digit). Continued NAPCO Security Systems GEM-P1664 Programming Instructions...
- Page 49 Relay Control Group 2 Area 2 Fail to Open Zone 36 Entry Relay Area 1 Area 2 Fail to Close Zone 37 Entry Relay Area 2 Entry Relay Area 3 Entry Relay Area 4 NAPCO Security Systems GEM-P1664 Programming Instructions...
-
Page 50: Rf Receiver & Supervisory Timer Options
(•) 2035 blank (•) 2043 Type 7 Smoke Detector Type F Napco Glass Break blank (•) 2036 blank (•) 2044 [Default = blank (•) blank (•) from address 2029-2044] RF SUPERVISORY TIMERS: RF Supervisory Timers may be programmed for each type of RF SUPERVISORY TIMERS transmitter used. -
Page 51: Clear Program Options
2. Press Q Until “TURNON PROG Y/N” (GEM-RP2ASe2/GEM-K2AS) or “17” (GEM-RP3DGTL/GEM-K3DGTL or GEM-RP4RFC/GEM-K4RF) appears on the LCD screen. 3. Press P To Enter User Program Mode. 4. Press C To Exit User Program Mode when finished. NAPCO Security Systems GEM-P1664 Programming Instructions... -
Page 52: User Codes
User Number each code. FIRE TROUBLE G 0 button to clear character at cursor. NOTE: Press BYPASS CHIME To continue press P or Q button. User Code (Direct Entry) Programming User Codes with GEM-K4RF Keypad NAPCO Security Systems GEM-P1664 Programming Instructions... -
Page 53: Keypad Configuration Mode
Cut Jumper A to disable touch pad backlighting to conserve 11mA standby current. LCD BACKLIGHT Cut Jumper B to disable LCD backlighting. DISABLE SOUNDER Cut Jumper C to disable the sounder. (Do not disable in UL applications). NAPCO Security Systems GEM-P1664 Programming Instructions... -
Page 54: Alphabetical Index
CHANGING OR CANCELING A CODE ........10, 17 AREA 1 SYSTEM EVENT/TROUBLE ..........26 CHIME (ZONE OPTION) ........... 43, 44, 45, 46 AREA 2 SYSTEM EVENT/TROUBLE ..........26 CHIME 2 (ZONE OPTION) ..........43, 44, 45, 46 NAPCO Security Systems GEM-P1664 Programming Instructions... - Page 55 DIRECT ADDRESS PROGRAM MODE ..........20 ENABLE KEYPAD TIME/DATE DISPLAY, ADDRESS 1420 ..... 28 DIRECT ADDRESS PROGRAM MODE (ACCESS) ......22 ENABLE LINE-FAULT TEST, ADDRESS 1423 ........28 DIRECT ADDRESS PROGRAM MODE KEYPAD COMMANDS ..21 NAPCO Security Systems GEM-P1664 Programming Instructions...
- Page 56 LCD BACKLIGHT ................. 53 FIRE ZONES ..................13 LEADING DIGITS FOR PAGER FORMAT, ADDRESS 0546-0547 ... 25 FIRE ZONES IN AREA 1 ...............6 LINE-FAULT TEST ONLY WHEN ARMED, ADDRESS 1423 .... 28 FUNCTION MODE.................4 NAPCO Security Systems GEM-P1664 Programming Instructions...
- Page 57 PRIORITY WITH BYPASS (ZONE OPTION) ....43, 44, 45, 46 SUM CHECK, ADDRESS 0505 ............30 PROGRAMMING STEPS ..............23 SUPERVISORY TIMERS, RF ............. 50 PROGRAMMING TIMEOUTS ............. 24 SUPPRESS BYPASS REMINDER WHEN ARMED, ADDRESS 142128 NAPCO Security Systems GEM-P1664 Programming Instructions...
- Page 58 WIRING DIAGRAM ................64 ZONE 6 TEMPERATURE SENSOR ...........42 ZONE ANDING GROUP 1-4 (ZONE OPTION) ....43, 44, 45, 46 ZONE AREA 1 (ZONE OPTION) ........43, 44, 45, 46 ZONE AREA 2 (ZONE OPTION) ........43, 44, 45, 46 NAPCO Security Systems GEM-P1664 Programming Instructions...
-
Page 59: Address Number Location Index
ADDRESS 0800-0817 .......CS USER REPORTING OPTIONS ..............34 ADDRESS 0818-0835 .......CS USER REPORTING OPTIONS ..............35 ADDRESS 0836-0871 .......SYSTEM OPTIONS .....................26 ADDRESS 0872-0887 .......SYSTEM OPTIONS .....................27 ADDRESS 0900-1016 .......ZONE OPTIONS - ZONES 1 TO 16 ..............43 NAPCO Security Systems GEM-P1664 Programming Instructions... - Page 60 ADDRESS 1423 ........Wireless Trouble Activates Telco 3 ..............28 ADDRESS 1424 ........Automatic Interior Bypass/Easy Exit ..............28 ADDRESS 1424 ........Disable 2nd Call Ans. Machine Override ............. 28 ADDRESS 1424 ........Disable Code Required for EZ Bypass ..............28 NAPCO Security Systems GEM-P1664 Programming Instructions...
- Page 61 ADDRESS 2056 ........RF RECEIVER & supervisory timer options ............50 ADDRESS 2056 ........RF Receivers (number of) ..................50 ADDRESS 2059 ........DOWNLOAD/CALLBACK OPTIONS ..............25 ADDRESS 2059 ........NUMBER OF RINGS BEFORE PICKUP .............25 ADDRESS 2285-2286 .......Clear program OPTIONS ..................51 NAPCO Security Systems GEM-P1664 Programming Instructions...
- Page 62 Page 62 WI1423A 1/06 NOTES NAPCO Security Systems GEM-P1664 Programming Instructions...
- Page 63 Page 63 WI1423A 1/06 NOTES NAPCO Security Systems GEM-P1664 Programming Instructions...
-
Page 64: Gem-P1664 Wiring Diagram
Page 64 WI1423A 1/06 GEM-P1664 WIRING DIAGRAM 550mA 550mA MODEL-DELAY-SEC NAPCO Security Systems GEM-P1664 Programming Instructions...
Need help?
Do you have a question about the GEMINI GEM-P1664 and is the answer not in the manual?
Questions and answers