Advertisement
Available languages
Available languages
Quick Links
Advertisement

Related Manuals for Akai ATT-603


Summary of Contents for Akai ATT-603
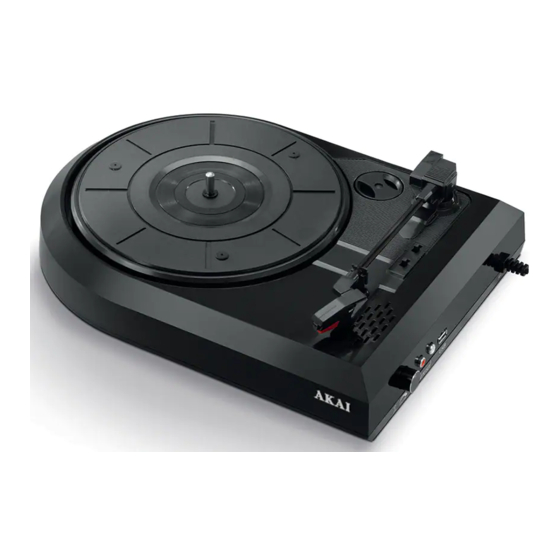
- Page 1 Turntable User’s Manual ATT-603...
- Page 2 PLEASE READ THIS OPERATING MANUAL COMPLETELY BEFORE OPERATING THIS UNIT AND RETAIN THIS BOOKLET FOR FUTURE REFERENCE. Getting Started Remove appliance from the box. Remove any packaging from the product. Place packaging inside the box and either store or dispose of safely. Accessories Included: USB Turntable Software Installation CD...
-
Page 3: Specification
SPECIFICATION: 1.GENERAL SECTION : Power Supply AC 230V 50 Hz Built-in Speaker Output: 1X8 ohm 5W Power Consumption 5 Watts Consumption Of Power Standby < 0.5 Watts Dimensions: 350(W) x 280(D) x 50(H)mm Weight 1.50Kg Standard Test Condition: Ambient Temperature:20 +/- 2 degC Relative Humidity:65% +/- 5% NOTE : If there is no doubt for the measure results , test can be done at 5 degC to 35 degC , and 45%... -
Page 4: Cartridge Section
4.CARTRIDGE SECTION : Type Moving magnetic cartridge Stylus Diamond stylus Output VOLTAGE 100-190mV , 1KHz 5 cm/sec LAT Frequency Response 20Hz ~ 20KHz +1/-3(RIAA) Channel Separation More than 15dB at 1KHz (HP-4005) Channel Balance Within 2.5dB at 1KHz (HP-4005) Load Impedence 4ohm ,3W Important Safety Information ●When using electrical appliances, basic safety precautions should always be followed. -
Page 5: Functions And Controls
FUNCTIONS AND CONTROLS 1. 45 Single adaptor 2. Tone arm 3. Speed control switch 4. Tone arm rest and security latch 5. Cartridge/Stylus 6. Hi-fi speaker 7. Turntable 8. USB OUTPUT 9.AUX-L OUT 10. AUX-R OUT 11. Power Switch & Volume Control 12.Auto Stop Switch Setting up the USB Turntable ●Remove all packaging from the unit. - Page 6 Installing the software ●Place the supplied CD into the drive of your computer, follow the instructions and the software will automatically install as follows: ●Click ‘Next’ ●Select ‘I accept’ option then click ‘Next’:...
- Page 7 ●Click ‘Next’: ●Here either select another location or click ‘Next’ to continue (recommended):...
- Page 8 ●Click ‘Next’ to continue: ●Click ‘Install’ to continue:...
- Page 9 ●The software will start to install: ●Click on ‘Finish’ to complete the installation:...
- Page 10 ●Audacity should automatically start up, if not follow the next sequence: ●The Audacity icon will now be seen on the desktop, double click on it to start Audacity running, if an icon does not appear, go to the ‘C’ drive under ‘My Computer’, click on ‘Program files’...
- Page 11 Playing a record ●Switch on the unit by pressing the power switch on the front, the LED above it will light... ●Raise the dust cover and push it back far enough until it stays upright. ●Release the Security latch from the tone arm by moving it to the right. ●Place the record to be played on the turntable.
- Page 12 ●Use the file, Edit, View, Project, Generate, Effect and Analyse menus to Save, Export and Manipulate your music. ● If the recording level requires adjustment, click on ‘START’, ‘SETTINGS’ and select control panel. Under Control Panel select ‘SOUNDS and AUDIO DEVICES’, click on the ‘VOLUME’...
-
Page 13: How To Replace The Stylus
Exporting your music files (.WAV) ● Once you have recorded and edited your music, you will need to save your files to the computer. To do this, click on file and move down to "Export as WAV" tab. ● Click on this and you will promptly be asked for the file name of the music recorded which will be saved in the location shown. -
Page 14: Disposal Of Electrical And Electronic Equipment
Do’s and don’ts ● Do not place unit on top of or near loudspeakers as acoustic feedback will occur. ● Do not play badly worn or chipped records. ● Ensure Stylus is clean and free of fluff and dust. Care and Maintenance ●... - Page 15 Pick-up cu USB ATT-603 Manualul Utilizatorului...
- Page 16 VĂ RUGĂM SĂ CITIŢI ACEST MANUAL DE UTILIZARE ÎNAINTE DE A OPERA APARATUL. PĂSTRAŢI ACESTE INTRUCŢIUNI PENTRU CONSULTĂRI ULTERIOARE. Noţiuni introductive Scoateţi aparatul din cutie. Îndepărtaţi orice ambalaj de pe produs. Aşezaţi ambalajul în interiorul cutiei şi fie o depozitaţi fie o aruncaţi în condiţii de siguranţă.
- Page 17 SPECIFICAŢII: 1.GENERAL: Sursa de curent AC 230V 50 Hz Ieşire difuzor î ncorporat: 1X8 ohm 5W Putere Consumată 5 Watts Putere consumată în modul Standby < 0.5 Watts Dimensiuni: 350(W) x 280(D) x 50(H)mm Greutate 1.50Kg Condiţii de testare: Temperatura ambientală:20 +/- 2 degC Umiditate relativă:65% +/- 5% NOTĂ...
- Page 18 4.DOZĂ : Doză magnetică Peniţa Diamant Tensiune de ieşire 100-190mV , 1KHz 5 cm/sec LAT Frecvenţa de răspuns 20Hz ~ 20KHz +1/-3(RIAA) Separare Canale >15dB la 1KHz (HP-4005) Balanţă Canale 2.5dB la 1KHz (HP-4005) Impedanţa 4ohm ,3W Informaţii importante de siguranţă ●Atunci când utilizaţi aparate electrice, întotdeauna trebuie să...
- Page 19 Funcţii şi comenzi 2. Braţ de ton 1. Adaptor pentru disc Single 45 3. Comutator Control De Viteză 4. Dispozitivul de blocare şi spaţiul de repaus al braţului de ton 5. Doză/Peniţă 6. Difuzor de Înaltă Fidelitate 8. Ieşire USB 7.
- Page 20 Comutator Auto Stop Dacă comutatorul AUTO STOP este setat pe ON, redarea se va opri î n mod automat. Dacă este setat pe OFF, redarea nu se va opri î n mod automat. Instalarea Software-ului ● Aşezați CD-ul furnizat î n unitatea calculatorului, urmați instrucțiunile și software-ul se va instala automat, după...
- Page 21 ●Selectaţi opţiunea ‘I accept’ apoi apăsaţi ‘Next’: ●Apăsaţi ‘Next’:...
- Page 22 ●Aici, fie selectaţi altă locaţie, fie apăsaţi ‘Next’ pentru a continua (recomandat): ●Apăsaţi ‘Next’ pentru a continua:...
- Page 23 ●Apăsaţi ‘Install’ pentru a continua: ●Software-ul va î ncepe instalarea:...
- Page 24 ●Apăsaţi "Finish" pentru a termina instalarea: ● Audacity ar trebui să înceapă în mod automat, dacă nu, urmați următoarea secvență: ● Pictograma Audacity va fi acum văzută pe desktop, faceţi dublu clic pe acesta pentru a deschide Audacity, î n cazul î n care această pictogramă nu apare, mergeţi la drive-ul "C"...
- Page 25 opţiunea "USB Audio Device" din meniu. De asemenea, bifaţi căsuţa "Software Play through (Play new track while recoding it)", pentru a reda piesa î n timp ce înregistrează. ●Sub meniul "Recording", este meniul "Channel", 1 este Mono şi 2 este Stereo, selectaţi opţiunea "Stereo".
- Page 26 Î nregistrarea cu programul Audacity ●Începeţi redarea aşa cum este descries mai sus şi apăsaţi Record (Înregistrare) din partea de sus a ferestrei Audacity pentru a î ncepe î nregistrarea pe calculator. ●Odată terminată înregistrarea, puteţi folosi comenzile Go to start, Play, Record, Pause, Stop şi Go to end al formei de undă, aşa cum vedeţi mai jos: ●Folosiţi opţiunile din meniu, "Edit", "View", "Project", "Generate", "Effect"...
- Page 27 î n care î nregistrarea este la un volum mic şi î n jos î n cazul î n care î nregistrarea este prea tare. ● NOTĂ Forma de undă albastră ar trebui să stea in fereastra Audacity, astfel î ncât, vârfurile să...
- Page 28 Exportarea fiţierelor de muzică (.MP3) ● ● După ce aţi terminat de înregistrat şi editat melodia, va trebui să salvaţi fisşierul pe calculator. Pentru a face acest lucru,faceţi clic pe fişier şi mutaţi jos la Export as MP3 tab. ● După ce aţi făcut clic, imediat vi se va cere numele de fişier al melodiei înregistrate, care va fi salvat în locaţia prezentată.
- Page 29 Întreţinere ● Curăţaţi aparatul cu o bucată de material textile moale, umedă, fără scame şi nu folosiţi produse chimice sau abrasive dure. ● Folosiţi un agent de curăţare special pentru a optimiza rezultatele Reciclarea echipamentelor electrice si electronice uzate Acest simbol prezent pe produs sau pe amblaj semnifica faptul ca produsul respectiv nu trebuie tratat ca deseu menajer obisnuit.Nu aruncati aparatul la gunoi la sfarsitul duratei de functionare ci duceti-l la un centru de colectare autorizat pentru reciclare.In acest...
Need help?
Do you have a question about the ATT-603 and is the answer not in the manual?
Questions and answers