Advertisement
Advertisement
Table of Contents

Related Manuals for Matrix LIFESTYLE CLIMBMILL


Summary of Contents for Matrix LIFESTYLE CLIMBMILL
-
Page 2: Important Precautions
IMPORTANT PRECAUTIONS SAVE THESE INSTRUCTIONS When using Matrix exercise equipment, basic precautions should always be followed, including the following: Read all instructions before using this equipment. It is the responsibility of the owner to ensure that all users of this equipment are adequately informed of all warnings and precautions. -
Page 3: Power Requirements
If the user does not follow these grounding instructions, comply may void the warranty. the user could void the Matrix limited warranty. 2. It is essential that this equipment is used only indoors in a climate controlled room. If... - Page 4 63.1” x 28.2” x 81.7” 63.1” x 28.2” x 81.7” * Ensure a minimum clearance width of 0.6 meters (24”) for access to and passage around MATRIX equipment. Please note, 0.91 meters (36”) is the ADA recommended clearance width for individuals in wheelchairs.
- Page 5 ENGLISH ASSEMBLY Hardware Flat Head Bolt Hardware Button Head Bolt Arc Washer Bolt Flat Washer Tighten all bolts from steps 1–3 to 24 Nm / 17.7 ft-lb IMPORTANT: Do not tighten bolts until step 3 is complete. Hardware Hardware LCB Communication Flat Head Bolt Bolt Extension Power Wire...
- Page 6 ENGLISH ASSEMBLY ASSEMBLY COMPLETE Hardware Torque Value 39 Nm / 28.8 ft-lb Bolt PLACE WARNING LABEL HERE...
-
Page 7: Before You Begin
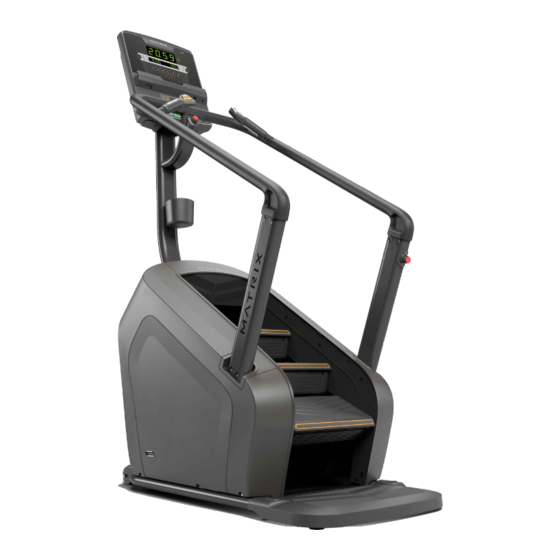
ENGLISH BEFORE YOU BEGIN LOCATION OF THE UNIT Place the unit on a level and stable surface away from direct sunlight. The intense UV light can cause discoloration on the plastics. Locate your unit in an area with cool temperatures and low humidity. Please leave a clear zone behind the unit that is at least 24”... - Page 8 ENGLISH BEFORE YOU BEGIN PROPER USAGE MOUNTING THE CLIMBMILL There are two EMERGENCY STOP BUTTONS on the ClimbMill. One emergency stop button is located at the top of the handlebars and the second is located on the lower right side handlebar. The EMERGENCY STOP BUTTONS will bring the step surfaces to a complete stop when pressed.
-
Page 9: Maintenance
5. Ensure that any person(s) making adjustments or performing maintenance other area where it can become pinched or cut during storage or use. or repair of any kind is qualified to do so. MATRIX dealers will provide • If any labels are damaged or illegible. - Page 10 © 2021 Johnson Health Tech Rev 1.4 A...
Need help?
Do you have a question about the LIFESTYLE CLIMBMILL and is the answer not in the manual?
Questions and answers