
Related Manuals for Hisense AUF-48UR6RTMPA


Summary of Contents for Hisense AUF-48UR6RTMPA
- Page 1 Refrigerant TECHNICAL & SERVICE MANUAL V1.0 —DC-INVERTER AIR CONDITIONERS MODEL: AUF-48UR6RTMPA...
-
Page 2: Table Of Contents
DC-Inverter Air Conditioner Technical & Service Manual Table of Contents 1. General ..........................1 1.1 Features ........................2 1.2 Product lineup ......................2 1.3 Nomenclature ......................2 1.4 Unit installation ......................2 1.5 Working range......................3 1.6 Product appearance....................4 2. Specifications ........................7 3. Outlines and dimensions......................9 3.1 Indoor units .........................9 3.2 Outdoor units......................10 4. -
Page 3: General
1. GENERAL 1. General 1.1 Features Floor-standing Type Air Conditioner Features 24-hour Timer ON and OFF This Timer can be set to automatically turn the unit on or off within a 24-hour period. Mute Operation The excellent fan design enables the airflow to be quiet and smooth with minimum noise. -
Page 4: Product Lineup
1. GENERAL 1.2 Product lineup Model (Btu/h) Type ● Floor standing ●--- available model 1.3 Nomenclature 1.4 Unit installation 1:1 system is the only compatible combination. (One indoor unit can only be connected with one outdoor unit.) -
Page 5: Working Range
1. GENERAL 1.5 Working range Power Supply Working Voltage 342V ~ 438V Voltage Imbalance Within a 3% deviation from each voltage at the main terminal of outdoor unit Starting Voltage Higher than 85% of the Rated Voltage Operating temperature range This heat pump air conditioner has been designed for the following outdoor operating temperatures. -
Page 6: Product Appearance
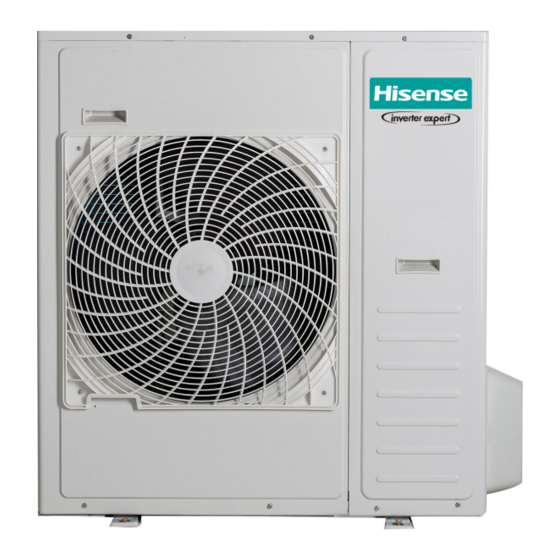
1. GENERAL 1.6 Product picture Model (capacity) Indoor Unit Outdoor Unit... - Page 7 1. GENERAL Display and Button Introduction ●Button Operation 1. ON/OFF BUTTON For turning on/off the appliance. 2. TEMPERATURE SETTING BUTTONS Used to adjust the set temperature. Each time button is pressed, the temperature can rise by 1℃; Each time button is pressed, the temperature can rise by 1℃. 3.
- Page 8 1. GENERAL Display and Button Introduction ●Display Introduction 1. Auto mode display: Display during auto mode. 2. Cooling mode display: Display during cooling mode. 3. Dry mode display: Display during dry mode. 4. Fan only mode display: Display during fan only mode. 5.
-
Page 9: Specifications
2. SPECIFICATIONS Model AUF-48UR6RTMPA Indoor model AUF-48UR4RMPA Outdoor model AUW-48U6RT Power supply Indoor V/ph/Hz 220~240-1-50 Power supply Outdoor V/ph/Hz 380~415-3-50 Electric parameter Input consumption Max. 6400 Input current Max. 11.6 Pdesignc 12.3 SEER 6.11 Cooling ηs,c 100% 240% Energy Efficiency... - Page 10 2. SPECIFICATIONS Model AUF-48UR6RTMPA Indoor model AUF-48UR4RMPA Outdoor model AUW-48U6RT Model KTF310D43UMT Type ROTARY Brand GMCC Capacity Btu/h 34154 Compressor Input 2765 Rated current (RLA) 5.38 Model POE VG74 Refrigerant oil Amount 1000 Model SIC-81FW-F1138-1 Outdoor fan motor Output Speed...
-
Page 11: Outlines And Dimensions
3. OUTLINES AND DIMENSIONS 3. Outlines and dimensions 3.1 Indoor unit Unit:mm... -
Page 12: Outdoor Units
3. OUTLINES AND DIMENSIONS 3.2 Outdoor unit Unit:mm... -
Page 13: Electrical Data
E LECTRIC DATA 4. Electrical data Power supply Applicable Voltage Nominal Outdoor unit Frequency Nominal Sensitive Voltage(V) Umin (V) Umax (V) (Hz) Current (A) Current (mA) 380-415 NOTE: 1. The above compressor data is based on 100% capacity combination of indoor units at the rated operating frequency. -
Page 14: Capacities And Selection Data
CAPACITIES AND SELECTION DATA 5. Capacities and selection data 5.1 Capacity characteristic charts The following charts show the characteristics of outdoor unit capacity, which corresponds with the operating ambient temperature of outdoor unit. Conditions: ①Pipe length / height difference : 5m / 0m ②Compressor at rated inverter frequency ③Indoor fan speed at high fan speed ④Capacity loss due to white frost and defrost operation is not included. -
Page 15: Piping Length Correction Factor
5. CAPACITIES AND SELECTION DATA 5.2 Piping length correction factor The correction factor is based on the equivalent piping length in meters (EL) and the height difference between the outdoor and indoor units in meters (H). Height difference between indoor unit and outdoor unit (m). •... - Page 16 5. CAPACITIES AND SELECTION DATA Heating: Model 0.94 0.91 0.88 0.85 0.82 0.79 0.76 0.73 0.70 The correction factor of height between indoor unit and outdoor unit Height difference Factor 0.01 0.02 0.025 To ensure correct unit selection, consider the farthest indoor unit. NOTE 1.
-
Page 17: Correction Factors According To Defrosting Operation
5. CAPACITIES AND SELECTION DATA 5.3 Correction factors according to defrosting operation The heating capacity in the previous paragraph is given without consideration of the condition of defrosting operation period. In consideration of defrosting operation, the heating capacity is corrected with the equation below. -
Page 18: Sound Pressure Data
6.SOUND PRESSURE DATA 6. Sound pressure data Indoor unit Model Test condition 1.0m under the unit; 1.0m high from the ground; NC-70 NC-65 NC-60 NC-55 NC-50 NC-45 NC-40 NC-35 NC-30 NC-25 NC-20 NC-15 Octave band center frequency(Hz) Outdoor unit Model Test condition 1.0m ahead of the unit;... -
Page 19: Air Flow Distribution
7. AIR FLOW DISTRIBUTION Air flow distribution Floor-standing installation/Cooling/Air Velocity Distribution Floor-standing installation/Cooling/Air Temperature Distribution... -
Page 20: Refrigerant Cycle
8. REFRIGERANT CYCLE 8. Refrigerant cycle Indoor Unit Cooling Cycle Heating cycle List of components Hexagon nut Ambient temperature sensor Split capillary Coil temperature sensor Indoor heat exchanger... - Page 21 8. REFRIGERANT CYCLE Outdoor Unit Cooling cycle Heating cycle List of components Compressor Defrost temperature sensor Coil temperature sensor Low pressure switch High pressure switch Ambient temperature sensor Discharge temperature sensor Electronic expansion valve Stop valve Suction temperature sensor 4-Way valve Stop valve Outdoor heat exchanger...
-
Page 22: Wiring Diagram
9. WIRING DIAGRAM 9. Wiring diagram 9.1 Electrical wiring diagrams Indoor Unit Electric wiring diagram 2031763. B Remark: Dashed parts are not available in some models. For details, see the table below. Wired Display Indoor units model YEL/GRN remote NANOE Humidity WIFI board... - Page 23 9. WIRING DIAGRAM Outdoor Unit Electric wiring diagram 1937236.D Remark: Dashed parts are not available in some models. For details, see the table below. Outdoor unit Crankcase model heater ● ● --available part ●...
-
Page 24: Control Board Picture
9. WIRING DIAGRAM 9.2 Control Board Picture Indoor unit Description Description Swing Display L-IN Room N-IN Coil SI-IN WIFI Output EE Prom Nano Fan Motor Wired Controller Step Motor... - Page 25 9. WIRING DIAGRAM Outdoor unit Description Description High Pressure Switch EEPROM Program Low Pressure Switch AC Power in Suction Temperature Sensor Heater-N Coil & Defrost Temperature Sensor Heater-L DC Fan 2 Transformer DC Fan 1 AC contactor IPM-SI Transformer Computer/Checker Ambien Te mperature Sensor Discharge Temperature Sensor...
- Page 26 9. WIRING DIAGRAM Driver board Description Description IPM-S AC IN-L2 DC Fan 2 AC IN-L3 DC Fan 1 Contactor RY1 DC Fan Motor 2 Reactor L1 DC Fan Motor 1 Reactor L2 Contactor RY2 Compressor W AC Power Compressor V AC IN-L1 Compressor U...
-
Page 27: Common Wiring
9. WIRING DIAGRAM 9.3 Common Wiring Indoor unit Outdoor unit Terminal Terminal 1(L) 1(L) Transmitting Cord Between Indoor and Outdoor 2(N) 2(N) 4(SI) 4(SI) Power supply Recommended Wire Size Nominal Model Power source Transmitting Rated Power supply Sensitive (Capacity) Current (cable size) Cable Size Current... - Page 28 9. WIRING DIAGRAM (B) DO NOT PUSH THE BUTTON OF THE MAGNETIC SWITCH(ES). It will cause a serious accident. NOTES: 1) Follow local codes and regulations when selecting field wires. 2) The wire sizes marked in the table are selected at the maximum current of the unit according to the European Standard, EN60335-1.
-
Page 29: Field Setting
10.FIELD SETTING 10. Field Setting 10.1 Outdoor unit DIP switch DIP Switch Setting of Outdoor Unit DIP Setting Disconnect the power before setting. Without turning off, the switch settings are not refreshed and might be invalid. Mark of " " indicates the position of DIP switches. Setting is required After setting refrigerant piping length dip switch, cooling/heating performance can be improved. - Page 30 10.FIELD SETTING Step 4: Open the maintenance panel. Step 5: Switch the dial code SW2-4 to ON position on the main control board. Step 6: Switch on the machine power. Step 7: Check if “40” is displayed on the LED digital tube of the main control board. Step 8: When the numerals on the LED digital tube of outdoor unit count down to 0 (40 →...
- Page 31 10.FIELD SETTING Indoor unit parameter revision Internal control parameter adjustment can be performed using wired remote controller YXE-C01U/YXE-C02U. 1. Connecting the wired remote controller with the indoor unit Step 1: Remove the upper cover of the wired controller Upper cover of the wired controller Lower cover of the wired controller Insert a normal screw driver into the position,...
- Page 32 10.FIELD SETTING Press “ON/OFF”button or “CANCEL”button to quit parameter adaption state. ⑤Press “ON/OFF”button or “CANCEL”button to quit. PARAMETER VALUE&REPRESENTATION PARAMETER PARAMETER NOTE DATA REPRESENTATION CODE DESCRIPTION TYPE (FUNCTION CODE) 0:Cancel Self Recovery of Power Self Recovery of Break function; Integer Power Break 1:Self Recovery of Power Break;...
- Page 33 10.FIELD SETTING Running Parameter Query Running parameter can be referred by digital tube switch or specified wired remote controller. Query by wired remote controller (YXE-C01U,YXE-C02U,YXE-D01U) Operation: 1.Connect the wired remote controller with the indoor unit (same method as Indoor unit parameter revision ) 2.Change the system parameter OPERATION:...
- Page 34 10.FIELD SETTING Query by digital tube switch Digital Display Switch Introduction It can be used to check outdoor running parameters. There are 3 buttons on the digital display board: 1) SWITCH button:Indoor parameters and outdoor parameters can be selected in turn by pressing it. “P.”-outdoor unit parameter, “H.”-indoor unit parameter;...
- Page 35 10.FIELD SETTING rapidly decreased. 4) The parameters will be displayed after 3s when the checking numbers are selected. Parameters can be checked as the table below. Parameter Descriptions code Protection Code or Fault code P .1 Target Frequency P .2 Driving Frequency P .4 Outdoor EEV Opening...
-
Page 36: Instructions For The Function Setting Of Access Control, Fire Protection
10.FIELD SETTING 10.2 Instructions for the function setting of access control, fire protection 10.2.1 Factory setting In case of using or cancelling the access control / fire protection function, use the wired controller to modify the parameters of indoor unit. NOTE: please refer to “... - Page 37 10.FIELD SETTING (2) Timing sequence description: ● Access control: 1) Control of entrance card disconnection: the air conditioner will be shut down after the access control signal is disconnected for 30 seconds. In this state, the indoor unit can’t start. If the user performs start operation, the wired controller will not respond and displays power-off status.
-
Page 38: Piping Work And Refrigerant Charge
11. PIPING WORK AND REFRIGERANT CHARGE 11. Piping work and refrigerant charge 11.1 MAX. length allowed Indoor unit Model CoolingCapacity Max.Pipe Length (m) Max.Drop Length (m) Max. length (Btu/h) Outdoor unit *Do your best to reduce the pipe length. Long pipe may cause capacity decrease. Refrigerant precharge for a piping length of 5m is charged in the outdoor unit at the factory. -
Page 39: Air Tight Test
11. PIPING WORK AND REFRIGERANT CHARGE 11.3 Air tight test Do use nitrogen when performe air-tight test. Connect the gauge manifold using charging hoses with a nitrogen cylinder to the check joints of the liquid line and the gas line stop valves. Perform the air-tight test. Don't open the gas line stop valves. Apply nitrogen gas pressure of 4.3MPa. -
Page 40: Installation Tools And Installation Flow Chart
12. INSTALLATION TOOLS AND INSTALLATION FLOW CHART 12.1 Necessary tools and instrument list for installation Tool Tool Tool Tool Handsaw Copper Pipe Bender Spanner Leveler Phillips Clamper for Solder- Manual Water Pump Charging Cylinder Screwdriver less Terminals Hoist Vacuum Pump Pipe Cutter Gauge Manifold (for Indoor Unit) -
Page 41: Installation Flow Chart
12. INSTALLATION TOOLS AND INSTALLATION FLOW CHART 12.2 Installation flow chart Drawing audit Preparation before installation Confirm installation location of indoor unit and outdoor unit Indoor unit installation Drain piping Refrigerant Duct installation Electrical wiring installation piping installation Heat insultation Outdoor unit installation Vacuum pumping and leakage detection... -
Page 42: Control Mode
13. CONTROL MODE 13. Control mode 13.1 Indoor unit mode control 1. Main general technical parameters (1) Remote receiver distance: 8 m. (2) Remote receiver angle: Less than 80 degrees. (3) Temperature control accuracy: ±1℃. (4) Time error: Less than 1%. 2. - Page 43 13. CONTROL MODE (3) In the cooling mode, the set temperature will rise automatically after the sleep function is started. (4) By default, the setting is to cancel the sleep function. Turning off the unit will also cancel the sleep function. Highly efficient run function (only for some remote controller) In Cooling, Dehumidification, Fan mode, press the "HIGH POWER "...
- Page 44 13. CONTROL MODE 2.10 Fault code The fault code can be shown by LED on the indoor panel. 2.11 Filter cleaning Filter cleaning LED will light up when air filter is clogged with dust. How to set/cancel: It can be set /cancelled with the wired remote controller.
-
Page 45: Outdoor Unit Mode Control
13. CONTROL MODE 13.2 Outdoor unit mode control Control function 1. Cooling Anti-Freeze Protection The indoor coil sensor functions as real time temperature detector of evaporator. It prevents the indoor unit evaporator temperature becoming too low. If the indoor coil temperature is too low, the compressor will automatically start the protection mode. -
Page 46: Sensor Parameter
14. SENSOR PARAMETER 14. Sensor parameter 1. THE PARAMETER OF OUTDOOR COMPRESSOR DISCHARGE TEMPERATURE SENSOR: =187.25K±6.3%;R =3.77K±2.5K;B0/100=3979K±1%) (R T [ ℃ ] Rmin [ KΩ ] Rnom [ KΩ ] Rmax [ KΩ ] DR (MIN)% DR (MAX)% 908.2603 985.5274 1065.1210 -7.84 7.47... - Page 47 14.SENSOR PARAMETER T [ ℃ ] Rmin [ KΩ ] Rnom [ KΩ ] Rmax [ KΩ ] DR (MIN)% DR (MAX)% 68.1036 71.9808 75.8414 -5.39 5.09 65.1373 68.8141 72.4746 -5.34 5.05 62.3155 65.8032 69.2746 -5.30 5.01 59.6306 62.9395 66.2324 -5.26 4.97 57.0752...
- Page 48 14. SENSOR PARAMETER T [ ℃ ] Rmin [ KΩ ] Rnom [ KΩ ] Rmax [ KΩ ] DR (MIN)% DR (MAX)% 7.3264 7.5679 7.8078 -3.19 3.07 7.0891 7.3202 7.5499 -3.16 3.04 6.8605 7.0818 7.3018 -3.12 3.01 6.6403 6.8522 7.0629 -3.09 2.98...
- Page 49 14. SENSOR PARAMETER 2. THE PARAMETER OF THE OTHER SENSOR IN INDOOR AND OUTDOOR UNIT: (R =15K±2%; B0/100=3450K±2%) T [℃] Rmin [ KΩ ] Rnom [ KΩ ] Rmax [ KΩ ] DR (MIN)% DR (MAX)% 60.78 64.77 68.99 -6.16 6.12 57.75 61.36...
- Page 50 14. SENSOR PARAMETER T [℃] Rmin [ KΩ ] Rnom [ KΩ ] Rmax [ KΩ ] DR (MIN)% DR (MAX)% 9.199 9.422 9.647 -2.37 2.33 8.826 9.047 9.269 -2.44 2.40 8.470 8.689 8.910 -2.52 2.48 8.129 8.347 8.567 -2.61 2.57 7.804 8.021...
- Page 51 14.SENSOR PARAMETER T [℃] Rmin [ KΩ ] Rnom [ KΩ ] Rmax [ KΩ ] DR (MIN)% DR (MAX)% 1.827 1.941 2.062 -5.87 5.87 1.767 1.880 1.998 -6.01 5.91 1.710 1.820 1.936 -6.04 5.99 1.655 1.763 1.876 -6.13 6.02 1.602 1.707 1.818...
- Page 52 14.SENSOR PARAMETER T [℃] Rmin [ KΩ ] Rnom [ KΩ ] Rmax [ KΩ ] DR (MIN)% DR (MAX)% 0.4787 0.5224 0.5698 -8.37 8.32 0.4655 0.5083 0.5547 -8.42 8.36 0.4528 0.4946 0.5401 -8.45 8.42 0.4404 0.4814 0.5259 -8.52 8.46 0.4284 0.4685 0.5121...
-
Page 53: Troubleshooting
15. TROUBLESHOOTING 15.Troubleshooting 15.1 Trouble guide Troubleshooting for Normal Malfunction Troubleshooting Possible Reason of Abnormality How to Deal With 1. Check power supply circuit; 2. Measure insulation resistance to 1. Power supply failure; ground to see if there is any 2. - Page 54 15. TROUBLESHOOTING Outdoor Unit Fault code will display on digital tube board. Outdoor Control Board 7-segment display...
-
Page 55: Fault Codes
15. TROUBLESHOOTING 15.2 Fault codes The following is the fault code table of outdoor unit. Table 1 Outdoor fault code Fault Fault Description Possible Reasons for Abnormality How to Deal With Remarks code 1. Reconnect the outdoor ambient 1.The outdoor ambient temperature temperature sensor;... - Page 56 15. TROUBLESHOOTING Fault Fault Description Possible Reasons for Abnormality How to Deal With Remarks code The wiring of the high pressure Reconnect the wiring the high Applied to protector is connected loosely; pressure protector; The high pressure models The high pressure protector Replace the high pressure switch operates or with high...
- Page 57 15. TROUBLESHOOTING The following is the fault code table of indoor unit. Table 2 Indoor fault code Fault Fault Description Possible Reasons for Abnormality Remarks How to Deal With code The indoor unit and the outdoor unit are not connected properly; 1.
- Page 58 15. TROUBLESHOOTING Fault Fault Description Possible Reasons for Abnormality How to Deal With Remarks code 1. The wired controller and the Reconnect the wiring between indoor control board are the wired controller to the connected loosely. indoor control board; 2. The sequence of the wiring Communication Replace the wiring between between the wired controller...
- Page 59 15. TROUBLESHOOTING NOTE 4: Overload in heating mode Overload in heating mode The root cause Corrective measures Discharge the refrigerant, and recharge the refrigerant The refrigerant is excessive referring to the rating label The indoor ambient temperature is too high Please use it within allowable temperature range Short-circuit occurs in the air outlet and air Adjust the installation of the indoor unit referring to the...
- Page 60 15. TROUBLESHOOTING Table 3 Drive Fault code Fault Fault description How to deal with Possible reasons for abnormality code 1. Check the compressor wire; 1. Compressor wire is not connected properly; 2. Change the driver board ; 2. Bad driver board components; Q axis current 3.
- Page 61 15. TROUBLESHOOTING Fault Fault description Possible reasons for abnormality How to deal with code 1. Voltage input is too low; 1. Check the power supply; Low DC voltage 200V 2. Drive board fault. 2. Change the driver board; Driver board read EE 1.
- Page 62 15. TROUBLESHOOTING Table 4 Limitation code Definitions Descriptions Code When overcurrent occurs, stop the frequency from Current control increasing. When overcurrent occurs, reduce the frequency. Current control When the temperature of IPM module is too high, Frequency control to keep appropriate temperature stop the frequency from increasing.
-
Page 63: Checking Components
16. CHECKING COMPONENTS 16. Checking components 16.1 Check refrigerant system TEST SYSTEM FLOW Conditions: ① Compressor is running. ② The air condition should be installed in good ventilation. Tool: Pressure Gauge Technique: ① see ② feel ③ test See ----- Tube defrost. Feel ----- The difference between temperature of tubes. - Page 64 14. CHECKING COMPONENTS Test system flow Cooling mode Test system pressure. The pressure on the Is the low pressure high side. normal at service part ? Recharge refrigerant after air purging with If the pressure is The pressure on the the vacuum close to static low side.
-
Page 65: Check Parts Unit
16. CHECKING COMPONENTS 16.2 Check parts unit 1. INDOOR FAN MOTOR Motor model (DC motor) 48k: ZW702B500008 Test in resistance. TOOL: Multimeter. Test the resistance of the main winding. The indoor fan motor fails if the resistance of main winding is 0 (short circuit) or ∞ (open circuit). Test in voltage TOOL: Multimeter. - Page 66 CHECKING COMPONENTS 2. OUTDOOR FAN MOTOR Motor Model: DC MOTOR 48K: SIC-81FW-F1138-1 3. COMPRESSOR COMPRESSOR EXAMINE AND REPAIR 48K: KTF310D43UMT Test in resistance. TOOL: Multi-meter. Test the resistance of the winding. The compressor fails if the resistance of winding is 0 (short circuit) or ∞...
- Page 67 16. CHECKING COMPONENTS NOTES: Don’t put a compressor on its side or turn over. Please assemble the compressor in your air conditioner rapidly after removing the plugs. Don’t place the compressor in air for a long time. Avoid compressor running in reverse caused by connecting electrical wire incorrectly. Warning! In case AC voltage is impressed to compressor, the compressor performance will decrease because of its rotor magnetic force decreasing.
- Page 68 16. CHECKING COMPONENTS 6. FUSE Checking for continuity of fuse on PCB ASS’Y. Remove the PCB ASS’Y from the electrical component box. Then pull out the fuse from the PCB ASS’Y (Fig.1) Fuse PCB Ass'Y Fig.1 Check for continuity by a multimeter as shown in Fig.2. Fuse Fig.2 7.
-
Page 69: Disassembly And Assembly
17. DISASSEMBLY AND ASSEMBLY 17.1 Disassembly and assembly for compressor and motor The special tools for compressor & motor disassembly and assembly: Tool Hexagon Screwdriver Hexagon Socket Important: Before disassembly and assembly, make sure that the power to the system has been disconnected and verified as voltage free. - Page 70 17. DISASSEMBLY AND ASSEMBLY 17.2 Disassembly and assembly for compressor and motor Important: Before disassembly and assembly, make sure that the power to the system has been disconnected and verified as voltage free. Step Illustration Handling Instruction Remove the four 1.
- Page 71 17. DISASSEMBLY AND ASSEMBLY Remove the two screws 4. Remove the air on the front of air inlet inlet parts parts. 1.Remove the air guiding plate rotating clockwise. 5. Remove the fan 2. Unscrew the hex nuts. 3. Remove the centrifugal fan.
-
Page 72: Control Logic Description
18. CONTORL LOGIC DESCRIPTION Control logic description 18.1 Fan Only Mode (1) Outdoor fan and compressor stop. (2) Temperature setting function is disabled, and no setting temperature is displayed.(3) Indoor fan can be set to high/medium/low, but can not be set to auto. 18.2 Cooling Mode Indoor fan running rules: In cooling mode, indoor fan runs all the time and the speed can be selected as high,... - Page 73 18. CONTORL LOGIC DESCRIPTION 18.3 Heating Mode Indoor fan running rules: In several minutes after the heating mode is started, the fan of the indoor unit will not run until the heat exchanger of the indoor unit reaches a high enough temperature. That is because cold air prevention system is operating.
- Page 74 18. CONTORL LOGIC DESCRIPTION 18.4 Auto Mode This mode can be chosen with remote controller and the setting temperature can be changed between 16~30℃. In auto mode, the machine will choose cooling, heating or fan-only mode according to ΔT (ΔT =T1-Ts).
- Page 75 18. CONTORL LOGIC DESCRIPTION 18.6 Condenser High-temperature Protection DC-Inverter outdoor unit AC will enter T3 protection if any of the following conditions is satisfied. TE10 TE11 Condition1: Cooling mode: When the outdoor coil temp. T3 keeps higher than T2 for 10 seconds, the compressor and outdoor fan will shut off.
- Page 76 Product improvement, specifications and appearance in this manual are subject to change without prior notice.
Need help?
Do you have a question about the AUF-48UR6RTMPA and is the answer not in the manual?
Questions and answers
what does E5 indicate on model AP0819CRW