Table of Contents
Advertisement
Available languages
Available languages
Quick Links
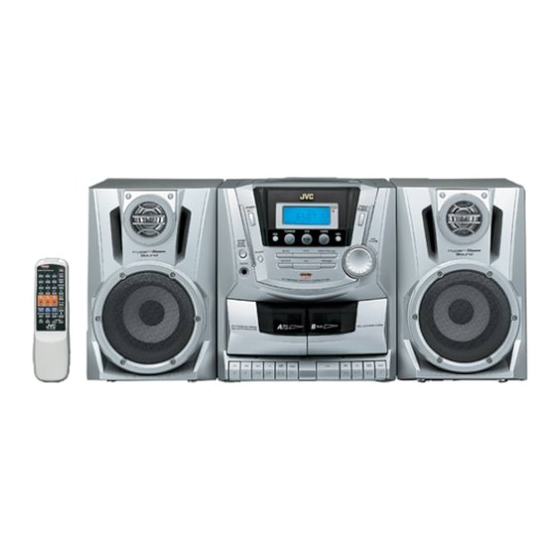
CD PORTABLE COMPONENT SYSTEM
SISTEMA PORTATIL DE COMPONENTES DE CD
PC-X270
Consists of CA-PCX270 and SP-PCX270.
Consta del CA-PCX270 el SP-PCX270.
SP-PCX270
CA-PCX270
7
INSTRUCTIONS
MANUAL DE INSTRUCCIONES
SP-PCX270
POWER
1
2
3
4
5
6
7
8
9
0
+10
TUNER
TAPE
CD
PRESET/
PROGRAM
INTRO
REPEAT
FM MODE
RANDOM
HBS
EQ
VOL
For Customer Use:
Enter below the Model No. and Serial
No. which are located either on the rear,
bottom or side of the cabinet. Retain this
information for future reference.
Model No.
Serial No.
601-270000-011
LVT1093-001B
[J]
Advertisement
Chapters
Table of Contents

Related Manuals for JVC PC-X270


Summary of Contents for JVC PC-X270
- Page 1 CD PORTABLE COMPONENT SYSTEM SISTEMA PORTATIL DE COMPONENTES DE CD PC-X270 Consists of CA-PCX270 and SP-PCX270. Consta del CA-PCX270 el SP-PCX270. SP-PCX270 SP-PCX270 CA-PCX270 POWER TUNER TAPE PRESET/ PROGRAM INTRO REPEAT FM MODE RANDOM INSTRUCTIONS For Customer Use: Enter below the Model No. and Serial MANUAL DE INSTRUCCIONES No.
- Page 2 Warnings, Cautions and Others Mises en garde, précautions et indications diverses CAUTION CAUTION To reduce the risk of electrical shocks, fire, etc.: 1. Do not remove screws, covers or cabinet. RISK OF ELECTRIC SHOCK DO NOT OPEN 2. Do not expose this appliance to rain or moisture. CAUTION: TO REDUCE THE RISK OF ELECTRIC SHOCK, ATTENTION...
- Page 3 Introduction We would like to thank you for purchasing one of our JVC products. Before operating this unit, read this manual carefully and thoroughly to obtain the best possible performance from your unit, and retain this manual for future reference.
-
Page 4: Table Of Contents
Contents Location of the Buttons and Controls ....... 3 Front Panel ..............3 Remote Control ............5 Getting Started ............6 Unpacking ..............6 Putting the Batteries into the Remote Control ... 6 Connecting Speakers ..........6 Connecting Other Equipment ........7 Power Supply ............. -
Page 5: Location Of The Buttons And Controls
Location of the Buttons and Controls Become familiar with the buttons and controls on your unit. Front Panel – 3 –... - Page 6 Continued Display Window PROGRAM REPEAT RANDOM INTRO TAPE AUX CH TRACK MONO JAZZ CLASSIC STEREO FLAT ROCK See pages in the parentheses for details. Display window Front Panel 1 CD play mode indicators 1 Display window • PROGRAM, REPEAT, RANDOM and INTRO 2 POWER button (8) indicators...
-
Page 7: Remote Control
Remote Control Remote Control 1 POWER button (8) 2 Number buttons (10 – 12) 3 TUNER button (10) 4 TAPE button (14, 16) 5 4/¢ buttons (8, 10 – 12) 6 PRESET/REPEAT button (10, 13) 7 FM MODE button (10) POWER 8 HBS (HYPER BASS SOUND) button (9) 9 EQ (Equalizer) button (9) -
Page 8: Getting Started
Getting Started Continued Unpacking Connecting Speakers After unpacking, check to be sure that you have all the Insert the L (left) and R (right) speaker cords into the following items. corresponding speaker terminals on the back of the unit. The number in the parentheses indicates the quantity of the pieces supplied. -
Page 9: Connecting Other Equipment
Use the System in a car properly You can connect an audio equipment — used only as a • Be sure to use the specified car adapter (JVC model CA-R120) to playback device. prevent mishaps or damage resulting from different polarity When you connect and use this equipment, refer also to its design. -
Page 10: Common Operations
Common Operations Turning On or Off the Power Selecting the Sources To turn on the unit, press POWER To listen to the FM/AM broadcasts, press TUNER. (See page 10.) To play back CD, press CD 3¥8. (See pages 11 – 13.) To turn off the unit (on standby), press POWER again. -
Page 11: Reinforcing The Bass Sound
Reinforcing the Bass Sound Ensuring Good FM and AM Reception The Hyper Bass Sound function provided for this unit can FM reception: Pull out the antenna and reorient it for better enhance the bass sound and reduce the bass sound distortion reception. -
Page 12: Listening To Fm And Am Broadcasts
Listening to FM and AM Broadcasts Tuning in a Station Press PROGRAM/SET. Press TUNER. The unit automatically tunes in the previously tuned station (either FM or AM). Press PRESET/REPEAT • Each time you press the button, the band alternates between FM and AM. to select a preset number. -
Page 13: Playing Back Cd
Playing Back CD Basic CD Operations This unit has been designed to play back the following CDs: Audio CD, CD-R, and CD-RW. While playing a CD, you can do the following operations. Continued use of irregular shape CDs (heart-shape, octagonal, etc.) can damage the unit. -
Page 14: Programming The Playing Order Of The Tracks - Program Play
Continued To stop during play, press STOP 7. Programming the Playing Order of the Tracks — Program Play To exit from Program play mode, press STOP 7 before or after play so that the unit enters another play mode. (The You can arrange the order in which the tracks play before you program you have made is stored in memory until you erase start playing. -
Page 15: Playing At Random - Random Play
Playing at Random — Random Play To cancel Repeat play, press PRESET/REPEAT repeatedly until the REPEAT indicator goes off from the display. The tracks of loaded CD will play at random. • To use Repeat play for Random play, press PRESET/ Playing Introductions —... -
Page 16: Playing Back Tapes
Playing Back Tapes To play the tapes in B and A cassette decks You can play back only type I (Normal) tapes. continuously Playing Back a Tape Set the cassette tapes in A and B decks. • If the tape direction is set wrong, remove the cassette. Press STOP/EJECT 7 /0 for the deck you want to use. -
Page 17: Recording
Recording IMPORTANT: Recording a Tape on Deck A • It should be noted that it may be unlawful to re-record On the unit ONLY: pre-recorded tapes, records, or discs without the consent of the owner of copyright in the sound or video Press STOP/EJECT 7/0 for the deck A. -
Page 18: Dubbing Tapes
To record an AM station — Beat Cancel CD Direct Recording While recording an AM broadcast, beats may be heard Everything on the CD goes onto the tape in the order it is on (which are never heard when listening to the broadcast the CD, or according to the order you have made for Program without recording it). -
Page 19: Maintenance
Maintenance To get the best performance of the unit, keep your discs, tapes, and mechanism clean. Handling cassette tapes Handling discs • If the tape is loose in its cassette, take • Remove the disc from its case by up the slack by inserting a pencil in holding it at the edge while pressing the one of the reels and rotating. -
Page 20: Troubleshooting
Troubleshooting If you are having a problem with your unit, check this list for a possible solution before calling for service. If you cannot solve the problem from the hints given here, or the unit has been physically damaged, call a qualified person, such as your dealer, for service. - Page 21 Introducción Muchas gracias por adquirir uno de nuestros productos JVC. Antes de operar esta unidad, lea detenidamente este manual para comprender a fondo todas las instrucciones y obtener un máximo disfrute de esta unidad. Guarde este manual para futuras consultas.
- Page 22 Contenido Ubicación de los botones y controles ......3 Panel frontal ............... 3 Control remoto ............5 Primeros pasos ............6 Desembalaje ............... 6 Colocación de las pilas en el control remoto ..... 6 Conexión de los altavoces .......... 6 Conexión de otro equipo ..........
-
Page 23: Ubicación De Los Botones Y Controles
Ubicación de los botones y controles Familiarícese con los botones y controles de su unidad. Panel frontal – 3 –... - Page 24 Continua Ventanilla de visualización PROGRAM REPEAT RANDOM INTRO TAPE AUX CH TRACK MONO JAZZ CLASSIC STEREO FLAT ROCK Para los detalles, consulte las páginas entre paréntesis. Ventanilla de visualización Panel frontal 1 Indicadores del modo de reproducción de CD 1 Ventanilla de visualización •...
-
Page 25: Control Remoto
Control remoto Control remoto 1 Botón POWER (8) 2 Botones numéricos (10 – 12) 3 Botón TUNER (10) 4 Botón TAPE (14, 16) 5 Botones 4/¢ (8, 10 – 12) 6 Botón PRESET/REPEAT (10, 13) 7 Botón FM MODE (10) POWER 8 Botón HBS (HYPER BASS SOUND) (9) 9 Botón EQ (ecualizador) (9) -
Page 26: Primeros Pasos
Primeros pasos Continua Desembalaje Conexión de los altavoces Después de abrir el paquete, asegúrese de que dispone de Inserte los cables de altavoz L (izquierdo) y R (derecho) en todos los elementos siguientes. los correspondientes terminales de altavoz en la parte trasera El número entre paréntesis indica la cantidad de piezas de la unidad. -
Page 27: Conexión De Otro Equipo
• Asegúrese de utilizar el adaptador para automóvil especificado solamente como un dispositivo de reproducción. (JVC modelo CA-R120) para evitar posibles contratiempos o Para conectar y utilizar este equipo, consulte también el daños resultantes de un diseño de polaridad diferente. -
Page 28: Operaciones Comunes
Operaciones comunes Conexión y desconexión de la alimentación Selección de las fuentes Para encender la unidad, pulse POWER Para escuchar radiodifusiones FM/AM, pulse TUNER. (Véase página 10). Para reproducir un CD, pulse CD 3¥8. (Véase páginas 11 Para apagar la unidad (en espera), pulse de nuevo POWER –... -
Page 29: Refuerzo De Los Sonidos Graves
Refuerzo de los sonidos graves Cómo asegurar una buena recepción en FM y La función Hyper Bass Sound de esta unidad puede resaltar los sonidos graves y reducir su distorsión, mientras escucha Recepción en FM: Extraiga la antena y cambie su cualquier fuente a bajos niveles de volumen. -
Page 30: Escuchando Radiodifusiones En Fm Y Am
Escuchando radiodifusiones en FM y AM Cómo sintonizar una emisora Pulse PROGRAM/SET. Pulse TUNER. La unidad sintoniza automáticamente la emisora sintonizada previamente (ya sea FM o Pulse PRESET/REPEAT AM). • Cada vez que pulsa el botón, la banda alterna para seleccionar un entre FM y AM. -
Page 31: Reproducción De Cd
Reproducción de CD Operaciones básicas de CD Esta unidad ha sido diseñada para reproducir los discos CD siguientes: CD de audio, CD-R y CD-RW. El uso continuo de discos CD de forma irregular (forma de corazón, Mientras reproduce un CD, podrá realizar las operaciones octogonal, etc.) puede dañar la unidad. -
Page 32: Programando El Orden De Reproducción De Las Pistas - Reproducción Programada
Continua Para detener la reproducción, pulse STOP 7. Programando el orden de reproducción de las pistas — Reproducción programada Para salir del modo de reproducción programada, pulse STOP 7 antes o después de la reproducción para que la Antes de comenzar la reproducción, podrá programar el unidad entre en otro modo de reproducción. -
Page 33: Reproducción Al Azar - Reproducción Aleatoria
Reproducción al azar — Reproducción aleatoria Repetición de pistas o de CD — Reproducción repetida Las pistas del CD cargado se reproducen de forma aleatoria. • Para usar la reproducción repetida en la reproducción Usted podrá hacer que el CD, la programación o la pista aleatoria, pulse PRESET/REPEAT después que se inicie la individual que se está... -
Page 34: Reproducción De Las Cintas
Reproducción de las cintas Para reproducir continuamente las cintas de las Usted podrá reproducir solamente cintas tipo I (Normal). platinas B y A Reproducción de una cinta Coloque las cintas cassette en las platinas A y B. • Si la dirección de la cinta no es la correcta, saque el cassette. -
Page 35: Grabación
Grabación IMPORTANTE: Grabación de una cinta en la platina A • Tenga en cuenta que la regrabación de cintas pregrabadas, grabaciones o discos sin el consentimiento En la unidad SOLAMENTE: de los titulares del copyright podría resultar ilegal en cuanto a grabación de sonido o de vídeo, radiodifusión o Pulse STOP/EJECT 7/0 de la platina A. -
Page 36: Duplicación De Cintas
Para grabar una emisora AM — Corte de batido Grabación directa de CD Mientras graba un radiodifusión en AM, se podrán escuchar Todo lo del CD serpa copiado en la cinta en el mismo orden batidos (que no se escucharían durante la audición del que el CD, o de acuerdo con el orden seleccionado por usted programa si no lo grabara). -
Page 37: Mantenimiento
Mantenimiento Para obtener el máximo rendimiento de la unidad, mantenga limpios los discos, las cintas, y el mecanismo. Manejo de las cintas cassette Manejo de los discos • Si la cinta está floja en su cassette, • Saque el disco de su estuche elimine la flojedad haciendo girar uno sujetándolo por los bordes, mientras de los carretes con un lápiz. -
Page 38: Localización De Averías
Localización de averías Si experimenta algún problema con su unidad, verifique la siguiente lista para ver si consigue resolver el problema antes de acudir al centro de servicio. Si el problema persiste a pesar de las indicaciones contenidas en esta lista, o si la unidad está físicamente dañada, solicite el servicio a personal cualificado, como por ejemplo, su proveedor. - Page 39 VICTOR COMPANY OF JAPAN, LIMITED EN, SP 0503TMMMDWMTS © 2003 VICTOR COMPANY OF JAPAN, LIMITED...
Need help?
Do you have a question about the PC-X270 and is the answer not in the manual?
Questions and answers