JVC CA-PCX290 Instructions Manual
Cd portable component system consists of ca-pcx290 and sp-pcx290
Hide thumbs
Also See for CA-PCX290:
- Service manual (83 pages) ,
- Instructions manual (48 pages) ,
- Instructions manual (43 pages)
Table of Contents
Advertisement
Quick Links
Download this manual
See also:
Service Manual
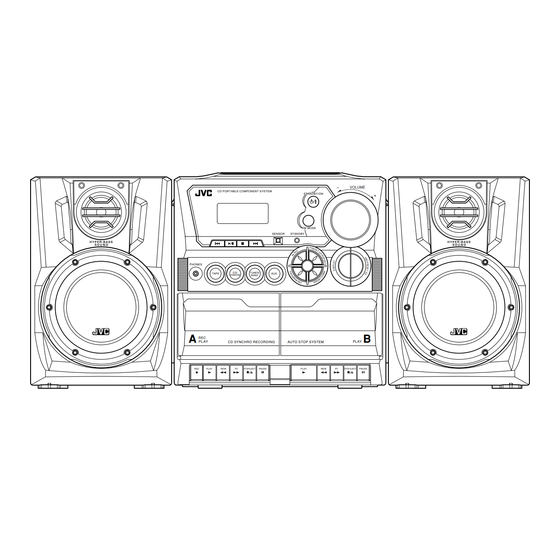
CD PORTABLE COMPONENT SYSTEM
PC-X290
Consists of CA-PCX290 and SP-PCX290
SP-PCX290
PHONES
A
CA-PCX290
-
VOLUME
CD PORTABLE COMPONENT SYSTEM
STANDBY/ON
FM MODE
SENSOR
STANDBY
TUNER/
CD/
TAPE
AUX
RANDOM
BAND
REC
PLAY
PLAY
CD SYNCHRO RECORDING
AUTO STOP SYSTEM
REC
PLAY
REW
FF
STOP/EJECT
PAUSE
PLAY
REW
FF
STOP/EJECT
PAUSE
INSTRUCTIONS
SP-PCX290
+
B
CD/
TUNER/
TAPE
RANDOM
BAND
LVT1189-001A
[B]
Advertisement
Table of Contents

Related Manuals for JVC CA-PCX290


Summary of Contents for JVC CA-PCX290
- Page 1 CD PORTABLE COMPONENT SYSTEM PC-X290 Consists of CA-PCX290 and SP-PCX290 SP-PCX290 CA-PCX290 CD PORTABLE COMPONENT SYSTEM PHONES TUNER/ TAPE RANDOM BAND PLAY CD SYNCHRO RECORDING PLAY STOP/EJECT INSTRUCTIONS SP-PCX290 VOLUME STANDBY/ON FM MODE SENSOR STANDBY PLAY AUTO STOP SYSTEM PAUSE...
-
Page 2: Warnings, Cautions And Others
IMPORTANT for the U.K. DO NOT cut off the mains plug from this equipment. If the plug fitted is not suitable for the power points in your home or the cable is too short to reach a power point, then obtain an appro- priate safety approved extension lead or consult your dealer. -
Page 3: Safety Instructions
“SOME DOS AND DON’TS ON THE SAFE USE OF EQUIPMENT” This equipment has been designed and manufactured to meet international safety standards but, like any electrical equipment, care must be taken if you are to obtain the best results and safety is to be assured. ✮✮✮✮✮✮✮✮✮✮✮✮✮✮✮✮✮✮✮✮✮✮✮✮✮✮✮✮✮✮✮✮✮✮✮✮✮✮✮✮✮✮✮✮✮✮✮... - Page 4 Introduction We would like to thank you for purchasing one of our JVC products. Before operating this unit, read this manual carefully and thoroughly to obtain the best possible performance from your unit, and retain this manual About This Manual This manual is organized as follows: •...
-
Page 5: Table Of Contents
Contents Location of the Buttons and Controls ... 3 Getting Started ... 6 Common Operations ... 9 Listening to FM and AM Broadcasts ... 12 Playing Back CD ... 13 Playing Back Tapes ... 16 Recording ... 17 Maintenance ... 19 Troubleshooting ... -
Page 6: Location Of The Buttons And Controls
Location of the Buttons and Controls Become familiar with the buttons and controls on your unit. Front Panel PHONES TAPE PLAY PLAY CD PORTABLE COMPONENT SYSTEM STANDBY/ON FM MODE SENSOR STANDBY TUNER/ RANDOM BAND CD SYNCHRO RECORDING AUTO STOP SYSTEM STOP/EJECT PAUSE PLAY... - Page 7 Display Window INTRO PROG RANDOM HBS MUTING ALL CLASSIC See pages in the parentheses for details. Front Panel 1 Display window 2 Operation buttons • 4 (9, 12 – 14), 3¥8 (play/pause) (13 – 15), 7 (13 – 15), ¢ (9, 12 – 15) 3 TAPE button (9, 16, 18) 4 PHONES jack (10) 5 CD/RANDOM button (9, 13, 15, 18)
-
Page 8: Remote Control
Remote Control TUNER/ TAPE RANDOM BAND Remote sensor VOLUME CD PORTABLE COMPONENT SYSTEM STANDBY/ON FM MODE SENSOR STANDBY TUNER/ TAPE RANDOM BAND PLAY CD SYNCHRO RECORDING AUTO STOP SYSTEM PLAY STOP/EJECT PAUSE PLAY STOP/EJECT PAUSE When using the remote control, point it at the remote sensor on the front panel. -
Page 9: Getting Started
Getting Started Unpacking After unpacking, check to be sure that you have all the following items. The number in the parentheses indicates the quantity of the pieces supplied. • Remote control (1) • AC power cord (1) • Battery (R03(UM-4)/AAA(24F)) (2) If any is missing, consult your dealer immediately. -
Page 10: Connecting Other Equipment
Attaching the speaker system to the main unit Fit the speaker into the grooves on the main unit (1) and slide down the speaker vertically (2) as the illustration shows. Detaching the speaker system from the main unit With the lever on the back of the unit pushed in the direction of the arrow (1), lift up the speaker vertically (2) as the illustration shows. -
Page 11: Power Supply
Power Supply Use AC power or dry batteries (not supplied) to operate the unit. • As long as the AC power cord is connected to a power source, the unit operates on AC power rather than on the batteries in it. To connect the AC power cord To the AC IN terminal... -
Page 12: Common Operations
Common Operations Turning On or Off the Power To turn on the unit, press STANDBY/ON • When you use the batteries for power supply, the backlight of the display dims to save power consumption. To turn off the unit (on standby), press STANDBY/ON again. -
Page 13: Adjusting The Volume
Adjusting the Volume You can adjust the volume level only while the unit is turned Turn the VOLUME +/– clockwise to increase the volume or counterclockwise to decrease it. • The volume level can be adjusted in 31 steps (00 VOL to 30 VOL). When using the remote control, press VOLUME + to increase the volume or press VOLUME –... -
Page 14: Ensuring Good Fm And Am Reception
Ensuring Good FM and AM Reception FM reception: Pull out the antenna and reorient it for better reception. AM reception: Reorient the main unit for better reception. For better reception of both FM and AM • Make sure the antenna conductors do not touch any other terminals and connecting cords. -
Page 15: Listening To Fm And Am Broadcasts
Listening to FM and AM Broadcasts Tuning in a Station Press TUNER/BAND. The unit automatically tunes in the previously tuned station (either FM or AM). • Each time you press the button, the band alternates between FM and AM. Press and hold 4 or ¢ for more than 1 second. -
Page 16: Playing Back Cd
Playing Back CD This unit has been designed to play back the following CDs: Audio CD, CD-R, and CD-RW. Continued use of irregular shape CDs (heart-shape, octagonal, etc.) can damage the unit. When playing a CD-R or CD-RW User-edited CD-Rs (Recordable) and CD-RWs (Rewritable) can be played back only if they are already “finalized.”... -
Page 17: Programming The Playing Order Of The Tracks -Program Play
Programming the Playing Order of the Tracks —Program Play You can arrange the order in which the tracks play before you start playing. You can program up to 20 tracks. • To use Repeat play (see page 15) for Program play, press PRESET UP/REPEAT after starting Program play. -
Page 18: Playing At Random-Random Play
Playing at Random—Random Play The tracks of loaded CD will play at random. • To use Repeat play for Random play, press PRESET UP/ REPEAT so that REP ALL indicator lights up on the display after starting Random play (Random play will be canceled when you select REP 1). -
Page 19: Playing Back Tapes
Playing Back Tapes You can play back only type I (Normal) tapes. Playing Back a Tape Press STOP/EJECT 7 /0 for the deck you want to use. For Deck A For Deck B Put a cassette in, with the exposed part of the tape down. -
Page 20: Recording
Recording IMPORTANT: • It should be noted that it may be unlawful to re-record pre-recorded tapes, records, or discs without the consent of the owner of copyright in the sound or video recording, broadcast or cable program and in any literary, dramatic, musical, or artistic embodied therein. -
Page 21: Dubbing Tapes
To record an AM station—Beat Cut While recording an AM broadcast, beats may be heard (which are never heard when listening to the broadcast without recording it). If this occurs, set the BEAT CUT switch on the back of the unit to 1 or 2 to reduce the beating sound. -
Page 22: Maintenance
Maintenance To get the best performance of the unit, keep your discs, tapes, and mechanism clean. Handling discs • Remove the disc from its case by holding it at the edge while pressing the center hole lightly. • Do not touch the shiny surface of the disc, or bend the disc. -
Page 23: Troubleshooting
Resetting causes the unit to restore its factory default settings and results in all the settings made by the user being deleted. Specifications Amplifier section—CA-PCX290 Output Power: 5 W + 5 W at 3.2 Ω (10% THD) Audio input sensitivity/Impedance (at 1 kHz) AUX: 1 000 mV/47 kΩ... - Page 24 VICTOR COMPANY OF JAPAN, LIMITED 0204TMMMDWORI © 2004 VICTOR COMPANY OF JAPAN, LIMITED...
Need help?
Do you have a question about the CA-PCX290 and is the answer not in the manual?
Questions and answers