Table of Contents
Advertisement
Quick Links
Advertisement
Table of Contents

Related Manuals for Silvan Selecta DEC101213P


Summary of Contents for Silvan Selecta DEC101213P
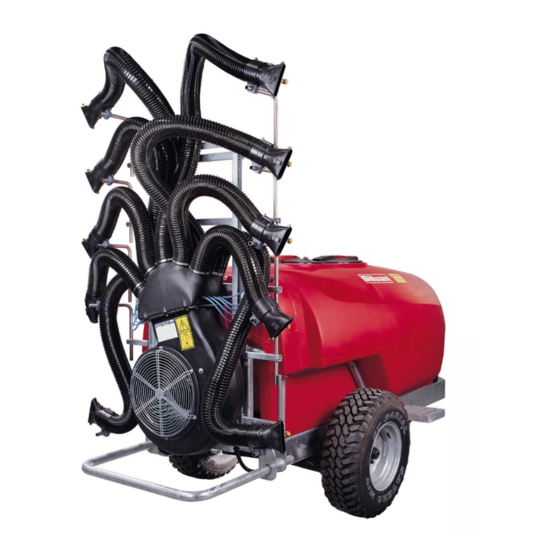
- Page 1 Operator’s Manual Trailed Oktopus Air Assist Sprayers MANSLV-2 August 2021...
-
Page 2: Table Of Contents
Contents Page Contents Sprayer Details Warranty Specifications Safety Information Installation Operation Calibration Optional Equipment Lubrication and Maintenance Troubleshooting Pre Delivery, Installation and Warranty Form YOUR SPRAYER DETAILS Record the details of your sprayer here for future reference when discussing service with your Silvan dealer, ordering parts or making a warranty claim. -
Page 3: Warranty
New Product Warranty Silvan Australia Pty. Ltd. builds equipment to a high level of specification using components from quality suppliers. The following information is provided to assist you with any repairs required within the warranty period. All warranty repairs on Silvan products are carried out by Silvan dealers. If any warranty repairs are required on Silvan products, it is recommended that the product be returned to the place of purchase. -
Page 4: Specifications
Specifications General The Silvan Trailed Oktopus air assist sprayer is Nozzles designed application agricultural 10 double side, non-drip nozzle assemblies for easy chemicals in horticultural crops. It uses a high changing of application rate. Flip over action to turn pressure pump and nozzles to atomise the chemical on or off. -
Page 5: Safety Information
Safety Information Before operating the sprayer read the following safety instructions. Failure to comply with these warnings may result in serious injury or death. Whilst your Silvan Oktopus sprayer has been designed and manufactured to incorporate all necessary safety features it is essential that any person who operates or works on the machine is aware of the safety precautions that should be exercised. - Page 6 Safety decals should be kept clean and legible at all times. If any decals are missing or unreadable they should be replaced by ordering new decals from your Silvan dealer using the part numbers shown. DEC101213P Front LH side of tank. Both models DEC 63 Drain Valve Warning decal at fan rear both models...
- Page 7 The wording of the safety decals shown on the previous pages is given below. Before operating the sprayer read all safety warning decals. Failure to comply with these warnings could result in serious injury or death DEC 48 Part Number DEC101213P Part Number 399 14 1000...
-
Page 8: Installation
Installation Attaching to the Tractor where the bolt holes align. Reinstall the drawbar Attach the sprayer hitch to the tractor drawbar bolt and tighten securely. using the tractor hitch pin. Adjust the height of the The length of the tractor drawbar may also need tractor drawbar and/or sprayer hitch to level the to be adjusted. - Page 9 Installation Adjusting Wheel Track (optional sliding axle) The wheel track may require adjusting to match the track of the tractor or to increase the stability of the sprayer (2000L only). Use the maximum track on sloping terrain if possible. Lift the sprayer with a jack and support it with stands under the drawbar and each side of the frame behind the wheels.
-
Page 10: Operation
Operation Starting the Sprayer On 1000L models check the drain valve located Before starting the sprayer for the first time in front of the LH tyre is in the “pump” position, i.e. grease all lubrication points including the PTO with the red handle placed vertically. Fill the tank shafts. - Page 11 Operation Turn all sections on again and repeat for the Electric Motor Valves remaining sections. The sprayer is then adjusted correctly. Master Valve Electric Pressure Section Valves Regulating Valve Adding Chemicals Before adding chemicals read and Manual Pressure follow the chemical Regulating Valve manufacturer's instructions and wear the recommended protective...
- Page 12 Operation Note: This is the only operation permitted with the sprayer running while the operator is off the tractor. Emptying and Rinsing the Sprayer (2000L) At the end of each day partly fill the tank with water and run this through the pump, spray lines and nozzles to purge them of chemicals.
- Page 13 Operation Spray Nozzles The spray nozzles have an outlet at each end but The Oktopus sprayer is assembled at Silvan with only the jet that is flipped to the outward facing the air ducts and modules placed in the standard position is “on”.
-
Page 14: Calibration
Calibration STEP 3 Nozzle Selection Nozzle Selection and Calibration Checking Decide on the number of nozzles to be used in Chemical application rates and hence nozzle total. For single nozzle holders the number of selections will vary greatly depending on the crop nozzles will be 10. - Page 15 Calibration HCC Hollow Cone Nozzle Chart Nozzle Sets for Typical Spraying Applications The nozzle sets in the following examples are suitable for typical applications when spraying grapes, orchard fruits and berries. 1. Grapes Application rate 600 l/ha Travel speed 5 km/hr Row width 3.0 m Spraying pressure...
- Page 16 Calibration 3. Berries Application rate 400 l/ha Travel speed 5 km/hr Row width Spraying pressure 13 Bar Total Application Rate (l/min) = Application rate (l/ha) x Speed (km/hr) x Row width (m) 400 x 5 x 3 = 10 l/min If using 8 nozzles (4/side) with two turned off due to a smaller canopy then each nozzle needs to deliver 1.25 l/min.
-
Page 17: Optional Equipment
Optional Equipment Flotation Tyres Optional flotation tyres are 400/60 x 15.5” fitted to fixed axle in lieu of the standard wheels and tyres. Automatic Rate Controller Arag Bravo automatic rate controller in lieu of standard electric valves. Ensures application rate remains constant with any minor changes in ground speed. -
Page 18: Lubrication And Maintenance
Lubrication and Maintenance Pump Start Up Inspection Check the oil level in the viewer daily and if During the first few days of operation, before necessary top up with SAE 20W-50 multigrade starting each day check that all hardware is tight engine oil. - Page 19 Lubrication and Maintenance Tank, Pump and Spray Lines Wheel Hubs At the end of each day run clean water through Remove the wheel hubs annually and check that the pump, spray lines and nozzles to purge them the bearings and seals are in good condition. of chemicals.
-
Page 20: Troubleshooting
Trouble Shooting Pump does not prime • No liquid in tank or not covering suction inlet. • Suction filter blocked. • Suction filter stop valve closed. • Suction filter bowl loose or missing O-ring. • Suction line loose allowing pump to suck air. •... -
Page 21: Pre Delivery, Installation And Warranty Form
PRE-DELIVERY, INSTALLATION AND WARRANTY REGISTRATION FORM FOR AIR ASSIST SPRAYERS IMPORTANT: This form is to be completed and returned to Silvan within 10 working days of installation. Failure to do so may result in a limited warranty period. SPRAYER DETAILS Optional Equipment Model Description: Silvan Serial No.:... - Page 22 SILVAN AUSTRALIA PTY. LTD. ABN 48 099 851 144 68 Atlantic Drive Keysborough,VIC, 3173 Australia Telephone: 1300 745 826 Facsimilie: 1800 745 826 www.silvan.com.au...
Need help?
Do you have a question about the DEC101213P and is the answer not in the manual?
Questions and answers